Discover the simple how to shred chicken in Ninja blender method that saves time and effort. This powerful kitchen tool turns cooked chicken into perfectly shredded meat in seconds—ideal for meal prep or quick dinners. With the right technique, you’ll get fluffy, evenly textured chicken every time without tearing or over-processing.
Key Takeaways
- Speed & Efficiency: A Ninja blender can shred chicken faster than manual methods like forks or tongs, especially for large batches.
- Texture Control: Use pulse settings to avoid turning chicken into paste—start slow and increase speed gradually.
- Safety First: Always cool cooked chicken slightly before blending to prevent steam buildup and potential burns.
- Batch Sizing: Don’t overload the blender jar; process in small batches (about 1–1.5 cups per run) for best results.
- Cleaning Tips: Remove tough bits with a spatula after blending, then wash the pitcher immediately to avoid dried-on residue.
- Versatile Use: Shredded chicken works great in tacos, casseroles, soups, salads, and sandwiches—making it a pantry staple.
- Storage Ready: Freeze shredded portions in ice cube trays or airtight containers for future meals without losing quality.
📑 Table of Contents
- How to Shred Chicken in Ninja Blender: The Ultimate Guide
- Why Use a Ninja Blender for Shredding Chicken?
- Preparing Your Chicken for the Ninja Blender
- Step-by-Step: How to Shred Chicken in Ninja Blender
- Troubleshooting Common Issues
- Creative Ways to Use Shredded Chicken
- Storing and Freezing Shredded Chicken
- Maintenance and Cleaning Tips
- Frequently Asked Questions
- Final Thoughts
How to Shred Chicken in Ninja Blender: The Ultimate Guide
If you’re tired of spending extra minutes at the stove trying to fluff up shredded chicken with a fork or whisk, let me introduce you to a game-changer: your Ninja blender. Yes, that same appliance you use for smoothies and soups can also become your secret weapon for perfectly shredded chicken—fast, easy, and mess-free. Whether you’re prepping for a busy week of tacos, making a big batch of enchiladas, or just want to save time on dinner prep, learning how to shred chicken in Ninja blender is a skill worth mastering.
Blenders aren’t just for liquids—they’re surprisingly effective at breaking down solid foods when used correctly. The sharp blades and powerful motor in a Ninja blender slice through cooked chicken with ease, giving you that light, fluffy texture you love. But here’s the catch: doing it wrong can lead to gummy, over-processed results or even damage your blender. So today, we’re going deep into everything you need to know—from preparation tips to cleanup hacks—so you can shred chicken like a pro every single time.
Why Use a Ninja Blender for Shredding Chicken?
The Speed Advantage
One of the biggest reasons people turn to blenders for shredding chicken is speed. If you’ve ever tried to shred two pounds of chicken by hand, you know how tedious and time-consuming it can be. In contrast, a Ninja blender can do the job in under a minute. That’s not only faster but also more consistent—especially if you’re working with multiple servings.
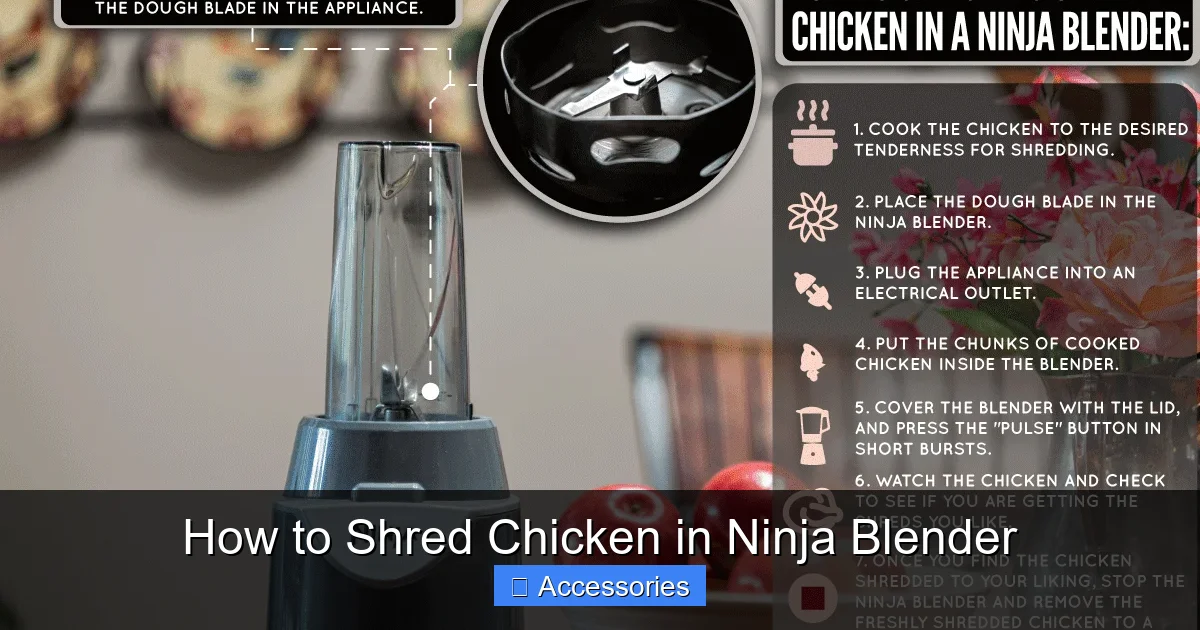
Visual guide about How to Shred Chicken in Ninja Blender
Image source: kitchenseer.com
Plus, once the chicken is shredded, you don’t have to transfer it back and forth between bowls. Everything stays in one container, reducing cross-contamination and saving dishwashing time. It’s ideal for meal preppers who cook ahead and store portions in the fridge or freezer.
Even Texture Every Time
Manual shredding often leads to uneven pieces—some too thick, others too thin. With a blender, you get uniform strands that blend beautifully into recipes like burritos, pasta sauces, or grain bowls. This consistency makes your dishes look and taste better, whether you’re cooking for family or hosting guests.
And since you control the blending duration, you can stop at exactly the right point to avoid mushiness. Think of it as precision cooking—but with less elbow grease.
Multitasking Made Easy
While your blender is busy shredding chicken, you can prep other ingredients—like chopping onions, grating cheese, or even making a sauce. This kind of multitasking keeps your kitchen workflow smooth and efficient. Plus, Ninja blenders come with multiple attachments (like food processor blades), so you can switch tasks seamlessly.
Preparing Your Chicken for the Ninja Blender
Start With Properly Cooked Chicken
The foundation of great shredded chicken begins with proper cooking. You can use rotisserie chicken from the store, leftover grilled chicken, or freshly boiled chicken breast. Just make sure it’s fully cooked—no pink parts—and cooled slightly before blending.
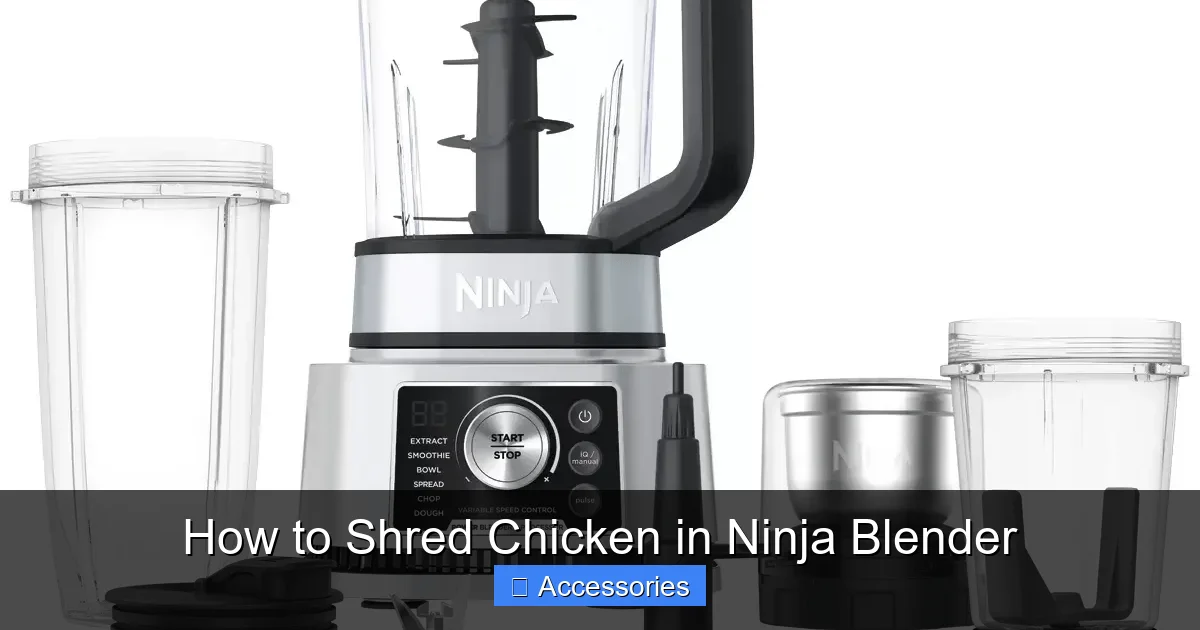
Visual guide about How to Shred Chicken in Ninja Blender
Image source: thekitchenappliancedad.com
Cooked chicken should be moist but not greasy. If yours seems dry, soak it in a bit of broth or olive oil while it cools to retain moisture during blending.
Remove Skin and Bones (If Needed)
For most recipes, remove any skin and bones first. While some recipes call for bone-in chicken (like in soups), shredding it whole isn’t practical in a blender. Peel off the skin, then pick out any visible bones. Small cartilage pieces are fine—they’ll break down during blending—but large bones will damage your blades.
Cut Into Manageable Pieces
This step is crucial! Don’t dump a whole breast into the blender. Instead, cut the chicken into chunks no larger than 1–2 inches. This helps the blades circulate freely and prevents clogging. Large pieces take longer to break down and may result in uneven shreds.
Let It Cool Slightly
Hot chicken creates steam inside the blender jar, which can cause splattering or pressure buildup. Let the chicken sit until it’s warm to the touch—this usually takes about 10–15 minutes after removing it from heat. This small step ensures safer, cleaner blending.
Step-by-Step: How to Shred Chicken in Ninja Blender
1. Load the Blender Jar Correctly
Open your Ninja blender pitcher (make sure it’s securely locked into place). Add the chicken pieces in batches—typically no more than 1–1.5 cups per run. Overloading reduces efficiency and increases the risk of uneven shredding.
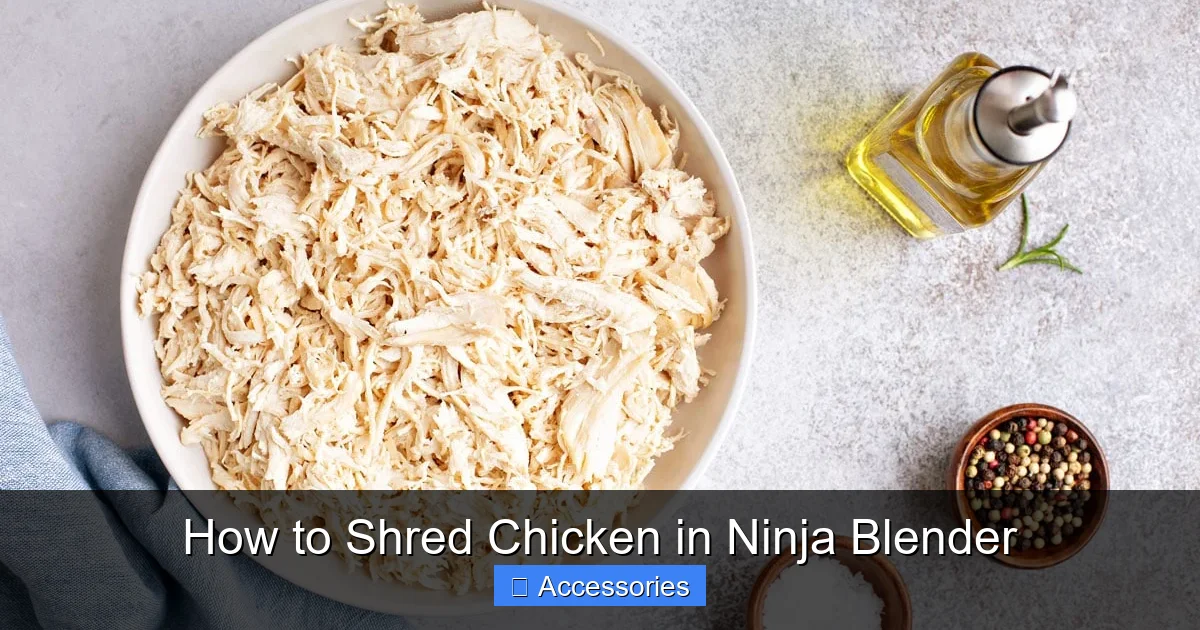
Visual guide about How to Shred Chicken in Ninja Blender
Image source: recipes.net
2. Choose the Right Setting
Most Ninja models have a “Pulse” function, which is ideal for shredding. Start on low speed using short pulses (1–2 seconds each). This gives you control and prevents over-processing. Once the chicken starts breaking apart, increase to medium speed for smoother results.
Models with variable speed dials allow gradual adjustment—perfect for fine-tuning texture. Avoid continuous high-speed blending unless your recipe calls for finely minced chicken.
3. Pulse Until Desired Texture
After initial pulses, check the consistency. You want long, soft strands—not crumbs. If it looks too chunky, pulse again in 1-second intervals. Stop as soon as the chicken reaches your desired fluffiness. Remember: less is more here!
4. Scrape Down the Sides
Use a silicone spatula to gently push any remaining pieces down toward the blades. This ensures even shredding and maximizes output. Most Ninja pitchers have a wide mouth and smooth interior, making scraping easy.
5. Repeat for Remaining Batches
Once the first batch is done, empty the pitcher and repeat the process with the rest of the chicken. Label containers if storing for later use.
Troubleshooting Common Issues
Problem: Chicken Turns Into Paste
If your chicken becomes slimy or pulpy, you likely blended it too long or used too much liquid. Always blend dry chicken—never mix it with water, broth, or oil unless specified in a recipe. Also, avoid overfilling the jar.
Problem: Uneven Shreds
This usually happens when pieces are too big or the chicken wasn’t cut uniformly. Cut all chunks similarly sized and don’t rush the initial pulse phase.
Problem: Blades Won’t Spin
Ensure the pitcher is properly seated on the base. Check that the blade assembly is correctly inserted. Sometimes, if the gasket is misaligned, the blender won’t activate. Refer to your user manual if issues persist.
Problem: Steam Buildup During Blending
If you notice hissing or resistance, stop blending immediately. Hot chicken releases moisture that turns to steam. Let it cool longer next time, or consider using frozen chicken cubes (thawed briefly) for easier processing.
Creative Ways to Use Shredded Chicken
In Mexican Dishes
Shredded chicken is a star ingredient in tacos, burritos, quesadillas, and nachos. Combine it with salsa, cheese, lettuce, and guacamole for quick weeknight meals. You can also add spices like cumin, chili powder, or smoked paprika for extra flavor.
Asian-Inspired Bowls
Pour your shredded chicken over rice or noodles and top with stir-fried veggies, soy sauce, and sesame seeds. It works beautifully in kung pao chicken bowls or Thai curry dishes.
Heartier Meals
Mix shredded chicken into mac and cheese, lasagna, or shepherd’s pie for protein-packed comfort food. It binds well with creamy sauces and baked goods.
Salads and Wraps
Add shredded chicken to Caesar salads, Cobb salads, or whole-wheat tortilla wraps. Pair it with avocado, tomatoes, spinach, and Greek yogurt dressing for a balanced lunch.
Storing and Freezing Shredded Chicken
Refrigeration (Up to 4 Days)
Store in an airtight container in the refrigerator. If the chicken seems dry, add a splash of olive oil or broth to revive moisture.
Freezing (Up to 3 Months)
For long-term storage, spread shredded chicken on a parchment-lined baking sheet and freeze until solid. Then transfer to freezer-safe bags or containers. Thaw overnight in the fridge before reheating.
Meal Prep Hack
Divide shredded chicken into individual portions (about ½ cup each) and freeze them in silicone muffin trays. Once frozen, pop out cubes and store in zip-top bags—perfect for grab-and-go meals.
Maintenance and Cleaning Tips
Rinse Immediately After Use
Don’t wait! Chicken proteins stick fast and harden when they dry. Rinse the pitcher with warm water right after blending, then wash with mild soap and a soft sponge.
Soak for Tough Residue
For stubborn bits, fill the pitcher halfway with warm, soapy water and let it soak for 10–15 minutes. Use a bottle brush to scrub the blades and sides.
Dry Thoroughly
Always dry the pitcher and lid completely before reassembling. Moisture can promote mold growth inside the seals and gaskets.
Avoid Dishwashers (Sometimes)
While many Ninja pitchers are dishwasher-safe, frequent washing can degrade rubber parts over time. Hand-wash delicate components like the lid and tamper to extend lifespan.
Frequently Asked Questions
Can I shred raw chicken in a Ninja blender?
No—raw chicken must be fully cooked before blending. Raw meat poses food safety risks and doesn’t shred well due to its dense structure. Always cook chicken thoroughly first.
How much chicken can one batch hold?
Stick to 1–1.5 cups per batch to ensure even shredding. Larger amounts reduce blade efficiency and increase processing time unnecessarily.
Do I need to add liquid when shredding chicken?
Generally, no. Adding liquid turns chicken into soup rather than shreds. Only add broth or oil if a specific recipe requires it (like in soups or sauces).
What if my Ninja blender doesn’t have a pulse setting?
Use the lowest speed setting and blend in short bursts. Many older models lack dedicated pulse buttons, but you can still achieve good results with careful timing.
Can I shred boneless, skinless chicken thighs?
Absolutely! Thighs tend to stay juicier than breasts, making them perfect for shredding. Just cook them until tender, then follow the standard shredding steps.
Is it safe to blend hot chicken?
It’s safer to blend slightly cooled chicken. Hot meat creates steam that can build pressure and cause splatters. Allow it to cool for 10–15 minutes before processing.
Final Thoughts
Learning how to shred chicken in Ninja blender transforms your cooking routine—saving time, reducing waste, and giving you restaurant-quality texture every time. It’s a simple trick, but one that pays off big in convenience and flavor. Whether you’re meal prepping for the week or whipping up last-minute tacos, this method keeps things fast, clean, and delicious.
Remember: preparation is key. Cut evenly, blend carefully, and clean promptly. With practice, you’ll find your perfect rhythm. And who knows? Soon, shredding chicken might become your favorite kitchen hack—ahead of even making smoothies!
Ready to try it? Grab your Ninja, some cooked chicken, and let those blades do the work. Your future self will thank you.
Frequently Asked Questions
Can I shred raw chicken in a Ninja blender?
No—raw chicken must be fully cooked before blending. Raw meat poses food safety risks and doesn’t shred well due to its dense structure. Always cook chicken thoroughly first.
How much chicken can one batch hold?
Stick to 1–1.5 cups per batch to ensure even shredding. Larger amounts reduce blade efficiency and increase processing time unnecessarily.
Do I need to add liquid when shredding chicken?
Generally, no. Adding liquid turns chicken into soup rather than shreds. Only add broth or oil if a specific recipe requires it (like in soups or sauces).
What if my Ninja blender doesn’t have a pulse setting?
Use the lowest speed setting and blend in short bursts. Many older models lack dedicated pulse buttons, but you can still achieve good results with careful timing.
Can I shred boneless, skinless chicken thighs?
Absolutely! Thighs tend to stay juicier than breasts, making them perfect for shredding. Just cook them until tender, then follow the standard shredding steps.
Is it safe to blend hot chicken?
It’s safer to blend slightly cooled chicken. Hot meat creates steam that can build pressure and cause splatters. Allow it to cool for 10–15 minutes before processing.