
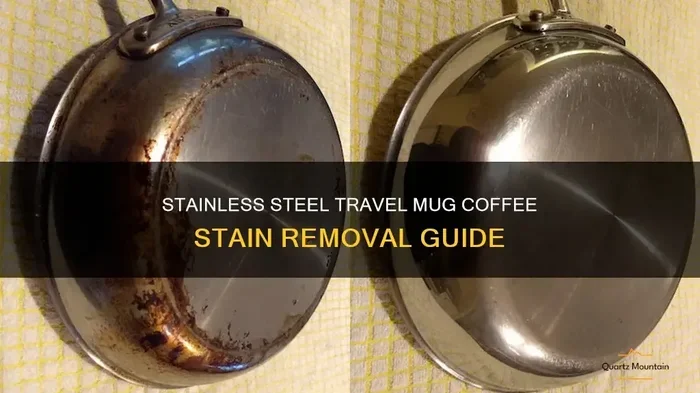
Keeping your daily drink container clean does not have to be a struggle. coffee stains build up quickly, but simple household items can restore a shiny finish in minutes. This guide shows you how to clean coffee stains from stainless steel mug surfaces without harsh chemicals. You will learn safe routines, quick fixes, and long-term care tips that work every time.
Key Takeaways
- Use baking soda paste: A gentle mix of baking soda and water lifts stubborn marks without scratching the surface.
- Try white vinegar: Vinegar breaks down oily residue and neutralizes odors left behind by daily drinks.
- Avoid abrasive scrubbers: Steel wool and harsh pads can damage the finish and make future stains stick harder.
- Clean daily: Rinsing and washing right after use stops buildup before it hardens.
- Dry thoroughly: Air drying or towel drying prevents water spots and keeps the interior fresh.
- Deep clean weekly: A longer soak with mild soap restores shine and removes hidden residue.
- Store properly: Keep the lid off when not in use to allow airflow and reduce trapped moisture.
📑 Table of Contents
- Why Coffee Stains Stick to Stainless Steel
- What You Need Before You Start
- How to Clean Coffee Stains from Stainless Steel Mug with Simple Steps
- Deep Cleaning for Heavy Buildup
- Keeping Your Mug Clean Every Day
- When to Use Baking Soda, Vinegar, or Soap
- Expert Insights for Long-Term Care
- Final Thoughts on a Spotless Travel Cup
Why Coffee Stains Stick to Stainless Steel
Stainless steel looks tough, but it still catches everyday buildup. Dark drinks leave behind oils and tannins that cling to the inner walls. Over time, these residues create brown rings and dull patches. The good news is that the material itself does not absorb the stain. The mark sits on the surface, which means you can remove it with the right approach.
Many people notice the problem after a few weeks of daily use. The mug sits in a car, on a desk, or in a bag. Heat and moisture speed up the staining process. If you leave liquid inside for hours, the residue settles into tiny scratches and seams. That is why a quick rinse often is not enough. You need a simple cleaning routine that targets the buildup before it hardens.
Understanding the cause helps you pick the right fix. Tannins come from the coffee itself. Oils come from the beans and any cream or sweetener you add. Both can bond to the surface if they dry inside the cup. Once you know this, you can choose gentle cleaners that break down the residue without damaging the finish.
What You Need Before You Start
Gather a few basic items before you begin. Most of these are already in a standard kitchen. You do not need fancy products or expensive tools. Simple ingredients work best because they are mild, safe, and easy to rinse away.
Visual guide about Coffee stains on stainless steel mug
Image source: i.ytimg.com
Here is a practical checklist:
- Warm water: Helps loosen residue and makes scrubbing easier.
- Mild dish soap: Cuts through oily film and daily grime.
- Baking soda: Acts as a gentle abrasive for stuck-on marks.
- White vinegar: Breaks down stubborn deposits and refreshes the smell.
- Soft sponge or cloth: Protects the surface while lifting stains.
- Small brush: Reaches the lid, rim, and tight corners.
- Clean towel: Dries the mug fully after washing.
If your mug has a lid, separate the parts before cleaning. Gaskets, seals, and small cracks often trap residue. Taking the mug apart makes the job faster and more thorough. It also helps you avoid missing hidden spots that cause lingering odors.
How to Clean Coffee Stains from Stainless Steel Mug with Simple Steps
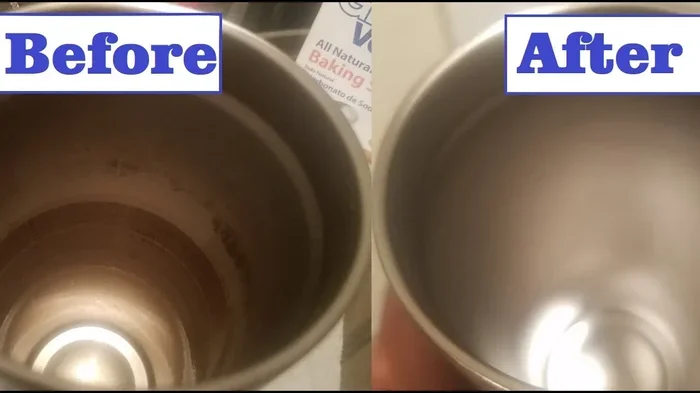
The easiest method uses items you already have at home. Start with a warm rinse to soften the buildup. Then add a small amount of dish soap and scrub gently. If the stain remains, move to a baking soda paste. This approach works well for regular maintenance and light discoloration.

Visual guide about Coffee stains on stainless steel mug
Image source: tipsbulletin.com
Follow these steps:
- Rinse with warm water: Fill the mug and swirl the water around for a minute.
- Add dish soap: Use a few drops and mix with warm water.
- Scrub gently: Use a soft sponge in circular motions.
- Focus on the bottom: Stains often settle near the base and along the lower walls.
- Rinse again: Wash away all soap and loosened residue.
- Dry completely: Wipe with a clean towel or let it air dry with the lid off.
If the mark still shows, make a paste with baking soda and a little water. Spread it over the stained area and let it sit for a few minutes. Then scrub lightly with a soft cloth. The paste lifts the residue without scratching the surface. Rinse well and check the result. Repeat once more if needed.
For tougher buildup, add white vinegar to the process. Fill the mug with equal parts vinegar and warm water. Let it sit for ten to fifteen minutes. This soak loosens dried-on stains and helps remove lingering smells. Afterward, wash with soap and water as usual. The combination of soak, gentle scrub, and rinse is often enough to restore the shine.
Quick Tips for Stubborn Stains
Some marks need a little extra attention. Try these practical ideas when the standard wash does not fully work:
- Use a soft toothbrush: It reaches the rim, threads, and small grooves.
- Soak longer: Ten minutes may not be enough for heavy buildup. Try fifteen or twenty.
- Warm the vinegar solution: Slightly warm liquid can loosen residue faster.
- Wipe the lid separately: Rubber seals and plastic parts often hold odors.
- Check the interior seams: Small ridges can trap dried coffee.
These small adjustments make a big difference. The goal is to be thorough without being rough. Gentle care keeps the surface smooth and makes future cleaning easier.
Common Mistakes to Avoid
A few habits can make staining worse or damage the finish. Watch out for these issues:
- Leaving coffee inside overnight: Dried residue becomes harder to remove.
- Using steel wool or harsh pads: These can scratch the surface and create rough spots.
- Skipping the lid: Hidden parts often hold the worst buildup.
- Rinsing with cold water only: Cold water does not loosen oily film well.
- Leaving the mug damp: Moisture can lead to water spots and stale smells.
Avoiding these mistakes saves time later. A careful routine keeps the mug looking new for longer.
Deep Cleaning for Heavy Buildup
Sometimes a mug needs more than a quick wash. If you have neglected it for a while, the stains may feel baked on. In that case, a deeper clean helps reset the surface. This method is still simple, but it takes a bit more time.
Visual guide about Coffee stains on stainless steel mug
Image source: bsgcreations.com
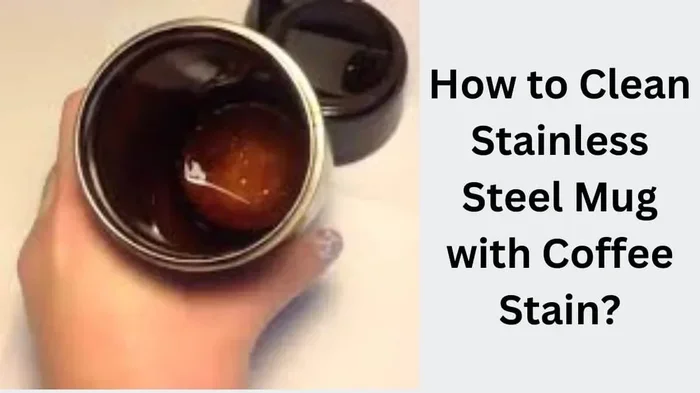
Start by emptying the mug and rinsing it with warm water. Then fill it with a mixture of warm water and baking soda. Let it sit for twenty to thirty minutes. This longer soak softens the hardened layer. After that, scrub with a soft sponge and rinse thoroughly. If the stain persists, repeat the soak with vinegar instead.
You can also clean the lid more carefully during this process. Remove any rubber ring if possible. Wash each part separately with warm soapy water. Use a small brush for narrow spaces. Dry every piece before reassembling. This full reset removes hidden residue and improves the taste of your next drink.
Keeping Your Mug Clean Every Day
Daily habits matter just as much as deep cleaning. The easiest way to prevent stains is to rinse the mug soon after use. Even a quick water rinse stops residue from drying inside. If you have time, wash it with soap before the next refill. That small habit keeps buildup from turning into stubborn marks.
Here are a few simple habits that help:
- Rinse right away: Do not let coffee sit in the cup for hours.
- Wash with soap daily: A fast wash removes oils before they settle.
- Dry with the lid off: Airflow reduces trapped moisture.
- Clean the sip lid or gasket: Small parts collect residue quickly.
- Store in a dry place: A closed, damp bag encourages odors.
If you use the mug at work or in the car, keep a small sponge or travel cloth nearby. A quick wipe after finishing your drink takes only a moment. Over time, this prevents the need for heavy scrubbing. Prevention is easier than removal.
When to Use Baking Soda, Vinegar, or Soap
Each cleaner has a different strength. Soap handles daily grease and light residue. Baking soda works well on stuck-on marks because it is mildly abrasive. Vinegar is useful for odors and stubborn deposits. Knowing when to use each one makes cleaning faster and more effective.
Use soap for routine washing. It is the best first step after every drink. Use baking soda when you see brown rings or dull patches. Use vinegar when the mug smells stale or when the stain feels hardened. You can also combine them in separate steps, but avoid mixing everything at once. A simple sequence works better than a crowded mixture.
If you want a safe all-purpose routine, start with soap and warm water. If stains remain, follow with baking soda. If odor or tough residue remains after that, finish with a short vinegar soak. This order keeps the process gentle and effective.
Expert Insights for Long-Term Care
Experienced cleaners know that consistency beats force. A stainless steel mug lasts longer when you treat it gently. Avoid extreme temperature shocks, such as moving a hot mug straight into cold water. That sudden change can stress the material over time. It is also wise to check the manufacturer’s care notes, especially for insulated models.
Here are a few expert-friendly habits:
- Wash soon after use: Fresh residue is easier to remove.
- Use soft tools only: Cloths, sponges, and soft brushes protect the finish.
- Keep the interior dry: Moisture encourages smells and spots.
- Inspect the seal often: A worn gasket can trap grime.
- Deep clean on a schedule: Weekly care prevents heavy buildup.
These habits keep the mug dependable and pleasant to use. A little attention goes a long way.
Final Thoughts on a Spotless Travel Cup
A clean mug makes every sip more enjoyable. It also helps your drink taste better because old residue does not mix with fresh coffee. Learning how to clean coffee stains from stainless steel mug surfaces is simple once you have a routine. Start with warm water and soap. Add baking soda for marks that linger. Use vinegar for stubborn buildup and stale odors. Finish by drying the mug fully and storing it with the lid off.
The best results come from regular care, not harsh scrubbing. Treat the surface gently, and it will stay smooth and shiny. Keep a small cleaning habit after each use, and you will spend less time removing stains later. With a few easy steps, your stainless steel mug can stay fresh, bright, and ready for daily use.
Frequently Asked Questions
How do I remove old coffee stains from a stainless steel mug?
Start with warm water and dish soap, then scrub gently with a soft sponge. If the stain remains, use a baking soda paste or a short vinegar soak to loosen the residue before rinsing thoroughly.
Can I use vinegar to clean coffee stains from stainless steel?
Yes, white vinegar is a safe option for breaking down stubborn residue and odors. Mix it with warm water, let the mug soak for ten to fifteen minutes, then wash and rinse as usual.
What is the best way to clean the lid and gasket?
Take the lid apart if possible and wash each piece with warm soapy water. Use a small brush for narrow grooves and dry the gasket fully before reassembling to prevent trapped moisture.
Will baking soda scratch a stainless steel mug?
Baking soda is usually gentle enough for stainless steel when used as a soft paste. Apply it lightly with a soft cloth or sponge, then rinse well to avoid leaving any gritty residue.
How can I stop coffee stains from coming back?
Rinse the mug soon after use and wash it with soap daily. Dry it completely with the lid off, and clean the seal or sip lid regularly to prevent residue from building up again.
Is it safe to clean a stainless steel mug in the dishwasher?
Many stainless steel mugs are dishwasher safe, but you should check the manufacturer’s instructions first. Hand washing is often gentler on the finish and helps preserve insulation quality over time.



