
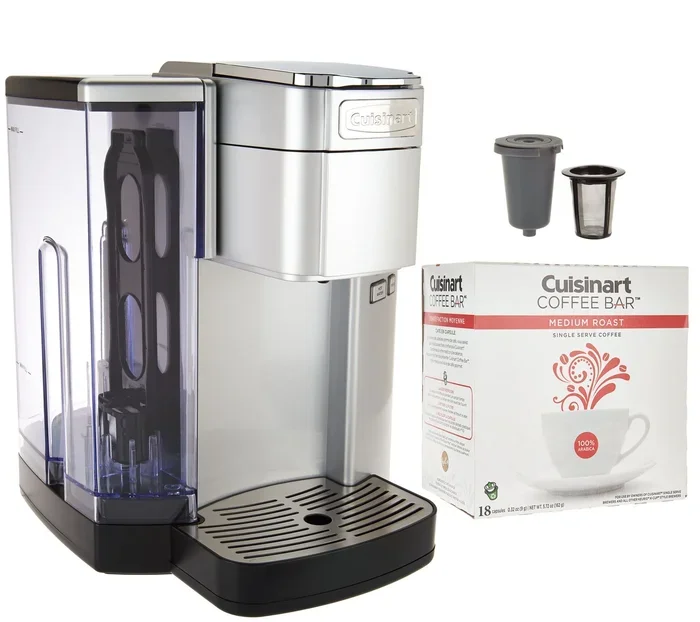
Cleaning your Cuisinart K cup side keeps coffee tasting fresh and prevents clogs. A simple rinse and descaling routine removes residue, mineral buildup, and stale flavors. You only need warm water, a soft cloth, and a safe cleaning solution. Follow these easy steps to keep your brewer running smoothly every day.
Cleaning your Cuisinart coffee maker K cup side does not have to feel like a chore. A few simple habits keep your brewer fresh, fast, and reliable. When you ignore the K cup side, coffee oils and mineral buildup start to collect. That can lead to weak coffee, slow pours, and odd smells. The good news is that a quick rinse and a regular deep clean solve most of these problems.
You probably use this machine because it makes one perfect cup at a time. That convenience matters. But convenience works best when the machine stays clean. A clean K cup side helps hot water move evenly through the pod. It also keeps old flavors from mixing with your fresh brew. If you want consistent taste every morning, a simple cleaning routine is the easiest fix.
In this guide, you will learn how to clean the K cup side step by step. We will cover daily rinsing, deep cleaning, needle care, descaling, and smart maintenance habits. You will also find quick tips, common mistakes to avoid, and answers to frequent questions. By the end, you will know exactly how to keep your Cuisinart brewer in great shape without wasting time or supplies.
Key Takeaways
- Regular rinsing prevents buildup: Running a water-only cycle after each use washes away leftover coffee oils and sugars.
- Descale every few months: Mineral deposits from hard water slow down brewing and affect flavor.
- Use gentle cleaning tools: A soft sponge and mild soap protect plastic parts and seals from damage.
- Clean the needle area carefully: Coffee grounds often stick near the puncture point and cause slow flows.
- Dry all parts fully: Moisture left inside encourages mold and stale smells.
- Follow the manual for your model: Some Cuisinart units have specific wash prompts or self-clean modes.
- Use fresh water for every brew: Clean water improves taste and reduces scale formation over time.
📑 Table of Contents
- Why Cleaning the K Cup Side Matters
- What You Need Before You Start
- Step by Step: How to Clean Cuisinart Coffee Maker K Cup Side
- Deep Cleaning and Descaling the K Cup Side
- Daily Habits That Keep the K Cup Side Clean
- Troubleshooting Common K Cup Side Issues
- Long-Term Care for Your Cuisinart K Cup Brewer
Why Cleaning the K Cup Side Matters
The K cup side handles the pod during brewing. Hot water passes through the pod, pulls out the coffee, and carries oils and fine grounds into the cup. Some of that residue stays behind. Over time, it builds up on the brew chamber, the exit path, and the puncture area. That buildup changes how water flows and how coffee tastes.
A dirty K cup side can cause several small problems. Coffee may taste flat or bitter. The brew might drip slowly. You may notice a stale smell when you open the lid. These signs usually point to residue or scale, not a broken machine. Cleaning the K cup side on a regular schedule prevents these issues and keeps your coffee tasting clean.
This part of the machine also touches water directly. If you live in an area with hard water, minerals can collect faster. Those minerals mix with coffee oils and create a sticky film. That film is harder to remove if you wait too long. A simple routine stops the problem before it grows.
How Buildup Affects Flavor and Flow
Coffee oils are natural, but they turn rancid when they sit. Old oils leave a sour or bitter note in your next cup. Fine grounds can also collect near the exit hole and slow the flow. When water meets that residue, it does not move evenly through the pod. The result is uneven extraction and a weaker cup.
Scale creates a different problem. It narrows the water path and can make the machine work harder. You may hear strange sounds or notice longer brew times. Cleaning the K cup side removes both types of buildup. That keeps flavor bright and flow steady.
Quick Tip: If your coffee tastes off even with fresh pods, check the K cup side first. Residue there is one of the most common causes of flavor changes.
What You Need Before You Start
You do not need fancy supplies to clean the K cup side. Most households already have everything required. The key is to use gentle tools that protect plastic parts, seals, and sensors. Harsh scrubbers or strong chemicals can damage the brewer and leave unwanted flavors behind.

Visual guide about Cuisinart K Cup Coffee Maker
Image source: newcoffees.com
Gather these items before you begin:
- Warm water
- Mild dish soap
- Soft microfiber cloth or sponge
- Small soft brush, like a clean toothbrush
- White vinegar or a food-safe descaling solution
- A large mug or bowl for rinse water
- Paper towels or a dry cloth for drying
If your Cuisinart model has a self-clean button or descale alert, check the manual before you start. Some machines guide you through a cleaning cycle. Others need a manual rinse. Knowing your model helps you avoid extra steps and keeps the process smooth.
Choosing Safe Cleaning Supplies
Mild soap works well for daily cleaning. It lifts oils without leaving harsh residue. Vinegar is useful for mineral buildup, but use it carefully and rinse well. If you prefer a ready-made option, choose a descaler made for coffee machines. Follow the label directions and avoid mixing products.
Stay away from abrasive pads, bleach, and heavy-duty cleaners. Those products can scratch plastic and affect seals. They may also leave scents that change the taste of your coffee. Simple, gentle supplies do the best job.
Step by Step: How to Clean Cuisinart Coffee Maker K Cup Side
A good cleaning routine has two parts. The first is a quick daily rinse. The second is a deeper clean every week or two, plus descaling when needed. Together, they keep the K cup side clear and ready for the next brew.

Visual guide about Cuisinart K Cup Coffee Maker
Image source: bestautomaticcoffeemaker.com
Here is a simple process you can follow:
- Unplug the machine and let it cool.
- Remove any used pod or adapter.
- Lift the K cup holder or open the brew chamber.
- Rinse the parts with warm water.
- Wipe the inside with a soft cloth.
- Clean the needle area gently.
- Run a water-only cycle to flush the side.
- Dry everything fully before reassembling.
Start with the easiest step. Remove the K cup side insert or brew basket, if your model allows it. Rinse it under warm water. Use a drop of mild soap if you see oily film or coffee stains. Wash gently with your fingers or a soft sponge. Rinse again until the water runs clear.
Cleaning the Brew Chamber and Holder
The brew chamber is where hot water meets the pod. Coffee oils often collect on the walls and floor of this area. Wipe the inside with a damp cloth. If the holder is removable, wash it in warm soapy water. Pay attention to corners and edges, where residue likes to hide.
Rinse well. Soap left behind can affect flavor. After rinsing, shake off excess water and set the parts on a towel. Let them air dry completely before putting everything back together.
Cleaning the Exit Needle and Puncture Area
The needle area needs careful attention. Coffee grounds can stick near the puncture point and slow the flow. Use a soft brush or a dry cloth to remove loose debris. If your model has a removable needle cover or access point, open it gently and clean around it.
Do not poke hard objects into the needle area. That can damage the part or push debris deeper. A soft brush and light wiping are enough for routine care. If water still flows slowly after cleaning, run a water-only cycle to flush the path.
Quick Tip: Hold a small flashlight near the brew area while you clean. It helps you spot hidden grounds and oily spots you might miss in dim light.
Deep Cleaning and Descaling the K Cup Side
Daily rinsing handles surface residue. Deep cleaning handles buildup that has had time to settle. If you use the machine often, plan a deeper clean every couple of weeks. If you brew less often, check the K cup side once a month and clean as needed.

Visual guide about Cuisinart K Cup Coffee Maker
Image source: m.media-amazon.com
For deep cleaning, remove the K cup insert and wash it thoroughly. Wipe the chamber walls and floor. Check the lid area and any seals that touch water. Use a soft brush for tight spots. Rinse everything well and dry it fully.
Descaling comes next if you notice slow brewing, white spots, or a scale warning. Mineral buildup comes from hard water and can collect in the water path and brew area. Use a descaling solution or a vinegar rinse, depending on your machine and preference. Follow the product directions and run the recommended flush cycles.
How Often to Descale
The right schedule depends on your water and how much you brew. If you use filtered or soft water, you may need descaling less often. If your water is hard, scale can form faster. A good rule is to check the K cup side and water path every few months. Clean early if you see signs of buildup.
Some Cuisinart models display a descale reminder. That alert is helpful, but you do not need to wait for it. If the machine brews slowly or the coffee tastes flat, inspect the K cup side and water path. Early cleaning saves time later.
Safe Descaling Steps
Use this simple approach for a safe descaling routine:
- Empty the water reservoir and rinse it.
- Fill it with the descaling solution or diluted vinegar as directed.
- Place a large mug or container under the brew area.
- Run a brew cycle without a pod.
- Discard the liquid and repeat if the instructions say to.
- Rinse the reservoir and run fresh water cycles to flush the system.
After descaling, run at least one or two cycles with clean water. That removes any leftover solution taste. Then clean the K cup side again with warm water and dry it well. Your brewer should feel fresher and flow more evenly.
Common Mistake: Skipping the final water rinse after descaling. Leftover solution can change the taste of your next cup and leave an odd smell in the K cup side.
Daily Habits That Keep the K Cup Side Clean
A clean machine is easier to maintain than a dirty one. Small daily habits make a big difference. They reduce residue, limit odors, and keep brew times steady. You do not need a long routine. You just need consistency.
Try these simple habits:
- Remove the used pod right after brewing.
- Rinse the K cup side with warm water when possible.
- Wipe the chamber dry before closing the lid.
- Use fresh water for every brew.
- Store pods in a cool, dry place to reduce stale dust.
- Check the needle area if the flow slows.
These habits work because they stop buildup before it starts. A quick rinse removes coffee oils before they dry. Drying the chamber reduces moisture that can lead to smells. Fresh water lowers the chance of scale. Together, they keep the K cup side in much better shape.
Smart Storage and Pod Handling
How you handle pods matters too. Keep them sealed until use. Avoid shaking the box or bin too much, since loose grounds can drift into the brew area. When you insert a pod, make sure it sits correctly and the lid closes fully. That helps water flow evenly and reduces spills inside the K cup side.
If you use a reusable pod, clean it after each use. Grounds can cling to the filter and leave residue in the brewer. A quick rinse and gentle wash keep both the pod and the K cup side cleaner.
Troubleshooting Common K Cup Side Issues
Even with good care, problems can happen. Most of them are easy to fix once you know what to look for. Slow brewing, weak coffee, and strange smells usually point to residue, scale, or a pod placement issue. Start with the simplest check before assuming the machine is broken.
Use this quick checklist:
- Is the pod seated correctly?
- Is the K cup side free of grounds and film?
- Has the machine been descaled recently?
- Is the water reservoir filled with fresh water?
- Are the seals and chamber dry and clean?
If the flow is slow, clean the needle area and run a water-only cycle. If the taste is off, wash the brew chamber and check for old oils. If there is a smell, dry the parts fully and remove any trapped moisture. These steps solve most routine issues.
When to Look Beyond the K Cup Side
Sometimes the problem is not in the K cup side alone. A clogged water path, a dirty reservoir, or a worn seal can also affect performance. If cleaning the K cup side does not help, check the water tank and the brew path. Rinse the reservoir and look for buildup in other wet areas.
If the machine still acts up, consult the manual for your model. Some units have specific cleaning modes or parts that need extra attention. A careful inspection usually reveals the cause.
Expert Insight: Most brewing issues come from small buildup, not major damage. A steady cleaning routine is usually more effective than waiting for a problem to grow.
Long-Term Care for Your Cuisinart K Cup Brewer
Long-term care is really about consistency. Clean the K cup side often. Descale when needed. Use gentle supplies. Keep parts dry. These habits extend the life of the machine and keep coffee tasting better for longer.
It also helps to keep a simple schedule. For example, rinse the K cup side after use, do a deeper wash every week or two, and check descaling needs every few months. Write the schedule on a sticky note or set a reminder on your phone. Small routines are easy to forget, but they make the biggest difference.
If you ever upgrade to a different brewer, the same cleaning habits still help. A clean brew area always improves flavor and flow. The details may change slightly by model, but the basics stay the same.
Key Takeaways:
- Rinse the K cup side after use to remove oils and grounds.
- Deep clean the brew chamber and needle area on a regular schedule.
- Descale when you see slow flow, white buildup, or a reminder alert.
- Use mild soap, soft cloths, and gentle brushes.
- Dry all parts fully to prevent smells and moisture issues.
- Keep pods sealed and use fresh water for better results.
A clean Cuisinart K cup side makes every cup taste closer to what the pod promises. It also keeps your machine reliable and easy to use. With a few minutes of care, you can avoid most common brewing problems and enjoy a better cup every time.
Frequently Asked Questions
How often should I clean the K cup side of my Cuisinart coffee maker?
Rinse the K cup side after each use if you can, and do a deeper clean every week or two. If you brew daily, check for residue more often and wipe the chamber whenever you notice oils or grounds.
Can I use vinegar to clean the Cuisinart K cup side?
Yes, diluted vinegar can help with mineral buildup, but rinse thoroughly afterward. A food-safe descaling solution is also a good option if you want a more targeted clean. Always follow the product directions and flush with fresh water.
Why does my Cuisinart K cup brewer brew slowly?
Slow brewing usually comes from residue near the needle area, coffee oils in the chamber, or mineral buildup in the water path. Clean the K cup side, remove loose grounds, and run a water-only cycle to improve flow.
Do I need to remove the K cup insert before cleaning?
If your model allows it, yes. Removing the insert makes it easier to wash the brew chamber and holder thoroughly. Rinse with warm water, use mild soap if needed, and dry everything before reassembling.
How do I stop my Cuisinart K cup side from smelling stale?
Stale smells usually come from trapped moisture and old coffee oils. Remove used pods right away, rinse the chamber, and dry all parts fully. A regular deep clean also helps remove buildup that causes odors.
Is a reusable K cup harder to clean in the Cuisinart K cup side?
A reusable pod can leave more grounds and oils behind, so it needs extra rinsing after each use. Wash the pod separately and clean the K cup side more often to keep residue from building up.



