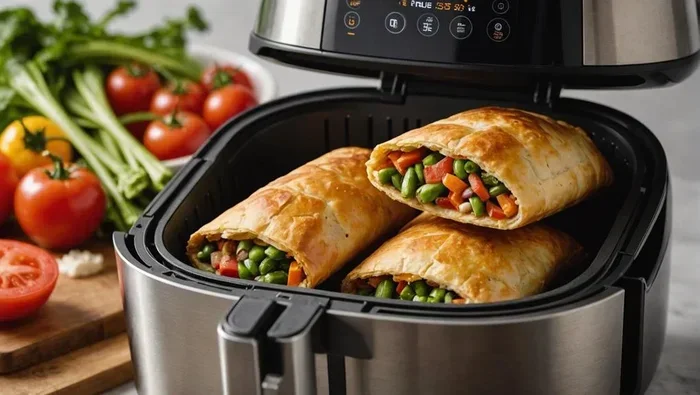
Wondering how long do you put Hot Pockets in an air fryer? The sweet spot is usually 10 to 12 minutes at 375°F for a perfectly crispy exterior and a fully melted center. Cooking times can shift slightly based on your specific air fryer model and the flavor you choose. This guide breaks down exact timing, temperature settings, and simple tricks to avoid a soggy or burnt result every single time.
Key Takeaways
- Ideal Cooking Time: Most Hot Pockets cook perfectly in 10 to 12 minutes at 375°F in an air fryer.
- Preheating Matters: Preheating your air fryer for 3 to 5 minutes ensures even cooking and a crispier crust.
- Flip Halfway Through: Turning the pocket over at the 5-minute mark promotes uniform browning on both sides.
- Watch the Filling: Avoid overcooking since the cheese and meat filling can leak or burn if left too long.
- Size Variations Exist: Thick or double-filled varieties may need an extra 1 to 2 minutes, so always check doneness.
- Use Parchment or a Rack: Placing a small parchment liner or wire rack prevents sticking and improves air circulation.
- Let It Rest: Allowing a 2-minute rest after cooking helps the filling set and reduces burn risks.
📑 Table of Contents
- How Long Do You Put Hot Pockets In An Air Fryer For Best Results
- Why Air Fryers Work So Well For Hot Pockets
- Exact Cooking Time And Temperature Guide
- Step-By-Step Air Fryer Method For Perfect Hot Pockets
- Common Mistakes And How To Fix Them
- Tips For Different Air Fryer Models And Flavors
- Comparing Air Fryer, Oven, And Microwave Results
- Final Thoughts On Cooking Hot Pockets In An Air Fryer
How Long Do You Put Hot Pockets In An Air Fryer For Best Results
Hot Pockets have been a quick comfort food favorite for decades. They are easy to grab, simple to heat, and always satisfying when the cheese melts just right. Many people still reach for a microwave, but an air fryer can completely change the texture. You get a crisp outer shell and a warm, gooey center without the soggy feel that sometimes comes from microwaving.
If you are asking how long do you put Hot Pockets in an air fryer, you are in the right place. The answer depends on a few simple factors like your machine, the flavor, and how crispy you like the crust. In most cases, you will land somewhere between 10 and 12 minutes at a steady 375°F. That range gives you a golden finish while keeping the inside soft and safe to eat.
Air fryers work by moving hot air quickly around the food. That fast airflow removes surface moisture and creates a crunchy layer. For a frozen handheld snack like this, that means a much better bite than a standard oven or microwave. You still need to watch the clock because the filling can heat up fast. Too much time and the crust dries out. Too little time and the center stays cold.
This guide will walk you through exact timing, temperature choices, prep steps, and easy fixes for common problems. You will also learn how to adjust for different models and flavors. By the end, you will know exactly how to get a crisp, melty result without guessing.
Why Air Fryers Work So Well For Hot Pockets
Air fryers are basically small convection ovens with strong fans. That design moves heat around the food from every angle. For a frozen snack with a bread-like crust, that steady heat creates a better texture than a microwave. The outer layer firms up while the inside thaws and warms through.
The main benefit is speed. You do not need to wait for a full-size oven to heat up. The compact cooking chamber also uses less energy for a single snack. That makes it a practical choice for a fast lunch or late-night bite.
Another big plus is texture control. You can decide how crisp you want the outside. A shorter cook gives a softer bite. A slightly longer cook gives a deeper golden finish. That flexibility is hard to get with a microwave, which often leaves the wrapper soft and damp.
How Hot Air Changes The Texture
The circulating heat dries the surface just enough to create a light crunch. At the same time, the filling thaws and warms evenly. This is why many people prefer this method when they want a more satisfying bite.
When A Microwave Still Makes Sense
A microwave is still useful when speed matters most. It is also a better choice if you want a softer wrapper. But if you care about a crisp finish, the air fryer is usually the better tool.
Exact Cooking Time And Temperature Guide
The most reliable starting point is 375°F for 10 to 12 minutes. That range works for most standard frozen pockets. If you like a lighter crust, aim for the lower end. If you want a deeper golden color, go a bit longer.
Some models run hotter or cooler than the dial suggests. That is why it helps to check the snack near the end. A quick look at the crust and a gentle squeeze can tell you a lot. If the outside is pale, give it another minute or two.
Here is a simple time-and-temperature reference you can follow:
Standard Frozen Hot Pockets
- 375°F for 10 to 12 minutes: Best all-around setting for a crisp shell and hot center.
- 350°F for 12 to 14 minutes: Use this if your machine runs hot or if you want a gentler cook.
- 400°F for 8 to 10 minutes: Good for a faster, crisper result, but watch closely to avoid drying out.
Thicker Or Double-Filled Varieties
Larger or stuffed pockets may need a little more time. The extra filling takes longer to warm through. Add about 1 to 2 extra minutes and check the center before serving. If the crust looks done but the middle feels cool, lower the temperature slightly and finish cooking.
Fresh Or Thawed Pockets
If the snack has already thawed, it will cook faster. Start with 6 to 8 minutes at 375°F. Keep an eye on the wrapper because a thawed crust can brown quickly.
Step-By-Step Air Fryer Method For Perfect Hot Pockets
Getting a great result is simple once you follow a steady process. The steps below help you avoid undercooking, overheating, or ending up with a dry crust.
1. Preheat The Air Fryer
Preheating helps the snack start cooking right away. Set the machine to 375°F and let it run for 3 to 5 minutes. This short warm-up improves browning and reduces uneven cooking.
2. Prepare The Pocket
Take the Hot Pocket out of the wrapper. You can place it directly in the basket or on a small piece of parchment made for air fryers. Some people also use a wire rack to improve airflow. If you want extra protection against sticking, a light air fryer-safe liner can help.
3. Cook And Flip
Slide the pocket into the preheated basket. Cook for about 5 minutes, then flip it over. Flipping helps both sides brown evenly. After the flip, continue cooking for another 5 to 7 minutes, depending on your texture preference.
4. Check For Doneness
Look for a lightly golden crust and a firm feel when you press it gently. If the outside is still pale, add a minute or two. If the filling seems cool in the center, lower the heat a bit and finish slowly.
5. Rest Before Eating
Let the snack sit for about 2 minutes after cooking. This short rest helps the cheese and meat settle. It also lowers the chance of burning your mouth on hot filling.
Common Mistakes And How To Fix Them
Even a simple snack can go wrong if the settings are off. The good news is that most problems are easy to correct once you know what to look for.
Undercooked Center
This usually happens when the time is too short or the temperature is too low. If the crust looks done but the middle is cold, add 1 to 2 minutes and check again. You can also lower the temperature slightly and cook a bit longer for more even heating.
Over Crispy Or Dry Crust
If the outside turns hard or dark too fast, your heat may be too high. Try 350°F instead of 375°F and shorten the cook time a little. A lighter coating of airflow exposure can also help prevent drying.
Filling Leakage
Some leakage can happen if the pocket is overcooked or handled roughly. To reduce this, avoid poking or squeezing the snack before cooking. A gentler flip and a shorter cook can help keep the filling sealed inside.
Uneven Browning
This often comes from crowded baskets or weak airflow. Cook one pocket at a time if possible. Flip halfway through and make sure the snack sits flat without touching the walls too much.
Tips For Different Air Fryer Models And Flavors
Not every air fryer behaves the same way. Basket-style machines, oven-style units, and hybrid models can all give slightly different results. A little adjustment goes a long way.
Basket-Style Air Fryers
These models usually cook faster because the airflow is concentrated. Start with 375°F for 10 minutes and check early. If your basket is small, avoid crowding so the hot air can move freely.
Oven-Style Air Fryers
These units often need a slightly longer cook because the space is larger. You may want to use 375°F for 12 minutes or a bit more. Place the pocket in the center for more even heat.
Adjusting For Flavor And Size
Meat-heavy flavors can brown faster because of the filling texture. Cheese-heavy flavors may need careful timing so the center gets hot without overcooking the shell. If you try a new flavor, start with the standard time and adjust by one-minute steps.
Quick Tips For Better Results
- Use a small parchment liner: It helps with cleanup and reduces sticking.
- Flip once halfway: This simple step improves browning on both sides.
- Do not stack: One pocket at a time gives the best airflow.
- Check early: It is easier to add time than to fix an overcooked snack.
- Rest briefly: A short pause after cooking makes the filling safer to eat.
Comparing Air Fryer, Oven, And Microwave Results
Each heating method gives a different result. The best choice depends on what matters most to you: speed, texture, or convenience.
| Method | Typical Time | Texture | Best For |
|---|---|---|---|
| Air Fryer | 10 to 12 minutes at 375°F | Crisp outside, hot melty center | Best overall texture |
| Oven | 15 to 20 minutes at 350°F to 375°F | Evenly warmed, moderately crisp | Cooking several snacks at once |
| Microwave | 1 to 3 minutes | Soft wrapper, fast heating | Speed and convenience |
The air fryer stands out when you want a crisp finish without waiting long. The oven works well for batches. The microwave wins when you only care about speed. If texture matters, the air fryer is usually the strongest choice.
Final Thoughts On Cooking Hot Pockets In An Air Fryer
If you want a better texture than a microwave can give, the air fryer is a smart option. The key is simple: start with 375°F for 10 to 12 minutes, flip halfway, and check near the end. Small adjustments will help you match your machine and your favorite flavor.
Remember that timing is only part of the process. Preheating, airflow, and a short rest all help create a better bite. Once you find your ideal window, you can repeat it with confidence. That makes this method easy to use anytime you want a fast, crispy snack.
So the next time you ask how long do you put Hot Pockets in an air fryer, you already know the basic answer. Aim for the 10 to 12-minute range, watch the crust, and let it rest before biting in. With a little practice, you will get a perfectly heated pocket every time.
Frequently Asked Questions
How long do you put Hot Pockets in an air fryer at 375 degrees?
Most Hot Pockets cook well for 10 to 12 minutes at 375°F. Check near the end so the crust does not overbrown. If the center still feels cool, add a minute or two.
Do I need to preheat the air fryer before cooking a Hot Pocket?
Preheating is helpful but not always required. A short preheat of 3 to 5 minutes gives more even browning and a crisper crust. If you skip it, just add a little extra time.
Can I cook two Hot Pockets at the same time in an air fryer?
Yes, but only if they fit without touching too much. Air needs space to move around each one. If they are crowded, cook in batches for better results.
Why is my Hot Pocket crust hard or dry after air frying?
That usually means the heat was too high or the cook time was too long. Try 350°F to 375°F and reduce the time slightly. Checking a minute early can prevent over-drying.
Do different Hot Pocket flavors need different cooking times?
Most flavors use the same basic timing, but thicker or heavier fillings may need a little more time. Start with the standard range and adjust by 1 to 2 minutes if needed.
Should I keep the wrapper on when air frying a Hot Pocket?
No, remove the wrapper before cooking. The snack should go into the basket bare or on an air fryer-safe liner. This helps the crust brown properly and avoids unwanted material in the machine.