
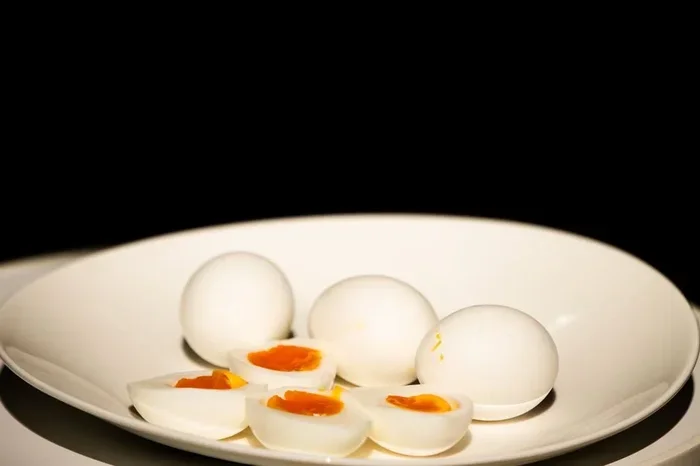
Boiling eggs for deviled eggs is simpler than most people think. With the right timing and a few pro tricks, you can get perfectly cooked eggs every single time. This guide walks you through every step, from picking the right eggs to filling and serving your deviled eggs like a pro.
There is something truly satisfying about a plate of perfectly made deviled eggs. They show up at every potluck, backyard barbecue, and holiday gathering for a reason. But the whole process starts with one crucial step: boiling eggs for deviled eggs the right way. If you have ever ended up with cracked shells, gray-green yolks, or eggs that just would not peel cleanly, you know how frustrating it can be. The good news is that once you learn a few simple tricks, you will never have bad boiled eggs again.
This guide covers everything you need to know about how to boil eggs for deviled eggs like a pro. We will walk through different methods, timing, peeling secrets, and filling ideas. Whether you are a complete beginner or just looking to level up your game, you will find practical tips that work right away. Let us get started.
Key Takeaways
- Use older eggs: Eggs that are 7 to 10 days old peel much easier than fresh ones straight from the hen.
- Start with cold water: Dropping eggs into already boiling water can cause cracking. Cold water allows gentle, even heating.
- Add vinegar or baking soda: These simple additions help the shell separate from the egg white for effortless peeling.
- Ice bath is essential: Cooling eggs immediately stops the cooking and prevents that gray-green ring around the yolk.
- Steam or boil: Both methods work great, but steaming often gives even better results for easy peeling.
- Peel under running water: Water seeps between the shell membrane and the white, making peeling clean and mess-free.
📑 Table of Contents
- Why Getting the Boil Right Matters for Deviled Eggs
- What You Need to Boil Eggs for Deviled Eggs
- How to Boil Eggs for Deviled Eggs on the Stovetop
- How to Boil Eggs Using the Steaming Method
- How to Peel Boiled Eggs Without Tearing Them
- How to Fill and Finish Your Deviled Eggs
- Common Mistakes to Avoid When Boiling Eggs for Deviled Eggs
- Expert Tips for the Perfect Deviled Eggs Every Time
- Final Thoughts
Why Getting the Boil Right Matters for Deviled Eggs
Deviled eggs are all about the yolk. The creamy, seasoned filling is what makes people come back for seconds. But if your hard boiled eggs are overcooked, undercooked, or impossible to peel, the whole dish suffers. A perfectly boiled egg has a bright yellow yolk that is firm but not dry. The white should be tender, not rubbery. Getting this balance right is the foundation of great deviled eggs.
Many people underestimate how much the boiling method affects the final result. Boiling eggs for deviled eggs is not just about dropping them in a pot of water. It is about control. Temperature, timing, and cooling all play a role. When you nail these details, your eggs will be easy to peel, look clean when sliced, and have a smooth, creamy yolk that mixes beautifully with your filling ingredients.
What Makes Eggs Easy or Hard to Peel
The ease of peeling comes down to a few factors. Fresh eggs have a lower pH level in the shell membrane, which causes them to cling to the white. Older eggs, around 7 to 10 days old, have a higher pH, making the membrane release more easily. This is why many chefs recommend using eggs that are not straight from the hen. If you buy eggs from a store, they have usually been sitting long enough to work well for boiling eggs.
Another factor is how you cool the eggs. A quick ice bath after boiling causes the egg to contract inside the shell, creating a gap between the white and the shell. This gap makes peeling a breeze. Skipping the ice bath is one of the most common mistakes people make when learning how to boil eggs for deviled eggs.
What You Need to Boil Eggs for Deviled Eggs
You do not need a lot of equipment to boil eggs perfectly. The basics are simple, and you probably already have them in your kitchen. Here is what you will need:
- A medium or large saucepan with a lid
- Enough water to cover the eggs by about one inch
- A slotted spoon or tongs for removing the eggs
- A bowl filled with ice water for the cooling step
- A timer or clock to track boiling time
- Fresh eggs, ideally 7 to 10 days old
That is really all there is to it. Some people like to add vinegar or baking soda to the water. Both can help loosen the shell, but they are not required. If you want to experiment, a teaspoon of vinegar or a half teaspoon of baking soda per quart of water works well. The most important thing is to have everything ready before you start heating the water.
How to Boil Eggs for Deviled Eggs on the Stovetop
The stovetop method is the most common way to boil eggs for deviled eggs. It is straightforward, reliable, and gives you full control over the process. Here is how to do it step by step.
Step 1: Place Eggs in the Pot
Start by placing your eggs gently in the saucepan. Try not to stack them too tightly. You want room for the water to circulate around each egg. If you are boiling a large batch, use a bigger pot so the eggs are not crowded. Crowding leads to uneven cooking and more cracked shells.
Step 2: Add Cold Water
Fill the pot with cold water until the eggs are covered by about one inch. Starting with cold water is important. It allows the eggs to heat up gradually, which reduces the risk of cracking from thermal shock. Some people prefer to start with hot or boiling water, and that works too, but cold water gives you more even cooking throughout.
Step 3: Add Vinegar or Baking Soda (Optional)
If you want easier peeling, add a teaspoon of white vinegar or a half teaspoon of baking soda to the water. These ingredients slightly change the pH level and help the shell separate from the egg white. This is a small trick that makes a big difference, especially with fresher eggs that tend to stick more.
Step 4: Bring to a Boil and Set the Timer
Place the pot on the stove over medium-high heat and bring the water to a full rolling boil. Once you see large bubbles breaking the surface consistently, set your timer. For hard boiled eggs ideal for deviled eggs, cook for 10 to 12 minutes. Ten minutes gives you a slightly softer center, while 12 minutes gives you a fully set yolk that is perfect for mashing into a smooth filling. Use a reliable egg timer or your phone to remove any guesswork.
Step 5: Transfer to an Ice Bath
As soon as the timer goes off, use a slotted spoon to move the eggs into a bowl of ice water. Let them sit for at least 10 minutes. This stops the cooking immediately and makes the eggs easier to handle. It also prevents that unappealing gray-green ring that sometimes forms around the yolk. The ice bath is one of the most important steps in the entire process of boiling eggs for deviled eggs.
For those who prefer using an Instant Pot, the process is a bit different. You can also learn how to boil water in an Instant Pot without a lid if you want to explore that route. Both methods produce excellent results for deviled eggs.
How to Boil Eggs Using the Steaming Method
Steaming is a fantastic alternative to boiling. Many home cooks swear by it because it produces eggs that are even easier to peel. The steam heats the eggs gently and evenly, and the lack of direct water contact means less shell sticking. If you have a steamer basket or insert, this method is well worth trying.
To steam eggs, add about an inch of water to your pot and bring it to a boil. Place the eggs in a steamer basket above the water. Cover with a lid and steam for 12 to 13 minutes. Then transfer them straight to an ice bath, just like with the stovetop method. The steaming method is especially helpful if you are dealing with a batch of eggs and want consistent, easy-to-peel results every time. Steamed eggs tend to have fewer cracks and cleaner shells, which makes the whole process smoother.
You can also check out our guide on the best egg cutter for soft boiled eggs if you want clean, precise cuts for your deviled eggs. A good egg cutter saves time and gives your eggs a polished look on the serving plate.
How to Peel Boiled Eggs Without Tearing Them
Peeling is where most people struggle. You have cooked the eggs perfectly, but now the shell clings to the white in frustrating patches. There are several proven techniques that make peeling almost painless.
Tap and Roll Method
Gently tap the egg on a hard surface all around to create small cracks. Then roll the egg between your hands or on the counter with light pressure. This loosens the shell all over. Start peeling from the wider end, where there is usually an air pocket. The air pocket acts as a natural starting point and helps the shell come off in large, clean pieces. This method works well for egg peeling tips that save time and frustration.
Peel Under Running Water
Another highly effective method is to peel the eggs under a stream of cool running water or while submerged in a bowl of water. The water seeps between the shell membrane and the egg white, helping to separate them. This technique also prevents tiny bits of shell from sticking to the egg. It takes a little more time, but the results are worth it. Many professional cooks rely on this method for their perfect boiled eggs every single time.
Use Older Eggs for Easier Peeling
As mentioned earlier, the age of the egg matters a lot. If you know you will be making deviled eggs soon, buy your eggs at least a week in advance. The extra days allow the pH level to rise, which naturally loosens the bond between the shell and the white. If you only have very fresh eggs, the steaming method or adding baking soda to the water can help compensate. Older eggs peel easier, and this simple trick can change your entire experience.
Proper egg storage also plays a role. If you want to keep your eggs fresh for longer before cooking, learn more about how to store eggs for long term to keep them at their best quality for your next batch of deviled eggs.
How to Fill and Finish Your Deviled Eggs
Once your eggs are boiled, cooled, and peeled, it is time to make them into deviled eggs. This is the fun part where you get to be creative. The classic filling is simple, but there are countless variations to explore.
The Classic Filling
Slice each egg in half lengthwise. Use a sharp knife or a wet knife for clean cuts that do not drag. Scoop out the yolks into a bowl and mash them with a fork until smooth. Add mayonnaise, mustard, salt, and pepper. Mix until the texture is creamy and spreadable. Taste and adjust the seasoning as needed. Some people like a squeeze of lemon juice or a dash of paprika for extra flavor. The yolk filling is really where you can make the recipe your own.
Creative Filling Ideas
Once you have the classic method down, you can experiment with different flavors. Here are some popular variations:
- Avocado deviled eggs: Replace half the mayonnaise with mashed avocado for a creamy, healthy twist.
- Spicy deviled eggs: Add a pinch of cayenne pepper or a dash of hot sauce to the yolk mixture.
- Bacon deviled eggs: Sprinkle crumbled cooked bacon on top of each filled egg half.
- Herbed deviled eggs: Mix in fresh dill, chives, or parsley for a bright, garden-fresh flavor.
- Smoked salmon deviled eggs: Fold in a small amount of flaked smoked salmon for an elegant upgrade.
How to Store Deviled Eggs
If you are making deviled eggs ahead of time, you can store filled deviled eggs in the refrigerator for up to two days. Keep them in an airtight container or cover the tray tightly with plastic wrap. It is best to fill the eggs right before serving if possible, but they hold up well overnight. Just bring them back to room temperature for about 15 minutes before serving for the best flavor and texture. Proper egg storage keeps everything fresh and safe to eat.
Common Mistakes to Avoid When Boiling Eggs for Deviled Eggs
Even experienced cooks sometimes make mistakes when boiling eggs. Here are a few common errors to watch out for:
- Using eggs straight from the fridge: Cold eggs are more likely to crack when dropped into hot water. Let them sit at room temperature for 5 to 10 minutes before boiling to reduce thermal shock.
- Overcrowding the pot: Too many eggs in one pot means less room for water circulation. Cook in batches if you need a large quantity for a party or gathering.
- Overcooking the eggs: Boiling for too long makes the yolks dry and chalky. Stick to 10 to 12 minutes for the perfect texture that is ideal for mashing into a filling.
- Skipping the ice bath: This step is non-negotiable. Without it, the eggs continue cooking inside the shell and the yolks develop that unpleasant gray-green color that nobody wants to see.
- Peeling immediately: Let the eggs cool in the ice bath for at least 10 minutes. Peeling them too warm makes the process messier and more frustrating than it needs to be.
Avoiding these simple mistakes will save you time and frustration. Each one is easy to fix with a little planning and attention. Once you build these habits into your routine, boiling eggs for deviled eggs becomes second nature. You will wonder why you ever struggled with it in the first place.
Expert Tips for the Perfect Deviled Eggs Every Time
Here are a few extra tips from experienced cooks and chefs that can take your deviled eggs to the next level:
- Use a timer every time. Even if you think you know how long to boil, a timer removes guesswork and ensures consistent results batch after batch.
- Buy eggs in bulk and age them. Purchase a large carton and let them sit in the fridge for a week before using them for boiling. You will notice a big difference in how easily they peel.
- Add a pinch of salt to the water. Salt can help the white set faster and may reduce cracking by sealing small leaks in the shell during cooking.
- Use a spoon to transfer eggs. A slotted spoon or spider strainer gently lifts eggs out of the hot water without causing them to bump and crack against the pot.
- Chill eggs before peeling. If you are short on time, place the boiled eggs in the refrigerator for 30 minutes before peeling. The cold temperature helps the shell separate more cleanly from the white.
These small adjustments might seem minor, but they add up to a noticeable improvement in your final result. The goal is to make the process as smooth and stress-free as possible so you can focus on the fun part: making delicious deviled eggs that everyone will love. With practice, you will be able to whip up a batch of perfect boiled eggs without even thinking about it.
Final Thoughts
Learning how to boil eggs for deviled eggs properly is one of those kitchen skills that pays off every single time. Once you understand the basics of timing, cooling, and peeling, you can make deviled eggs with confidence and consistency. The stovetop method and steaming method both work beautifully, and each has its own advantages. Choose the one that fits your routine best.
Remember, the secret to great deviled eggs starts long before you get to the filling. It starts with perfectly boiled eggs. Take your time, follow the steps, and do not be afraid to experiment with flavors and techniques. The more you practice, the more natural it will become. Soon, you will be the person everyone turns to when deviled eggs are on the menu. Happy boiling!
Frequently Asked Questions
How long should I boil eggs for deviled eggs?
Boil eggs for 10 to 12 minutes once the water reaches a full rolling boil. Ten minutes gives you a slightly softer yolk, while 12 minutes produces a fully set yolk that is ideal for mashing into a smooth filling. Always use a timer to get consistent results every time you cook.
Do I need to use older eggs for boiling?
It is highly recommended. Eggs that are 7 to 10 days old peel much more easily than very fresh eggs. The pH level in the shell changes over time, which naturally loosens the membrane between the shell and the egg white. If you only have fresh eggs, try the steaming method or add baking soda to the water to help compensate.
Can I boil eggs in an Instant Pot for deviled eggs?
Yes, absolutely. An Instant Pot is a great alternative to the stovetop method. Place eggs on a trivet with one cup of water, set the pot to high pressure, and cook for 5 minutes. Let the pressure release naturally for 5 minutes, then transfer the eggs to an ice bath immediately to stop the cooking.
Why do my boiled eggs have a gray-green ring around the yolk?
This happens when eggs are overcooked or not cooled quickly enough. The ring is caused by a reaction between the iron in the yolk and the sulfur in the white. To prevent it, stick to the recommended 10 to 12 minutes of boiling and always use an ice bath right after cooking your eggs.
What is the best way to store leftover deviled eggs?
Store filled deviled eggs in an airtight container in the refrigerator for up to two days. It is best to keep them covered to prevent them from absorbing other fridge odors. Bring them to room temperature for about 15 minutes before serving for the best taste and creamy texture.
Can I freeze boiled eggs for deviled eggs?
Freezing is not recommended for boiled eggs. The whites become rubbery and watery after thawing, which ruins the texture you need for a smooth filling. It is much better to boil only what you need or to store peeled eggs in the refrigerator for up to two days in a sealed container.



