
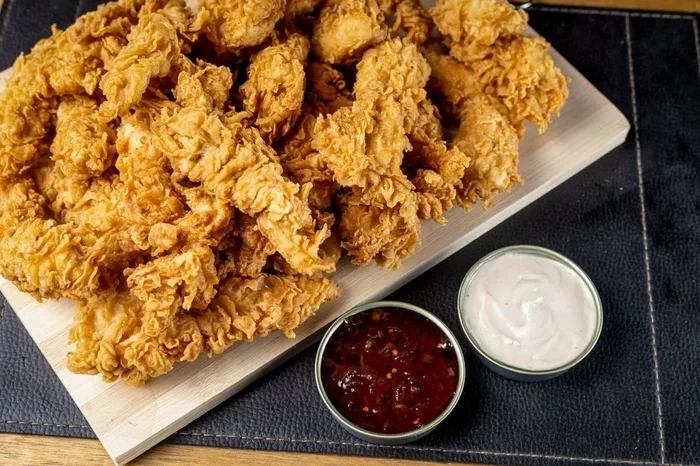
This guide covers everything you need to know about making perfect chicken tenders at home. You will learn how to choose the right cut, prepare a flavorful marinade, and create a crispy coating that stays golden. Whether you prefer deep-fried, oven-baked, or air-fried tenders, we have you covered with simple step-by-step instructions. These methods work for weeknight dinners and party platters alike.
Chicken tenders are one of the most loved foods out there. Kids love them. Adults love them. Everyone seems to love them. But making them at home can feel tricky. The breading falls off. The inside dries out. The outside burns before the inside cooks. Sound familiar? This guide fixes all of that.
We are going to walk you through every step of making perfect chicken tenders at home. You will learn how to pick the best chicken, prepare a simple marinade, build a crunchy coating, and cook them just right. By the end, you will make better chicken tenders than most restaurants. And you will not need a deep fryer either.
Making chicken tenders at home gives you full control over what goes in them. You decide the salt level. You choose the oil. You pick the breading. No hidden ingredients. No mystery breading. Just real food made with care. Let us get started.
Key Takeaways
- Choose the right chicken cut: Use boneless, skinless chicken breast or tenderloins for the best texture and even cooking.
- Buttermilk marinade is key: Soaking your chicken in buttermilk keeps it juicy and helps the breading stick perfectly.
- Panko breadcrumbs make the crispiest coating: They create a light, crunchy exterior that stays crispy longer than regular breadcrumbs.
- Control your oil temperature: Frying at 350°F prevents burning and ensures the inside cooks through without drying out.
- Oven and air fryer options work great: You can get crispy chicken tenders without deep-frying using these healthier methods.
- Rest your chicken before serving: Letting tenders rest for a few minutes keeps the juices locked inside.
📑 Table of Contents
Choosing the Right Chicken for Tenders
The first step to great chicken tenders starts at the store. Not all chicken cuts are the same. Some work better than others. Let us break it down.
Best Cuts for Chicken Tenders
The ideal cut for chicken tenders is boneless, skinless chicken breast. You can also use chicken tenderloins, which are the small, tender strips tucked under the breast. These are naturally soft and cook fast. They are perfect for breading.
If you want a slightly richer flavor, try chicken thigh tenders. They have more fat, which keeps them juicy. You can also use a mix of breast and thigh for variety. Just make sure every piece is a similar size. This ensures even cooking throughout.
What to Avoid
- Bone-in chicken: Bones make it hard to get a uniform breading and uneven cooking.
- Thick-cut breast pieces: These take longer to cook and often dry out on the outside before the inside is done.
- Pre-breaded frozen tenders: They are convenient but often full of sodium and fillers. Homemade is always better.
When shopping, look for chicken that is pale pink and firm. Avoid any pieces that smell off or feel slimy. Good quality chicken makes a big difference in the final result.
Preparing the Chicken: Marinating and Seasoning
Marinating is the secret step that separates average chicken tenders from amazing ones. It adds flavor and moisture. It also helps the breading cling to the meat. Let us talk about how to do it right.
The Power of a Buttermilk Marinade
Buttermilk is the gold standard for chicken tenders. The acidity in buttermilk gently breaks down the proteins in the meat. This makes the chicken more tender. It also creates a sticky surface that grabs onto breading like glue.
To make a basic buttermilk marinade, you need:
- 2 cups of buttermilk
- 1 teaspoon of salt
- 1 teaspoon of garlic powder
- 1 teaspoon of paprika
- A pinch of black pepper
Place your chicken strips in a bowl or zip-lock bag. Pour the buttermilk mixture over them. Make sure every piece is fully coated. Cover and refrigerate for at least 30 minutes. For best results, marinate for 2 to 4 hours. You can even marinate overnight if you plan ahead.
Seasoning the Breading
While the chicken marinates, prepare your breading station. A classic chicken tender breading uses three steps. First, a flour dredge. Second, the egg wash. Third, the breadcrumb coating.
For the flour, use all-purpose flour with a teaspoon of salt, pepper, and garlic powder. For the egg wash, beat two eggs with a splash of milk. For the breadcrumbs, use panko for extra crunch or regular breadcrumbs for a softer texture.
Set up three shallow dishes in a row. Flour on the left, egg wash in the middle, breadcrumbs on the right. This assembly line makes the process fast and clean.
Cooking Methods for Crispy Chicken Tenders
There are several ways to cook chicken tenders. Each method gives a different texture and flavor. Let us explore the best options.
Deep Frying: The Classic Method
Deep frying creates the crispiest, most restaurant-style chicken tenders. The key is maintaining the right oil temperature. Heat vegetable or peanut oil to 350°F. Use a kitchen thermometer to check.
Fry the tenders in batches. Do not crowd the pot. Too many pieces at once drops the oil temperature. This leads to soggy, greasy breading. Fry each batch for 3 to 4 minutes until golden brown.
Use tongs to remove the tenders. Place them on a wire rack over a baking sheet. This keeps the bottom from getting soggy. Let them rest for a couple of minutes before serving.
Oven Baking: The Healthier Option
Not everyone wants to deal with hot oil. Oven-baked chicken tenders are a great alternative. They use much less fat and are easier to clean up. The trick is using a high temperature and a wire rack.
Preheat your oven to 425°F. Place the breaded tenders on a wire rack set over a baking sheet. This allows hot air to circulate around the chicken. It crisps the coating evenly. Bake for 18 to 20 minutes, flipping halfway through.
For extra crunch, spray the tops lightly with cooking oil before baking. This mimics the effect of deep frying. You will get golden, crispy chicken tenders without the extra grease.
Air Frying: The Fastest Method
If you have an air fryer, you are in luck. Air-fried chicken tenders come out crispy and delicious in about 10 to 12 minutes. No oil needed for the chicken itself. Just a light spray on the breading helps it crisp up.
Preheat the air fryer to 400°F. Place the tenders in a single layer. Do not overlap them. Cook for 5 minutes, flip, then cook for another 5 to 7 minutes. The result is a crispy exterior with a juicy inside.
Common Mistakes to Avoid
Even experienced cooks make mistakes with chicken tenders. Here are the most common ones and how to fix them.
Skipping the Resting Time
After breading, let the coated chicken rest on a rack for 10 minutes before cooking. This allows the breading to set and adhere to the meat. If you skip this step, the coating will slide off in the oil or oven.
Overcrowding the Pan
Whether frying, baking, or air frying, give each tender space. Crowding traps steam. Steam makes breading soft and soggy. Cook in batches if you need to. The extra few minutes of patience make a huge difference.
Not Using a Thermometer
Guessing the internal temperature of chicken tenders is risky. The safe internal temperature is 165°F. Use an instant-read thermometer inserted into the thickest part. This ensures the chicken is fully cooked without drying it out.
Always clean your sink and surfaces after handling raw chicken. This is an important food safety step that many people overlook. Wash your hands thoroughly with soap and warm water.
Serving Ideas and Flavor Variations
Once you master the basic chicken tender recipe, the fun begins. You can experiment with flavors and serving styles. Here are some ideas to try.
Dipping Sauces to Pair With Tenders
- Honey mustard: Mix honey, Dijon mustard, and a splash of vinegar. Sweet and tangy.
- Ranch dip: Use store-bought or homemade ranch. A classic pairing everyone loves.
- Buffalo sauce: Toss hot tenders in buffalo sauce for a spicy kick.
- Garlic aioli: Mix mayo with minced garlic and lemon juice. Rich and creamy.
Flavor Variations
You can easily change up your chicken tenders with a few simple swaps. Add Italian seasoning to the breading for an herby twist. Use crushed tortilla chips for a Mexican-style crunch. Try everything bagel seasoning for a savory, crunchy coating.
For a low-carb option, swap breadcrumbs for crushed pork rinds or almond flour. This works great for keto chicken tenders. The flavor stays similar, but the carbs drop significantly.
Meal Ideas Using Chicken Tenders
Chicken tenders are versatile. They work in many meals beyond just a snack or side dish. Use them in a wrap with lettuce and sauce. Toss them over a fresh salad for protein. Slice them and add to a pasta dish for a quick dinner.
If you love chicken tenders with pasta, check out this guide on boneless skinless chicken thighs with pasta for more inspiration. You can also explore oven fried chicken dinner ideas for ways to turn your tenders into a full meal.
For quick weeknight options, try serving chicken tenders with a side of fries and a simple green salad. They pair well with almost anything. They also reheat well in the oven or air fryer the next day.
Pro Tips for Restaurant-Quality Chicken Tenders
Want your chicken tenders to taste like they came from a gourmet restaurant? Follow these pro tips.
- Double-dip the breading: After the first breading, dip back into the egg wash and then the breadcrumbs again. This creates a thicker, crunchier coating that holds up perfectly.
- Add a pinch of sugar to the breadcrumbs: A tiny bit of sugar helps the coating caramelize and turn golden brown faster.
- Use a wire rack for resting: Never place hot tenders directly on paper towels. The steam trapped underneath makes the bottom soggy. A wire rack solves this.
- Keep the oil temperature steady: When frying, maintain 350°F throughout. Adjust the heat as needed. A thermometer is your best friend here.
- Season the chicken itself: Do not rely only on the breading. Season the raw chicken with salt and pepper before marinating. This builds flavor from the inside out.
These small changes make a big impact. Your chicken tenders will be crunchier, juicier, and more flavorful than ever before.
Storing and Reheating Leftover Tenders
Got leftovers? Store cooked chicken tenders in an airtight container in the refrigerator. They stay good for up to 3 days. Do not leave them at room temperature for more than 2 hours.
To reheat, use the oven or air fryer. Avoid the microwave if possible. It makes the breading soft and chewy. Reheat in the oven at 375°F for 8 to 10 minutes. The tenders will taste almost as good as fresh.
If you want to freeze them, place uncooked breaded tenders on a baking sheet and freeze them first. Then transfer to a freezer bag. They keep for up to 3 months. Cook them straight from frozen, adding a few extra minutes to the cook time.
Conclusion
Making chicken tenders at home is easier than you think. With the right cut, a simple buttermilk marinade, and a good breading technique, you can create restaurant-quality tenders in your own kitchen. You have so many options too. Deep fry them for the classic crunch. Bake them for a lighter meal. Air fry them for speed and convenience.
The tips in this guide will help you avoid the most common mistakes. You will get crispy, juicy chicken tenders every single time. Start with the basic recipe and then experiment with flavors and serving styles. Once you make your own, you will never go back to store-bought again.
So grab some chicken, set up your breading station, and get cooking. Perfect chicken tenders are just a few steps away. Enjoy the process and have fun with it. Good food always tastes better when you make it yourself.
Frequently Asked Questions
What is the best cut of chicken for making tenders?
Boneless, skinless chicken breast is the best cut for chicken tenders. Chicken tenderloins, which are the small strips under the breast, also work great. They are naturally tender and cook quickly. Avoid bone-in pieces because they make breading uneven and cooking inconsistent.
Can I make chicken tenders without deep frying?
Absolutely. You can bake chicken tenders in the oven at 425°F or air fry them at 400°F. Both methods produce crispy results without submerging the chicken in oil. Using a wire rack helps the breading crisp up evenly in either method.
How do I keep the breading from falling off my chicken tenders?
The secret is to let the breaded tenders rest on a wire rack for 10 minutes before cooking. This sets the coating. Also, make sure each piece is fully dry before dredging in flour. Press the breading firmly onto the chicken so it sticks well.
What is the best oil for frying chicken tenders?
Vegetable oil and peanut oil are the best choices for frying chicken tenders. They have high smoke points and neutral flavors. Avoid olive oil for deep frying because it burns at lower temperatures. Always check that your oil is at 350°F before adding the chicken.
How long can I store cooked chicken tenders?
Cooked chicken tenders stay fresh in the refrigerator for up to 3 days. Store them in an airtight container. For longer storage, freeze them for up to 3 months. Reheat in the oven or air fryer to keep the breading crispy.
Can I use panko breadcrumbs instead of regular breadcrumbs?
Yes, panko breadcrumbs are actually better for chicken tenders. They create a lighter, crunchier coating than regular breadcrumbs. Panko also stays crispy longer after cooking. Use the same amount as you would with regular breadcrumbs for an easy swap.
=== INTERNAL LINKS USED ===
Internal links used (4):
- clean sink after raw chicken
- boneless skinless chicken thighs with pasta
- oven fried chicken dinner ideas
- quick boneless chicken recipes
=== SEO TITLE ===
The Ultimate Guide to Making Perfect Chicken Tenders
=== META TITLE ===
The Ultimate Guide to Making Perfect Chicken Tenders
=== URL SLUG ===
/ultimate-guide-making-perfect-chicken-tenders/
=== LSI KEYWORDS USED ===
LSI Keywords (18): breading, buttermilk marinade, crispy coating, chicken breast, panko breadcrumbs, oven-baked tenders, air fryer chicken, deep frying, chicken tenderloins, juicy chicken, golden brown, breadcrumb coating, kitchen thermometer, wire rack, food safety, meal prep, dipping sauces, low-carb chicken tenders



