
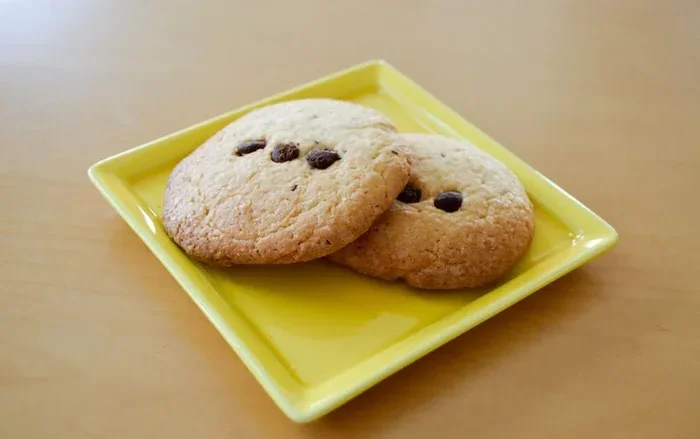
Learn how to make cookies from scratch with simple ingredients and foolproof techniques that anyone can follow. This guide covers everything from essential baking ingredients and step-by-step instructions to storing your finished treats. You will find easy cookie recipes, expert baking tips, and practical advice that makes homemade cookies a breeze every single time.
There is something truly special about pulling a tray of warm, freshly baked cookies out of the oven. The smell fills your kitchen, and everyone gathers around hoping for a taste. Learning how to make cookies from scratch is easier than you might think. With just a few basic ingredients and some simple techniques, you can bake cookies that rival any bakery treat. This guide will walk you through every step, from mixing your first batch of cookie dough to pulling perfectly golden cookies off the cookie sheet. Whether you love chocolate chip, sugar cookies, or oatmeal cookies, you will find everything you need right here.
Baking cookies at home gives you full control over what goes into them. You choose the quality of your butter, the amount of sugar, and the mix-ins that make each batch your own. No preservatives, no mystery ingredients. Just honest, delicious homemade cookies made with love. Let us dive into the process and get you baking.
Key Takeaways
- Fresh ingredients matter: Using quality butter, fresh baking soda, and pure vanilla extract makes a big difference in flavor and texture.
- Chilling your dough helps: Refrigerating cookie dough prevents spreading and creates thicker, chewier homemade cookies.
- Oven temperature is key: An oven thermometer ensures your baking cookies at the right heat for perfect results every time.
- Proper cookie storage keeps them fresh: Storing methods can keep your homemade treats tasting great for days or even months when frozen.
- Experiment with mix-ins: Adding chocolate chips, nuts, or dried fruit lets you create your own signature cookie recipe.
- Patience pays off: Following each step carefully leads to bakery-quality results right in your own kitchen.
📑 Table of Contents
The Basics of Homemade Cookies
Before you start mixing, it helps to understand what makes a great cookie. The foundation of any good cookie recipe is simple: fat, sugar, flour, and a leavening agent. From there, everything else is about personal preference and technique.
Why Bake Cookies From Scratch?
Making cookies from scratch lets you customize every bite. Store-bought cookies often contain added preservatives and excess sodium. When you bake at home, you control the ingredients. You can reduce sugar, use real butter, and add the mix-ins your family loves most. Baking cookies from scratch also fills your home with an irresistible aroma that no store-bought package can match.
The process also teaches valuable kitchen skills. Measuring ingredients, creaming butter and sugar, and understanding how oven temperature affects your bake are all useful abilities. Once you master the basics, you can adapt any cookie recipe to suit your taste. You might start with a simple drop cookie and eventually work your way up to delicate butter cookies or layered bar cookies.
Essential Equipment for Cookie Baking
You do not need fancy tools to bake great cookies. A few basics will get you started:
- A large mixing bowl for combining ingredients
- A hand mixer or stand mixer for creaming
- A cookie sheet lined with parchment paper
- A cookie rack for cooling
- An oven thermometer to check accuracy
- A spatula for scraping and scooping dough
These simple tools make the entire process smoother. The cookie sheet and parchment paper are especially important. They prevent sticking and ensure even browning. A cookie rack lets air circulate around your cookies so the bottoms stay crispy and the tops stay soft.
Essential Ingredients You Will Need
Every cookie recipe starts with a few core ingredients. Understanding what each one does helps you troubleshoot and adjust as you go.
Butter and Fat
Butter provides richness, flavor, and structure to your cookies. Most cookie recipes call for softened butter, which creams easily with sugar. Some recipes use melted butter for a chewier texture. The choice between butter and other fats like shortening depends on the texture you want. Butter gives a richer taste, while shortening creates a more cake-like cookie.
Sugar and Sweeteners
Sugar does more than sweeten your cookies. It also affects texture, color, and spread. Granulated sugar creates crisp edges, while brown sugar adds moisture and chewiness. Many cookie recipes use a combination of both for the perfect balance. When you are not baking, make sure to how to store sugar properly in an airtight container to keep it fresh and free-flowing for your next batch.
Flour and Leavening Agents
All-purpose flour is the most common choice for cookies. It provides structure without being too heavy. Baking soda is the most popular leavening agent for cookies. It reacts with acidic ingredients like brown sugar to create lift and spread. Baking powder works too, but it produces a different texture. Always check that your baking soda is fresh. Old baking soda loses its potency and can lead to flat, dense cookies.
Eggs and Flavorings
Eggs bind all the ingredients together and add moisture. Most cookie recipes call for one or two large eggs. Vanilla extract is the classic flavoring, but you can also use almond extract, citrus zest, or melted chocolate for variety. A pinch of salt enhances all the flavors and balances the sweetness of your cookie dough.
Step-by-Step Cookie Making Process
Now that you have your ingredients and equipment ready, it is time to bake. Follow these steps for consistent, delicious results every time.
Step 1: Cream the Butter and Sugar
Start by beating your softened butter and sugar together until the mixture is light and fluffy. This step, called creaming, incorporates air into the dough. The air pockets expand during baking, giving your cookies a tender texture. Beat for about three to five minutes on medium speed. You will notice the color lighten significantly. This is a crucial step that many beginners skip, but it makes a real difference in the final texture of your homemade cookies.
Step 2: Add Eggs and Flavorings
Beat in your eggs one at a time. Add the vanilla extract or other flavorings next. Mix until just combined. Overmixing at this stage can develop too much gluten in the flour, leading to tough cookies. Keep an eye on the dough and stop mixing as soon as everything is incorporated.
Step 3: Combine Dry Ingredients
In a separate bowl, whisk together your flour, baking soda, and salt. Gradually add the dry mixture to the wet ingredients, mixing on low speed or folding by hand. Stir until you no longer see flour streaks. The dough should be soft but not sticky. If it feels too dry, add a splash of milk. If it feels too wet, sprinkle in a tablespoon of flour.
Step 4: Chill the Dough
This step is optional but highly recommended. Cover your cookie dough and refrigerate it for at least thirty minutes or up to overnight. Chilling the dough prevents the cookies from spreading too much in the oven. It also deepens the flavor as the ingredients meld together. If you are in a hurry, even fifteen minutes in the fridge helps. For more baking inspiration, you can also explore how to make toaster strudel as another fun from-scratch baking project to try on the weekend.
Step 5: Scoop and Bake
Preheat your oven to the temperature specified in your cookie recipe. Line your cookie sheet with parchment paper. Scoop the dough using a cookie scoop or spoon, placing each ball about two inches apart on the sheet. Bake for the recommended time, usually nine to twelve minutes. The edges should be golden brown while the centers look slightly underdone. They will firm up as they cool on the cookie rack.
Step 6: Cool and Enjoy
Let your cookies cool on the baking sheet for about five minutes before transferring them to a cookie rack. This resting period allows the cookies to set and stay together. Once cooled, enjoy them right away or store them for later. There is nothing quite like a warm, homemade cookie fresh from the oven.
Popular Cookie Types to Try
Once you understand the basics, you can experiment with different styles. Here are some beloved cookie types that every home baker should try.
Chocolate Chip Cookies
Chocolate chip cookies are the most popular cookie type for a reason. They are easy to make, universally loved, and endlessly customizable. Use semi-sweet chocolate chips for a classic flavor, or try milk chocolate, dark chocolate, or white chocolate for variety. Add a pinch of sea salt on top before baking for an irresistible sweet-and-salty contrast. This is the perfect cookie to start with if you are new to baking from scratch.
Sugar Cookies
Sugar cookies are buttery, sweet, and perfect for decorating. Roll out the dough and use a cookie cutter to create fun shapes. These cookies are great for holidays, birthdays, or just a simple afternoon treat. Dip them in white chocolate or add colorful sprinkles for a festive touch. Sugar cookies are also excellent for gift-giving because they hold their shape so well during baking.
Oatmeal Cookies
Oatmeal cookies are hearty and satisfying. They combine rolled oats with brown sugar, butter, and spices like cinnamon and nutmeg. Add raisins, dried cranberries, or chopped nuts for extra texture. These cookies have a wonderful chewy texture that keeps people coming back for more. They are also a great way to use up ingredients you already have in your pantry.
Snickerdoodles
Snickerdoodles are soft, cinnamon-coated cookies with a unique tangy flavor. They get their signature taste from a combination of cream of tartar and baking soda in the dough. Roll the dough in a cinnamon-sugar mixture before baking for that classic crackled surface. If you want to learn more about keeping snickerdoodles fresh, check out how to store snickerdoodles for tips on maintaining their soft, chewy texture for days.
Baking Tips for Perfect Cookies Every Time
Even experienced bakers run into issues sometimes. Here are some practical baking tips that will help you achieve perfect cookies consistently.
Check Your Oven Temperature
Ovens can be notoriously inaccurate. An oven that runs too hot will burn the edges while leaving the center raw. An oven that runs too cool will produce flat, pale cookies. Use an oven thermometer to verify the actual temperature inside your oven. This small investment pays off in better baking results every single time. If you want to learn more about oven techniques, you can also explore how to crisp bread in oven for additional insights into managing oven heat effectively.
Measure Flour Correctly
How you measure flour matters more than you might think. Scooping directly from the bag packs the flour down, giving you more than the recipe calls for. This leads to dense, dry cookies. Instead, spoon the flour into your measuring cup and level it off with a knife. For even better results, use a kitchen scale to weigh your ingredients in grams. This method is more accurate and produces more consistent cookies every time.
Do Not Overbake
One of the most common baking mistakes is leaving cookies in the oven too long. Cookies continue to cook on the hot cookie sheet even after you remove them from the oven. Pull them out when the edges are golden but the centers still look slightly underdone. They will firm up as they cool. A good rule of thumb is to remove them about one minute before they look done. You can always put them back in for an extra minute, but you cannot undo overbaked cookies.
Use Parchment Paper or a Silicone Mat
Skipping parchment paper often leads to cookies that stick and burn on the bottom. Parchment paper creates a non-stick surface and promotes even heat distribution. Silicone baking mats work well too and are reusable. Both options protect your cookie sheet and make cleanup much easier. They are small investments that make a big difference in your baking experience.
How to Store Your Homemade Cookies
Freshly baked cookies taste best within the first day or two, but proper storage extends their shelf life significantly. The method you choose depends on the type of cookie and how long you need to keep it.
For soft cookies like chocolate chip and snickerdoodles, store them in an airtight container at room temperature. Place a piece of bread in the container with the cookies. The bread releases moisture and keeps the cookies soft for up to five days. For crispy cookies like shortbread or biscotti, store them in a loosely covered container so air can circulate and maintain their crunch.
If you want to keep cookies longer, freezing is your best option. Arrange cooled cookies in a single layer on a cookie sheet and freeze them for about one hour. Then transfer them to a freezer-safe bag or container. They will keep for up to three months. To enjoy them, let them thaw at room temperature or warm them in a low oven for a few minutes. The result tastes almost as good as fresh-baked.
Common Cookie Mistakes and How to Fix Them
Even the best home bakers make mistakes. The good news is that most common problems have simple solutions.
Cookies spread too much: Your dough might be too warm. Try chilling it for thirty minutes before baking. Also check that your baking soda is fresh. Old baking soda loses its leavening power and can cause excessive spreading.
Cookies are too hard: You may have overbaked them or used too much flour. Measure your flour carefully and reduce baking time by one minute. Using a bit more butter or brown sugar can also add moisture and softness.
Cookies are too flat: This often happens when butter is too soft or the oven temperature is too low. Make sure your butter is softened but not melted. Check your oven with a thermometer and adjust accordingly.
Cookies taste bland: You might not be using enough salt or vanilla extract. Both ingredients enhance flavor significantly. A pinch more of salt and a splash more of vanilla can transform a boring cookie into something extraordinary. Experiment with adding a teaspoon of espresso powder to deepen chocolate flavors in your chocolate chip cookies.
Conclusion
Learning how to make cookies from scratch is one of the most rewarding skills you can develop in the kitchen. It is simpler than it looks, and the results are always worth the effort. From choosing the right ingredients to mastering the creaming step and understanding oven temperature, each part of the process builds your confidence. You now have the knowledge to bake chocolate chip cookies, sugar cookies, oatmeal cookies, and many more styles that will make everyone in your household happy.
Start with a simple recipe and practice the techniques. As you become more comfortable, you can experiment with new flavors, mix-ins, and shapes. The beauty of homemade cookies is that there is always room to grow and create something new. So preheat your oven, gather your ingredients, and start baking today. Your kitchen will smell amazing, and your family will thank you for it.
Remember, every great baker started exactly where you are now. The most important ingredient is not flour or sugar. It is the joy of creating something delicious with your own hands. Happy baking!
Frequently Asked Questions
What are the best ingredients for homemade cookies?
Quality butter, fresh baking soda, pure vanilla extract, and good-quality chocolate chips make the biggest difference. Using fresh, room-temperature ingredients ensures your cookie dough mixes smoothly and bakes evenly. Avoid margarine or old baking powder, as they can negatively affect texture and rise.
How long do homemade cookies last?
Most homemade cookies stay fresh at room temperature for three to five days when stored in an airtight container. Adding a piece of bread to the container helps keep them soft. For longer storage, freeze baked cookies for up to three months or freeze raw dough for up to six months.
Why are my cookies flat and thin?
Flat cookies usually result from butter that is too soft, old baking soda, or an oven that runs too cool. Make sure your butter is softened but not melted. Check your baking soda freshness and use an oven thermometer to verify accurate temperature. Chilling the dough before baking also helps prevent excessive spreading.
Can I use a convection oven for baking cookies?
Yes, convection ovens work well for cookies. Reduce the temperature by about twenty-five degrees Fahrenheit and check cookies a minute or two early. Convection fans circulate hot air evenly, which promotes uniform browning. Keep an eye on your first batch to adjust times for your specific oven.
How do I make cookies chewy versus crispy?
For chewy cookies, use more brown sugar than white sugar and slightly underbake them. For crispy cookies, use more white sugar, flatten the dough balls before baking, and bake for a longer time. The ratio of butter to flour also affects texture, so experiment until you find your preferred consistency.
Can I freeze cookie dough for later use?
Absolutely. Portion your cookie dough into balls, place them on a parchment-lined cookie sheet, and freeze until solid. Then transfer them to a freezer bag. When ready to bake, add two to three extra minutes to the baking time. Frozen dough can last up to six months and works great for making fresh cookies anytime you want them.



