Learning how to bake a cheesecake is easier than you think. This guide walks you through every step, from mixing the perfect batter to achieving a silky, crack-free finish. You will learn essential techniques, common mistakes to avoid, and creative variations that will make your cheesecake the star of any gathering.
There is something truly magical about a homemade cheesecake. Whether you are celebrating a birthday, hosting a dinner party, or simply craving something sweet, a how to bake a cheesecake guide can change everything. The truth is, many people think cheesecake is difficult to make. But with the right techniques and a little patience, you can create a dessert that looks and tastes like it came from a professional bakery.
This guide covers everything you need to know. We will go through the ingredients, the equipment, the step-by-step process, and even some troubleshooting tips. By the end, you will feel confident enough to bake a cheesecake that wows everyone at your table. Let us dive in and make something delicious together.
Key Takeaways
- Choose the right pan: A springform pan is essential for easy removal and even baking.
- Room temperature ingredients matter: Cream cheese, eggs, and sour cream blend much better when warm.
- Use a water bath: This simple trick prevents cracks and ensures a creamy texture.
- Cool gradually: Letting your cheesecake cool slowly avoids temperature shocks that cause cracks.
- Chill before serving: At least 4 hours of chilling sets the filling perfectly.
- Experiment with flavors: From chocolate to fruit swirls, variations keep cheesecake exciting.
📑 Table of Contents
Essential Ingredients for a Perfect Cheesecake
Great cheesecake starts with great ingredients. You do not need anything fancy, but you do need the right ones. Each component plays a specific role in creating that creamy, rich texture we all love.
The Cream Cheese Base
Cream cheese is the star of any cheesecake recipe. It gives the filling its signature tangy richness. Always use full-fat cream cheese for the best results. Low-fat versions can make your cheesecake taste watery and thin. Popular brands like Philadelphia work wonderfully, but store-brand options also perform well.
Make sure your cream cheese is at room temperature before mixing. Cold cream cheese creates lumps and uneven texture. Leave it out for about an hour before you start. This small step makes a huge difference in how smooth your batter turns out.
Supporting Ingredients
Beyond cream cheese, you will need a few more essentials:
- Sugar – adds sweetness and helps create a smooth texture
- Eggs – bind the filling together and add structure
- Sour cream – adds moisture and a subtle tang
- Vanilla extract – enhances the overall flavor
- Flour or cornstarch – a small amount helps stabilize the filling
- Lemon juice or zest – brightens the flavor and cuts through richness
Each ingredient has a purpose. Do not skip the flour or cornstarch, even if the recipe seems to call for only a tablespoon. It helps the cheesecake set properly without cracking.
How to Prepare Your Cheesecake Pan
Choosing and preparing your pan is one of the most overlooked steps in how to bake a cheesecake. But it matters more than most people realize. The right pan ensures your cheesecake releases cleanly and bakes evenly.
Choosing the Right Pan
A springform pan is the gold standard for cheesecake. The detachable sides make it incredibly easy to remove the cake without damaging it. Most bakers prefer a 9-inch springform pan for a standard cheesecake.
Before you buy a pan, check if it is non-stick. You can learn how to identify non-stick pans by looking at the coating finish and checking the manufacturer label. Non-stick pans help prevent the crust from sticking and make cleanup much easier. If you do not have a non-stick springform pan, greasing the sides is essential.
Greasing and Lining the Pan
Properly preparing your pan prevents sticking and ensures clean slices. If you want to avoid butter or oil, there is a simple method you can follow. Learn how to grease a pan without oil or butter by using parchment paper and a light dusting of flour.
Here is a quick method:
- Wrap the outside of your springform pan with two layers of aluminum foil
- Grease the inside with a thin layer of butter or cooking spray
- Line the bottom with a circle of parchment paper
- Dust the bottom with a tablespoon of flour, tapping out the excess
This preparation works whether you are using a traditional springform pan or a disposable aluminum pan. The foil wrapping prevents water from seeping in during the water bath step, which we will cover next.
Step-by-Step Instructions for Baking a Cheesecake
Now comes the fun part. Follow these steps carefully, and you will have a beautiful, creamy cheesecake ready to impress.
Step 1: Make the Crust
Most cheesecakes start with a graham cracker crust. Crush about 2 cups of graham crackers into fine crumbs. Mix them with 1/3 cup of melted butter and 2 tablespoons of sugar. Press the mixture firmly into the bottom of your prepared pan. Use the bottom of a measuring cup to create an even surface.
Bake the crust for 10 minutes at 350°F before adding the filling. This pre-baking step helps the crust stay crisp and prevents a soggy bottom.
Step 2: Prepare the Filling
Beat your room-temperature cream cheese with sugar until smooth and creamy. Add the eggs one at a time, mixing gently after each addition. Overmixing introduces too much air, which can cause cracks during baking. Stir in the sour cream, vanilla, and flour until just combined.
For an extra-smooth filling, you can pass the batter through a fine mesh strainer. This removes any lumps and creates an ultra-silky texture. It is a pro trick that makes a noticeable difference.
Step 3: Set Up Your Water Bath
A water bath, also called a bain-marie, is the secret to a crack-free cheesecake. The gentle, even heat prevents the edges from cooking faster than the center.
Here is how to set it up:
- Place your springform pan inside a larger roasting pan
- Pour hot water into the roasting pan until it reaches halfway up the springform
- Make sure your foil-wrapped pan is secure and water will not leak in
When checking your oven-safe equipment, always verify that your pans and lids can handle the heat. You can find out if a lid is oven-safe by checking the manufacturer markings or testing it at a low temperature first.
Step 4: Bake Low and Slow
Bake your cheesecake at 325°F for about 60 to 70 minutes. The edges should be set, but the center should still jiggle slightly. It will firm up as it cools. Overbaking is the number one cause of cracks and dry texture.
Use an oven thermometer to verify your oven temperature. Many home ovens run hot or cold, which can throw off your baking time. An accurate temperature reading makes a real difference.
Step 5: Cool Gradually
Once baking is complete, turn off the oven and crack the door open. Let the cheesecake sit inside for one hour. This slow cooling prevents temperature shock, which is a leading cause of surface cracks.
After an hour, remove the cheesecake from the oven and let it cool completely on a wire rack. Then cover it with plastic wrap and refrigerate for at least 4 hours, or overnight for the best results.
Common Cheesecake Problems and How to Fix Them
Even experienced bakers run into issues sometimes. Here are the most common problems and simple solutions.
Cracks on the Surface
Cracks happen when the cheesecake bakes too fast or cools too quickly. The good news is that cracks are mostly cosmetic. You can easily hide them with a generous layer of topping. Fresh whipped cream, fruit compote, or a chocolate ganache all work beautifully to cover any imperfections.
To prevent cracks in the future, make sure you cool your cheesecake gradually. Avoid opening the oven door during baking, and never place a hot cheesecake directly into the refrigerator.
Soggy Bottom Crust
A soggy crust usually means the water bath seeped in or the crust was not pre-baked long enough. Double-check your foil wrapping and make sure the crust is pre-baked for the full 10 minutes. Using a non-stick pan also helps, since you can learn to identify whether your pan has a proper non-stick coating that releases food easily.
Cheesecake Is Too Dense
If your cheesecake feels heavy and dense, you may have overmixed the batter or used cold ingredients. Always beat cream cheese until smooth, then add eggs on low speed. Mix just until combined. Room temperature ingredients blend more smoothly and create a lighter, creamier result.
Creative Cheesecake Variations to Try
Once you master the basic recipe, the fun begins. There are countless ways to customize your cheesecake to suit any taste or occasion.
Chocolate Cheesecake
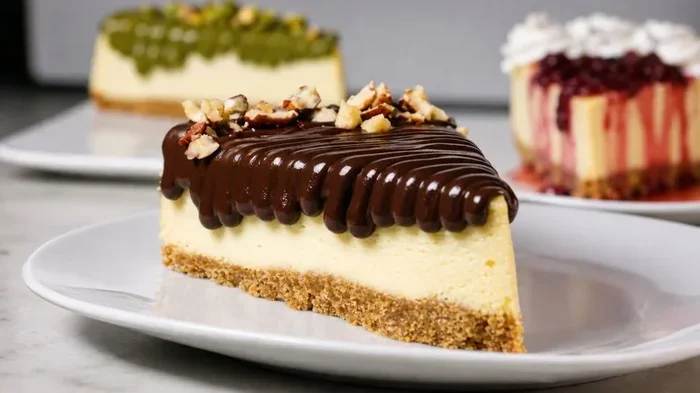
Add 1/2 cup of melted dark chocolate to your filling for a rich chocolate version. You can also drizzle a chocolate ganache over the top after chilling. This variation pairs wonderfully with a crumbly Oreo crust instead of graham crackers.
Berry Swirl Cheesecake
Create a beautiful marbled effect by swirling raspberry or strawberry jam into the filling before baking. Drop spoonfuls of jam over the batter and use a toothpick to create a spiral pattern. The tart fruit cuts through the rich cream cheese perfectly.
Lemon Blueberry Cheesecake
Add lemon zest and juice to the filling for a bright, citrusy flavor. Fold fresh blueberries into the batter just before baking. Top with a lemon glaze made from powdered sugar and fresh lemon juice for an elegant finish.
Pumpkin Spice Cheesecake
For fall baking, mix 1 cup of pumpkin puree and 1 teaspoon of pumpkin spice into your filling. This seasonal twist is rich, warming, and absolutely delicious. Top with a drizzle of caramel or a sprinkle of pecans.
Serving and Storing Your Cheesecake
Proper serving and storage keep your cheesecake tasting fresh for days. A few simple tips go a long way.
Always use a sharp knife dipped in hot water to slice clean portions. Wipe the knife between cuts for the neatest slices. Cheesecake tastes best at room temperature, so take it out of the refrigerator about 30 minutes before serving.
Store leftover cheesecake covered in the refrigerator for up to 5 days. It also freezes well for up to 2 months. Wrap individual slices tightly in plastic wrap and aluminum foil to prevent freezer burn. Thaw overnight in the refrigerator before serving.
Remember, a how to bake a cheesecake journey does not end with the oven. Presentation matters too. Add fresh berries, a dollop of whipped cream, or a light dusting of powdered sugar before serving. These small touches make your cheesecake look as good as it tastes.
Baking a perfect cheesecake is a skill anyone can develop. Start with the basic recipe, follow the steps carefully, and do not be afraid to experiment with flavors. Each batch you make will teach you something new. Soon enough, baking cheesecake will feel second nature to you.
The most important thing is to enjoy the process. Baking should be fun and rewarding. So preheat your oven, gather your ingredients, and get ready to create something truly special. Your perfect cheesecake is waiting to come to life.
Frequently Asked Questions
Can I use a different type of crust for my cheesecake?
Absolutely. While graham cracker crust is the most popular choice, you can use Oreo cookie crumbs, shortbread, or even a nut-based crust. Simply crush your chosen cookie or nut base, mix with melted butter, and press it into the pan. Each crust brings a unique flavor that complements the creamy filling beautifully.
How do I know when my cheesecake is done baking?
The edges should be set and slightly pulled away from the sides of the pan, while the center still jiggles like gelatin when you gently shake the pan. It will continue to set as it cools. Overbaking causes dryness and cracking, so err on the side of slightly underdone.
Why did my cheesecake crack?
Cracks usually form from rapid temperature changes or overbaking. To prevent them, cool your cheesecake gradually inside the oven with the door cracked, avoid overmixing the batter, and use a water bath for even heat distribution. If cracks do appear, you can cover them with toppings or a layer of whipped cream.
Can I bake a cheesecake without a water bath?
You can, but the results are different. A water bath provides gentle, moist heat that prevents cracking and creates a creamier texture. Without one, your cheesecake is more likely to develop cracks and a slightly drier consistency. If you skip the water bath, bake at a lower temperature and monitor closely.
How long should I chill my cheesecake before serving?
At minimum, chill your cheesecake for 4 hours. For the best texture and flavor, overnight chilling is ideal. The cold time allows the filling to set completely and develops the flavors. Never serve cheesecake straight from the oven or it will be too soft and runny.
Can I make cheesecake ahead of time?
Yes, cheesecake actually tastes better after resting overnight in the refrigerator. You can prepare it up to 2 days before serving. For longer storage, cheesecake freezes well for up to 2 months when wrapped properly. Just remember to thaw it slowly in the refrigerator before serving.