
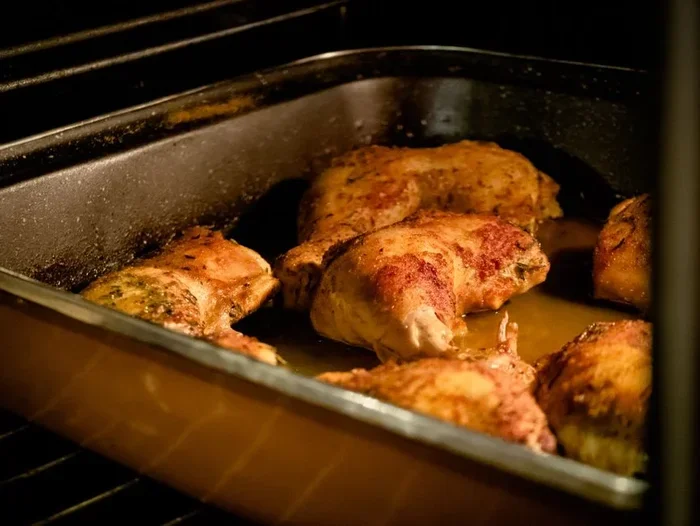
Baked chicken legs are the ultimate comfort food that delivers crispy skin and juicy meat with minimal effort. This foolproof recipe uses simple ingredients and a hot oven to give you restaurant-quality results at home. Whether you are a beginner or a seasoned cook, you will master crispy baked chicken legs in under an hour.
There is something truly special about a plate of baked chicken legs straight out of the oven. The skin is golden and crunchy, the meat is tender and juicy, and the whole kitchen smells incredible. If you have been looking for a reliable chicken leg recipe that never fails, you are in the right place.
This recipe is designed to give you crispy skin on baked chicken without any fuss. No special equipment. No complicated steps. Just honest, delicious food that your whole family will love. We have tested every detail so you can get perfect results the very first time.
Baked chicken legs are one of the most forgiving cuts you can cook. They are harder to dry out than chicken breast, they cost less, and they taste amazing. Whether you are cooking for a busy Tuesday dinner or a weekend feast, oven-baked chicken legs always deliver.
Key Takeaways
- Perfect temperature: Bake at 425°F for crispy skin and juicy interiors every time.
- Simple ingredients: You only need a handful of pantry staples to make incredible baked chicken legs.
- Pat the skin dry: This single step makes the biggest difference in achieving crispy perfection.
- Rest before serving: Letting the chicken rest locks in juices and keeps the meat tender.
- Endless flavor options: From lemon herb to spicy smoked paprika, the variations are endless.
- Bone-in is better: Bone-in chicken legs stay moister and more flavorful than boneless cuts.
📑 Table of Contents
- Why Baked Chicken Legs Are a Weeknight Winner
- What You Will Need: Ingredients and Tools
- Step-by-Step Baked Chicken Legs Instructions
- Tips for Achieving Ultra-Crispy Skin
- Common Mistakes to Avoid
- Delicious Flavor Variations
- How to Store and Reheat Leftovers
- Serving Suggestions and Meal Pairings
- Frequently Asked Questions
- Final Thoughts
Why Baked Chicken Legs Are a Weeknight Winner
Crispy baked chicken legs check every box for a great meal. They are affordable, flavorful, and incredibly satisfying. Here is why this cut deserves a spot in your regular rotation.
Bone-in chicken legs have more flavor than boneless cuts. The bone conducts heat slowly and evenly, which helps the meat stay moist throughout baking. The skin also renders beautifully in a hot oven, creating that satisfying crunch everyone loves.
Another big advantage is cooking time. Chicken legs bake faster than a whole chicken, and they do not require any monitoring or flipping. You pop them in the oven, set a timer, and focus on other things. For busy weeknights, this kind of simplicity is a game changer.
Compared to fried chicken, baked chicken legs use a fraction of the oil. You still get crispy skin, but without the guilt or the mess. They pair beautifully with roasted vegetables, mashed potatoes, or a simple green salad. You can also find great ideas for easy chicken dinner recipes that complement baked legs perfectly.
Nutritional Benefits of Chicken Legs
Chicken legs are a good source of protein and essential nutrients. They provide iron, zinc, and B vitamins that support overall health. Because they have a bit more fat than breast meat, they stay juicier during cooking, which means you need less added fat in the recipe.
What You Will Need: Ingredients and Tools
Making the best baked chicken legs starts with the right ingredients. Here is everything you need to gather before you begin.
Ingredients List
- Bone-in chicken legs (4 to 6 pieces, skin-on)
- 2 tablespoons olive oil
- 1 teaspoon salt
- 1 teaspoon black pepper
- 1 teaspoon garlic powder
- 1 teaspoon smoked paprika
- 1 teaspoon onion powder
- 1/2 teaspoon cayenne pepper (optional)
- 1 teaspoon dried thyme or rosemary
- 1 tablespoon fresh lemon juice
Tools You Will Need
- Large mixing bowl
- Baking sheet or roasting pan
- Parchment paper or aluminum foil
- Wire cooling rack (optional but helpful)
- Meat thermometer
- Tongs for handling
Using a wire rack on top of your baking sheet is a pro tip that elevates your results. It allows hot air to circulate around the chicken, which helps the skin crisp up evenly on all sides. If you do not have a rack, you can bake directly on a lined sheet pan, but you may need to flip the pieces once halfway through.
For those who like to experiment with flavors, you can explore various chicken dinner recipes that use similar seasoning blends. A lemon chicken dinner recipe also pairs wonderfully with baked legs for a bright, fresh flavor profile.
Step-by-Step Baked Chicken Legs Instructions
Now let us get into the fun part. Follow these steps closely, and you will have perfectly crispy baked chicken legs every single time.
Step 1: Preheat and Prep
Preheat your oven to 425°F. This high temperature is key to getting crispy skin. While the oven heats up, line your baking sheet with parchment paper or foil. If you are using a wire rack, place it on top of the sheet.
A hot oven is essential for crispy skin. When the oven is fully preheated before the chicken goes in, the skin starts rendering fat immediately. This creates that golden crunch we are all after. For more information on oven temperatures for different chicken cuts, you can check our guide on how long to cook chicken wings in oven 400, which covers similar high-heat baking techniques.
Step 2: Season the Chicken
Pat the chicken legs completely dry with paper towels. This is the most important step for crispy skin. Moisture is the enemy of crunch, so do not skip this.
Add the olive oil, salt, pepper, garlic powder, smoked paprika, onion powder, cayenne, and dried herbs to a mixing bowl. Stir to combine the seasonings. Add the chicken legs and toss them gently until every piece is evenly coated.
Let the seasoned chicken rest for about 10 to 15 minutes while the oven finishes preheating. This brief rest allows the salt to draw out a bit of moisture, which then gets reabsorbed into the meat, keeping it juicy.
Step 3: Bake
Place the chicken legs on the prepared baking sheet or wire rack. Make sure there is space between each piece so hot air can flow freely. Bake for 35 to 40 minutes, flipping once halfway through if you are not using a wire rack.
The chicken is done when the internal temperature reaches 165°F at the thickest part of the meat, near the bone. The skin should be deep golden brown and firm to the touch.
Step 4: Rest and Serve
Remove the chicken from the oven and let it rest for 5 to 7 minutes before serving. This resting period allows the juices to redistribute throughout the meat, which makes every bite more flavorful and tender.
Serve your baked chicken legs with your favorite sides. Roasted vegetables, garlic bread, or a fresh coleslaw all work wonderfully. For more dinner inspiration, our collection of oven fried chicken dinner ideas offers plenty of side dish and pairing suggestions.
Tips for Achieving Ultra-Crispy Skin
Getting crispy skin on baked chicken legs is not magic, but it does require a few key techniques. Here are the tips that make the biggest difference.
- Dry the skin thoroughly. Use paper towels and pat the chicken until no moisture remains. You can even pat it dry again after seasoning.
- Use a wire rack. This is the single best upgrade you can make. Air flows underneath the chicken, and the skin crisps up evenly.
- Do not crowd the pan. Leave at least one inch of space between each piece. Overcrowding traps steam and prevents crisping.
- Bake at a high temperature. 425°F is the sweet spot. Lower temperatures will steam the skin instead of crisping it.
- Do not skip the flip. If you are baking directly on a sheet pan, flip the chicken halfway through for even browning.
- Let the chicken come to room temperature. Take it out of the fridge 20 to 30 minutes before baking. This promotes more even cooking.
If you love the idea of crispy chicken but want to try another method, our oven fried chicken dinner ideas article covers several techniques for achieving that perfect crunch in the oven.
Common Mistakes to Avoid
Even with a great recipe, small mistakes can affect your results. Here is what to watch out for when making baked chicken legs.
- Not drying the skin. This is the number one mistake. Wet skin will steam instead of crisp, no matter how hot your oven is.
- Overcrowding the pan. Putting too many pieces on one sheet pan creates steam pockets that make the skin soggy.
- Under-seasoning. Chicken legs have more flavor than breast meat, but they still need a generous amount of seasoning. Do not be shy with the salt and spices.
- Opening the oven door too often. Every time you open the door, the temperature drops. Try to only open it once to check and flip.
- Cutting into the chicken too soon. Cutting immediately after baking releases all the juices. Always let it rest for at least 5 minutes.
Avoiding these simple mistakes will take your crispy baked chicken from good to outstanding. Once you nail the technique, you can experiment with any flavor profile you like.
Delicious Flavor Variations
One of the best things about baked chicken legs is how versatile they are. You can change the seasoning and create a completely different dish every time.
Lemon Herb Baked Chicken Legs
Add the zest of one lemon and two tablespoons of fresh chopped herbs like parsley, oregano, and basil. Increase the garlic powder to two teaspoons. This bright, fresh flavor is perfect for summer dinners and pairs beautifully with roasted potatoes and green beans.
Spicy Smoked Paprika Chicken
Double the smoked paprika and add one teaspoon of chili powder. Add a tablespoon of honey to the seasoning mix for a sweet and spicy glaze. This variation is bold, smoky, and incredibly addictive.
Asian-Inspired Baked Chicken
Swap the olive oil for sesame oil and add soy sauce, grated ginger, and a drizzle of honey. Sprinkle with sesame seeds before baking. This creates a savory, slightly sweet flavor that works wonderfully with steamed rice and stir-fried vegetables.
Buffalo-Style Baked Chicken Legs
Brush the baked chicken with hot sauce and melted butter after it comes out of the oven. Sprinkle with a little celery salt. This gives you all the flavor of buffalo wings in a hearty, bone-in form that is perfect for game day or casual gatherings.
For more creative chicken flavor ideas, explore our collection of lemon chicken dinner recipes that feature fresh, healthy combinations perfect for pairing with baked chicken legs.
How to Store and Reheat Leftovers
Leftover baked chicken legs are genuinely delicious the next day, but proper storage makes all the difference.
Let the chicken cool completely before storing. Place it in an airtight container and refrigerate for up to 3 days. To reheat, warm the chicken in the oven at 350°F for about 10 to 15 minutes. This keeps the skin crispy, unlike microwaving, which tends to make the skin soggy.
You can also freeze cooked chicken legs for up to 3 months. Wrap them tightly in foil and place them in a freezer-safe bag. Thaw overnight in the refrigerator before reheating in the oven.
If you are looking for general guidance on storing cooked chicken dishes, our article on how to store baked mac and cheese offers helpful principles that apply to all baked poultry leftovers as well.
Serving Suggestions and Meal Pairings
Baked chicken legs are incredibly versatile when it comes to sides. Here are some of our favorite pairings:
- Roasted vegetables: Carrots, Brussels sprouts, and sweet potatoes all roast beautifully alongside chicken.
- Mashed potatoes: The classic comfort pairing that soaks up all the juices.
- Rice or grains: Brown rice, quinoa, or couscous make a hearty and healthy base.
- Fresh salad: A bright green salad with a tangy vinaigrette balances the richness of the chicken.
- Crusty bread: Perfect for mopping up any remaining sauce or juices on the pan.
For a complete dinner spread, consider adding a soup or appetizer. A cream of broccoli soup recipe with chicken or a cream of mushroom soup with chicken makes a comforting starter that rounds out the meal beautifully.
Frequently Asked Questions
How long does it take to bake chicken legs at 425°F?
At 425°F, bone-in chicken legs typically bake for 35 to 40 minutes. The exact time depends on the size of the legs and whether you are using a wire rack. Always check that the internal temperature reaches 165°F for safe eating.
Should I cover chicken legs with foil when baking?
No, you should bake crispy baked chicken legs uncovered. Covering them traps steam and prevents the skin from crisping. If the skin is browning too quickly, you can loosely tent the pan with foil for the last 5 to 10 minutes of cooking.
Can I use chicken thighs instead of chicken legs?
Absolutely. Chicken thighs are very similar to legs and work beautifully in this recipe. They have the same rich flavor and forgiving cooking nature. You can follow the same temperature and timing guidelines for baked chicken thighs as well.
How do I know when baked chicken legs are done?
The most reliable way is to use a meat thermometer. Insert it into the thickest part of the meat near the bone. When the temperature reads 165°F, the chicken is fully cooked. The skin should also be deep golden brown and the juices should run clear.
Can I marinate chicken legs overnight?
Yes, marinating bone-in chicken legs overnight in the refrigerator deepens the flavor significantly. Just make sure to pat them dry before baking, even if they have been marinating. Excess moisture on the surface will prevent the skin from crisping properly.
What is the best way to reheat leftover baked chicken legs?
The oven is your best friend for reheating. Set it to 350°F and warm the chicken for 10 to 15 minutes. This keeps the skin crispy, unlike a microwave, which will make it soggy. If you need faster results, an air fryer also works well at 350°F for about 5 minutes.
Final Thoughts
Baked chicken legs are one of the simplest and most satisfying meals you can make at home. With just a few basic ingredients and a hot oven, you can achieve crispy, golden perfection that rivals any restaurant result.
The beauty of this recipe is in its simplicity. There is no need for fancy techniques or expensive equipment. Just good ingredients, proper seasoning, and a reliable oven. Once you master the basics, you can get creative with flavors and make this dish your own.
Remember to dry the skin, use a wire rack, and rest the chicken before serving. These three steps make all the difference between average and outstanding. Serve with your favorite sides, enjoy the process, and savor every crispy, juicy bite.
Whether you are cooking for one or feeding a whole family, baked chicken legs always hit the spot. They are affordable, delicious, and incredibly easy to prepare. So go ahead, fire up that oven, and make tonight’s dinner something to look forward to.



