This guide walks you through everything you need to know about using a Fisher and Paykel cooktop. You will learn how to power on the unit, adjust burner levels, and use smart features like touch controls and auto pan detection. Whether you own an induction, gas, or electric model, this article covers setup, daily operation, cleaning, and troubleshooting in plain language.
Using a new cooktop for the first time can feel overwhelming. The buttons, symbols, and settings might look confusing at first glance. But once you understand the basics, you will find that your Fisher and Paykel cooktop is designed to make cooking simple and enjoyable. This guide breaks everything down into easy steps. You will go from zero to confident cook in no time.
Fisher and Paykel is a trusted brand known for sleek designs and smart cooking technology. Their cooktops come in three main types: induction, gas, and electric. Each type has its own set of features and benefits. Induction cooktops heat the pan directly using magnetic energy. Gas cooktops use open flames for instant heat control. Electric cooktops use coiled elements or radiant heat beneath a glass surface. No matter which type you own, the principles of safe and effective use remain the same.
This article covers every aspect of operating your cooktop. You will learn about initial setup, daily use, cooking techniques, safety features, cleaning, and common troubleshooting. Let us dive in and get you comfortable with your new kitchen centerpiece.
Key Takeaways
- Know Your Model: Fisher and Paykel cooktops come in induction, gas, and electric types, each with unique controls and features.
- Start With the Manual: Always read the user guide to understand your specific model’s burner layout and safety settings.
- Use the Right Cookware: Induction models need magnetic pans, while gas and electric models work with most standard cookware.
- Master the Touch Controls: Learning how to adjust power levels, set timers, and use boost functions makes cooking easier.
- Safety First: Features like residual heat indicators, child locks, and auto pan detection protect your family.
- Clean Regularly: Proper maintenance keeps your cooktop looking great and performing well for years.
📑 Table of Contents
Getting Started With Your Fisher And Paykel Cooktop
Unboxing and Initial Setup
Before you turn on your cooktop, take a moment to unpack it carefully. Remove all protective materials, including plastic wraps and stickers. Check the cooking surface for any damage during shipping. Once the unit is clean and dry, place it on a flat, stable surface. Make sure the area around the cooktop is clear of flammable items like towels or paper.
Next, check the power connection. Most Fisher and Paykel models plug into a standard outlet. Some induction and electric models may require a dedicated circuit. Refer to the installation manual for specific electrical requirements. Never use an extension cord, as it can cause overheating. Once connected, you are ready to power on the unit for the first time.
Understanding the Control Panel
The control panel is the brain of your cooktop. Fisher and Paykel models typically feature touch controls or a combination of touch and slider controls. The layout varies by model, but most include the following elements:
- Power On/Off Button: This turns the entire cooktop on or off. Some models have a separate lock button for safety.
- Burner Controls: Each burner has its own slider or touch area to adjust the heat level.
- Boost Function: This temporarily increases power to the maximum level for quick heating.
- Timer Display: Shows remaining cooking time and allows you to set countdowns.
- Residual Heat Indicator: A light or symbol that warns you when the surface is still hot.
Take a few minutes to explore each button before cooking. Press the power button and watch the display light up. Familiarizing yourself with the layout will prevent confusion later. If your model came with a quick-start guide, keep it nearby for reference.
How To Use Each Burner Type
Using the Induction Burners
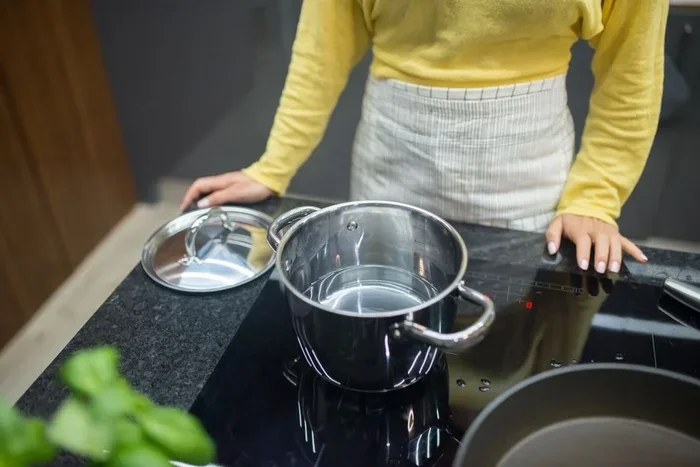
Induction cooking is one of the most efficient methods available. Instead of heating a coil or flame, induction creates a magnetic field that heats the pan directly. This means the cooking surface stays cooler, and heat transfers faster. Fisher and Paykel induction cooktops are known for precise temperature control and rapid heating.
To use an induction burner, follow these steps:
- Make sure your cookware is induction-compatible. A simple magnet test works great. If a magnet sticks to the bottom of your pan, it will work on induction.
- Place the pan on the burner zone.
- Press the power button or touch the burner icon on the control panel.
- Slide or tap to adjust the power level. Lower settings are perfect for simmering, while higher settings bring water to a boil quickly.
- Press the boost button for an extra burst of heat when needed.
One of the best features of Fisher and Paykel induction cooktops is auto pan detection. The cooktop senses whether a compatible pan is on the burner. If no pan is detected, the burner will not activate. This saves energy and adds a layer of safety.
When choosing pans for your induction cooktop, look for labels that say induction-ready. If you are unsure about which cookware to buy, check out our guide on the best non-stick cookware for induction cooktop to find great options that work perfectly with your Fisher and Paykel unit.
Using the Gas Burners
Gas cooktops offer a classic cooking experience with instant flame control. Fisher and Paykel gas models feature precise knobs that let you adjust the flame from a gentle simmer to a high sear. The visible flame makes it easy to see exactly how much heat you are applying.
Here is how to use a gas burner safely:
- Turn the knob to the ignition position. You should hear a clicking sound and see a spark.
- Hold the knob in for a few seconds after the flame lights. This prevents the flame from going out immediately.
- Adjust the knob to your desired flame size. A small flame works for gentle warming, while a large flame is ideal for stir-frying.
- Always turn the knob to the off position when you finish cooking.
Gas burners work with virtually any type of cookware. Whether you use stainless steel, cast iron, or aluminum, gas flames will heat the pan evenly. If you are looking for durable pots and pans for your gas cooktop, our guide on the best pots and pans for gas stoves can help you choose the right set.
Using the Electric Burners
Electric cooktops use either coil elements or smooth radiant heat beneath a glass-ceramic surface. Fisher and Paykel electric models heat up steadily and provide even warmth across the cooking zone. They are a popular choice for kitchens where gas is not available.
To use an electric burner:
- Press the power button to activate the cooktop.
- Select the burner you want to use by touching its icon or slider.
- Adjust the heat level using the control. Electric burners take a little longer to heat up compared to gas or induction.
- When finished, turn the burner off and allow it to cool before touching the surface.
Electric cooktops work well with most cookware types. For best results on a smooth electric surface, use flat-bottomed pans that make full contact with the heating element. If you need guidance on selecting compatible cookware, our article on the best pots and pans for electric stoves covers top-rated options.
Mastering Cooking Techniques on Your Cooktop
Understanding Power Levels
Most Fisher and Paykel cooktops offer multiple power levels, usually ranging from 1 to 9 or 1 to 12. Each level corresponds to a percentage of the burner’s maximum output. Understanding these levels helps you cook with precision.
| Power Level | Percentage | Best For |
|---|---|---|
| 1-2 (Low) | 10-20% | Keeping food warm, melting butter, gentle simmering |
| 3-4 (Medium-Low) | 30-40% | Slow cooking, oatmeal, delicate sauces |
| 5-6 (Medium) | 50-60% | Sauteing vegetables, heating soups |
| 7-8 (Medium-High) | 70-80% | Searing meat, boiling pasta |
| 9-10+ (High) | 90-100% | Rapid boiling, stir-frying, wok cooking |
For everyday cooking, most tasks work best at medium or medium-low settings. Using the right power level prevents food from burning and saves energy. Simmering at a low setting is perfect for soups, stews, and sauces that need gentle, steady heat over time.
Using the Boost Function
The boost function is a standout feature on many Fisher and Paykel models. It temporarily pushes the burner to its maximum power level for a short burst. This is incredibly useful when you need to bring a large pot of water to a boil quickly.
To use boost, simply press the boost button on the control panel. The burner will run at full power for a set time, usually 5 to 10 minutes. After that, it automatically returns to your previous setting. This feature saves time and reduces the wait when you are in a hurry to start cooking.
Using the Timer Function
Fisher and Paykel cooktops often include a built-in timer. This is separate from the cooking time and helps you keep track of how long your food has been cooking. To set the timer:
- Press the timer button on the control panel.
- Use the plus and minus controls to set your desired time.
- The cooktop will beep when the timer goes off.
The timer is especially helpful when you are multitasking in the kitchen. Set it and focus on other prep work without worrying about overcooking your meal.
Safety Features You Should Know
Residual Heat Indicators
One of the most important safety features on any cooktop is the residual heat indicator. After you turn off a burner, the cooking surface can remain hot for several minutes. Fisher and Paykel cooktops display a light or symbol to warn you that the surface is still warm.
Always wait for the indicator to turn off before placing your hand on the surface. This is especially important in households with children. Teaching kids to respect the cooktop and never touch it after cooking is a good habit to build early.
Child Lock
Many Fisher and Paykel models include a child lock feature. This prevents accidental activation of the burners. To engage the child lock, hold the lock button for a few seconds until the display confirms it is active. When the lock is on, the controls will not respond to touch or button presses.
The child lock is a simple but effective way to keep your kitchen safe. If you have curious little ones, make it a habit to activate the lock whenever you finish cooking.
Auto Pan Detection
As mentioned earlier, auto pan detection is a smart safety feature found on induction models. The cooktop checks for a compatible pan before generating heat. If you place a non-induction pan on the burner, the unit will not heat up. This prevents wasted energy and reduces the risk of burns from a hot surface with no visible flame or indicator.
Cleaning and Maintenance Tips
Daily Cleaning Routine
Keeping your cooktop clean improves its appearance and performance. A quick cleaning routine after each use goes a long way. Here is what to do daily:
- Wait for the surface to cool to a warm touch but not completely cold.
- Wipe the cooking surface with a damp, soft cloth.
- For stubborn spots, apply a small amount of cooktop cleaner and wipe gently.
- Dry the surface with a clean cloth to prevent water spots.
Avoid using abrasive scrubbers or harsh chemical cleaners. These can scratch or damage the glass-ceramic surface. Stick to products designed for cooktop cleaning, and your surface will stay smooth and shiny.
Deep Cleaning
Once a week or as needed, give your cooktop a deeper clean. Remove any burnt-on residue with a cooktop scraper designed for glass surfaces. Apply a specialized cooktop cleaning paste, let it sit for a few minutes, and wipe away with a microfiber cloth.
For gas models, remove the burner caps and grates. Soak them in warm soapy water, then scrub gently with a soft brush. Rinse and dry thoroughly before replacing them. Clean burner ports with a toothpick or pin to remove any food debris that might block gas flow.
For induction and electric models, clean the control panel with a lightly dampened cloth. Avoid spraying liquid directly onto the panel, as moisture can seep inside and damage the electronics.
When To Call a Professional
Most maintenance tasks are simple and can be done at home. However, some issues require professional attention. If you notice any of the following problems, contact a certified technician:
- The cooktop will not power on.
- A burner does not heat up or heats unevenly.
- The control panel displays an error code that does not clear after a reset.
- You smell gas near a gas cooktop (turn off the gas supply immediately and call for help).
Regular maintenance and prompt attention to problems will extend the life of your cooktop and keep it running safely.
Common Mistakes To Avoid
Even experienced cooks can make mistakes when using a new cooktop. Here are some common errors to watch out for:
- Using the wrong cookware on induction: Not all pans work on induction. Always check for the induction-compatible label before cooking.
- Sliding pans across the surface: This can scratch the glass-ceramic top. Lift pans when moving them on and off the cooktop.
- Ignoring the residual heat warning: Touching a hot surface can cause burns. Respect the indicator light every time.
- Overloading the boost function: While boost is handy, using it constantly can wear out the burner faster. Use it sparingly for quick heating tasks.
- Skipping regular cleaning: Built-up grime can affect heat distribution and make your cooktop harder to clean over time.
Avoiding these simple mistakes will keep your cooktop in excellent condition and make your cooking experience much more enjoyable.
Expert Tips for Getting the Most From Your Cooktop
Here are some insider tips from experienced cooks who love their Fisher and Paykel units:
- Match the pan size to the burner zone. A small pan on a large burner wastes energy. Use a pan that covers at least 70% of the burner area for efficient heating.
- Use the simmer setting for delicate foods. Eggs, chocolate, and cream-based sauces benefit from the low, steady heat of a simmer setting.
- Preheat your pan before adding oil. A preheated pan helps food release easily and prevents sticking, especially on induction surfaces.
- Let the cooktop cool before cleaning. Sudden temperature changes can crack the glass surface. Wait at least 10 to 15 minutes after cooking before wiping down.
- Keep the manual handy. Every Fisher and Paykel model has unique features. The manual is the best resource for understanding all the functions specific to your unit.
If you are planning to upgrade your cookware to match your new cooktop, check out our guide on the best pots and pans to last a lifetime. These durable sets pair beautifully with Fisher and Paykel cooktops and will serve you well for years.
Conclusion
Learning how to use your Fisher and Paykel cooktop does not have to be complicated. With a little practice and familiarity with the controls, you will be cooking delicious meals with confidence. Start by understanding your specific model type, whether it is induction, gas, or electric. Master the basic functions like power adjustment, boost, and timer. Then explore the advanced features like auto pan detection and child lock. Keep your cooktop clean and well-maintained, and it will serve you reliably for many years to come.
The key to success is patience and practice. Try new techniques, experiment with different power levels, and do not be afraid to make mistakes. Every cook starts somewhere, and your Fisher and Paykel cooktop gives you a great foundation to build on. Enjoy the process and happy cooking.
Frequently Asked Questions
How do I turn on my Fisher and Paykel cooktop?
Press the power button on the control panel. The display will light up and show the standby mode. Select the burner you want to use by touching its icon, then adjust the heat level using the slider or touch controls. If your model has a lock feature, make sure it is disengaged before use.
Can I use any pan on a Fisher and Paykel induction cooktop?
No, induction cooktops require magnetic cookware. You can test your pan by holding a magnet to the bottom. If it sticks, the pan is induction-compatible. Non-magnetic pans like aluminum or copper will not work unless they have a magnetic base layer built in.
Why is my cooktop showing an error code?
Error codes on Fisher and Paykel cooktops usually indicate a specific issue like overheating, a faulty sensor, or a ventilation problem. Refer to the user manual for a list of error codes and their meanings. Most codes will clear after the cooktop cools down, but persistent errors may require professional service.
How long does it take for the residual heat indicator to turn off?
The residual heat indicator typically stays on for 5 to 15 minutes after you turn off a burner, depending on the heat level used and the model. High heat settings leave more residual warmth, so the indicator stays on longer. Always wait for the light to go off before touching the surface.
What is the boost function and when should I use it?
The boost function temporarily increases the burner to its maximum power level for a short period, usually 5 to 10 minutes. It is best used when you need to bring water to a boil quickly or heat a large amount of liquid fast. After the boost period ends, the cooktop returns to your previous setting automatically.
How often should I deep clean my Fisher and Paykel cooktop?
A deep clean once a week is usually sufficient for regular home use. If you cook frequently or use the cooktop for messy tasks like boiling over sauces, you may need to clean it more often. Daily wiping after each use helps reduce the need for heavy deep cleaning sessions.