Repairing cooktop glass doesn’t have to cost a fortune. You can fix cracks, chips, and scratches on your glass cooktop with simple household items and affordable repair kits. This guide walks you through every method, from DIY fixes to knowing when to call a pro, so your cooktop looks and works like new again.
Key Takeaways
- DIY repair is possible: Most minor cooktop glass damage can be fixed at home with simple tools and affordable kits.
- Assess the damage first: Knowing whether you have a crack, chip, or scratch determines the right repair method.
- Cooktop repair kits work well: Epoxy and resin fillers can restore smooth surfaces for under $30.
- Prevention saves money: Proper cleaning and care habits keep glass cooktops in great shape for years.
- Know when to replace: Deep cracks or widespread damage may need full glass replacement, not repair.
- Use the right cookware: Choosing the best pots and pans for glass cooktop prevents future damage.
📑 Table of Contents
- How To Repair Cooktop Glass Without Spending Much Money
- Understanding Cooktop Glass Damage
- DIY Cooktop Glass Repair Methods
- When to Replace the Cooktop Glass
- Preventing Future Cooktop Glass Damage
- Cost Comparison: DIY Repair vs Professional Repair
- Expert Tips for a Flawless Repair
- Common Cooktop Glass Repair Mistakes to Avoid
- Final Thoughts on Cooktop Glass Repair
How To Repair Cooktop Glass Without Spending Much Money
Your glass cooktop looks terrible. There’s a crack running across the surface, or maybe a nasty chip from a heavy pot. You’re probably thinking about calling a repair technician. But here’s the truth: repairing cooktop glass doesn’t have to drain your wallet. You can do it yourself with basic tools and a few dollars.
This guide covers every method you need. We’ll talk about fixing small scratches, sealing cracks, and even replacing the glass yourself. By the end, you’ll know exactly what to do. No guesswork. No overpriced repair bills. Just clear, practical steps that actually work.
Glass cooktops are beautiful. They heat evenly, they’re easy to wipe down, and they give your kitchen a sleek, modern look. But they’re also fragile. One wrong move and you’ve got damage. The good news? Most damage is fixable. Let’s get into it.
Understanding Cooktop Glass Damage
Before you start fixing anything, you need to understand what you’re dealing with. Not all cooktop glass damage is the same. Different types of damage need different approaches.
Common Types of Cooktop Glass Damage
- Cracks: Long or short lines running through the glass surface. These happen from impact or thermal shock.
- Chips: Small pieces missing from the edge or surface. Usually caused by dropping cookware or hitting the cooktop hard.
- Scratches: Surface-level marks from abrasive cleaners, rough pans, or food debris being dragged across the glass.
- Burn marks: Discoloration or etching from food boiling over or pans being left on high heat too long.
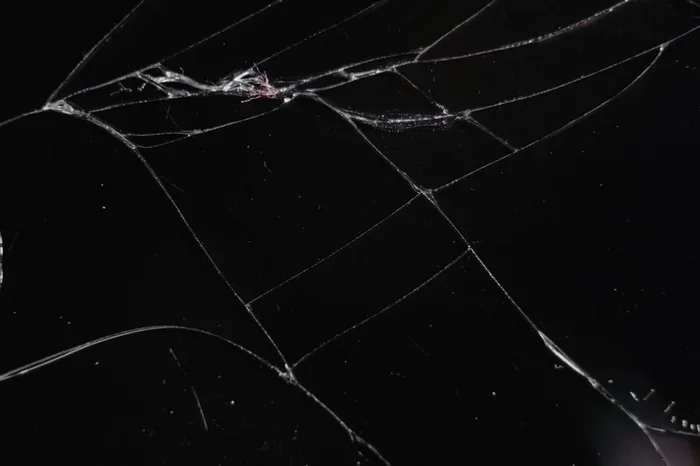
- Spider web damage: Multiple small cracks that spread from a single impact point. This looks bad but can sometimes be repaired.
Why Cooktop Glass Gets Damaged
Glass cooktop damage happens for a few common reasons. Thermal shock is a big one. That’s when you put a cold pan on a hot surface, or vice versa. The sudden temperature change causes the glass to expand and contract unevenly. Over time, this creates stress fractures.
Impact damage is another major cause. Dropping a heavy pot or skillet onto the surface can crack or chip the glass instantly. Even something as light as a ceramic mug can leave a chip if it lands wrong.
Using the wrong cookware also contributes. Rough-bottomed pans, cast iron with burrs, or pans that don’t sit flat can scratch and damage the surface over time. Always choose smooth, flat cookware to protect your glass cooktop.
DIY Cooktop Glass Repair Methods
Now for the good part. Here are the best methods to fix your cooktop glass at home. Each method works for different types of damage, so pick the one that matches your situation.
Method 1: Fixing Minor Scratches with Baking Soda Paste
Light scratches are the easiest to fix. You probably already have everything you need in your kitchen right now.
- Mix two parts baking soda with one part water to make a thick paste.
- Apply the paste directly to the scratch.
- Rub gently in a circular motion with a soft cloth for about two minutes.
- Wipe clean with a damp cloth.
- Repeat if the scratch is still visible.
This method works well for surface-level scratches. It won’t fix deep cracks or chips, but it can make your cooktop look much better. The baking soda acts as a very mild abrasive that smooths out the scratch without damaging the glass further.
Method 2: Using a Glass Cooktop Repair Kit
For cracks and chips, a cooktop glass repair kit is your best bet. These kits are affordable, usually between $10 and $30, and they work surprisingly well for minor to moderate damage.
Here’s how most kits work:
- Clean the damaged area thoroughly with glass cleaner and let it dry completely.
- Apply the epoxy or resin filler into the crack or chip using the included applicator.
- Smooth the surface with a plastic spreader so it’s level with the surrounding glass.
- Let it cure for the time listed on the package (usually 24 to 48 hours).
- Buff the repaired area with a microfiber cloth to match the rest of the surface.
These kits use clear epoxy that bonds with glass and dries almost invisible. They’re great for stopping cracks from spreading and making the damage much less noticeable. The repaired area won’t be as strong as the original glass, but it will be functional and look much better.
When shopping for a repair kit, look for one that’s specifically designed for glass cooktops. Some kits are made for car windshields and may not work as well on smooth-top cooktops.
Method 3: Filling Deep Chips with Clear Epoxy
If you don’t want to buy a full repair kit, you can use clear epoxy from any hardware store. This works well for deep chips that catch your pots and pans.
Here’s what to do:
- Choose a clear, fast-drying epoxy that’s rated for high heat (since your cooktop gets hot).
- Apply a small amount to the chip using a toothpick or small spatula.
- Let it overfill slightly so you can sand it down later.
- Let it cure fully according to the package instructions.
- Sand the excess gently with fine-grit sandpaper (600 grit or higher).
- Polish the area with a glass polishing compound.
This method takes a bit more patience, but the results are impressive. The epoxy fills the chip completely, and after sanding and polishing, it becomes nearly invisible.
Method 4: Fixing Cracks with Glass Glue
For hairline cracks, glass glue (also called glass adhesive) can be very effective. This method works best on cracks that haven’t spread too far and where the glass pieces are still in place.
Apply a small drop of glass glue along the crack. Press the crack closed gently with tape and let it dry for 24 hours. The glue bonds the crack together and prevents it from getting worse. It won’t make the crack disappear completely, but it will stop it from spreading and make the cooktop safe to use again.
Important: Glass glue works for surface cracks. If your glass is broken into pieces or has large chunks missing, you’ll need a different approach (more on that below).
When to Replace the Cooktop Glass
Not all damage can be repaired at home. Sometimes, replacing the glass is the smarter and safer choice. Here’s how to decide.
Signs You Need a Full Replacement
- The crack runs completely across the surface and the glass feels unstable.
- There are multiple deep cracks or large spider web patterns.
- A large piece of glass is missing or broken off.
- The damage is in a spot where cookware sits directly on it.
- Repair attempts haven’t worked and the surface is still rough or uneven.
If you’re dealing with any of these issues, replacing the glass is the way to go. The good news is that you can often buy a replacement glass top directly from the manufacturer for much less than a full cooktop replacement. The cost usually runs between $100 and $300 depending on your model.
Replacing the glass yourself is doable if you’re handy. You’ll need to remove the old glass carefully, clean the surface underneath, and set the new glass in place. Always make sure the cooktop is unplugged and completely cool before you start.
Preventing Future Cooktop Glass Damage
Once you’ve fixed your cooktop, you’ll want to keep it in great shape. Prevention is always cheaper than repair.
Simple Habits That Protect Your Glass Cooktop
- Lift cookware instead of sliding it. Never drag pots or pans across the glass surface. This is the number one cause of scratches.
- Use flat-bottomed pans. Pans with uneven bottoms create pressure points that can crack the glass over time.
- Avoid thermal shock. Don’t place cold pans on a hot cooktop or splash cold water on a hot surface.
- Clean spills promptly. Boiled-over food can etch the glass if left too long. Wipe up spills after cooking.
- Use cooktop-safe cleaners. Avoid abrasive scouring pads and harsh chemicals. A soft cloth and cooktop cleaner work best.
- Check your cookware bottoms. Rough or dirty bottoms can scratch the surface. Make sure pans are clean before placing them on the cooktop.
Choosing the Right Cookware for Your Glass Cooktop
The cookware you use matters a lot. Rough or damaged bottoms on your pots and pans can scratch and damage the glass surface over time. Always choose cookware with smooth, flat bottoms that are designed for glass or ceramic surfaces.
If you’re not sure what to buy, look at best pots and pans for glass cooktop options. These are specifically designed to protect smooth-top surfaces while delivering great cooking performance. The same goes for best pots and pans for electric glass stove models, which share similar surface requirements.
Investing in quality cookware saves you money in the long run. Good pans last longer, cook better, and keep your cooktop surface safe. Check out the best pots and pans to last a lifetime if you want durable options that won’t scratch your glass surface.
Cost Comparison: DIY Repair vs Professional Repair
One of the biggest reasons people avoid cooktop repair is cost. Let’s break down what you’d actually spend.
| Repair Type | DIY Cost | Professional Cost |
|---|---|---|
| Scratch removal | $0 (household items) | $100 – $200 |
| Chip filling with repair kit | $10 – $30 | $150 – $300 |
| Crack sealing with glass glue | $5 – $15 | $100 – $250 |
| Full glass replacement | $100 – $300 (parts only) | $300 – $600 |
| Full cooktop replacement | Not applicable | $500 – $2000+ |
As you can see, DIY repair saves you a significant amount of money. Even if you need to buy a repair kit or replacement glass, you’re still spending a fraction of what a professional would charge. The only exception is if the damage is so severe that you need a full cooktop replacement. In that case, DIY won’t help much.
Expert Tips for a Flawless Repair
Here are some insider tips that make a big difference in the quality of your repair:
- Work in a well-lit area. You need to see every scratch and crack clearly to fix it properly.
- Clean the surface before every step. Dust, grease, or food residue can prevent repair materials from bonding properly.
- Be patient with curing times. Don’t use the cooktop until the repair material is fully cured. This usually takes at least 24 hours.
- Test any cleaner or polish on a hidden spot first. Some products can damage glass cooktops if they’re too harsh.
- Use a flashlight to inspect your work. Shine it at an angle across the surface to spot any remaining scratches or uneven spots.
- Apply even pressure. Whether you’re sanding, buffing, or filling, consistent pressure gives the best results.
Common Cooktop Glass Repair Mistakes to Avoid
Even with the best intentions, it’s easy to make mistakes when repairing cooktop glass. Here are the ones to watch out for:
- Using the wrong type of glue or epoxy. Regular household glue won’t withstand heat. Always use products rated for high temperatures.
- Sanding too aggressively. Heavy sanding can remove more glass than you intended and make the surface uneven. Go slow and use fine-grit sandpaper.
- Ignoring small cracks. A tiny crack can spread quickly, especially with repeated heating and cooling. Fix small cracks early before they become big problems.
- Using abrasive cleaners after repair. After you’ve repaired your cooktop, switch to gentle cleaners. Abrasive cleaners can damage the repair and scratch the surrounding glass.
- Using the cooktop too soon. Patience is key. Let the repair material cure completely before cooking on the surface again.
Final Thoughts on Cooktop Glass Repair
Repairing cooktop glass without spending much money is absolutely doable. Whether you’re dealing with a minor scratch or a noticeable crack, there’s a method that works for you. The key is to assess the damage accurately, choose the right repair method, and take your time.
Most repairs cost under $30 and take less than an hour of actual work. That’s a tiny fraction of what a professional repair or full replacement would cost. Plus, you’ll learn a valuable skill that saves you money every time something goes wrong with your kitchen appliances.
Remember to protect your repaired surface with proper care and the right cookware. Prevention is always the best strategy. With the tips in this guide, your glass cooktop can look and work like new for years to come.
Don’t let a cracked or scratched cooktop ruin your kitchen experience. Grab some basic supplies, follow the steps in this guide, and get your cooktop looking great again. Your wallet will thank you.
Frequently Asked Questions
Can you repair a cracked glass cooktop yourself?
Yes, you can repair a cracked glass cooktop yourself using a glass cooktop repair kit or clear epoxy. These kits are affordable, easy to use, and work well for minor to moderate cracks. Just clean the area, apply the filler, let it cure, and buff the surface smooth.
How much does it cost to repair a glass cooktop?
DIY repairs cost between $5 and $30 for most methods like epoxy filling or scratch removal. Professional repair typically costs $100 to $300 depending on the damage. Full glass replacement runs $100 to $300 for the part alone if you do it yourself.
What causes cracks in glass cooktops?
The most common causes are thermal shock (sudden temperature changes), impact from heavy cookware, and using rough or uneven-bottomed pans. Dropping something on the surface or dragging heavy pots across it can also cause cracks and chips.
Is it safe to use a cooktop with a cracked glass surface?
It’s generally not recommended. Small hairline cracks may be okay temporarily, but cracks can spread quickly with heat and pressure. A cracked surface can also be a safety hazard, and the damage may worsen during cooking. It’s best to repair or replace the glass as soon as possible.
Can deep scratches on a glass cooktop be removed?
Deep scratches are harder to remove but not impossible. You can use a glass cooktop polishing compound or a baking soda paste for lighter scratches. For deeper scratches, a repair kit with epoxy filler works best. If the scratches are very deep, glass replacement may be the better option.
How long does a cooktop glass repair last?
A DIY repair with epoxy or resin can last several years if the cooktop is properly maintained. The repaired area won’t be as strong as the original glass, so it’s important to avoid impact and thermal shock on the repaired spot. With good care, most repairs hold up well over time.
=== CONCLUSION ===
Repairing cooktop glass without spending much money is one of the smartest DIY projects you can tackle. You’ve learned how to fix scratches with baking soda, seal cracks with epoxy, and fill chips with glass glue. You’ve also seen when it’s time to replace the glass entirely and how to prevent future damage.
The methods in this guide work because they’re practical and proven. You don’t need expensive tools or professional training. A little patience and the right materials go a long way. Start with the method that matches your damage, follow the steps carefully, and you’ll have a cooktop that looks great again.
Take care of your repaired surface with gentle cleaning and the right cookware. And remember, the best pots and pans for glass cooktop can help prevent future damage. Your kitchen deserves a smooth, beautiful cooktop, and now you have the knowledge to make it happen.