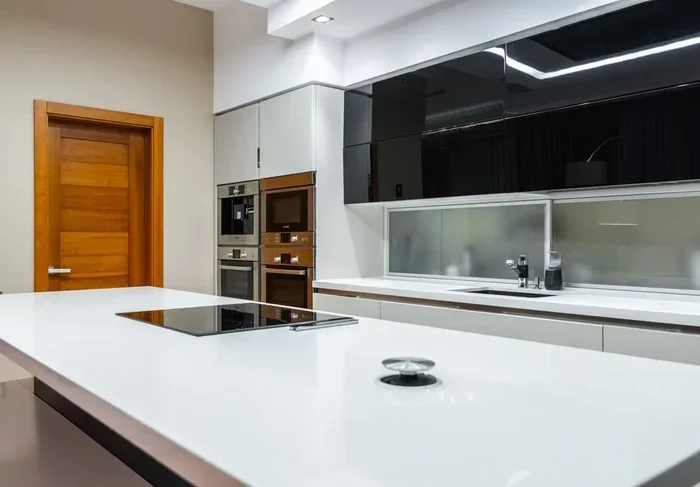
Installing a downdraft cooktop is easier than most homeowners think. This guide walks you through every step, from planning your layout to testing the ventilation system. You will learn how to cut the countertop, connect ductwork, handle electrical wiring, and avoid common mistakes.
Installing a downdraft cooktop can transform how your kitchen handles cooking fumes, grease, and odors. Instead of mounting a bulky range hood above your stove, a downdraft system pulls smoke and steam downward through the cooktop itself. This creates a cleaner, more open kitchen feel without sacrificing ventilation power.
Many homeowners avoid this project because it sounds complicated. But the truth is, most people can handle a downdraft cooktop installation with basic DIY skills and the right guidance. This guide breaks the entire process into simple, manageable steps. Whether you are replacing an old cooktop or installing a new one, you will find everything you need right here.
We will cover planning, cutting, wiring, ductwork, testing, and troubleshooting. By the end, you will feel confident tackling this project yourself. Let us get started.
Key Takeaways
- Plan before you start: Measure your cooktop cutout, check ductwork paths, and gather all tools before beginning installation.
- Downdraft ventilation pulls smoke downward: Unlike traditional range hoods, downdraft systems draw cooking fumes down through the cooktop and away from the kitchen.
- Countertop cutting requires precision: Measure twice and cut once to ensure a perfect fit for your downdraft cooktop.
- Electrical and gas connections need care: Always turn off power and gas supply before making any connections.
- Test your system thoroughly: Run the fan at all speeds, check for leaks, and verify proper airflow before daily use.
- Call a pro when unsure: Gas line work and complex electrical setups are best left to licensed professionals.
📑 Table of Contents
Understanding Your Downdraft Cooktop System
Before you pick up a single tool, it helps to understand how a downdraft ventilation system works. Unlike a traditional range hood that sits above the stove, a downdraft unit is built into the cooktop or sits just behind it. When you cook, the fan pulls air down through vents in the cooking surface.
The air then travels through ductwork hidden inside your cabinetry or walls. Finally, it exits your home through an exterior vent or filters back into the room. This closed-loop system keeps your kitchen air fresh without taking up valuable overhead space.
How Downdraft Ventilation Works
The basic concept is simple. When you turn on the fan, it creates a downward airflow. Cooking fumes, grease particles, and steam get pulled into the cooktop surface. From there, they move through a series of ducts and either exit outside or get filtered.
Most downdraft cooktops offer multiple fan speeds. A low setting works great for light simmering. A high setting handles heavy sautéing or stir-frying. Some models even include automatic sensors that adjust fan speed based on heat levels.
Types of Downdraft Cooktops
Not all downdraft systems are the same. Here are the main types you might encounter:
- Built-in downdraft cooktops: These are fully integrated into the cooking surface. They sit flush with your countertop and offer a sleek, seamless look.
- Pop-up downdraft vents: These units rise up from behind the cooktop when activated. They stay hidden when not in use, preserving your kitchen’s clean aesthetic.
- Drop-in downdraft units: These are separate ventilation units that sit behind the cooktop. They are easier to install but may not look as seamless as built-in models.
Each type has its own installation requirements. Check your specific model’s manual before starting. The best 30 electric downdraft cooktop with 4 elements options on the market today offer a range of features, so choose one that matches your kitchen layout and cooking habits.
Preparing for Downdraft Cooktop Installation
Proper preparation makes or breaks any DIY project. Installing a downdraft cooktop is no different. Spend time planning and gathering everything you need before you start cutting or wiring.
Checking Your Kitchen Layout
Start by measuring the space where your cooktop will sit. You need to know the exact cutout dimensions. Most cooktops require a specific opening size, and even a half-inch difference can cause fitting problems.
Next, check your ductwork path. Downdraft systems need a clear route from the cooktop to the exterior vent. This path usually goes through cabinets, walls, or floors. Measure the distance and note any obstacles. If you are using a best pots and pans set for induction cooktop, make sure your cooktop surface is compatible with your existing cookware.
Also consider your power supply. Most downdraft cooktops require a dedicated electrical circuit. Check your home’s electrical panel to confirm you have an available outlet that matches the cooktop’s amperage requirements.
Gathering Tools and Materials
Here is a checklist of what you will need:
- Tape measure and level
- Drill with appropriate bits
- Jigsaw or reciprocating saw
- Screwdriver set
- Wire stripper and electrical tape
- Ductwork and connectors
- Sealant and mounting hardware
- Stud finder
- Multimeter for electrical testing
Having everything ready before you start will save you hours of frustration. Trust me on this one. There is nothing worse than stopping mid-project because you forgot a tool or a part.
Step-by-Step Downdraft Cooktop Installation
Now comes the fun part. Follow these steps carefully, and your downdraft cooktop installation will go smoothly.
Step 1: Cut the Countertop Opening
First, place your cooktop on the countertop and trace the cutout outline. Use the manufacturer’s template if one is included. Double-check every measurement before you make a single cut.
Use a drill to create a starter hole, then carefully cut along your traced line with a jigsaw. Go slow and let the blade do the work. Once the opening is cut, test-fit the cooktop to make sure it sits flush with the surface.
Quick tip: Place a strip of painter’s tape along your cut line. This helps prevent the countertop material from chipping or cracking during the cut.
Step 2: Connect the Ductwork
With the cooktop positioned, it is time to connect the ductwork. Attach the ventilation duct to the back of the cooktop unit. Use metal ducting for the best airflow and durability. Avoid flexible ducting if possible, as it can restrict airflow and collect grease over time.
Route the duct through your cabinets or walls toward the exterior vent. Secure all connections with metal tape or clamps. Every joint should be airtight to prevent air leaks and grease buildup. If your duct run is long, consider adding an inline booster fan to maintain strong airflow.
Step 3: Handle Electrical Connections
Before touching any wires, turn off the power at your circuit breaker. Use a multimeter to confirm the power is completely off. This is a safety step you should never skip.
Connect the cooktop’s wiring to your home’s electrical supply. Match the ground, neutral, and hot wires according to your local electrical code. Use wire connectors to secure all connections, and wrap each junction with electrical tape.
If you are not comfortable working with electrical wiring, this is the step where you should call a licensed electrician. A best non-stick cookware for induction cooktop setup also requires proper electrical grounding, so make sure your connections are safe and secure.
Step 4: Secure the Cooktop and Test
Once all connections are made, carefully lower the cooktop into the cutout. Secure it with the mounting brackets provided by the manufacturer. Make sure the unit is level and stable.
Turn the power back on and test the fan at all speed settings. Listen for unusual noises and check that air flows strongly from the vent. If you have a gas cooktop, have a professional check all gas line connections for leaks using a soap solution test.
Testing and Fine-Tuning Your Setup
After installation, take time to test your system thoroughly. A rushed test can lead to problems later. Here is what to do:
- Run the fan on low, medium, and high. Listen for rattling or humming sounds. Airflow should feel strong and consistent at every speed.
- Check for air leaks. Run your hand along all duct joints. If you feel air escaping, add more sealant or tighten the connections.
- Cook something and observe. Fry some bacon or sauté vegetables. Watch how quickly the smoke and steam get pulled away from your cooking surface.
- Inspect the grease filter. Make sure it is properly seated and easy to remove for cleaning. Grease buildup is one of the most common issues with downdraft systems.
If everything checks out, you are good to go. If you notice weak airflow or unusual sounds, go back and check each connection point. Sometimes a simple adjustment makes all the difference.
Common Installation Mistakes to Avoid
Even experienced DIYers can make mistakes during downdraft cooktop installation. Here are the most common ones to watch out for:
- Skipping the manual: Every cooktop model is different. Always read the manufacturer’s installation guide before starting.
- Using the wrong duct size: A duct that is too small restricts airflow. A duct that is too large is hard to seal properly. Match the duct diameter to your cooktop’s specifications.
- Forgetting to turn off utilities: Always shut off both power and gas before beginning any work. This is a safety non-negotiable.
- Poor countertop support: Downdraft cooktops are heavy. Make sure your countertop has adequate support underneath. If you are cutting into a laminate countertop, reinforce the area with additional backing.
- Ignoring clearance requirements: Most cooktops need specific clearance distances from walls and cabinets. Check your manual and follow these guidelines exactly.
Avoiding these mistakes will save you time, money, and frustration. A little extra care during installation pays off in years of reliable performance.
When to Call a Professional
Not everyone needs to hire a professional for downdraft cooktop installation. But some situations call for expert help. If your home has complex electrical wiring, outdated plumbing, or unusual ductwork paths, a professional can save you from costly mistakes.
Gas line work is another area where professional help is strongly recommended. Improper gas connections create serious safety hazards. A licensed technician will ensure everything is connected correctly and passes inspection.
If you are ever unsure about any step of the process, it is perfectly fine to call in an expert. A best pot that goes from stove to oven and a properly installed downdraft cooktop both contribute to a better cooking experience, so getting the installation right matters.
Maintaining Your Downdraft Cooktop After Installation
Once your downdraft cooktop is installed and working, regular maintenance keeps it running at peak performance. Clean the grease filter every two to four weeks, depending on how often you cook. Most filters are dishwasher-safe, which makes cleanup quick and easy.
Wipe down the cooktop surface after each use. This prevents grease from building up in the ventilation openings. Every few months, inspect your ductwork connections and reseal any joints that may have loosened over time.
If you notice a drop in performance, check for obstructions in the duct path. Sometimes small debris or nesting materials from pests can block airflow. A clear duct means a powerful downdraft system.
Conclusion
Installing a downdraft cooktop is a rewarding project that improves both the look and function of your kitchen. From understanding your ventilation system to cutting the countertop, connecting ductwork, and testing everything, each step builds on the last. With careful planning and attention to detail, most homeowners can complete this installation in a single weekend.
Remember to take your time, follow safety guidelines, and never hesitate to call a professional when a step feels beyond your comfort zone. A properly installed downdraft ventilation system gives you cleaner air, a sleeker kitchen, and a better cooking experience every single day.
Start your project today with confidence. You have all the knowledge you need to succeed. Happy cooking.
Frequently Asked Questions
Do I need special ventilation for a downdraft cooktop?
Yes, downdraft cooktops require a dedicated ventilation duct that routes air either outside or through a filtering system. Most models connect to standard 4-inch or 6-inch ductwork. Make sure your duct path is clear and unobstructed for the best performance.
Can I install a downdraft cooktop myself?
Many homeowners successfully install downdraft cooktops as DIY projects. You need basic skills in cutting countertops, connecting ductwork, and handling electrical wiring. If you are uncomfortable with any of these tasks, hiring a licensed professional is a smart choice.
How much does it cost to install a downdraft cooktop?
The cost varies depending on your cooktop model, ductwork complexity, and whether you hire a professional. DIY installation saves on labor costs, but materials like ductwork, sealant, and mounting hardware typically run between $50 and $200. Professional installation adds $200 to $500 depending on your location.
What is the difference between a downdraft cooktop and a range hood?
A range hood sits above your stove and pulls smoke upward. A downdraft cooktop pulls smoke downward through the cooking surface. Downdraft systems work well for open-concept kitchens where a range hood might block sightlines or feel bulky.
How often should I clean my downdraft cooktop filter?
Clean your grease filter every two to four weeks if you cook frequently. If you cook lightly, once a month is usually sufficient. A clogged filter reduces airflow and ventilation effectiveness, so regular cleaning is important.
Are downdraft cooktops louder than range hoods?
Downdraft cooktops can be slightly louder because the fan is closer to the cooking surface. However, most modern models operate at reasonable noise levels, especially on lower speeds. Check the decibel rating before purchasing if noise is a concern for your kitchen.