Properly lighting pellets in your pizza oven is crucial for achieving the high, consistent temperatures needed for perfect pizza crusts. Follow our step-by-step guide to master the ignition process and ensure your wood-fired pizza oven reaches optimal cooking temperatures efficiently.
There’s nothing quite like the experience of making pizza in a wood-fired oven. The smoky flavor, the perfectly charred crust, and the quick cooking time all combine to create a culinary masterpiece that’s hard to replicate with conventional ovens. But before you can enjoy that perfect pizza, you need to master one essential skill: how to light pellets for pizza oven effectively.
Lighting pellets in a pizza oven might seem straightforward, but there’s actually quite a bit of technique involved. Getting it right means achieving the high, consistent temperatures needed for authentic pizza cooking, while doing it wrong can lead to uneven heating, excessive smoke, or difficulty maintaining proper cooking temperatures. In this comprehensive guide, we’ll walk you through every aspect of lighting pellets for your pizza oven, from choosing the right pellets to maintaining proper heat throughout your cooking session.
Whether you’re a novice pizza oven owner looking to improve your technique or someone considering purchasing a pellet-fired pizza oven, this article will provide you with all the knowledge you need to become proficient in lighting and managing your pizza oven’s fire. Let’s dive in and explore the art of pellet ignition for perfect pizza every time.
Key Takeaways
- Use quality hardwood pellets: Always food-grade hardwood pellets specifically designed for pizza ovens to ensure clean burning and proper flavor.
- Start with proper ventilation: Ensure your pizza oven’s vents are open to allow proper airflow during the initial lighting process.
- Follow the chimney method: Create a chimney effect with your pellets by stacking them vertically to promote efficient ignition and heat distribution.
- Use a reliable ignition source: Either a pellet-specific starter or a propane torch for consistent, controlled ignition of your pellets.
- Allow proper preheating time: Let your pellets burn for 20-30 minutes before cooking to achieve optimal pizza oven temperatures.
- Monitor temperature carefully: Use an infrared thermometer to ensure your oven reaches the ideal 700-900°F (370-480°C) for pizza perfection.
📑 Table of Contents
Understanding Pizza Ovens and Pellet Systems
Before we dive into the specifics of how to light pellets for pizza oven, it’s essential to understand the different types of pizza ovens available and how pellet systems work within them. Pizza ovens come in various configurations, each with its own advantages and considerations when it comes to lighting and maintaining a fire.
Types of Pizza Ovens
There are several main types of pizza ovens you might encounter:
- Wood-fired pizza ovens: Traditional ovens that burn logs or wood chunks to generate heat. These ovens can be modified to use pellet systems.
- Pellet pizza ovens: Specifically designed ovens that use compressed wood pellets as their primary fuel source.
- Hybrid pizza ovens: Ovens that can operate using multiple fuel sources, including pellets, gas, or wood.
- Portable pellet pizza ovens: Smaller, often more affordable ovens designed for outdoor use that exclusively use pellets.
When it comes to lighting pellets, the basic principles remain similar across these different types, though there may be slight variations in ignition methods based on the specific design of your oven.
How Pellet Systems Work
Pellet systems for pizza ovens typically consist of three main components: the hopper (where pellets are stored), the auger (which feeds pellets into the burn pot), and the burn pot (where pellets are ignited and burned). Understanding this basic system helps you comprehend why proper lighting techniques are so important.
When lighting pellets for pizza oven, you’re essentially creating a small, controlled fire in the burn pot that will then ignite additional pellets as they’re fed into the system. This initial ignition needs to be hot enough to catch the new pellets but controlled enough to allow for proper temperature regulation throughout your cooking session.
Advantages of Using Pellets in Pizza Ovens
There are several compelling reasons why many pizza oven enthusiasts prefer using pellets over other fuel sources:
- Consistent quality: Pellets are manufactured to specific standards, ensuring consistent burn characteristics and heat output.
- Convenience: Pellets are easier to store, handle, and measure than traditional wood logs.
- Temperature control: Pellet systems often offer better temperature control and consistency than traditional wood fires.
- Cleaner burning: High-quality pellets produce less ash and smoke than many other wood fuel options.
- Flavor infusion: Different wood pellets can impart unique flavors to your pizzas, from hickory to applewood.
Understanding these advantages helps explain why properly lighting pellets is so important—it’s the foundation for enjoying all these benefits while making delicious pizza.
Preparing for Lighting Pellets
Successful pellet ignition begins with proper preparation. Before you even think about how to light pellets for pizza oven, you need to ensure your oven is ready, you have the right equipment, and you’ve selected appropriate pellets for your cooking needs.
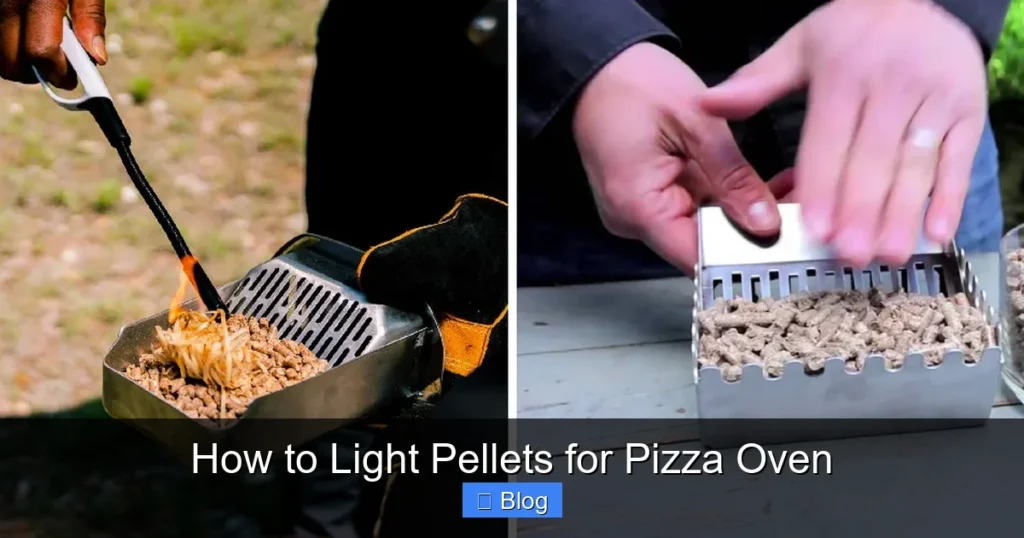
Visual guide about How to Light Pellets for Pizza Oven
Image source: i.ytimg.com
Essential Equipment and Tools
Gathering the right tools before you start will make the lighting process much smoother:
- Pellet starter or lighter: A specialized tool designed to help ignite pellets efficiently.
- Heat-resistant gloves: Essential for protecting your hands when working with the oven.
- Long-handled lighter or torch: For safely reaching into the oven to ignite pellets.
- Pellet scoop or measuring cup: For measuring the correct amount of pellets.
- Infrared thermometer: For monitoring oven temperature accurately.
- Ash shovel or tool: For cleaning out the burn pot before lighting.
- Fire extinguisher: Safety first—always have one nearby when operating your oven.
Having these tools ready before you begin will prevent interruptions during the critical lighting phase and ensure a smooth start to your pizza cooking experience.
Selecting the Right Pellets
Not all pellets are created equal, and choosing the right type is crucial when learning how to light pellets for pizza oven effectively:
- Food-grade pellets: Always use pellets specifically rated for food use, as they’re free from chemicals and binders that could affect flavor.
- Hardwood pellets: Opt for hardwood pellets (like oak, hickory, or maple) rather than softwood, which can burn too quickly and create excessive smoke.
- Low-moisture content: Pellets with moisture content below 6% will light easier and burn hotter.
- Consistent size and shape: Quality pellets are uniform in size and shape, ensuring proper feeding and burning.
- Flavor considerations: Different woods impart different flavors—experiment to find your preference for pizza.
When I first started using my pizza oven, I didn’t realize how much pellet quality affected the lighting process. Cheap, low-quality pellets would often fail to ignite properly, leading to frustrating delays and uneven heating. Once I switched to a premium food-grade hardwood pellet, everything changed—lighting became consistent, and my pizza quality improved dramatically.
Oven Preparation Steps
Before you attempt to light pellets for pizza oven, proper preparation of the oven itself is essential:
- Clean the burn pot: Remove any leftover ash or debris from previous use. A clean surface allows for better ignition and airflow.
- Check ventilation: Ensure all vents are fully open to allow proper airflow during lighting and initial burn.
- Position the oven: If using a portable oven, place it on a stable, heat-resistant surface away from flammable materials.
- Prepare the cooking area: Have your pizza-making tools and ingredients ready so you can start cooking as soon as the oven reaches temperature.
- Check safety features: Ensure any safety mechanisms on your pellet system are functioning properly.
One mistake I made early on was neglecting to clean my burn pot thoroughly before lighting. The residual ash would insulate the new pellets, preventing them from reaching ignition temperature quickly. Once I established a routine of cleaning before each use, my lighting time decreased significantly, and I achieved more consistent results.
Step-by-Step Guide to Lighting Pellets
Now that you understand the basics and have prepared properly, let’s dive into the actual process of how to light pellets for pizza oven. Following these steps carefully will help you achieve a strong, consistent fire that’s ready for pizza cooking in the shortest possible time.
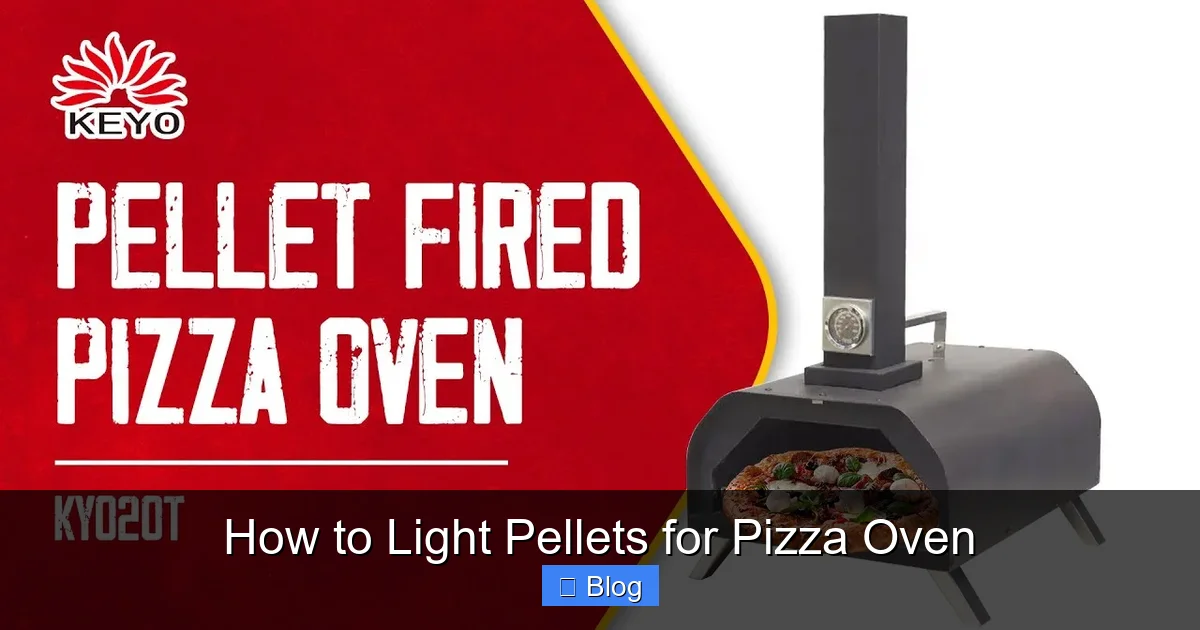
Visual guide about How to Light Pellets for Pizza Oven
Image source: solobaking.com
The Chimney Method for Pellet Ignition
One of the most effective techniques for lighting pellets in a pizza oven is the chimney method, which creates optimal airflow for ignition:
- Fill the burn pot: Start by filling your burn pot with pellets—typically about 1-2 inches deep, enough to create a good base but not so much that it restricts airflow.
- Create a chimney: Use a pellet scoop or your hands to create a small “chimney” or tunnel in the center of the pellets, reaching down to the bottom of the burn pot.
- Add ignition material: Place a small amount of pellet starter, fire starter cubes, or even crumpled paper (if approved for your oven) in the bottom of the chimney.
- Prepare the igniter: If using a torch or lighter, turn it on and adjust the flame to a medium setting.
- Ignite the starter material: Insert your igniter into the chimney and ignite the starter material at the bottom.
- Allow flames to spread: Give the flames a moment to spread upward through the chimney, igniting the pellets along the way.
- Turn on pellet system: Once you see flames and consistent burning, turn on your pellet system so the auger begins feeding additional pellets.
The chimney method works because it creates a natural draft that pulls air through the pellets, supporting combustion. This method is particularly effective for pizza ovens because it establishes a strong, hot fire quickly, which is essential for reaching the high temperatures needed for pizza cooking.
Torch Lighting Method
If your pizza oven came with a specific torch ignition system or you prefer using a handheld torch, here’s how to light pellets effectively:
- Prepare the burn pot: Clean the burn pot and fill it with pellets as described in the chimney method.
- Position the torch: Insert the torch nozzle into the burn pot, aiming it at the bottom where pellets are most concentrated.
- Apply flame directly: Turn on the torch and apply the flame directly to the pellets at the bottom of the burn pot.
- Move the torch slowly: Keep the torch moving slowly in a circular or back-and-forth motion to ensure even heating of the pellets.
- Watch for ignition: Continue applying heat until you see the pellets begin to ignite and produce flames.
- Establish consistent burning: Once pellets are burning consistently, remove the torch and turn on the pellet system.
When using a torch method, it’s important not to leave the flame in one spot too long, as this can cause uneven burning or even damage to certain types of burn pots. The key is consistent, even application of heat across the pellet bed.
Electric Starter Method
Some pellet pizza ovens come with electric starters, which can be very convenient and reliable:
- Prepare the burn pot: Clean and fill with pellets as previously described.
- Position the starter: Insert the electric starter element into the center of the pellet bed.
- Activate the starter: Turn on the electric starter and allow it to heat up according to the manufacturer’s instructions.
- Monitor ignition: Watch as the pellets begin to smolder and then catch fire around the starter element.
- Remove the starter: Once pellets are consistently burning, turn off and remove the electric starter.
- Start the pellet system: Turn on your pellet system to begin regular feeding of pellets.
Electric starters are often preferred by many pizza oven enthusiasts because they provide consistent, controlled heat without an open flame. This can make the lighting process safer and more predictable, especially for those new to using pellet pizza ovens.
Troubleshooting Common Lighting Issues
Even when following proper procedures, you may encounter issues when trying to light pellets for pizza oven. Here are some common problems and their solutions:
- Pellets won’t ignite: Check for moisture in pellets, ensure proper airflow, and verify your ignition source is working correctly.
- Uneven burning: Rotate or stir the pellets slightly to ensure even exposure to heat and oxygen.
- Excessive smoke: Reduce the amount of pellets initially, increase airflow, or check for improper combustion.
- Poor flame establishment: Try adding a small amount of additional starter material or adjusting your ignition technique.
- Auger not feeding properly: Check for pellet jams in the feed system and ensure the auger is functioning correctly.
When I first started using my pellet pizza oven, I frequently struggled with pellets that would smolder but not catch fire properly. After some troubleshooting, I realized the issue was with pellet moisture. I now store my pellets in a dry environment and always test a small batch before committing to a full pizza-making session.
Achieving and Maintaining Proper Temperature
Lighting pellets for pizza oven is just the beginning. Once you’ve established a fire, you need to achieve and maintain the proper temperatures for authentic pizza cooking. The ideal temperature range for most pizza ovens is between 700-900°F (370-480°C), which allows for the quick cooking that creates that perfect crispy yet chewy crust.
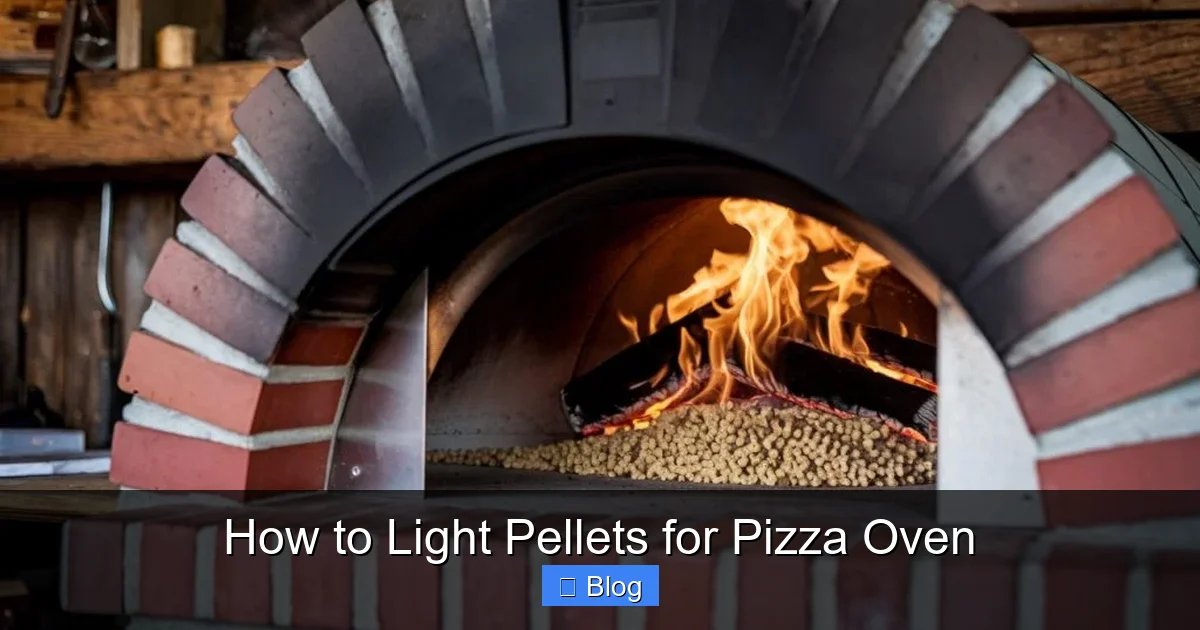
Visual guide about How to Light Pellets for Pizza Oven
Image source: pizzaovenworld.com
Understanding Pizza Oven Temperature Zones
A properly heated pizza oven typically has different temperature zones, each serving a specific purpose:
- Cooking surface (floor): The hottest area, typically reaching 800-900°F (425-480°C), where the pizza base directly contacts the surface.
- Dome ceiling: Often slightly cooler than the floor, around 700-800°F (370-425°C), ideal for topping the pizza.
- Back wall: Usually the hottest part of the oven, perfect for finishing pizzas that need additional heat.
- Front opening: The coolest area, where you can place pizzas if they’re cooking too quickly.
Understanding these zones helps you utilize your oven’s space effectively and cook perfect pizzas every time. When learning how to light pellets for pizza oven, it’s helpful to think about how the heat will distribute throughout these different areas.
Monitoring Temperature
Accurate temperature monitoring is crucial when using a pizza oven:
- Infrared thermometers: These are the most accurate for measuring surface temperatures quickly without contact.
- Oven thermometers: Place these inside the oven at different heights to get a sense of temperature variations.
- Visual indicators: Experienced pizza makers can often judge temperature by observing the color and behavior of the flames and the oven’s interior.
I recommend investing in a good quality infrared thermometer when you first start using your pizza oven. It will help you understand how your specific oven heats and allows you to make precise adjustments to achieve perfect pizza results.
Adjusting Airflow for Temperature Control
Once your pellets are lit, controlling airflow becomes your primary method for temperature regulation:
- Primary air intake: This vent controls the amount of oxygen reaching the fire, affecting burn rate and temperature.
- Secondary air intake: Found in some ovens, this helps with complete combustion and can influence heat distribution.
- Chimney/damper: Adjusting this controls the rate at which heat escapes the oven.
The general rule is: more air equals higher temperatures, while restricting air lowers temperatures. However, be careful not to restrict airflow too much, as this can cause incomplete burning and excessive smoke.
Managing the Fire During Cooking
As you cook multiple pizzas, you’ll need to manage the fire to maintain optimal temperatures:
- Adding pellets: Most pellet systems will automatically feed pellets as needed, but you may need to adjust the feed rate.
- Rotating pizzas: Use a pizza peel to rotate pies for even cooking, especially if your oven has hot spots.
- Positioning pizzas: Place pizzas in different zones of the oven depending on their cooking needs—newer pies go in hotter areas, nearly finished ones in cooler spots.
- Managing ash buildup: Periodically remove excess ash to maintain proper airflow and combustion efficiency.
When I first started making multiple pizzas in a session, I struggled to maintain consistent temperatures. I’ve since learned to add pellets before the temperature drops too significantly and to position pizzas strategically based on their cooking stage. These adjustments have made a tremendous difference in the consistency of my pizza results.
Safety Considerations and Best Practices
When learning how to light pellets for pizza oven, safety should always be your top priority. Pizza ovens involve high temperatures, open flames, and combustible materials, so understanding and following proper safety protocols is essential to prevent accidents and ensure enjoyable cooking experiences.
Safety Equipment and Precautions
Before you even think about lighting pellets, ensure you have these safety measures in place:
- Heat-resistant gloves: Always use proper gloves when handling hot surfaces or adjusting the oven.
- Suitable clothing: Wear natural fibers like cotton rather than synthetic materials that can melt.
- Clear workspace: Keep the area around your oven clear of flammable materials.
- Fire extinguisher: Have a Class ABC or Class B fire extinguisher rated for grease and wood fires nearby.
- First aid kit: Keep a well-stocked first aid kit accessible in case of burns or other injuries.
- Adult supervision: Never leave children unattended near a lit pizza oven.
I learned the importance of safety the hard way when a small grease fire flared up during my early pizza-making attempts. While I was able to control it quickly, it reminded me that even experienced cooks can encounter unexpected situations. Now, I always have my fire extinguisher within arm’s reach and wear appropriate protective gear.
Pellet Storage Safety
How you store your pellets affects both their performance and safety:
- Dry environment: Store pellets in a dry location away from moisture, which can affect ignition quality.
- Original packaging: Keep pellets in their original sealed bags until ready to use to maintain proper moisture content.
- Elevated storage: Store bags off concrete floors to prevent moisture absorption.
- Fire separation: Keep pellet storage away from potential ignition sources.
Many people don’t realize that pellet storage can significantly impact how well they light and burn. I once stored pellets in my garage without proper protection, and they absorbed moisture. When I tried to light them in my pizza oven, they produced excessive smoke and failed to reach proper temperatures—a frustrating lesson in proper storage.
Safe Lighting Procedures
When actually lighting pellets for pizza oven, follow these safety procedures:
- No accelerants: Never use lighter fluid, gasoline, or other chemical accelerants to light pellets.
- Proper ventilation: Always ensure adequate ventilation when lighting and using your pizza oven.
- Ignition source safety: Keep ignition sources away from fuel sources when not in use.
- Never leave unattended: Stay with your oven while lighting pellets until the fire is well-established.
- Follow manufacturer instructions: Adhere specifically to your oven manufacturer’s lighting guidelines.
One common mistake people make is using lighter fluid or other accelerants to try to get their pellets lighting faster. This is extremely dangerous and can lead to sudden flare-ups or difficult-to-control fires. Always use appropriate, oven-approved ignition methods.
Cooking Safety
Safety doesn’t stop once your pellets are lit and you’re cooking:
- Pizza peel handling: Use long-handled peels to keep a safe distance from the oven heat.
- Hot surface awareness: Remember that all oven surfaces, including the exterior, become extremely hot.
- Steam burn prevention: Be cautious of steam when opening the oven door or removing pizzas.
- Cool-down period: Allow the oven to cool completely before attempting to clean or move it.
- Residual fire risk: Even after cooking, check for hot embers or smoldering pellets before leaving the area.
I once got a nasty steam burn when I opened my pizza oven too quickly after cooking. The rush of hot steam caught me off guard, even though I was being careful. This experience taught me to always open oven doors slowly and be prepared for sudden releases of heat or steam.
Troubleshooting Common Issues
Even when you know how to light pellets for pizza oven properly, you may encounter various issues that affect performance. Understanding these common problems and their solutions will help you achieve consistent results and avoid frustration during your pizza-making sessions.
Pellet Ignition Problems
If you’re having trouble getting your pellets to light, consider these potential solutions:
- Moisture in pellets: Test pellet moisture by burning a small handful—if they sizzle rather than ignite, they’re too wet. Store pellets in a drier environment.
- Insufficient airflow: Ensure all vents are fully open and the burn pot isn’t overloaded with pellets.
- Wrong ignition technique: Try different methods—some ovens work better with the chimney method, others with torch ignition.
- Cold ambient temperature: In very cold weather, pre-warm the burn pot slightly with a torch before adding pellets.
- Poor quality pellets: Switch to a different brand or higher quality food-grade pellets.
When I first started using my pizza oven, I struggled with pellets that would smolder but not catch fire properly. After some experimentation, I realized my pellets had absorbed moisture from a humid storage area. Once I switched to storing them in a climate-controlled space and using a premium brand, ignition became much more reliable.
Temperature Maintenance Issues
If your oven isn’t maintaining proper temperatures, try these troubleshooting steps:
- Check pellet feed rate: Ensure your pellet system is feeding an adequate amount of pellets to maintain heat.
- Adjust airflow: Increase primary air intake for higher temperatures, decrease for lower temperatures.
- Clean the burn pot: Ash buildup can insulate pellets and prevent proper combustion.
- Inspect chimney/damper: Make sure it’s opening fully to allow proper heat escape control.
- Check for air leaks: Ensure door seals are intact to maintain proper internal temperature.
I noticed my pizza oven would start hot but then cool down significantly after about 30 minutes. After some investigation, I found that the ash had built up to the point where it was insulating the fresh pellets from the existing heat. Once I established a routine of cleaning the burn pot between pizzas, temperature maintenance became much more consistent.
Excessive Smoke Issues
Too much smoke can ruin your pizza and make cooking unpleasant. Here’s how to address it:
- Incomplete combustion: Increase airflow to ensure pellets are burning completely rather than smoldering.
- Wet pellets: Switch to drier pellets or allow current pellets to air dry before use.
- Overloading the burn pot: Reduce the amount of pellets in the burn pot to ensure proper airflow around each pellet.
- Wrong wood type: Some woods produce more smoke than others—experiment with different pellet types.
- Cold oven startup: Preheat longer with good airflow before adding pizza to reduce initial smoke.
During one pizza-making session, my oven suddenly began producing thick, white smoke that filled my outdoor kitchen. After panicking for a moment, I realized I had accidentally knocked the primary air vent partially closed. Once I opened it fully, the smoke cleared within minutes, and the fire returned to a clean blue flame.
Pizza Cooking Problems
Issues with the actual pizza cooking can often be traced back to pellet ignition and temperature problems:
- Uneven cooking: Rotate pizzas during cooking and position them in different oven zones as needed.
- Undercooked center: Ensure proper oven temperature and consider preheating longer before cooking.
- Burned crust: Move pizza to a cooler zone of the oven or reduce cooking time.
- Soggy bottom: Make sure the oven floor is hot enough before placing pizza and avoid excessive toppings that release too much moisture.
- Smoky flavor too strong: Try different wood pellets or reduce the amount of time pellets burn before cooking.
One issue I frequently encountered was pizzas with perfectly cooked toppings but undercooked crusts. After some troubleshooting, I realized I was placing pizzas in the oven too soon after lighting the pellets. Now, I always wait until the oven reaches full temperature (confirmed by my infrared thermometer) before cooking the first pizza, which has dramatically improved my crust quality.
Oven Maintenance Issues
Proper maintenance is key to consistent performance when learning how to light pellets for pizza oven:
- Regular cleaning: Clean the burn pot and remove ash after each use to prevent buildup.
- Inspection of components: Regularly check the auger, hopper, and other moving parts for wear or damage.
- Seal maintenance: Replace door seals if they become worn to maintain proper heat retention.
- Vent cleaning: Keep vents and chimneys clear of obstructions to ensure proper airflow.
- Seasonal storage: If storing the oven for an extended period, clean it thoroughly and protect it from the elements.
I learned the importance of regular maintenance the hard way when my pizza oven’s auger became jammed with pellet dust and ash. After a frustrating session of disassembling and cleaning the system, I now make it a habit to perform a thorough cleaning after every use, which has prevented similar issues from recurring.
Mastering how to light pellets for pizza oven is an essential skill for anyone looking to create authentic, wood-fired pizzas at home. From understanding your oven’s specific requirements to selecting the right pellets and following proper lighting techniques, each step plays a crucial role in achieving the high, consistent temperatures needed for perfect pizza results.
Remember that proficiency comes with practice. Don’t be discouraged if your first few attempts aren’t perfect—every experienced pizza oven enthusiast has gone through the learning process. Pay attention to how your specific oven responds to different techniques, keep detailed notes about what works and what doesn’t, and don’t hesitate to experiment with different pellet types and ignition methods.
The rewards of properly lighting pellets for pizza oven extend beyond just great pizza—there’s something deeply satisfying about mastering the art of wood-fired cooking. The crackle of the fire, the aroma of wood smoke, and the delicious results all combine to create an experience that’s worth the effort. With the knowledge you’ve gained from this guide, you’re well on your way to becoming a confident pizza oven operator capable of creating restaurant-quality pizzas in your own backyard.
🎥 Related Video: How to light your Ooni Fyra pizza oven
📺 Love Logs
A guide to lighting your Ooni Fyra pizza oven using wood pellets – we get to over 450°C in less than 20 minutes. You can find our …
Frequently Asked Questions
How long does it take to light pellets for pizza oven?
The time required to light pellets for pizza oven typically ranges from 10 to 20 minutes, depending on your specific oven model, ignition method, and ambient conditions. Using proper techniques like the chimney method can help you achieve ignition more quickly than other methods.
Can I use regular fireplace pellets in my pizza oven?
It’s not recommended to use regular fireplace pellets in your pizza oven. Always use food-grade hardwood pellets specifically designed for cooking, as they’re free from chemicals and binders that could affect flavor and safety. Pellets rated for cooking will also provide better heat characteristics for pizza.
Why do my pellets keep going out after I light them?
Pellets may go out due to insufficient airflow, moisture in the pellets, overfilling the burn pot, or a malfunctioning pellet feed system. Ensure proper ventilation, use dry pellets, don’t overload the burn pot, and check that your pellet system is functioning correctly.
What’s the best way to clean my pizza oven after using pellets?
After cooling completely, remove the burn pot and clean out all ash using a brush or ash tool. Wipe down interior surfaces with a dry cloth. For the exterior, use a damp cloth to remove any soot or residue. Regular cleaning after each use prevents ash buildup that can affect future lighting and performance.
How many pellets will I need for a pizza cooking session?
The amount of pellets needed depends on your oven size, cooking duration, and temperature requirements. As a general guideline, plan for about 1-2 pounds of pellets per pizza when cooking at high temperatures. Most portable pizza ovens use between 5-10 pounds for a full cooking session making multiple pizzas.
Can I leave my pizza oven unattended after lighting the pellets?
It’s never recommended to leave a pizza oven unattended while pellets are burning. Always monitor your oven during lighting and cooking to ensure safe operation and proper temperature maintenance. If you need to step away, turn down the heat or extinguish the fire completely.

