
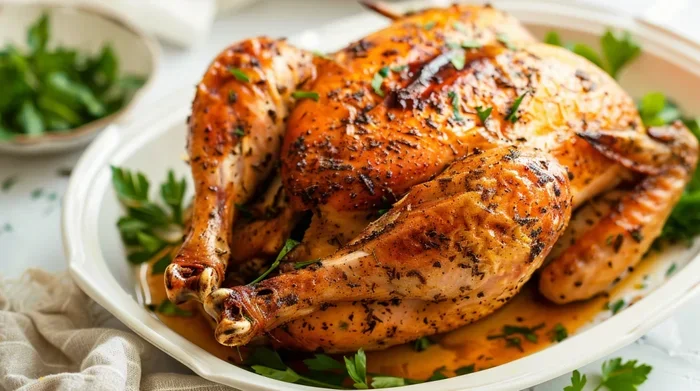
Cooking a whole chicken in an air fryer is a fast and simple way to get juicy meat and crispy skin without heating up your kitchen. You just need to season the bird well, set the right temperature, and check the internal temperature to stay safe. This method saves time and gives you a delicious roast dinner with very little cleanup. Whether you are cooking for family or meal prepping for the week, air fryer whole chicken delivers great results every single time.
If you have ever wondered how do I cook a whole chicken in the air fryer, you are in the right place. This method is becoming a favorite for home cooks because it is quick, easy, and gives you fantastic results. You get that golden, roasted taste without waiting hours for the oven to preheat. Plus, the air fryer keeps the kitchen cooler and cuts down on cleanup time.
Many people think air fryers are only good for fries or frozen snacks. That is not true at all. A whole chicken fits beautifully in most basket-style or oven-style air fryers. The hot air circulates around the bird and cooks it evenly. You also get a nice crispy skin without flipping the chicken halfway through. It is a smart way to make dinner on busy weeknights or weekends when you want something special.
In this guide, I will walk you through everything you need to know. We will cover the best chicken size, seasoning ideas, cooking times, safety checks, and simple tips to avoid common mistakes. By the end, you will feel confident making a whole bird in your air fryer and serving it with pride.
Key Takeaways
- Right size matters: Pick a chicken that fits your air fryer basket, usually around 3 to 4 pounds, so air can flow around the bird.
- Temperature and timing: Cook at 360°F for the best balance of crispy skin and tender meat, adjusting time based on weight.
- Use a meat thermometer: Always check that the thickest part of the thigh reaches 165°F before pulling the chicken out.
- Season well: A simple rub with oil, salt, pepper, and herbs helps the skin crisp up and adds big flavor.
- Rest before carving: Let the chicken sit for 10 minutes after cooking so the juices stay inside the meat.
- Clean as you go: Line the basket with foil or parchment to make cleanup quick and easy.
- Try variations: You can stuff the cavity with lemon and garlic or add root vegetables around the chicken for a full one-pan meal.
📑 Table of Contents
- How Do I Cook a Whole Chicken in the Air Fryer: The Basics
- How Long Do I Cook a Whole Chicken in the Air Fryer
- How Do I Cook a Whole Chicken in the Air Fryer Step by Step
- Air Fryer Whole Chicken Tips for Best Results
- How Do I Cook a Whole Chicken in the Air Fryer for Different Meals
- Final Thoughts on How Do I Cook a Whole Chicken in the Air Fryer
How Do I Cook a Whole Chicken in the Air Fryer: The Basics
Before you start, it helps to understand why this method works so well. An air fryer is basically a small, powerful convection oven. It moves hot air around the food very quickly. That fast airflow removes surface moisture and helps the skin turn golden and crisp. At the same time, the inside stays moist because the cooking time is shorter than a traditional oven roast.
The key is to choose the right bird and give it enough space. If the chicken is too big for the basket, the air cannot move around it properly. That leads to uneven cooking. A 3 to 4 pound chicken usually fits best in a standard 6 to 8 quart air fryer. If you have a larger oven-style model, you may have more room, but the same rule applies. Leave a little space on the sides so the air can circulate.
You also want to think about shape. Some chickens are flatter and some are rounder. A flatter bird often cooks a bit more evenly because the heat reaches more surface area. If your chicken has a very rounded breast, you can gently tuck the wings back and tie the legs together. That helps the bird hold a neat shape and promotes even cooking.
Pick the Right Chicken Size
Size matters more than many people realize. A bird that is too large will crowd the basket and slow down the cooking. A bird that is too small may dry out before the skin gets crispy. For most home air fryers, a 3 to 4 pound whole chicken is the sweet spot. If you are cooking for a bigger family, you may need to cook two smaller chickens or use a larger oven-style air fryer.
When you buy the chicken, check the cavity and make sure it is clean. Rinse it quickly if needed, then pat it very dry with paper towels. Dry skin is one of the biggest secrets to a crisp finish. If the skin is wet, it will steam instead of brown. So take your time with this step. It makes a real difference.
Simple Seasoning Ideas
You do not need fancy ingredients to make a tasty bird. A basic rub works beautifully. Mix a little oil with salt, black pepper, garlic powder, and paprika. You can also add dried herbs like thyme, rosemary, or oregano. Rub the mixture all over the chicken, including under the skin if you want extra flavor. Be gentle when lifting the skin so you do not tear it.
For the cavity, you can add simple aromatics. A halved lemon, a few garlic cloves, and some herb sprigs work well. These add a fresh scent and a little flavor from the inside out. You can also stuff the cavity with onion quarters or a small bunch of fresh parsley. Keep in mind that stuffing the bird tightly can slow down cooking, so it is usually better to keep the cavity loose.
How Long Do I Cook a Whole Chicken in the Air Fryer
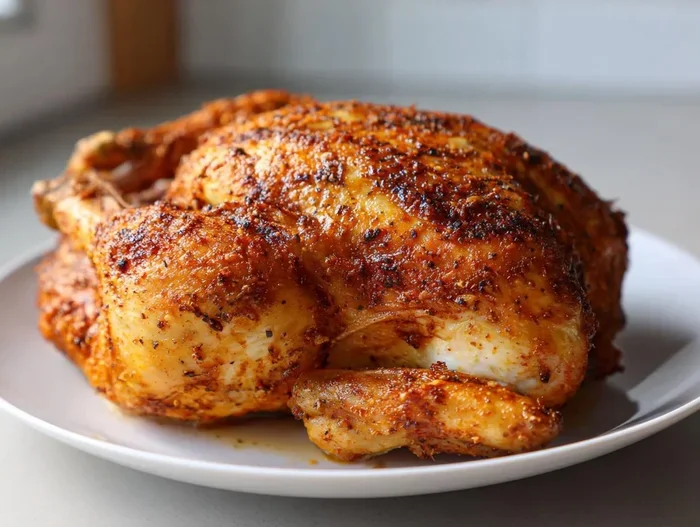
One of the most common questions is about timing. The short answer is that it depends on the size of the chicken and the temperature you use. A good rule of thumb is to cook a 3 to 4 pound chicken at 360°F for about 50 to 60 minutes. Larger birds may need a little more time, while smaller ones may finish sooner. The best way to know for sure is to use a meat thermometer.
Visual guide about whole roasted chicken air fryer
Image source: richfeast.com
If you are looking for a slightly darker skin, you can start at 360°F and then increase the heat to 400°F for the last 5 to 10 minutes. That final blast of heat helps the skin tighten and crisp. Just keep an eye on it so the skin does not burn. Every air fryer runs a little differently, so it helps to check the chicken early and adjust as needed.
Here is a simple time guide you can follow:
- 3 pound chicken: about 45 to 55 minutes at 360°F
- 3.5 to 4 pound chicken: about 50 to 60 minutes at 360°F
- 4.5 pound chicken: about 60 to 70 minutes at 360°F, if it fits comfortably
These times are starting points, not strict rules. Always check the internal temperature before serving. The thickest part of the thigh should reach 165°F. If you hit that number and the skin is not as crispy as you want, you can raise the temperature for a few more minutes.
Temperature Tips for Crispy Skin
Temperature plays a big role in texture. If you cook at a very low temperature, the skin may stay soft and pale. If you cook at a very high temperature the whole time, the outside may brown too fast while the inside is still raw. A moderate temperature like 360°F gives you a nice balance. It lets the chicken cook through while the skin slowly turns golden.
Another helpful trick is to brush the skin lightly with oil before cooking. Oil helps heat move into the skin and encourages browning. You do not need much. A thin coat is enough. Too much oil can make the bottom greasy, especially if the chicken sits in its own juices during cooking.
How Do I Cook a Whole Chicken in the Air Fryer Step by Step
Now let us walk through the process from start to finish. This is the part where everything comes together. Follow these steps and you will have a solid routine that you can repeat anytime.
Visual guide about whole roasted chicken air fryer
Image source: gracelikerainblog.com
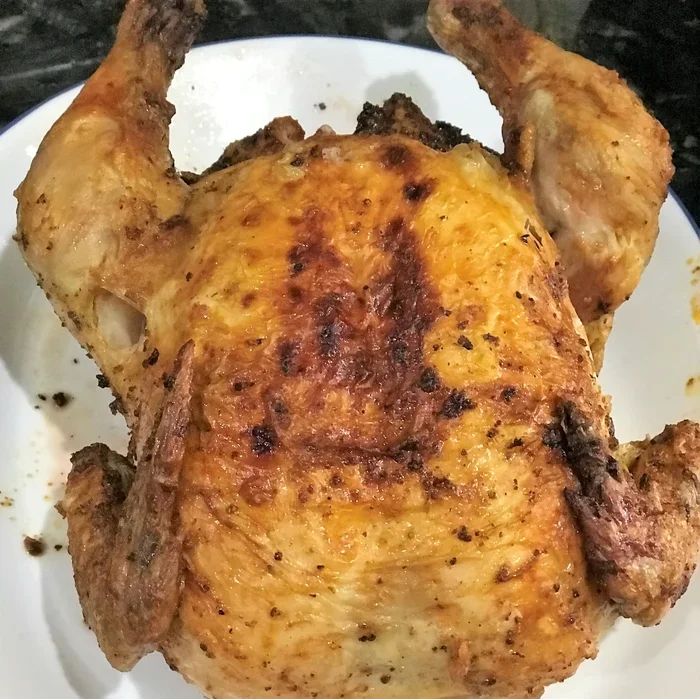
Step 1: Prep the chicken. Remove the chicken from the packaging. Take out any giblets or extra parts from the cavity. Rinse the chicken if you prefer, then pat it completely dry with paper towels. Dry skin is your friend here.
Step 2: Season the bird. Rub a little oil over the whole chicken. Sprinkle your salt, pepper, and seasoning blend all over the outside. If you like, gently loosen the skin over the breast and rub a little seasoning directly on the meat. Add aromatics to the cavity if you want extra flavor.
Step 3: Place the chicken in the basket. Set the chicken in the air fryer basket with the breast side up. Make sure it sits flat and does not tip over. Leave a little space around the sides so the air can move freely. If your basket is small, you may need to angle the chicken slightly, but avoid crowding it.
Step 4: Set the temperature and time. Preheat the air fryer if your model recommends it. Many air fryers heat up very quickly, so a long preheat is not usually necessary. Set the temperature to 360°F and start with a time around 50 to 60 minutes for a 3 to 4 pound bird.
Step 5: Check and adjust. About 10 minutes before the expected finish time, check the chicken. Look at the skin color and test the thickest part of the thigh with a meat thermometer. If the skin is pale, you can bump the heat up for the last few minutes. If the skin is getting too dark, you can lower the heat slightly and finish cooking gently.
Step 6: Rest and carve. When the chicken reaches 165°F in the thigh, remove it from the air fryer. Let it rest for 10 minutes before carving. Resting helps the juices settle back into the meat. If you cut too soon, the juices can run out and the meat may feel drier.
Common Mistakes to Avoid
Even a simple recipe can go sideways if a few small things are missed. Here are the most common mistakes people make when learning how do I cook a whole chicken in the air fryer:
- Skipping the drying step: Wet skin leads to soft skin. Always pat the chicken dry first.
- Overcrowding the basket: If the chicken fills the basket completely, the air cannot circulate. That means uneven cooking.
- Not using a thermometer: Guessing the doneness can lead to undercooked or dry chicken. A thermometer takes the guesswork out.
- Forgetting to rest the meat: Cutting immediately can release the juices. A short rest makes a big difference.
- Using too much seasoning salt: A heavy salt coating can make the skin burn or taste too salty. Start with a moderate amount and adjust next time.
Air Fryer Whole Chicken Tips for Best Results
If you want to get the best results every time, a few small habits help a lot. First, keep your air fryer basket clean. Old grease or crumbs can smoke when the heat goes up. A clean basket also helps the air move smoothly. If you want easier cleanup, you can line the bottom with a piece of foil or parchment made for air fryers, but make sure it does not block the airflow.
Second, think about flavor variations. You can keep it simple with salt and pepper, or you can try a more bold seasoning mix. A little paprika gives a warm color. A touch of brown sugar can help the skin caramelize, but use it lightly so it does not burn. Garlic powder, onion powder, and dried herbs are all easy ways to build flavor without much work.
Third, consider what you serve with the chicken. Since the air fryer is doing the main job, you can use the oven or stovetop for sides. Roasted potatoes, green beans, rice, or a fresh salad all work well. If your air fryer has enough space, you can even cook vegetables around the chicken for a one-basket meal. Just keep the pieces similar in size so they cook evenly.
Quick Tips for Juicy Meat
Juiciness comes from a mix of seasoning, temperature, and timing. Here are a few quick tips that help keep the meat tender:
- Do not overcook: Pull the chicken as soon as it hits 165°F in the thigh. The temperature will rise a little more while it rests.
- Use oil on the skin: A thin layer helps the skin brown and protects it from drying out too fast.
- Season under the skin: A little salt and herbs under the skin adds flavor right where the meat needs it.
- Let it rest: A 10-minute rest keeps the juices inside the meat instead of running onto the cutting board.
How Do I Cook a Whole Chicken in the Air Fryer for Different Meals
One of the best things about this method is how flexible it is. You can make a simple weeknight dinner, prep for leftovers, or serve something that feels a little more special. The same basic technique works in all of these cases. You just change the seasoning and the sides.
For a quick family dinner, keep the seasoning simple and serve the chicken with easy sides. For meal prep, you can carve the chicken and store the meat in containers for lunches or salads. For a weekend meal, you can dress up the bird with a herb butter rub and serve it with roasted vegetables and gravy. The air fryer does the heavy lifting either way.
If you want to compare a few approaches, this table can help:
| Goal | Best Approach | Why It Works |
|---|---|---|
| Fast weeknight dinner | Simple salt, pepper, and garlic rub | Minimal prep and reliable flavor |
| Crispier skin | 360°F then 400°F at the end | Final high heat tightens the skin |
| Extra juicy meat | Light oil, herbs under skin, rest after cooking | Moisture stays in the meat |
| One-basket meal | Add vegetables around the chicken | Saves time and reduces dishes |
As you try different styles, you will learn what your air fryer likes. Some models run hotter, some run cooler. Some baskets are wide and some are tall. Once you get a feel for your own machine, you can adjust the time and temperature with confidence. That is the real secret to making air fryer whole chicken turn out great every time.
Expert Insight on Airflow and Placement
Airflow is the main reason this method works. If the chicken sits too close to the walls of the basket, the hot air has a harder time reaching every side. That is why placement matters. Center the chicken when you can. If your basket is narrow, you may need to angle the bird slightly, but try not to press it against the sides.
It also helps to avoid covering the chicken with foil during cooking. Foil can block the airflow and prevent the skin from crisping. If you want to protect the breast from browning too fast, you can loosely tent it for part of the cook time, but remove the tent near the end so the skin can finish crisping. Small adjustments like that can make a noticeable difference.
Final Thoughts on How Do I Cook a Whole Chicken in the Air Fryer
If you have been asking how do I cook a whole chicken in the air fryer, the answer is simpler than it sounds. Start with a chicken that fits your basket, dry the skin well, season it generously, and cook it at a steady temperature. Use a meat thermometer to check for doneness, and let the bird rest before carving. Those few steps will give you a golden, juicy chicken without much fuss.
The air fryer is a handy tool for more than snacks and frozen foods. It can handle a whole bird beautifully, and it does the job faster than a traditional oven. Once you try it, you may find yourself making this more often than you expected. It is a practical way to serve a roast chicken with less waiting and less cleanup.
So the next time you want a comforting dinner, give it a try. Season the chicken, set the timer, and enjoy the smell of a roasting bird filling your kitchen. With a little practice, you will know exactly how to tweak the time and temperature to match your taste. That is how you turn a simple question into a reliable go-to recipe.
Frequently Asked Questions
Can I cook a whole chicken in any air fryer?
Most air fryers can handle a whole chicken if the bird fits comfortably in the basket. A 3 to 4 pound chicken usually works best in a standard basket-style model, while larger oven-style air fryers can fit bigger birds.
What temperature is best for air fryer whole chicken?
A temperature of 360°F is a great starting point because it cooks the chicken evenly and helps the skin turn golden. You can raise the heat to 400°F for the last few minutes if you want a crispier finish.
How do I know when the chicken is done?
The safest way is to check the internal temperature with a meat thermometer. The thickest part of the thigh should reach 165°F, and the juices should run clear when you pierce the meat.
Should I flip the chicken while it cooks?
You usually do not need to flip a whole chicken in the air fryer. The circulating air cooks it from all sides, and keeping the breast side up helps the skin brown evenly.
Can I add vegetables around the chicken?
Yes, you can cook vegetables around the chicken if there is enough room for air to move. Root vegetables like potatoes or carrots work well, but cut them into similar sizes so they cook evenly.
How do I keep the skin crispy after cooking?
Let the chicken rest for about 10 minutes, then carve it soon after. If you want extra crispness, you can finish the chicken at a higher temperature for a few minutes before resting it.



