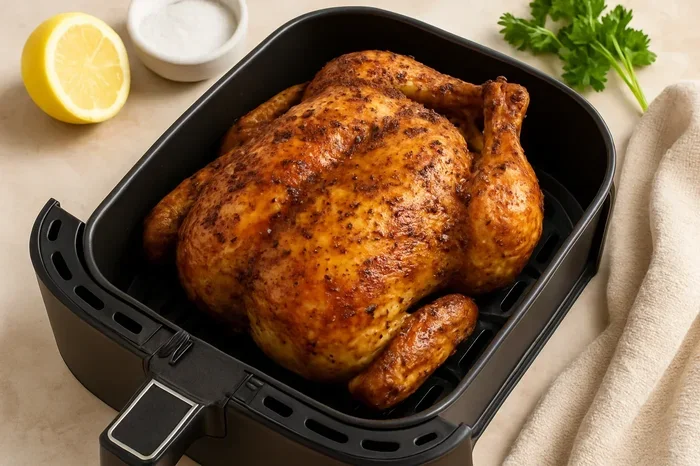
Cooking a whole bird in an air fryer saves time and delivers amazing results. How long to cook 6lb whole chicken in air fryer depends on temperature and prep, but you can expect about 50 to 65 minutes at 360°F. This guide breaks down timing, temp, and simple tricks for golden skin and tender meat every time.
Key Takeaways
- Timing range: Plan for 50 to 65 minutes at 360°F, then check doneness with a thermometer.
- Safe temperature: Cook until the thickest part reaches 165°F for juicy, safe meat.
- Crisp skin: Dry the bird well, add a light oil coating, and use a higher finish temp for color.
- Airflow matters: Truss legs, remove excess parts, and avoid crowding for even cooking.
- Resting step: Let the chicken rest 10 minutes before carving to keep juices inside.
- Size check: A 6lb bird fits most basket and oven-style units, but measure your basket first.
- Simple seasoning: Salt, pepper, garlic, and herbs work great without heavy marinades.
📑 Table of Contents
- How Long To Cook 6Lb Whole Chicken In Air Fryer Per Pound And Per Minute
- Best Temperature For A Crispy, Juicy 6Lb Chicken
- Step By Step Air Fryer Whole Chicken Method
- How To Tell When The Chicken Is Fully Cooked
- Serving, Resting, And Leftover Tips
- Common Mistakes And Quick Fixes
- Final Thoughts On Timing And Temperature
How Long To Cook 6Lb Whole Chicken In Air Fryer Per Pound And Per Minute
If you are wondering how long to cook 6lb whole chicken in air fryer, you are in the right place. This size is a great choice for family meals. It fits well in many basket and oven-style units. It also cooks faster than a big bird, which means less waiting and more eating. The key is to match time and temperature to the size and shape of your bird.
A good rule of thumb is to plan for about 10 to 12 minutes per pound at 360°F. For a 6lb bird, that lands you near 60 minutes. Some units run hot, so you may finish a bit sooner. Others run cool, so you may need a few extra minutes. The best move is to start checking early and use a thermometer. That way, you avoid dry meat and get a nice finish.
Air frying gives you crisp skin without deep frying. The fast air movement helps brown the outside while the inside stays tender. You still need to manage heat carefully. Too hot too fast can burn the skin before the center is done. Too low can leave the skin soft. A steady mid-range heat with a short high-heat finish usually works best.
Why Timing Changes With Your Air Fryer Model
Not all air fryers cook the same way. Basket models push air around a compact space. Oven-style units have more room and sometimes a different fan pattern. That can change how fast the bird browns and how evenly it cooks. A 6lb chicken may need a small adjustment between models.
Basket units often cook a bit faster because the airflow is tight. Oven-style units may need a few extra minutes because the space is larger. If your unit has a top rack, you can use it for veggies or potatoes while the bird cooks below. Just keep the chicken centered so air moves freely.
Here is a simple comparison to help you plan:
- Basket style: Usually faster browning. Check at 50 minutes.
- Oven-style: May need 55 to 65 minutes. Check at 55 minutes.
- Small capacity: May need to cook at a slightly lower temp to avoid over-browning.
- Large capacity: Often handles the bird with better airflow and even cooking.
If you want more ideas for other air fryer foods, you can explore guides like how to cook frozen fish in air fryer or how to reheat french fries in an air fryer oven. These show how timing shifts with different foods and models.
Best Temperature For A Crispy, Juicy 6Lb Chicken
Temperature matters just as much as time. For a 6lb whole chicken, a steady 360°F is a strong starting point. This heat cooks the bird evenly and gives the skin a nice chance to brown. If you go much higher at the start, the skin may darken too quickly while the center stays underdone.
Many cooks use a two-step approach. Start at 360°F to cook the meat through. Then raise the heat to 380°F or 400°F for the last 5 to 8 minutes. This short boost helps the skin crisp up without drying the meat. Keep an eye on the color during this final step.
If your bird has a lot of skin or a thicker shape, you may prefer a slightly gentler start. A lower heat can help the center catch up before the outside gets too dark. If your bird is leaner or smaller in shape, you may finish faster. The best plan is to watch the color and check the internal temp often.
How To Set Up The Bird For Even Cooking
Setup plays a big role in timing. A 6lb chicken should sit flat and stable. If the legs splay out, the bird can cook unevenly. A simple truss or a couple of skewers can help. You can also tuck the wing tips under the body to keep them from burning.
Air needs room to move. Do not force the bird into a tight space. If your basket is snug, consider an oven-style unit or cook at a slightly lower temp with a longer time. Clear space around the bird helps the skin brown evenly. It also reduces hot spots.
A light coating of oil helps the skin crisp. You do not need much. A thin brush of oil or a quick spray is enough. Too much oil can drip and cause smoke. Too little can leave the skin pale. A balanced coat gives you color without extra mess.
Step By Step Air Fryer Whole Chicken Method
This method keeps things simple and reliable. It works well for a 6lb bird in most air fryers. You can adjust the finish based on your model and preferred color.
1. Prep the bird. Pat the chicken completely dry with paper towels. Dry skin crisps better. Remove the giblets and neck if they are inside. Season the cavity with salt, pepper, and herbs if you like.
2. Season the outside. Rub the bird lightly with oil. Add salt, pepper, garlic powder, and your favorite herbs. Keep the layer thin and even. A simple seasoning often tastes the best.
3. Position the bird. Place the chicken breast-side up or flat, depending on your basket. Make sure it sits steady. Leave space around it for airflow.
4. Start cooking. Set the temperature to 360°F. Cook for about 50 minutes before your first check. If you are using an oven-style unit, you may start checking at 55 minutes.
5. Check doneness. Use a meat thermometer in the thickest part of the thigh, away from the bone. You want 165°F. If it is not there yet, add time in small blocks and check again.
6. Crisp the skin. If the meat is done and the skin needs more color, raise the heat to 380°F or 400°F for 5 to 8 minutes. Watch closely so it does not burn.
7. Rest and carve. Move the bird to a plate or cutting board. Let it rest for 10 minutes. This helps the juices settle. Then carve and serve.
Simple Seasoning Ideas That Work Well
You do not need a long marinade for great flavor. A dry rub is easy and crisps nicely. Try one of these simple blends:
- Classic herb: Salt, black pepper, garlic powder, onion powder, dried thyme, and paprika.
- Lemon pepper: Salt, lemon pepper, garlic powder, and a little zest inside the cavity.
- Smoky blend: Salt, pepper, smoked paprika, garlic powder, and a touch of brown sugar for color.
- Simple roast: Salt, pepper, olive oil, and fresh rosemary or thyme.
If you like a brighter flavor, add lemon wedges or a few herbs inside the cavity. That gives a gentle aroma while the bird cooks. Keep the cavity light so it does not steam too much. A dry outside and a lightly flavored inside is a great balance.
How To Tell When The Chicken Is Fully Cooked
The safest way to check doneness is with a thermometer. Insert it into the thickest part of the thigh, without touching the bone. The target is 165°F. You can also check the breast area. It should be hot and firm, not soft or jiggly.
Juices are another clue. When you pierce the thigh, the juices should run clear. If they look pink or reddish, keep cooking. Color alone is not enough, so use the thermometer as your main guide. That keeps you safe and helps you avoid overcooking.
If the skin is browning too fast but the center is not ready, lower the heat a little. You can also shield the breast with a small piece of foil if your unit allows it. The goal is even cooking from edge to center. A steady check every 5 to 10 minutes near the end helps a lot.
What To Do If The Skin Browns Too Fast
This happens sometimes, especially with smaller baskets or hotter units. If the skin looks dark but the meat is not done, do this:
- Lower the temp: Drop to 340°F and continue cooking in short checks.
- Cover lightly: Use a loose foil tent over the breast if needed.
- Move the bird: Rotate the chicken if your unit has hot spots.
- Finish gently: Keep the last minutes short and watch the color closely.
A little patience here saves the meal. It is better to finish a few minutes later than to burn the skin and undercook the center.
Serving, Resting, And Leftover Tips
Resting matters. When the bird comes out, give it 10 minutes before carving. This keeps the juices inside the meat instead of spilling onto the board. A rested chicken tastes juicier and is easier to slice cleanly.
Carving is easier when the bird is stable. Use a sharp knife and cut the breast away from the bone first. Then slice the breast against the grain for tender pieces. Remove the legs and thighs next. If you cooked extra veggies underneath, serve them alongside the bird for a full meal.
Leftovers can be great if you store them right. Let the meat cool a bit, then store it in a sealed container in the fridge. Use it within a few days. You can shred it for salads, sandwiches, or bowls. If you want a quick shredding tip, check how to shred chicken in ninja blender for a fast method after the meal.
Easy Sides That Pair Well
A 6lb chicken can feed several people, so plan a few simple sides. Air fryer-friendly options make the meal easy:
- Roasted potatoes: Toss cubes with oil, salt, and herbs. Cook them while the bird rests or in a separate round.
- Green vegetables: Asparagus or broccoli works well with a short cook time and light seasoning.
- Bread or rolls: Warm rolls are a simple addition for soaking up juices.
- Fresh salad: A crisp salad balances the rich bird and keeps the meal light.
If you enjoy cooking other proteins in your air fryer, you may like guides such as best way to cook cod in air fryer or how to cook frozen asparagus in an air fryer. These show how quick sides and seafood can fit into the same meal plan.
Common Mistakes And Quick Fixes
A few small errors can change the result. Here are the most common ones and how to fix them.
Wet skin. If the bird is not dried well, the skin stays soft. Pat it very dry before seasoning.
Crowded basket. If air cannot move, the bird cooks unevenly. Leave space and center the chicken.
Too much oil. A heavy coat can drip and smoke. Use a thin layer only.
Skipping the thermometer. Guessing the doneness can lead to dry or undercooked meat. Use a thermometer for confidence.
No resting time. Cutting right away releases juices. Let the bird rest for 10 minutes.
One temp all the way. A single high heat can brown the skin too fast. A steady mid heat with a short finish is safer.
Expert Insights For Better Results
A few small habits make a big difference. First, weigh the bird if you can. A true 6lb bird gives you a better time estimate than a guess. Second, preheat if your unit recommends it. A warm basket can help the skin start crisping sooner. Third, rotate the bird once if your model has uneven airflow. That simple move improves browning.
Also, think about the shape of the bird. A wider breast may need a gentler heat. A compact shape may finish sooner. Adjust by checking early and often. The best cooks stay flexible. They use time as a guide, not a rule.
If you like experimenting with other foods, you can try similar timing logic on other proteins and veggies. For example, how long to cook salmon in an air fryer oven and how long to cook salmon oven 400 both show how temperature and thickness change the finish. The same idea applies to your chicken.
Final Thoughts On Timing And Temperature
If you remember one thing, let it be this: how long to cook 6lb whole chicken in air fryer is usually around 50 to 65 minutes at 360°F, with a thermometer check to confirm. That range gives you a strong starting point. From there, adjust for your model, the shape of the bird, and the color you want. A short high-heat finish can add crispness without drying the meat.
Keep the setup simple. Dry the skin, use a light oil coat, and leave room for airflow. Check the thigh temperature near the end. Rest the bird before carving. These steps help you get a safe, juicy meal with a nice golden finish. Once you do it once, the process feels easy and repeatable.
For more air fryer timing ideas, you can browse guides like how long to air fry a toaster strudel or how to reheat a burrito in air fryer. Different foods need different timing, but the same careful checking habit works everywhere.
Frequently Asked Questions
How long to cook 6lb whole chicken in air fryer at 360°F?
Plan for about 50 to 65 minutes at 360°F. Start checking at 50 minutes with a thermometer. The bird is done when the thickest part of the thigh reaches 165°F.
Do I need to flip the chicken during cooking?
No, you usually do not need to flip a whole chicken. Keep it stable and centered so air moves around it. If your unit has hot spots, a single rotation can help even out the color.
Can I cook a 6lb chicken in a small basket air fryer?
Sometimes yes, if the basket is deep enough and the bird fits without crowding. If it feels tight, use a lower temp and check often. An oven-style unit may be easier for a bird this size.
What temperature should the chicken reach inside?
The thickest part of the thigh should reach 165°F. You can also check the breast area. A thermometer is the safest way to confirm doneness and avoid guessing.
How do I keep the skin crispy without drying the meat?
Dry the skin well, use a thin oil coat, and cook at a steady 360°F. Add a short high-heat finish at the end if needed. Rest the bird for 10 minutes before carving to keep the juices inside.
Can I season the chicken the night before?
Yes, you can season it ahead and keep it covered in the fridge. Bring it closer to room temp before cooking if your kitchen is cold. Pat the skin dry again before cooking for the best crispness.