
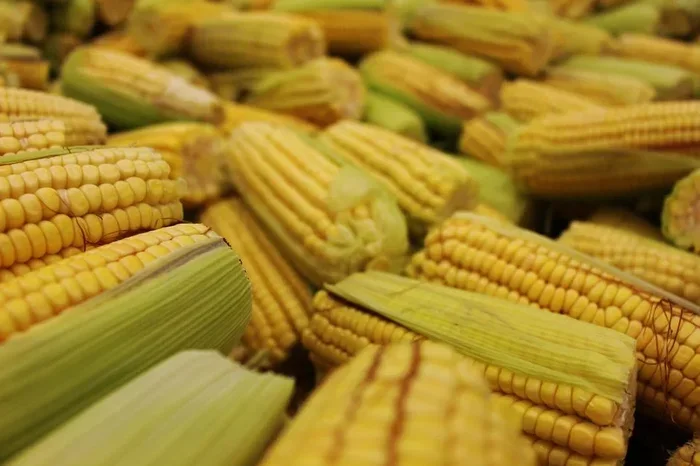
Cooking microwave corn on the cob in the husk is the easiest way to get juicy, tender sweet corn without any fuss. This method locks in moisture, keeps kernels plump, and saves you from shucking before cooking. You will learn the exact steps, timing, and pro tips to make microwave corn on the cob in the husk perfectly every single time.
There is something deeply satisfying about biting into a perfectly cooked ear of corn on a warm summer evening. The kernels are juicy, the texture is just right, and the flavor is unbeatable. Many people reach for the stove or the grill, but there is a simpler way. Microwave corn on the cob in the husk delivers incredible results with almost no effort. You do not need to shuck, scrub, or watch a pot boil over. Just a few minutes in the microwave, and you have restaurant-quality corn on your plate.
This method works because the husk acts as a natural wrapper. It traps steam inside, which cooks the corn evenly from all sides. The result is tender kernels with a slight smoky sweetness that feels almost grilled. Whether you are feeding a crowd or just yourself, cooking corn on the cob in the microwave is a game changer. In this guide, we walk you through every step so you get it right the first time.
If you have ever tried microwaving corn and ended up with rubbery or unevenly cooked kernels, do not worry. We will fix that. Below you will find everything you need to know about microwaving corn in the husk, from choosing the right ears to serving them up with your favorite toppings. Let us get started.
Key Takeaways
- Leave the husk on: Cooking corn in the husk traps steam and keeps kernels juicy and tender.
- Soak the corn first: A quick soak in water prevents the husk from burning and adds extra moisture.
- Adjust for wattage: Higher wattage microwaves cook faster, so always check your corn a minute or two early.
- Let it rest: Resting the corn for a few minutes after cooking makes it easier to handle and ensures even heat distribution.
- No special tools needed: You only need a microwave, water, and fresh corn to get great results.
- Add flavor while cooking: Try adding butter, herbs, or spices to the soaking water for extra taste.
📑 Table of Contents
Why Cook Corn on the Cob in the Husk?
You might wonder why anyone would keep the husk on while cooking. After all, most recipes tell you to peel it back or remove it entirely. But there is a good reason this technique has been around for generations. The husk does more than just protect the corn. It plays an active role in the cooking process.
The Science Behind Cooking Corn in Its Husk
When you place corn in the microwave with the husk still on, the husk traps moisture. That moisture turns into steam, which cooks the kernels gently and evenly. Think of it like a built-in steaming bag. The husk also prevents the corn from drying out, which is a common problem when cooking corn in the microwave without the wrapper.
This steaming method preserves the natural sweetness of the corn. The sugars in the kernels do not get a chance to caramelize too quickly or burn. Instead, they stay locked inside, giving you that perfect sweet corn taste we all love. If you have ever eaten boiled corn that tasted bland, this method will be a revelation. The husk essentially marinates the corn as it cooks.
Another benefit is convenience. You do not need to prepare a large pot of water or wait for it to boil. The microwave cuts cooking time dramatically. A full ear of corn is ready in under 10 minutes. That makes this method ideal for weeknight dinners, quick side dishes, or when you just do not feel like standing over a hot stove.
Benefits of Keeping the Husk On
- Natural steaming: The husk creates a moisture-rich environment that cooks corn evenly.
- Locks in flavor: Sweetness and nutrients stay trapped inside the husk wrapper.
- No sticking or burning: The husk prevents kernels from drying out or sticking to the plate.
- Easy handling: The husk acts as a natural handle when you pull the corn out of the microwave.
- Less cleanup: You do not need to scrub individual ears or deal with a messy pot.
As a bonus, this technique is very similar to how heating a damp towel in the microwave works. Both methods rely on moisture and steam to get the job done efficiently. The same principle applies here, just with a delicious result at the end.
What You Need to Get Started
One of the best things about this method is how simple it is. You do not need fancy equipment or hard-to-find ingredients. Just a few basics, and you are ready to go.
Choosing the Right Corn
Start with fresh ears of sweet corn. Look for corn with bright green husks that feel slightly damp. The husks should be snug around the ear, which tells you the corn is fresh. Avoid corn with dry, papery husks or brown spots. Those are signs that the corn has been sitting too long.
When you squeeze the ear gently through the husk, the kernels should feel plump and firm. Plump kernels mean more moisture, which leads to better steaming results. If you buy corn from a farmers market or grow your own, even better. Freshly picked corn cooks faster and tastes sweeter than store-bought options that have been sitting on a shelf for days.
Essential Supplies
You will need very little to get started. Here is your shopping list, and it is a short one:
- Fresh ears of corn with husks intact
- A microwave-safe plate or dish
- A damp paper towel or a small bowl of water
- Butter, salt, and your favorite toppings (optional)
That is it. No special microwave corn bags or fancy gadgets required. If you want to add extra flavor, you can also keep some herbs or spices on hand. We will get to that in a later section.
Step-by-Step Guide to Microwave Corn in the Husk
Now for the part you have been waiting for. Here is the exact process for making microwave corn on the cob in the husk perfectly every time. Follow these steps closely, and you will never go back to boiling again.
Step 1: Prepare the Corn
Start by rinsing the ears of corn under cool running water. This removes any dirt or debris from the outer husk layers. Do not peel the husk back yet. Just give the outside a quick rinse and shake off the excess water.
Next, soak the corn in a large bowl of cold water for about 10 to 15 minutes. This step is important. The soaking adds extra moisture to the husk, which helps create steam during cooking. It also prevents the husk from burning or catching fire in the microwave. If you are in a hurry, even a 5-minute soak will work, but the longer soak gives better results.
Step 2: Place the Corn in the Microwave
After soaking, remove the corn from the water and place it on a microwave-safe plate. You can cook one ear or multiple ears at a time. If cooking more than one, arrange them side by side with space between each ear. This allows the steam to circulate evenly.
For best results, leave the corn standing upright on the plate. The husk will naturally drape downward, and the steam will rise through the layers. This upright position ensures that every kernel gets cooked evenly.
Step 3: Set the Time and Power
Here is where timing matters. For one ear of corn, microwave on high for 3 to 4 minutes. For two ears, go with 5 to 6 minutes. Three ears will need about 7 to 8 minutes. These times are based on a standard 1000-watt microwave.
If your microwave runs at a lower wattage, you may need to add a minute or two. Conversely, if you have a high-powered microwave above 1200 watts, check the corn a minute early. Microwave cooking times vary, and it is always better to check early than to overcook your corn.
For comparison, this is much faster than the traditional method of boiling corn on the stove, which typically takes 15 to 20 minutes. The microwave method is also more consistent than grilling, where hot spots can cause uneven cooking. Think of it like using a built-in microwave convection combo for precision cooking, but without needing a fancy appliance.
Step 4: Let the Corn Rest
This is the step most people skip, but it is crucial. Once the microwave beeps, do not pull the corn out right away. Let it sit inside the closed microwave for 2 to 3 minutes. The residual heat continues to cook the corn gently, and the steam inside the husk redistributes for more even results.
When you do remove the corn, be careful. The husk will be very hot and full of steam. Use a towel or oven mitt to handle it. The husk should feel warm and slightly damp. If it feels dry, your corn may have cooked a bit too long, but it is still likely delicious.
Step 5: Peel and Serve
Now comes the satisfying part. Hold the ear of corn by the top of the husk and peel it downward. The husk should slide off easily, taking most of the silk with it. You will be left with a perfectly cooked ear of corn, golden and steaming.
At this point, you can serve it as-is or add your favorite toppings. A knob of butter, a sprinkle of sea salt, and a squeeze of lime are classic choices. Get creative with chili powder, parmesan cheese, or fresh herbs. The possibilities are endless.
Tips for Perfectly Cooked Corn Every Time
Even though this method is straightforward, a few extra tips can take your results from good to amazing. Here is what the experts recommend.
Adjusting for Different Microwave Wattages
Not all microwaves are created equal. A 700-watt microwave will need more time than a 1200-watt model. Here is a quick reference guide:
- 700-800 watts: Add 1 to 2 minutes per ear
- 900-1000 watts: Use the standard times listed above
- 1100-1200 watts: Reduce time by 1 minute per ear
- 1200+ watts: Start checking at 2 minutes per ear
The easiest way to test for doneness is to poke a kernel with a fork or toothpick. If it slides out easily and the kernel bursts with juice, your corn is ready. If it feels hard or chewy, give it another minute and check again.
Adding Flavor While Cooking
Want to take your corn to the next level? Try adding flavor during the soaking or cooking process. Here are some ideas:
- Butter in the soaking water: Add a tablespoon of melted butter to the bowl before soaking. The corn absorbs the flavor as it steams.
- Herbs and spices: Toss a few sprigs of fresh thyme or a pinch of cumin into the soaking water for a subtle aroma.
- Garlic butter after cooking: Melt some garlic butter and brush it on the corn right after peeling the husk.
- Citrus zest: Add lemon or lime zest to the soaking water for a bright, fresh twist.
These small additions make a big difference. They transform plain corn into a side dish that steals the show at any dinner table.
How to Store Leftover Cooked Corn
If you have leftovers, do not throw them away. Cooked corn stores well in the refrigerator for up to 4 days. Simply place the cooked ears in an airtight container or wrap them tightly in plastic wrap. When you are ready to eat them, reheat in the microwave for 30 seconds to 1 minute. You can also slice the kernels off the cob and use them in salads, soups, or corn salsa.
Common Mistakes to Avoid
Even the simplest cooking methods have pitfalls. Here are the most common mistakes people make when cooking microwave corn on the cob in the husk, and how to avoid them.
Overcooking the Corn
Overcooked corn becomes tough and starchy. The kernels lose their sweetness and turn chewy. To avoid this, start with shorter cooking times and add more time only if needed. It is always better to undercook slightly and give the corn a rest period than to overcook it.
Remember that the corn continues cooking during the resting phase. That extra 2 to 3 minutes inside the microwave after the timer stops adds significant cooking time. Factor this into your timing.
Skipping the Soaking Step
Some people skip the soak to save time, but this is a mistake. Without the extra moisture, the husk can dry out, burn, or even smoke in the microwave. The soaking step is what makes the entire method work smoothly. It takes only 10 minutes and makes a noticeable difference in the final result.
Cooking Too Many Ears at Once
It is tempting to pack the microwave full of corn, especially when feeding a large group. But overcrowding leads to uneven cooking. The ears on the outside get done while the ones in the center stay undercooked. Stick to three ears maximum per batch. If you need more, cook them in separate rounds.
Serving Ideas and Flavor Combinations
Once you have mastered the basic technique, it is time to get creative with how you serve your corn. Here are some popular and delicious options.
Classic Butter and Salt: This is the timeless favorite. Warm butter melts right into the hot kernels, and a sprinkle of flaky sea salt brings out the natural sweetness. Simple and perfect.
Mexican Street Style (Elote): Spread mayo over the corn, sprinkle with cotija cheese, add chili powder and a squeeze of lime. This is one of the most popular ways to serve corn in Mexico and it pairs beautifully with microwave corn.
Herb Butter: Mix softened butter with chopped fresh parsley, garlic, and a pinch of salt. Spread it on the hot corn for an instant upgrade.
Honey and Cinnamon: For a sweet twist, brush the corn with honey and dust it with cinnamon sugar. This works especially well with younger, sweeter corn varieties.
No matter how you serve it, microwave corn on the cob in the husk is a versatile side dish that pairs well with almost any meal. It goes great with grilled meats, pasta dishes, salads, and even sandwiches.
Final Thoughts
Cooking microwave corn on the cob in the husk is one of those techniques that once you learn it, you will never give up. It is fast, easy, and produces results that rival traditional methods. The husk does the hard work for you, trapping steam and keeping every kernel juicy and tender.
With just a few minutes of prep and under 10 minutes of cooking time, you can have a delicious side dish on the table. No pot to clean, no grill to fire up, no fuss. Just perfectly cooked corn ready for your favorite toppings.
Give this method a try at your next cookout, weeknight dinner, or summer gathering. Once you taste the difference, you will wonder how you ever cooked corn any other way. Enjoy your corn, and happy cooking.
Frequently Asked Questions
Can I microwave corn on the cob without the husk?
Yes, you can, but the results will not be as good. Without the husk, the corn dries out faster and the kernels may become tough. The husk acts as a natural steamer, so keeping it on is the best way to get juicy, tender corn.
How long does it take to microwave corn on the cob in the husk?
It typically takes 3 to 4 minutes per ear on high power in a standard 1000-watt microwave. Adjust the time based on your microwave wattage and the number of ears you are cooking.
Do I need to soak the corn before microwaving it?
Soaking is highly recommended. A 10 to 15 minute soak adds moisture to the husk, which helps create steam and prevents burning. If you are short on time, even a 5-minute soak will help.
Can I cook frozen corn on the cob in the microwave this way?
Yes, but you will need to increase the cooking time by about 2 to 3 minutes. Frozen corn has more moisture, so it takes longer to heat through. Let it thaw slightly for the best results.
What is the best way to check if the corn is done?
Poke a kernel with a fork or toothpick. If it slides out easily and the kernel bursts with juice, the corn is ready. If it feels hard or resists, give it another minute and check again.
Can I add butter or seasoning before microwaving the corn?
Yes, you can. Add a small pat of butter or a sprinkle of salt inside the husk before cooking. The steam will help the flavors absorb into the kernels for extra delicious results.



