
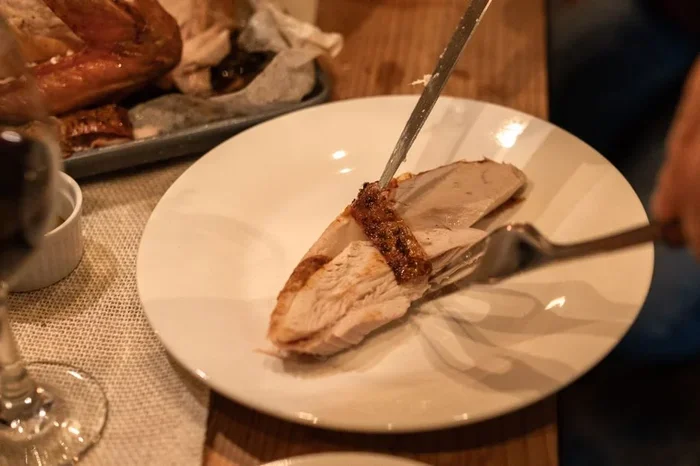
Cooking a 20 lb turkey takes about 4 to 4.5 hours at 325°F when roasted uncovered. The exact time depends on whether the turkey is stuffed or unstuffed, and whether you use a roasting pan or oven bag. Always use a meat thermometer to ensure the internal temperature reaches 165°F for safe eating.
Roasting a 20 lb turkey can feel intimidating. But with the right cooking time and temperature, you can pull off a stunning bird that impresses everyone at the table. Whether it is Thanksgiving, Christmas, or a special family gathering, knowing exactly how long to cook a 20 lb turkey makes all the difference.
A 20 lb turkey is a big bird. It needs attention to time, temperature, and technique. In this guide, we walk you through everything you need to know. From thawing to resting, we cover it all. You will learn the exact roast turkey time, the best oven settings, and simple tips that guarantee juicy results.
Key Takeaways
- Plan for 4 to 4.5 hours of cooking time for a 20 lb turkey at 325°F.
- Unstuffed turkeys cook faster than stuffed ones, so adjust your timing accordingly.
- Use a meat thermometer to check that the thickest part of the thigh reaches 165°F.
- Let the turkey rest for 30 minutes before carving to keep juices inside.
- Brining the turkey overnight leads to much juicier and more flavorful meat.
- A roasting rack helps heat circulate evenly around the bird for crispy skin.
📑 Table of Contents
How Long Does It Take to Cook a 20 lb Turkey?
The general rule for cooking a whole turkey is about 13 to 15 minutes per pound at 325°F. For a 20 lb turkey, that works out to roughly 4 to 4.5 hours. But this is just a starting point. Several factors can change the total time.
Here is what affects your cooking time:
- Stuffed vs. unstuffed. A stuffed turkey takes about 30 to 45 minutes longer because the stuffing needs to reach a safe temperature too.
- Oven type. Convection ovens cook faster than conventional ovens. Reduce time by about 25% if you use a fan-forced oven.
- Roasting pan vs. oven bag. Oven bags can reduce cooking time by 30 to 45 minutes because they trap heat and moisture.
- Starting temperature. A fully thawed turkey cooks more evenly and faster than a partially frozen one.
- Altitude. Higher altitudes can increase cooking time because the air is thinner and heats differently.
As a baseline, plan for 4 hours for an unstuffed turkey and closer to 4.5 to 5 hours for a stuffed one. Always rely on a meat thermometer rather than the clock alone.
Turkey Cooking Time Chart for a 20 lb Bird
Use this quick reference table to estimate your roasting time:
- Unstuffed at 325°F: 4 to 4.25 hours
- Stuffed at 325°F: 4.5 to 5 hours
- Unstuffed in an oven bag: 3.5 to 4 hours
- Convection oven, unstuffed: 3 to 3.5 hours
These times assume the turkey is fully thawed. If your turkey is still partially frozen, add extra time. Never rush the process by raising the oven temperature too high. That leads to dry meat and burnt edges.
The Best Oven Temperature for a 20 lb Turkey
Most experts agree that 325°F is the ideal temperature for roasting a whole turkey. It allows the meat to cook slowly and evenly. The skin gets golden and crispy without burning, and the inside stays moist.
Some cooks start at a higher temperature, like 425°F, for the first 20 to 30 minutes. This helps kickstart the browning process. Then they drop the heat down to 325°F for the rest of the cook. This two-step method works well for getting crispy skin without drying out the meat.
If you use a convection oven, set it to 300°F or 310°F. The fan circulates hot air, which cooks food faster and more evenly. You will need to check the turkey about 30 minutes earlier than the standard time suggests.
Why Low and Slow Works Best
A lower temperature gives the heat more time to penetrate deep into the meat. This is especially important for a big bird like a 20 lb turkey. High heat can cook the outside too fast while leaving the inside underdone. Low and slow ensures even cooking from the breast to the thighs.
Also, low heat reduces the risk of the skin splitting open. A 20 lb turkey has a lot of surface area, and sudden high heat can cause the skin to crack and release juices. Keeping the temperature steady at 325°F keeps everything intact and moist.
Step-by-Step Guide to Roasting a 20 lb Turkey
Follow these steps for a foolproof roast every single time.
Step 1: Thaw the Turkey Completely
A frozen turkey will cook unevenly. Plan ahead for thawing. The safest method is to place the turkey in the refrigerator on a tray. Allow about 24 hours of thawing for every 4 to 5 pounds. So a 20 lb turkey needs roughly 4 to 5 days in the fridge.
If you are short on time, you can thaw the turkey in cold water. Submerge it in its original wrapping and change the water every 30 minutes. This method takes about 30 minutes per pound, so plan for roughly 10 hours for a 20 lb bird.
Step 2: Prepare the Turkey
Remove the neck and giblets from the cavity. Pat the turkey dry with paper towels. Dry skin crisps up much better than wet skin. Next, season the inside and outside generously. Use salt, pepper, garlic powder, and any herbs you like, such as thyme or rosemary.
For extra flavor and moisture, consider brining the turkey the night before. A simple brine of water, salt, sugar, and spices works wonders. Soak the turkey for 12 to 24 hours, then rinse and pat dry before roasting.
Step 3: Choose Your Cooking Vessel
You have a few options here. A deep roasting pan with a rack works great. It lifts the turkey off the bottom, allowing hot air to flow underneath. This promotes even browning on all sides.
If you do not have a rack, you can use a best pan to cook turkey in oven, such as a deep ceramic dish or a sturdy metal baking pan. Just make sure there is enough room for the turkey to sit comfortably without touching the sides too tightly.
Another popular option is an oven bag. Oven bags trap steam and heat, which speeds up cooking and keeps the meat very juicy. They also make cleanup much easier since everything stays inside the bag.
Step 4: Roast the Turkey
Place the turkey breast-side up in your chosen pan. Put it in the preheated oven on the middle rack. Set a timer for the estimated cooking time, but do not rely on it alone.
About halfway through cooking, check the internal temperature. Use a meat thermometer inserted into the thickest part of the thigh, making sure it does not touch the bone. You are aiming for 165°F. If the skin is browning too fast, loosely cover it with aluminum foil.
Step 5: Rest the Turkey Before Carving
This step is critical and often skipped. Once the turkey reaches 165°F, take it out of the oven and let it rest for at least 30 minutes. During resting, the juices redistribute throughout the meat. If you carve too early, the juices run out and the meat dries out.
While the turkey rests, you can use the time to make a quick gravy from the pan drippings. The result is a tender, juicy, and flavorful turkey that everyone will love.
Tips for Juicy and Flavorful Turkey
Getting a 20 lb turkey right is about more than just time and temperature. Small details make a big difference in the final result.
Brine it overnight. A wet brine adds moisture and flavor deep into the meat. Use 1 cup of salt and 1/2 cup of brown sugar per gallon of water. Add bay leaves, peppercorns, and citrus slices for extra flavor. The turkey absorbs this solution over 12 to 24 hours, making every bite more succulent.
Bring the turkey to room temperature before roasting. Take it out of the fridge about 1 hour before it goes in the oven. A turkey that starts closer to room temperature cooks more evenly. This simple step can save you from a situation where the outside is done but the inside is still cold.
Baste the turkey every 45 minutes. Open the oven, spoon the hot juices over the top, and close the door quickly. Basting keeps the skin moist and promotes even browning. It also gives you a chance to check the progress without losing too much heat.
Do not overcook. This is the number one mistake people make. Once the thermometer reads 165°F in the thigh, pull the turkey out. The temperature will continue to rise a few degrees during resting. Overcooking by even 10 minutes can turn a juicy bird into dry meat.
Let the turkey rest properly. As mentioned, at least 30 minutes of resting time is essential. Tent it loosely with foil to keep it warm. After resting, the meat will be easier to carve and much more enjoyable to eat.
Store leftovers properly. If you have leftover turkey, store it in the fridge within 2 hours of cooking. Proper how to store turkey leftovers keeps the meat fresh for up to 4 days. You can also freeze cooked turkey for up to 3 months.
Common Mistakes to Avoid When Cooking a Large Turkey
Even experienced cooks make mistakes with a big bird. Here are the most common ones and how to avoid them.
- Not thawing the turkey fully. A partially frozen turkey cooks unevenly. The outside can be overdone while the inside remains raw. Always make sure the turkey is completely thawed before roasting.
- Cooking at too high a temperature. Cranking up the heat to save time is tempting but dangerous. It dries out the meat and can leave the center undercooked. Stick with 325°F for reliable results.
- Skipping the meat thermometer. Relying on time alone is risky. Ovens vary, and the size and shape of each turkey differ. A thermometer takes the guesswork out completely.
- Opening the oven door too often. Every time you open the door, heat escapes. This slows down cooking and can lead to uneven results. Check the turkey only when it is time to baste or measure the temperature.
- Forgetting to let the turkey rest. Cutting into the turkey immediately after pulling it from the oven releases all the juices onto the cutting board. The meat ends up dry and less flavorful. Patience pays off here.
How to Know When Your Turkey Is Done
The only reliable way to know your turkey is done is with a meat thermometer. Insert it into three key spots:
- The thickest part of the thigh. This should read 165°F.
- The thickest part of the breast. This should also read 165°F.
- The innermost part of the stuffing (if stuffed). The stuffing must also reach 165°F.
If you do not have a meat thermometer, look for these visual signs:
- The juices run clear when you pierce the thigh, not pink.
- The leg moves easily and feels loose in the joint.
- The skin is deep golden brown and sounds hollow when you tap it.
However, I strongly recommend using a thermometer. It removes all doubt and ensures your turkey is both delicious and safe to eat. After the turkey comes out of the oven, remember to let it rest. During resting, the internal temperature will rise by 5 to 10 degrees as the heat continues to cook the meat gently.
Once carved, you can keep the turkey warm by placing it in a covered dish in the oven at its lowest setting. If you need help with this, check out our guide on how to keep a turkey warm in the oven for simple methods that work every time.
Final Thoughts
Cooking a 20 lb turkey does not have to be stressful. With the right cooking time, temperature, and a few simple tips, you can serve a beautiful, juicy turkey that everyone will rave about. Remember to plan for about 4 to 4.5 hours at 325°F, always use a meat thermometer, and never skip the resting step.
The key to a perfect turkey is preparation. Thaw it properly, season it well, roast it low and slow, and let it rest before serving. Follow these guidelines and you will have a perfectly roasted 20 lb turkey every single time. Your guests will not believe how delicious it is.
Now that you know exactly how long to cook a 20 lb turkey, it is time to put this knowledge to work. Whether this is your first time or your fiftieth, these tips will help you achieve the best results. Happy roasting!
Frequently Asked Questions
How long does it take to cook a 20 lb turkey at 325°F?
An unstuffed 20 lb turkey takes about 4 to 4.5 hours at 325°F. A stuffed turkey will take closer to 4.5 to 5 hours. Always use a meat thermometer to confirm the internal temperature reaches 165°F in the thickest part of the thigh.
Should I cook a 20 lb turkey covered or uncovered?
Most experts recommend cooking a turkey uncovered for the entire roasting time. This allows the skin to crisp up and turn golden brown. If the skin starts to brown too quickly, you can loosely tent it with aluminum foil for the remaining cooking time.
How do I thaw a 20 lb turkey safely?
The safest method is to thaw it in the refrigerator. Allow about 24 hours for every 4 to 5 pounds, so plan for 4 to 5 days. If you are short on time, you can thaw it in cold water, changing the water every 30 minutes, which takes about 10 hours for a 20 lb bird.
What is the best pan to use for a 20 lb turkey?
A deep roasting pan with a rack works best because it lifts the turkey and allows hot air to circulate underneath. If you do not have a rack, a sturdy ceramic or metal baking pan works well too. You can also use an oven bag for faster cooking and easier cleanup.
Can I cook a 20 lb turkey at 350°F instead of 325°F?
Yes, you can cook at 350°F, but it will reduce the cooking time by about 15 to 20 minutes. Higher temperatures can dry out the meat faster, so keep a close eye on it and use a meat thermometer to avoid overcooking. 325°F remains the recommended temperature for the most even and moist results.
How long should a 20 lb turkey rest before carving?
Let the turkey rest for at least 30 minutes after taking it out of the oven. During this time, the juices redistribute throughout the meat, making it much juicier and easier to carve. Tent the turkey loosely with foil to keep it warm while it rests.



