
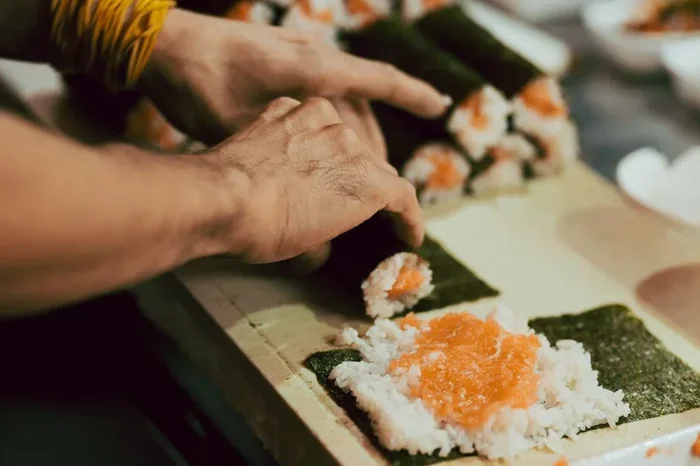
Our complete guide to the sushi rolling technique covers everything from choosing the right mat to slicing like a pro. You will learn how to make tight, beautiful rolls every single time. Whether you are a beginner or want to refine your skills, these tips will transform your homemade sushi.
Key Takeaways
- Choose the right mat: A bamboo sushi mat and plastic wrap are essential tools for clean rolling.
- Prepare your rice properly: Seasoned sushi rice is the foundation of every great roll.
- Master even pressure: Applying consistent pressure creates tight, professional-looking rolls.
- Use fresh fillings: Quality ingredients make a huge difference in flavor and texture.
- Slice with confidence: A sharp, wet knife ensures clean cuts every time.
- Practice makes perfect: Even experienced sushi chefs started with their first imperfect roll.
📑 Table of Contents
What Is the Sushi Rolling Technique?
The sushi rolling technique is the art of wrapping seasoned rice and fillings inside nori seaweed or other wrappers to create beautiful, bite-sized rolls. It is the skill that separates a simple rice and fish combo from a stunning piece of homemade sushi.
There are several types of rolls you can make. The most common are maki rolls, which are rolled inside the nori. Then there are inside-out rolls where the rice is on the outside. And hand rolls or temaki, which are cone-shaped and rolled by hand. Each style uses the same core rolling principles.
Learning this technique is easier than most people think. With the right tools and a little practice, you can create restaurant-quality rolls in your own kitchen. This guide will walk you through every step in detail.
Gather Your Sushi Rolling Tools
Before you start rolling, you need the right equipment. Having good tools makes the process much smoother and more enjoyable.
The Bamboo Sushi Mat
A bamboo rolling mat is the most important tool for making maki rolls. These mats are inexpensive and last for years. They give you the even pressure needed to shape a tight roll.
Look for a mat made of natural bamboo slats tied together with cotton string. Avoid mats with plastic wrapping, as they can stick to the rice. A good mat should feel sturdy and flexible at the same time.
Plastic Wrap and Other Essentials
Plastic wrap is a simple but game-changing addition. Place it over your bamboo mat before spreading the rice. This prevents sticking and keeps your mat clean.
Here is a quick list of everything you need:
- A bamboo sushi mat
- Plastic wrap or cling film
- A sharp, thin-bladed knife
- A wooden rice paddle or spatula
- A small bowl of water for wetting your hands
- Nori sheets, rice, and your favorite fillings
Having all your tools ready before you start is a tip every sushi chef follows. It keeps the workflow smooth and prevents the rice from drying out while you search for something.
Prepare Perfect Sushi Rice
The foundation of every great roll starts with the rice. Sushi rice is short-grain Japanese rice that becomes slightly sticky when cooked. This stickiness is what holds the roll together.
Cooking and Seasoning the Rice
Rinse your rice several times until the water runs clear. This removes excess starch and prevents gummy texture. Cook the rice according to package directions or use a rice cooker for consistent results every time.
While the rice is still warm, gently fold in a mixture of rice vinegar, sugar, and salt. This seasoning gives the rice its signature tangy-sweet flavor. Use a cutting and folding motion with your rice paddle. Do not stir or mash the rice, as that makes it mushy.
Let the seasoned rice cool to room temperature before using it for rolling. Warm rice will make the nori soggy and weaken your roll.
Tips for the Best Rice Texture
- Use short-grain Japanese rice for the right stickiness
- Fan the rice while seasoning to help it absorb the vinegar mixture faster
- Cover the rice with a damp cloth while you prepare your fillings
- The rice should be slightly warm, never hot, when you start rolling
Getting the rice right is half the battle. Many beginners focus only on the fillings and skip this crucial step. But without properly seasoned and cooled rice, even the best sushi rolling technique will not save your roll.
Master the Basic Maki Roll
The basic maki roll is where every sushi lover should start. It is a simple rolled sushi with rice and fillings wrapped in nori. Once you nail this, you can move on to more advanced styles.
Step-by-Step Rolling Process
- Place your bamboo mat on a clean surface and cover it with plastic wrap.
- Put a sheet of nori on the mat, shiny side down.
- Wet your hands with water to prevent sticking.
- Spread a thin, even layer of rice over the nori, leaving about one inch bare at the top.
- Add your fillings in a line across the center of the rice.
- Lift the edge of the mat closest to you and roll it over the fillings.
- Apply gentle, even pressure as you roll forward.
- Give the roll a firm but gentle squeeze to shape it.
The key to a tight roll is even pressure throughout the entire process. If you squeeze too hard, the filling will squish out. If you press too lightly, the roll will fall apart.
Common Maki Roll Mistakes to Avoid
- Spreading the rice too thick, which makes the roll bulky and hard to cut
- Overfilling the roll, which causes it to burst when you squeeze it
- Leaving the nori edge dry, which prevents a proper seal
- Rolling too loosely, which leads to a loose, messy slice
Take your time with the first few rolls. Once your hands remember the motion, it will become second nature. Think of it as building muscle memory for your sushi rolling technique.
Explore Different Roll Types
Once you are comfortable with the basic maki roll, you can explore other styles. Each type uses the same core rolling method but with different placement and shaping.
Uramaki (Inside-Out Roll)
An inside-out roll has the rice on the outside and the nori on the inside. This style is popular in Western sushi restaurants and looks beautiful with toppings like sesame seeds or fish roe.
To make an uramaki, spread the rice on the nori first, then flip it over so the rice faces down on the mat. Add your fillings, then roll just like a basic maki. The result is a roll with a rice-coated exterior.
Temaki (Hand Roll)
A hand roll or temaki is a cone-shaped roll that you eat with your hands. It does not require a mat at all. Simply place the nori in your palm, add rice and fillings, and fold it into a cone shape.
Hand rolls are fun and casual. They are perfect for a sushi party where guests can make their own. The key is to keep the cone tight so it holds together until you take a bite.
Comparison of Roll Types
| Roll Type | Wrapper Position | Difficulty Level | Best For |
|---|---|---|---|
| Maki Roll | Nori on outside | Beginner | Sliced sushi platters |
| Uramaki | Rice on outside | Intermediate | Decorative presentation |
| Temaki | Nor cone shape | Easy | Casual gatherings |
| Futomaki | Nori on outside | Intermediate | Thick, filling-rich rolls |
Choose the Right Fillings
The fillings you choose can make or break your roll. Fresh, high-quality ingredients are essential for great-tasting homemade sushi.
Classic Filling Combinations
Start with simple combinations and work your way up. Some tried-and-true pairings include:
- Avocado and cucumber for a fresh, light roll
- Cooked shrimp and avocado for a creamy texture
- Salmon and cream cheese for a rich, popular choice
- Carrot, cucumber, and pickled radish for a vegetarian option
For those who enjoy raw fish, make sure you source it from a trusted fishmonger. You can also explore raw salmon recipes for inspiration on flavor combinations and preparation methods.
Tips for Working with Fillings
- Cut fillings into thin, uniform strips for even rolling
- Pat wet ingredients dry to prevent a soggy roll
- Place fillings in the center, not too close to the edges
- Use less filling than you think you need
Less is more when it comes to fillings. Overstuffing is the number one reason rolls fall apart during slicing. A good rule of thumb is to keep the filling line narrow and centered.
Perfect Your Slicing Technique
Rolling is only half the process. How you cut your rolls determines how they look and taste on the plate. A clean cut reveals the beautiful spiral inside each roll.
The Right Knife and Motion
Use a sharp, thin-bladed knife for slicing. A dull knife will crush the roll instead of cutting through it. Wet the blade with water before each cut to prevent sticking.
Use a gentle sawing motion rather than pressing down hard. Let the sharpness of the blade do the work. Wipe the knife clean between cuts for the neatest results.
How to Cut Maki Rolls
- Place the roll on a cutting board
- Hold the knife at a slight angle
- Use a gentle back-and-forth sawing motion
- Cut the roll in half first, then cut each half into thirds
- You should end up with six even pieces
Aim for six to eight pieces per roll. This gives you bite-sized pieces that are easy to handle and eat. Clean cuts also make your sushi look more professional and appetizing.
Expert Tips to Improve Your Sushi Rolling
Even after you master the basics, there is always room to refine your sushi rolling technique. Here are some expert tips that will take your rolls to the next level.
Keep Everything Cold
Work in a cool environment if possible. Cold rice holds its shape better and is easier to handle. If your kitchen is warm, chill your cutting board and knife before you start.
Practice Even Pressure
The secret to a tight, beautiful roll is consistent pressure. Imagine you are gently hugging the roll with the mat. Not too tight, not too loose. Just firm enough to hold everything together.
Use a Damp Cloth
Keep a damp cloth nearby to wipe your hands and the mat. This prevents rice from sticking to surfaces and keeps your workspace clean throughout the process.
Watch and Learn
Watching experienced sushi chefs work can teach you things that written guides cannot. Look for videos online that show the rolling motion in slow motion. Pay attention to how they apply pressure and how they shape the final roll.
Experiment and Have Fun
Do not be afraid to try new combinations. The best homemade sushi comes from experimentation. Try different rice seasonings, unusual fillings, and creative presentations. The more you roll, the better you will become.
Common Questions About Sushi Rolling
Many people have questions when they first start learning the sushi rolling technique. Here are answers to the most common ones.
Can I use regular rice instead of sushi rice?
You can, but the results will be different. Sushi rice is short-grain and becomes sticky when cooked, which helps the roll hold together. Long-grain rice like basmati will not work as well because it stays too dry and loose.
Why does my roll fall apart when I slice it?
This usually happens because the roll is not tight enough or the rice layer is too thick. Make sure you apply firm, even pressure while rolling and keep the rice layer thin and consistent.
Can I make sushi rolls without a bamboo mat?
Yes, you can. For hand rolls or temaki, you do not need a mat at all. For maki rolls, you can use a clean kitchen towel rolled into a cylinder as a substitute, though a bamboo mat gives the best results.
How long do homemade sushi rolls last?
Homemade sushi is best eaten fresh, within a few hours of making it. The nori will soften over time, and the rice will lose its ideal texture. Store any leftovers tightly wrapped in the refrigerator, but plan to eat them the same day.
What is the best way to store leftover sushi rolls?
Wrap individual rolls tightly in plastic wrap and store them in the refrigerator. Consume them within 24 hours for the best taste and texture. Avoid freezing sushi rolls, as it changes the texture of the rice and nori significantly.
Is it expensive to make sushi at home?
Not at all. A basic sushi setup costs very little. A bamboo mat, nori sheets, rice, and a few simple fillings are all affordable. Once you have the tools, making sushi at home is much cheaper than ordering takeout regularly.
Conclusion
The sushi rolling technique is a skill that anyone can learn with patience and practice. From preparing your sushi rice to choosing the right fillings and mastering the rolling motion, every step matters. Start with the basic maki roll and gradually explore more advanced styles like uramaki and temaki.
Remember to use quality tools, keep your workspace clean, and apply even pressure throughout the rolling process. The more you practice, the more confident you will become. Soon, you will be making beautiful, restaurant-quality homemade sushi that impresses everyone at the table.
Grab your bamboo mat, gather your favorite fillings, and start rolling today. Your journey to mastering the sushi rolling technique begins with your very first roll.



