
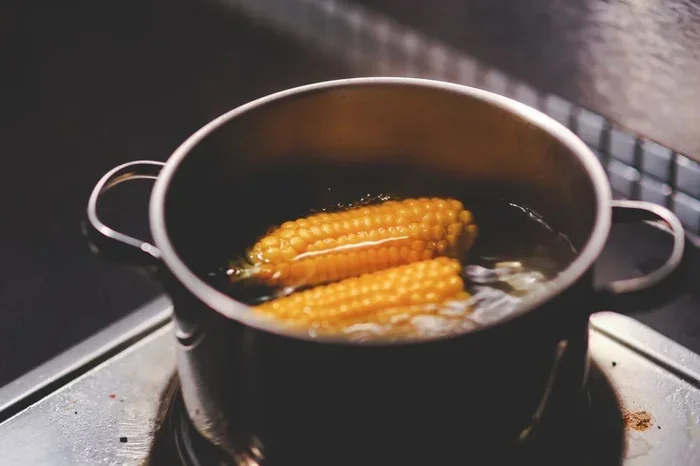
Cooking corn on the cob on the stove is one of the simplest ways to enjoy fresh, sweet corn at home. This guide walks you through every step, from choosing the right ears to perfecting your boil time. You will learn proven techniques, common mistakes to avoid, and expert tips that elevate your stovetop corn game.
There is something special about cooking corn on the cob on the stove. Whether you picked it up from a farmers market or grabbed it from the grocery store, stovetop corn is a classic comfort food that never gets old. The good news is that you do not need fancy equipment or years of experience to get it right.
In this guide, we will show you exactly how to cook corn on the cob on the stove like a pro. From picking the best ears at the store to nailing the perfect boiling time, we have got you covered. By the end, you will know all the tricks that make corn sweet, juicy, and full of flavor.
Key Takeaways
- Choose fresh, bright green husks: Fresh corn cooks better and tastes sweeter than older ears.
- Use a large pot with plenty of water: This ensures even cooking and prevents crowding.
- Boiling time matters: Most corn needs only 5 to 10 minutes for perfect tenderness.
- Salt the water generously: It seasons the corn from the inside out.
- Avoid overcooking: Overcooked corn becomes tough and loses its natural sweetness.
- Add butter and season after cooking: Fresh butter and a pinch of salt bring out the best flavor.
- Try the milk-boil method for extra sweetness: Boiling corn in milk creates a richer, creamier taste.
📑 Table of Contents
- Why Cook Corn on the Cob on the Stove?
- How to Pick the Best Corn for Stovetop Cooking
- How to Prepare Corn for the Stove
- The Best Pot and Water Setup for Stove Corn
- How to Cook Corn on the Cob on the Stove Step by Step
- Pro Tips for Perfect Stove-Top Corn
- Common Mistakes to Avoid When Boiling Corn
- How to Store and Reheat Cooked Corn
- Quick Comparison: Stovetop vs. Other Cooking Methods
- Final Thoughts on Cooking Corn on the Cob on the Stove
Why Cook Corn on the Cob on the Stove?
You might wonder why anyone would choose the stove over a grill or microwave. The answer is simple. Stovetop cooking gives you more control over the process. You can watch the corn, adjust the heat, and get consistent results every single time.
Grilling corn is great, but it requires a grill and good weather. The microwave works in a pinch, but it does not give you that same tender, evenly cooked texture. The stove, on the other hand, lets you boil corn gently in a pot of water, which keeps the kernels plump and juicy.
Another big reason is convenience. If you already have a stove and a pot, you are halfway there. No special tools needed. Just a few simple ingredients and about 15 minutes of your time.
How to Pick the Best Corn for Stovetop Cooking
Look for Bright Green Husks
The first step to great corn starts before you even turn on the stove. When you are shopping for corn, look for ears with bright green, snug husks. The husks should feel moist and fresh, not dry or papery.
Gently squeeze the ear through the husk. You should feel plump kernels underneath. If the ear feels thin or uneven, it may not be as fresh. The silk at the top should be light brown and slightly sticky, not completely dry or black.
Fresh corn cooks better and tastes sweeter than corn that has been sitting on the shelf for days. If you can buy corn from a local farm or market, do it. The difference in flavor is huge.
Sweet Corn vs. Field Corn
Not all corn is created equal. Sweet corn is what you want for cooking on the stove. It has higher sugar content and a tender texture that cooks beautifully. Field corn, the kind used for animal feed and cornmeal, is much starchier and tougher.
When you buy corn, check the label or ask the seller. Most grocery stores carry sweet corn varieties like Silver Queen, Peaches and Cream, or Country Gentleman. Any of these will work wonderfully for stovetop cooking.
How to Prepare Corn for the Stove
Shucking the Corn
Before you cook corn on the cob on the stove, you need to shuck it. Shucking means removing the outer husks and the silk threads. Pull the husks down from the top of the ear and peel them away. Then gently pull off any remaining silk.
Some people like to leave a few inner husk layers on. This can add a subtle smoky flavor and help hold the kernels together during cooking. But for a clean, classic boil, removing all the husks is the way to go.
Rinse and Clean
Once the corn is shucked, rinse it under cold water. This washes away any remaining silk or debris. Pat the ears dry with a clean towel. You are now ready to drop them into a pot.
If you notice any damaged or bruised kernels, you can snap those sections off. They tend to cook unevenly and can affect the overall texture of your dish.
The Best Pot and Water Setup for Stove Corn
Choosing the Right Pot
Not just any pot will do. You want a large, tall pot that can hold the corn upright or laid flat without crowding. A stockpot or Dutch oven works perfectly. The corn should have room to move freely in the water so it cooks evenly.
If you are cooking four or more ears at once, go bigger. Crowded corn steams instead of boiling, which leads to uneven cooking and mushy spots. Give each ear plenty of space.
How Much Water to Use
A good rule of thumb is to use enough water to fully cover the corn by at least two inches. You want the corn completely submerged so every kernel gets the same amount of heat.
Too little water means the corn will stick out above the surface and cook unevenly. Too much water is fine, but it will take longer to come to a boil. Find the sweet spot where the water covers the corn with a comfortable margin.
How to Cook Corn on the Cob on the Stove Step by Step
Step 1: Bring the Water to a Rolling Boil
Fill your pot with enough water to cover the corn. Place it on the stove over high heat and let it come to a full, rolling boil. Adding a generous pinch of salt to the water is optional, but it does wonders for flavor. The salt seeps into the kernels as they cook and enhances the natural sweetness.
Some cooks like to add a tablespoon of sugar to the water. This is an old trick that helps bring out the sweetness of the corn. It is not necessary, but it is worth trying if you want extra-sweet results.
Step 2: Add the Corn
Once the water is boiling vigorously, carefully lower the corn into the pot. Use tongs or a slotted spoon to avoid splashing. Do not drop the corn in from a height, as this can cause the water to boil over.
If you are cooking multiple ears, add them one at a time. This keeps the water temperature from dropping too much. The goal is to maintain a strong, steady boil throughout the cooking process.
Step 3: Cook for the Right Amount of Time
Here is where timing really matters. Fresh corn on the stove typically needs about 5 to 10 minutes to cook through. The exact time depends on how fresh the corn is and how tender you like it.
For very fresh corn, 5 to 7 minutes is usually perfect. Older corn or corn that has been stored in the fridge for a few days may need closer to 10 minutes. Start checking at the 5-minute mark by piercing a kernel with a fork. It should be tender but still have a slight snap.
Overcooking is the number one mistake people make. Boiled corn that sits too long in the water becomes tough, chewy, and loses its natural sweetness. Set a timer and keep an eye on it.
Step 4: Remove and Serve
Once the corn is done, use tongs to pull the ears out of the pot. Let the excess water drip off for a moment, then transfer the corn to a serving platter or cutting board.
Now comes the fun part. Slather each ear with butter. Add a pinch of salt and pepper. Some people like to sprinkle on chili powder, garlic powder, or a squeeze of lime juice. Get creative and make it your own.
If you are cooking for a crowd, keep the cooked corn warm by wrapping it in foil. This holds in the heat and keeps the butter from solidifying too quickly.
Pro Tips for Perfect Stove-Top Corn
Try the Milk-Boil Method
For an extra-rich, creamy flavor, try boiling corn in milk instead of water. The milk adds a subtle sweetness and a velvety texture to the kernels. Use whole milk for the best results, and combine it with an equal part of water so the milk does not scorch.
This method is a favorite among Southern cooks and is especially delicious when served at summer barbecues or holiday dinners. It takes the same amount of time as a water boil, so there is no extra effort required.
Do Not Peel Back the Husks Before Cooking
Some people prefer to cook corn with the husks still on. This method steams the corn inside the husk, keeping it incredibly moist and tender. To do this, soak the unshucked corn in cold water for 15 to 20 minutes before cooking. Then place the whole ears directly into the boiling water and cook for about 10 to 15 minutes.
When done, peel back the husks and enjoy. The corn comes out with a slightly smoky, earthy flavor that is hard to beat. This method also works well if you want to grill corn on the stove using a similar steaming approach.
Add Butter to the Boiling Water
Another pro trick is to add a few tablespoons of butter directly to the boiling water. As the corn cooks, the butter coats the kernels from the outside, giving them a rich, buttery flavor even before you add more butter at the table.
This technique works especially well if you are cooking corn without shucking it first. The butter melds into the husk and gently seasons the corn as it boils.
Season After Cooking for the Best Flavor
While salting the boiling water is helpful, the real flavor boost comes from seasoning after cooking. Fresh butter, a squeeze of lemon juice, a sprinkle of smoked paprika, or a dusting of parmesan cheese all work beautifully on hot, just-cooked corn.
The key is to season while the corn is still hot. The heat helps the flavors melt right into the kernels. Cold corn absorbs seasonings much less effectively, so serve it immediately.
Common Mistakes to Avoid When Boiling Corn
Overcrowding the Pot
One of the most common mistakes is cramming too many ears into a small pot. When the corn is crowded, it does not cook evenly. Some kernels end up mushy while others stay firm. Give each ear room to move around freely in the water.
Using Too Little Water
If the water level drops too low during cooking, the corn will steam instead of boil. This leads to uneven results and can leave some kernels undercooked. Always start with enough water and check the level if you are cooking for a long time.
Not Salting the Water Enough
Plain water makes bland corn. Be generous with the salt. A well-salted boiling water acts as a seasoning agent that penetrates the kernels as they cook. Think of it like pasta water, which should also taste pleasantly salty.
Letting Corn Sit Too Long After Cooking
Corn is best served immediately after cooking. It does not hold up well when left sitting in hot water for extended periods. If you need to keep it warm, remove it from the pot and wrap it in foil. Do not leave it submerged in the boiling water.
How to Store and Reheat Cooked Corn
If you have leftovers, store them properly to maintain the best texture. Let the corn cool to room temperature, then place it in an airtight container or zip-lock bag. Refrigerate within two hours of cooking. Cooked corn keeps well in the fridge for up to three days.
To reheat, steam the corn for 2 to 3 minutes or warm it in a pan with a little butter and water. Avoid microwaving if possible, as it can make the kernels rubbery. A gentle reheat on the stove preserves the tender texture and fresh flavor.
You can also freeze cooked corn for longer storage. Wrap individual ears tightly in plastic wrap and foil, then place them in a freezer bag. Frozen corn lasts up to six months. Thaw it overnight in the fridge before reheating.
Quick Comparison: Stovetop vs. Other Cooking Methods
| Method | Time | Ease | Flavor | Best For |
|---|---|---|---|---|
| Stovetop Boil | 5-10 min | Very Easy | Sweet, tender | Everyday meals |
| Grill | 15-20 min | Moderate | Smoky, charred | Summer cookouts |
| Microwave | 3-5 min | Easiest | Steamed, soft | Quick weeknight meals |
| Oven Roast | 25-30 min | Easy | Roasted, caramelized | Large batches |
As you can see, the stovetop method strikes a great balance between simplicity and flavor. It is faster than grilling, more flavorful than the microwave, and easier than oven roasting. For most home cooks, boiling corn on the stove is the go-to method for a reason.
Final Thoughts on Cooking Corn on the Cob on the Stove
Cooking corn on the cob on the stove is one of the most rewarding kitchen skills you can learn. It is fast, simple, and produces results that rival any restaurant or backyard barbecue. With the right pot, the right timing, and a little attention, you can serve perfectly cooked corn that everyone will love.
Remember to start with fresh corn, use plenty of salted water, and keep a close eye on the clock. Avoid the common pitfalls like overcooking and overcrowding, and you will be well on your way to stovetop corn perfection. Whether you are cooking for a family dinner or a casual weeknight meal, this method never disappoints.
So the next time you bring home a dozen fresh ears of corn, skip the grill and the microwave. Let your stove do the work. You will be amazed at how simple and delicious the results can be.
Now that you know the secrets to perfect stovetop corn, it is time to get cooking. Grab a pot, fill it with water, and bring those ears to a boil. Your kitchen is about to smell incredible, and your taste buds are in for a treat.
Frequently Asked Questions
How long does it take to cook corn on the cob on the stove?
Fresh corn typically takes 5 to 10 minutes to cook on the stove. Very fresh corn needs only 5 to 7 minutes, while older corn may need closer to 10 minutes. Start checking for tenderness at the 5-minute mark by piercing a kernel with a fork.
Do I need to shuck corn before boiling it on the stove?
Yes, for the standard boiling method, you should shuck the corn by removing the outer husks and silk. However, you can also cook corn with the husks on if you prefer a steamed, smoky flavor. Just soak the unshucked corn in water for 15 to 20 minutes first.
Can I boil corn in milk instead of water?
Absolutely. Boiling corn in milk gives it a richer, creamier flavor. Use whole milk mixed with an equal amount of water to prevent scorching. The cooking time remains the same at 5 to 10 minutes.
Why is my boiled corn tough and chewy?
Tough corn is usually a sign of overcooking. Corn should only boil for 5 to 10 minutes. If you cook it too long, the kernels lose their moisture and become hard and chewy. Always set a timer and check for doneness early.
Can I add butter to the boiling water?
Yes, adding a few tablespoons of butter to the boiling water is a great pro tip. The butter coats the kernels as they cook, adding a rich, buttery flavor from the outside in. This works especially well if you are cooking corn with the husks on.
What is the best way to reheat leftover boiled corn?
The best way to reheat leftover corn is to steam it on the stove for 2 to 3 minutes. You can also warm it in a pan with a little butter and water. Avoid microwaving, as it can make the kernels rubbery and dry out the corn.
=== CONCLUSION ===
Now you know everything you need to cook corn on the cob on the stove like a true pro. From selecting the freshest ears at the store to nailing the perfect boil time, these tips will transform your stovetop corn from ordinary to outstanding.
Remember that fresh ingredients, proper timing, and generous seasoning are the three pillars of great stove-cooked corn. Keep it simple, stay attentive, and do not be afraid to experiment with different flavors and methods.
The next time you have fresh corn in hand, head straight to your stove. With the techniques you have learned here, you will serve up corn that is juicy, sweet, and perfectly tender every single time. Happy cooking!



