Making hard boiled eggs on an induction cooktop is quick, easy, and gives you perfectly cooked eggs every time. This guide covers everything from choosing the right pot to nailing the exact boiling time. You will learn simple tricks for easy peeling and great results.
There is something deeply satisfying about a perfect hard boiled egg. The whites are firm, the yolk is creamy, and they are ready to eat in minutes. If you own an induction cooktop, you already know how fast and efficient it heats your cookware. But cooking eggs on this type of surface does come with a few small tricks.
Whether you meal prep for the week or want a quick protein-packed snack, hard boiled eggs on induction are a game changer. This guide walks you through every step in simple, easy-to-follow detail. You will learn the best pot to use, the exact timing, and how to get that smooth peel every single time.
By the end of this article, you will feel confident making perfect eggs on your induction cooktop. No more guessing, no more rubbery whites or green yolks. Just great eggs, ready when you are.
Key Takeaways
- Induction cooktops heat fast and evenly: This means your water boils quicker, so you need to watch your timing closely.
- Use a stainless steel or non-stick pot: The right cookware makes a big difference in cooking results and easy cleaning.
- Start with room temperature eggs: This helps prevent cracking when you place them in hot water.
- An ice bath is essential: It stops the cooking process and makes peeling much easier.
- 10 to 12 minutes is the sweet spot: This timing gives you a firm yolk without a green ring.
- Peel under running water: This simple trick removes the shell smoothly every time.
📑 Table of Contents
- Why Use an Induction Cooktop for Hard Boiled Eggs
- What You Need to Make Hard Boiled Eggs on Induction
- Step-by-Step Guide to Boiling Eggs on Induction
- Common Mistakes to Avoid When Boiling Eggs on Induction
- Pro Tips for Perfect Hard Boiled Eggs Every Time
- How to Store and Serve Hard Boiled Eggs
- Final Thoughts on Making Hard Boiled Eggs on Induction
Why Use an Induction Cooktop for Hard Boiled Eggs
Induction cooktops work differently from gas or electric stoves. They use a magnetic field to heat the cookware directly. This means the heat responds almost instantly. You get precise temperature control, which matters a lot when boiling eggs.
Here is why induction is a great choice for this task:
- Fast heating: Water reaches a boil in less time than on a traditional burner.
- Even heat distribution: Your pot heats uniformly, so no hot spots ruin your eggs.
- Cool surface: The cooktop itself stays cool, which makes cleanup safer and easier.
- Energy efficient: Less heat escapes, so you save energy and time.
If you are new to induction cooking, check out our guide on the best non-stick cookware for induction cooktop to find the right pot for your kitchen.
What You Need to Make Hard Boiled Eggs on Induction
Getting started is simple. You do not need fancy tools or special equipment. Here is what you will want to have ready before you begin.
The Right Pot
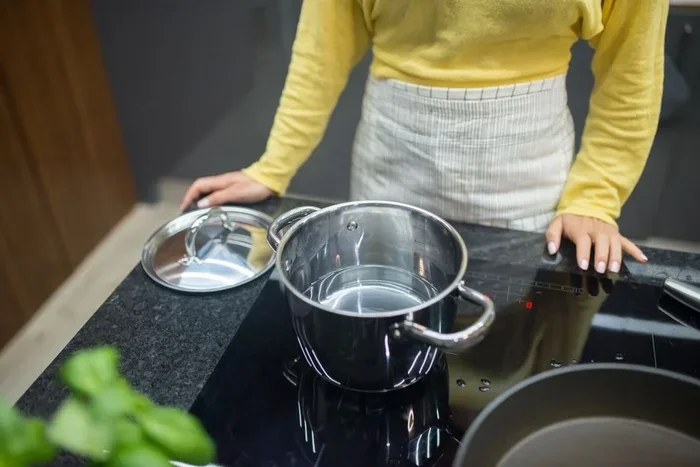
Choose a pot that is deep enough to fully cover the eggs with water. A stainless steel pot works great on induction. A heavy-bottomed pot distributes heat evenly and prevents the eggs from bouncing around. Avoid thin pots, as they can cause uneven cooking.
If you prefer a non-stick option, look at the best pots and pans set for induction cooktop. These sets are designed to work safely and efficiently on your cooktop.
Fresh Eggs vs. Older Eggs
You might have heard that older eggs peel easier. This is true. Fresh eggs have a lower pH, which causes the membrane to stick to the shell. Eggs that are 7 to 10 days old peel much more smoothly. If you only have fresh eggs, do not worry. The tips in this guide will still help you get a clean peel.
Other Essentials
- A slotted spoon or spider strainer for lifting eggs out
- A bowl for the ice bath
- Cold water and ice cubes
- A timer or phone timer
- A small bowl or cup for easy egg transfer
Step-by-Step Guide to Boiling Eggs on Induction
Now for the part you have been waiting for. Follow these steps carefully and you will have perfect hard boiled eggs every time.
Step 1: Place Eggs in the Pot
Gently place your eggs in the pot in a single layer. Do not stack them. Overcrowding can cause the eggs to bump into each other and crack. Use a pot that gives each egg enough room to sit comfortably.
Step 2: Fill with Cold Water
Add cold water until the eggs are covered by about one inch. Starting with cold water is important. It lets the eggs heat up gradually, which reduces cracking. If you drop room temperature or cold eggs into already boiling water, the sudden temperature change can cause them to split.
Step 3: Bring Water to a Boil on Induction
Place the pot on your induction cooktop and turn the heat to high. Because induction heats so efficiently, the water will boil faster than you might expect. Watch the pot closely. Once you see a full rolling boil, it is time to move to the next step.
Step 4: Cover and Set the Timer
Once the water reaches a full boil, reduce the heat to medium. Cover the pot with a lid. Set your timer for 10 to 12 minutes. Here is a quick breakdown:
- 10 minutes: A slightly softer yolk, great for dipping
- 11 minutes: A creamy, fully set yolk
- 12 minutes: A firm yolk, perfect for slicing or salads
If you like your yolks a little less firm, start with 10 minutes. If you prefer them fully set, go with 12.
Step 5: Transfer to an Ice Bath
This step is just as important as the boiling itself. As soon as the timer goes off, use a slotted spoon to move the eggs into a bowl of ice water. Let them sit for at least 5 minutes. The ice bath does two things. It stops the cooking immediately, and it helps the shell separate from the egg white. This makes peeling a breeze.
For more tips on cooking eggs without mess, check out our article on the best pan to cook eggs without sticking.
Step 6: Peel and Enjoy
Gently tap the egg on a hard surface to crack the shell all over. Roll it between your hands to loosen the membrane. Start peeling from the wide end, where there is usually an air pocket. Peeling under a thin stream of running water helps remove any remaining shell bits cleanly.
Common Mistakes to Avoid When Boiling Eggs on Induction
Even with a simple task like boiling eggs, small mistakes can lead to disappointing results. Here are the most common ones and how to avoid them.
Using Boiling Water From the Start
Some people skip the cold water step and drop eggs directly into boiling water. This causes a sudden temperature shock, which leads to cracked shells. Always start with cold water and bring it up to a boil together with the eggs.
Overcooking the Eggs
Induction cooktops heat water faster than other methods. This means your water reaches a boil quicker, but it also means you need to be more careful with timing. Set a timer and do not walk away. Overcooked eggs develop a green ring around the yolk, which looks unappetizing and tastes slightly sulfuric.
Skipping the Ice Bath
If you skip the ice bath, the eggs keep cooking from residual heat. This leads to overcooked yolks and makes them much harder to peel. Always transfer your eggs to ice water right after boiling.
Using the Wrong Pot
A lightweight or thin pot can cause the eggs to bounce and knock against each other. This increases the chance of cracks. Use a heavy-bottomed pot that keeps the eggs stable during the boiling process.
Pro Tips for Perfect Hard Boiled Eggs Every Time
Once you have the basics down, these extra tips will take your results to the next level.
- Add a teaspoon of baking soda to the water. This raises the pH and helps the shell peel off more easily.
- Use a steamer basket instead of submerging eggs in water. Steaming is a gentle method that produces very clean results.
- Label your eggs if you are meal prepping. A simple marker on the shell helps you keep track of which eggs are older.
- Store peeled eggs in water in an airtight container. This keeps them fresh for up to five days in the refrigerator.
- Try the spin test. A hard boiled egg spins smoothly, while a raw egg wobbles. This is a handy trick to check your results.
For those who love eggs prepared in different ways, you might also enjoy our article on the best 8-inch frying pan for eggs for stovetop egg cooking.
How to Store and Serve Hard Boiled Eggs
Hard boiled eggs are incredibly versatile. You can eat them on their own, slice them onto toast, or chop them into a salad. They also make a great protein boost for lunchboxes and snacks.
Store unpeeled eggs in the refrigerator for up to one week. Keep them in their shells until you are ready to eat them. This preserves freshness and prevents the eggs from absorbing odors from other foods in your fridge.
Once peeled, eat the eggs within two days for the best taste and texture. If you have a lot of leftovers, consider slicing them and storing them in a container with a damp paper towel. This keeps them from drying out.
Here are some fun and easy serving ideas:
- Slice and add to a green salad with a simple vinaigrette
- Halve and sprinkle with salt, pepper, and a dash of hot sauce
- Chop and mix into a classic egg salad sandwich
- Slice and place on avocado toast for a protein-packed breakfast
- Halve and fill with a mixture of yolk, mayo, and mustard for deviled eggs
Final Thoughts on Making Hard Boiled Eggs on Induction
Making hard boiled eggs on an induction cooktop is one of the easiest and most rewarding kitchen skills you can learn. The process is fast, the results are consistent, and the eggs turn out perfectly every time. With the right pot, the right timing, and a simple ice bath, you will have delicious eggs ready in under 20 minutes.
The beauty of induction cooking is the speed and control it gives you. Once you nail the timing, you will never go back to guessing. Whether you are a beginner or a seasoned cook, these steps work every time. Start with cold water, set a timer, and trust the process.
Now that you know exactly how to make perfect hard boiled eggs on your induction cooktop, it is time to put it into practice. Grab a few eggs, pick up your favorite pot, and give it a try. You will be amazed at how simple and satisfying it can be.
Frequently Asked Questions
Can I boil eggs on any induction cooktop?
Yes, you can boil eggs on any induction cooktop as long as you use a compatible pot. Induction requires magnetic cookware, so look for pots labeled induction-safe. Stainless steel and cast iron pots work perfectly for this task.
How long should I boil eggs on an induction cooktop?
Boil eggs for 10 to 12 minutes after the water reaches a full rolling boil. Ten minutes gives a slightly softer yolk, while 12 minutes produces a fully firm yolk. Induction heats water quickly, so keep a close eye on your timer.
Why do my hard boiled eggs have a green ring around the yolk?
The green ring forms when eggs are overcooked or left in hot water too long. The iron in the yolk reacts with the sulfur in the white. To avoid this, use a timer and transfer eggs to an ice bath immediately after boiling.
Do I need to use cold water when boiling eggs on induction?
Yes, always start with cold water. This allows the eggs to heat gradually, which prevents cracking. Cold water also ensures the eggs cook more evenly from the outside in.
Can I steam eggs instead of boiling them on my induction cooktop?
Absolutely. Steaming is an excellent alternative that produces very easy-to-peel eggs. Place a steamer basket in your pot, add about an inch of water, and steam the eggs for 12 to 14 minutes. Then transfer them to an ice bath right away.
How long do hard boiled eggs last in the refrigerator?
Unpeeled hard boiled eggs keep for up to one week in the refrigerator. Once peeled, they should be eaten within two days. Store them in an airtight container to maintain freshness and prevent them from absorbing fridge odors.
=== CONCLUSION ===
Making hard boiled eggs on an induction cooktop is simple, fast, and incredibly rewarding. With the right pot, proper timing, and a quick ice bath, you get perfectly cooked eggs every single time. Follow the steps in this guide and you will never have to worry about cracked shells, green yolks, or tough peeling again.
Start experimenting today. Try different timings to find your perfect yolk texture. Share your results with friends and family. Once you master this basic technique, you will wonder how you ever cooked eggs any other way. Happy cooking!