
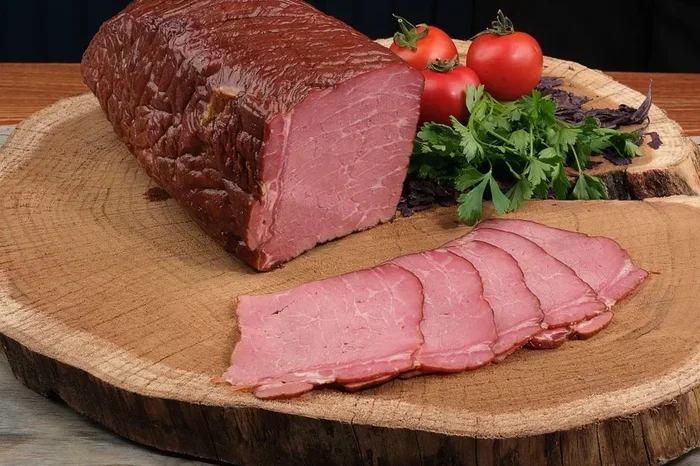
A beef tenderloin roast time chart helps you cook the perfect roast with confidence. Knowing the right time and temperature ensures juicy, tender results every single time. Whether you prefer rare, medium, or well-done, this guide covers everything you need. We break down roast times by weight, oven temperature, and desired doneness. You will also find pro tips, common mistakes, and answers to frequently asked questions.
A perfectly cooked beef tenderloin roast time chart is every home cook’s best friend. Whether you are hosting a dinner party or preparing a special meal for your family, timing is everything. The beef tenderloin is one of the most tender cuts of beef you can buy. But it can also be tricky to cook just right. Too much time in the oven and it dries out. Too little and it might not be safe to eat. That is exactly why a reliable time chart makes all the difference.
In this guide, we walk you through everything you need to know about roasting beef tenderloin. You will learn how long to cook it per pound, what temperatures to aim for, and how to get restaurant-quality results at home. We also share tips on seasoning, resting, and avoiding the most common mistakes. By the end, you will feel confident enough to roast a beef tenderloin like a pro. Let us get started.
Key Takeaways
- Roast time depends on weight and temperature: A 3-5 pound tenderloin takes roughly 25-45 minutes at different heat levels.
- Internal temperature is the real guide: Use a meat thermometer for perfect doneness every time.
- Resting the roast matters just as much as cooking it: Always let it rest for at least 10-15 minutes before slicing.
- Searing first locks in moisture: A quick sear before roasting creates a flavorful crust.
- Storage and leftovers are easy: Properly stored beef tenderloin stays fresh for up to 4 days in the fridge.
- Avoid common mistakes like overcooking: Pull the roast early and let carryover cooking finish the job.
📑 Table of Contents
- Why You Need a Beef Tenderloin Roast Time Chart
- Beef Tenderloin Roast Time Chart by Temperature
- Internal Temperature Guide for Beef Tenderloin
- Step-by-Step Guide to Roasting Beef Tenderloin
- Common Mistakes to Avoid When Roasting Beef Tenderloin
- Expert Tips for the Perfect Beef Tenderloin Roast
- How to Know When Your Roast Is Done
- Storing and Reheating Leftover Beef Tenderloin
- Conclusion
Why You Need a Beef Tenderloin Roast Time Chart
Cooking beef tenderloin without a plan is like driving without a map. You might eventually get there, but you could end up somewhere you did not mean to be. A beef tenderloin roast time chart gives you a clear roadmap. It tells you exactly how long to cook your roast based on its weight and the oven temperature you are using.
The tenderloin is a lean cut. This means it has very little fat compared to other roasts like chuck or brisket. Because of that, it cooks faster and can go from perfect to overcooked in just a few minutes. A chart removes the guesswork. You simply look up your roast weight, pick your target doneness, and follow the time and temperature guide.
Using a chart also helps you plan your meal better. You will know exactly when to pull the roast out of the oven. This gives you time to rest the meat, prepare sides, and serve everything hot. It is a simple tool that takes the stress out of cooking a premium cut of beef.
How Roast Time Varies by Weight
The weight of your beef tenderloin is the biggest factor in determining cook time. A smaller roast cooks much faster than a larger one. Here is a general idea of how weight affects timing:
- 1-2 pounds: Cooks in about 20-30 minutes at 425°F.
- 3-4 pounds: Takes roughly 35-45 minutes at 425°F.
- 5-7 pounds: Expect 50-65 minutes at 425°F.
- 8+ pounds: May need 70-90 minutes at 425°F.
These times are based on a starting oven temperature of 425°F. If you use a lower temperature like 325°F, the cook time will be longer. We will cover different temperature settings in the next section.
Beef Tenderloin Roast Time Chart by Temperature
Different recipes call for different oven temperatures. The temperature you choose affects both the cook time and the texture of the final product. Here is a breakdown of the most common approaches.
High Heat Method (425°F – 450°F)
The high heat method is the most popular way to roast beef tenderloin. It creates a beautiful brown crust on the outside while keeping the inside juicy. This method works well for roasts under 5 pounds.
At 425°F, a 3-pound tenderloin typically takes about 35-40 minutes for medium-rare. The high heat sears the surface quickly, locking in moisture. This is the method most chefs recommend for a show-stopping roast.
If you prefer a more well-done roast, simply add a few extra minutes. Just be careful not to go too long. Lean cuts like tenderloin dry out faster than fattier cuts. Always use a meat thermometer to check the internal temperature.
Low and Slow Method (325°F)
The low and slow method uses a lower oven temperature for a longer cook time. This approach is great for larger roasts or if you want more control over the cooking process.
At 325°F, a 4-pound tenderloin might take 60-75 minutes. The slower cooking allows the heat to penetrate more evenly. This can result in a more uniform doneness from edge to center.
The downside is that you get less of a crust on the outside. To compensate, many cooks sear the tenderloin first on the stovetop before transferring it to the oven. This gives you the best of both worlds.
Reverse Sear Method (275°F then high heat)
The reverse sear method is a favorite among grilling and roasting enthusiasts. You start the roast at a low temperature (around 275°F) and finish it with a blast of high heat.
This method gives you incredible control over the internal temperature. It also produces a gorgeous crust. For a 4-pound tenderloin, you might roast at 275°F for about 45-55 minutes, then finish at 450°F for 8-10 minutes.
Internal Temperature Guide for Beef Tenderloin
Time and temperature work together, but the internal temperature is the ultimate guide. A good beef tenderloin roast time chart always pairs time recommendations with target temperatures. Here is what you need to know.
| Doneness | Internal Temperature | Description |
|---|---|---|
| Rare | 120-125°F | Very red and cool in the center |
| Medium Rare | 130-135°F | Warm red center, most popular choice |
| Medium | 140-145°F | Pink center with a hint of gray |
| Medium Well | 150-155°F | Slight pink, mostly gray |
| Well Done | 160°F+ | No pink, fully cooked through |
Remember that the temperature will rise 5-10 degrees after you pull the roast from the oven. This is called carryover cooking. So if you want a medium-rare roast at 135°F, pull it out at 125-130°F. This is one of the most important tips for perfect results.
Always insert the thermometer into the thickest part of the roast. Avoid touching the bone or the pan, as these can give false readings. A digital instant-read thermometer is your best friend in the kitchen.
Step-by-Step Guide to Roasting Beef Tenderloin
Now that you understand the timing and temperature basics, let us walk through the actual cooking process. Following these steps will help you achieve consistent, delicious results every time.
Step 1: Prep the Tenderloin
Start by removing the beef tenderloin from the refrigerator 30-45 minutes before cooking. Letting it come to room temperature helps it cook more evenly. Pat it dry with paper towels. This helps create a better crust during searing.
Season the roast generously with salt and pepper. You can also add garlic powder, rosemary, thyme, or any herbs you enjoy. Some cooks like to add a light coating of olive oil or mustard as a flavor base.
Step 2: Sear the Roast
Preheat your oven to the desired temperature. While it heats up, heat a cast iron skillet or oven-safe pan over medium-high heat. Add a small amount of oil and sear the tenderloin on all sides until browned.
Searing usually takes about 2-3 minutes per side. This step is optional but highly recommended. It adds flavor and color to the outside of the roast. For the best results, use techniques that build a good sear on the surface of the meat.
Step 3: Roast in the Oven
Transfer the seared tenderloin to a roasting pan or baking sheet. Place it in the preheated oven and cook according to your time chart. Use the weight-based and temperature guidelines we shared above.
Start checking the internal temperature about 10 minutes before the estimated end time. This prevents overcooking and gives you a buffer. Every oven is slightly different, so these numbers are a starting point.
Step 4: Rest the Roast
Once the roast hits your target temperature, pull it out of the oven. Transfer it to a cutting board and tent it loosely with aluminum foil. Let it rest for at least 10-15 minutes.
Resting allows the juices to redistribute throughout the meat. If you cut into it right away, the juices will run out and the roast will be drier. This resting step is just as important as the cooking step itself.
Step 5: Slice and Serve
Use a sharp knife to slice the tenderloin against the grain. Cut slices about 1/2 inch thick for the best texture. Serve immediately with your favorite sides like roasted vegetables, mashed potatoes, or a fresh salad.
If you have leftovers, store them properly. You can learn more about how to store beef safely to keep your roast fresh for days.
Common Mistakes to Avoid When Roasting Beef Tenderloin
Even experienced cooks can make mistakes when roasting beef tenderloin. Here are the most common ones and how to avoid them.
Skipping the Thermometer
Relying on time alone is a recipe for disaster. Ovens vary, roasts vary in shape, and starting temperatures vary. A meat thermometer is the only reliable way to know when your roast is done. Do not skip this tool.
Overcooking the Roast
Beef tenderloin is lean and does not have much fat to protect it from drying out. Overcooking by even 5-10 minutes can turn a juicy roast into something tough and dry. Pull the roast out a few degrees early and let carryover cooking do the rest.
Not Letting the Meat Rest
Cutting into a roast immediately after it comes out of the oven wastes all those flavorful juices. Give it time to rest. Your patience will be rewarded with a much more succulent result.
Cooking Straight from the Fridge
A cold roast going into a hot oven cooks unevenly. The outside can overcook while the center is still too cold. Always let the meat temper at room temperature for about 30 minutes before roasting.
Neglecting the Sear
While searing is not mandatory, skipping it means missing out on a layer of deep, savory flavor. A good sear adds complexity and visual appeal to the final dish. If you are short on time, you can still get great results without it. But when you have the time, sear away.
If you ever end up with a tough roast, do not worry. You can learn from techniques to fix tough beef that apply to many cuts, including tenderloin.
Expert Tips for the Perfect Beef Tenderloin Roast
Here are some extra tips from experienced cooks and chefs that will elevate your roast game.
- Buy a whole tenderloin: Buying the whole piece and trimming it yourself gives you better control over size and shape.
- Tie the roast evenly: Use kitchen twine to create a uniform shape. This helps it cook at the same rate all the way through.
- Add aromatics to the pan: Toss in some onion quarters, garlic cloves, and fresh herbs into the roasting pan. They will infuse the kitchen with amazing aromas.
- Use a wire rack: Placing the roast on a wire rack over a baking sheet allows hot air to circulate evenly around the meat.
- Let it finish in the pan: After searing, many chefs finish the roast in the same pan. The fond (browned bits) on the bottom adds incredible flavor if you make a pan sauce later.
For more beef roast inspiration, check out this collection of juicy and tender beef roast recipes that use different cooking methods.
How to Know When Your Roast Is Done
The best way to know if your beef tenderloin is done is by checking the internal temperature with a meat thermometer. But there are a few other signs to look for as well.
A properly cooked tenderloin will feel firm but still have some give when you press it with your finger. If it feels very soft, it needs more time. If it feels rock hard, it is likely overdone.
Color is another indicator. A medium-rare roast will have a deep pink center. A medium roast will be pink with a slightly gray outer layer. Well-done roasts will be gray-brown throughout. However, color alone is not a reliable guide. Always use a thermometer for accuracy.
The juices can also tell you something. When you poke or cut the roast, medium-rare will release pink juices. Well-done will release clear juices. Keep this in mind as a secondary check.
Storing and Reheating Leftover Beef Tenderloin
Leftover beef tenderloin is a delicious treat the next day. But proper storage is key to keeping it safe and tasty.
Let the roast cool to room temperature within two hours of cooking. Wrap it tightly in plastic wrap or aluminum foil, or place it in an airtight container. Store it in the refrigerator for up to 4 days.
To reheat, use a low oven temperature (around 275°F) or a microwave on medium power. The goal is to warm it gently without drying it out. You can also slice the leftover tenderloin and use it in sandwiches, salads, or stir-fries for a quick and delicious meal.
For more ideas on using leftover beef, explore our guide on creative ways to use leftover beef in new and exciting dishes.
Conclusion
A beef tenderloin roast time chart is an essential tool for anyone who loves cooking beef at home. It takes the guesswork out of roasting and helps you achieve perfect results every single time. From choosing the right temperature to knowing when to pull the roast out, the chart gives you a clear and simple framework to follow.
Remember to use a meat thermometer, let your roast rest, and avoid the common mistakes we covered. With a little practice and the right information, you can roast a beef tenderloin that rivals any steakhouse. Your family and guests will be impressed, and you will feel proud of what you accomplished in your own kitchen.
So the next time you are planning a special meal, pull out your beef tenderloin roast time chart. Follow the steps, trust the process, and enjoy the delicious results. Happy cooking!
Frequently Asked Questions
How long does it take to cook a beef tenderloin at 350°F?
At 350°F, a 3-4 pound beef tenderloin typically takes about 45-55 minutes. The lower temperature means a longer cook time compared to the high-heat method. Always use a meat thermometer to check for your desired doneness. Remember that the internal temperature will continue to rise after you pull the roast out.
What is the best temperature for beef tenderloin?
The best temperature depends on your preference. Most people prefer 425°F for a good balance of crust and juiciness. If you want more control, try 325°F for a slower, more even cook. The target internal temperature for medium-rare is 130-135°F after resting.
How long should a beef tenderloin rest before slicing?
A beef tenderloin should rest for at least 10-15 minutes before slicing. This allows the juices to redistribute and makes the roast much juicier. Tent it loosely with foil during resting to keep it warm without steaming the crust.
Can I cook beef tenderloin from frozen?
It is not recommended to cook beef tenderloin straight from frozen. It will cook unevenly and the outside may dry out before the center is fully thawed. Always thaw the roast in the refrigerator for 12-24 hours before cooking for the best results.
How do I know if my beef tenderloin is overcooked?
An overcooked tenderloin will be dry, gray-brown throughout, and firm to the touch. The juices will run clear, and the meat may appear shrunken. Using a meat thermometer and pulling the roast a few degrees early helps prevent this.
What size beef tenderloin should I buy for a family dinner?
Plan on about 1/2 pound of raw tenderloin per person. For a family of 6, a 3-4 pound tenderloin is ideal. Keep in mind that the roast will lose about 15-20% of its weight during cooking due to moisture loss.



