Start by selecting the right tool—an abrasive saw or a reciprocating saw with a carbide‑tipped blade—since HardieBacker is tough fiberglass. Use a straight edge and a sharp blade, cutting slowly to avoid chipping, and always wear safety gear.
Key Takeaways
- Measure twice, cut once: Accurate measurements prevent waste and ensure a clean fit.
- Use a carbide‑tipped scoring blade: Scores the board efficiently for straight, precise cuts.
- Apply steady pressure when scoring: Consistent force creates a clean line without chipping.
- Snap the board along the scored line: Quick, tool‑free method for straight breaks.
- Finish edges with a rasp or sandpaper: Smooths rough spots for a professional appearance.
- Wear safety gear: goggles and a dust mask protect against silica dust and fragments.
📑 Table of Contents
- Introduction: Why Cutting Hardiebacker Board Can Feel Like a Puzzle
- 1. Understanding HardieBacker: What Makes It Different?
- 2. Essential Tools and Safety Gear for Cutting HardieBacker
- 3. Step‑by‑Step Guide: How Do I Cut HardieBacker Board?
- 4. Tips for Perfect Cuts and Minimizing Waste
- 5. Data Table: Tool Comparison for Cutting HardieBacker
- 6. Common Mistakes and How to Avoid Them
- Conclusion: Mastering the Art of Cutting HardieBacker
Introduction: Why Cutting Hardiebacker Board Can Feel Like a Puzzle
When you first open the box of HardieBacker board, the smooth, white surface looks inviting—almost like a blank canvas ready for a bathroom remodel or a tiled kitchen floor. But before you can lay down tile, you have to shape that board to fit around corners, pipes, and fixtures. How do I cut HardieBacker board? is a question that pops up for DIYers and pros alike, and the answer isn’t always as simple as grabbing a regular handsaw.
In my early days of home improvement, I tried to cut a sheet of HardieBacker with a cheap utility knife. The result? A ragged edge that shredded the board and left me with extra waste. After a few frustrating attempts, I learned that the right tools, the right technique, and a little patience make the process much smoother. In this post, I’ll walk you through everything you need to know about how do I cut HardieBacker board—from safety prep to finishing touches—so you can achieve clean, professional‑looking cuts every time.
1. Understanding HardieBacker: What Makes It Different?
What is HardieBacker?
HardieBacker is a cement‑based backer board made by James Hardie. Unlike drywall, it’s designed to withstand moisture, making it ideal for wet areas. Its composition of cement, sand, and cellulose fibers gives it strength and rigidity.
Visual guide about How Do I Cut Hardiebacker Board
Image source: luxuryhomestuff.com
Why Cutting It Is Unique
- Density: The board is heavier and denser than gypsum drywall, so a standard drywall saw can stall.
- Dust: Cutting creates fine silica dust, which is hazardous if inhaled.
- Edge Quality: A clean, straight edge is crucial for tile adhesion; any raggedness can cause lippage.
Choosing the Right Board Thickness
HardieBacker comes in ¼‑inch, ½‑inch, and ¾‑inch thicknesses. Thicker boards are sturdier but harder to cut. Knowing how do I cut HardieBacker board for each thickness helps you pick the best tool for the job.
2. Essential Tools and Safety Gear for Cutting HardieBacker
Tool Options
- Cement Board Saw: A handheld circular saw with a carbide‑tipped blade (often called a “diamond blade”) is the gold standard.
- Utility Knife: Works for straight cuts on ¼‑inch board when you score and snap.
- Jigsaw: Ideal for curves around plumbing; use a fine‑tooth blade.
- Score and Snap Kit: A straightedge and a sharp utility knife for quick, straight cuts.
Safety First
Whenever you ask yourself how do I cut HardieBacker board, remember that dust is the biggest hazard. Follow these steps:
Visual guide about How Do I Cut Hardiebacker Board
Image source: i.ytimg.com
- Wear a N95 respirator or a dust mask rated for silica.
- Use eye protection—safety glasses or goggles.
- Gloves protect your hands from the rough edges.
- Work in a well‑ventilated area or use a shop vac with a HEPA filter.
3. Step‑by‑Step Guide: How Do I Cut HardieBacker Board?
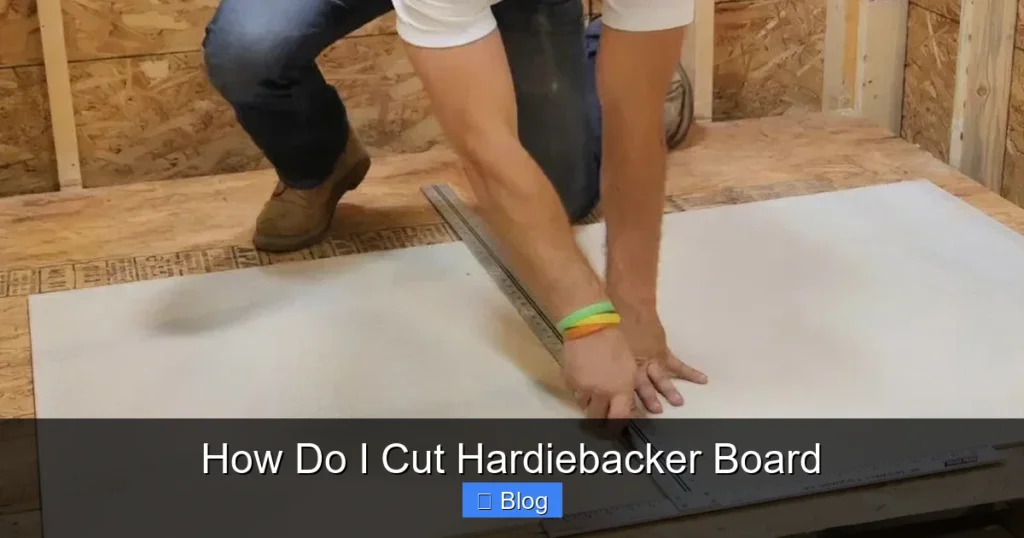
Step 1 – Measure Twice, Mark Once
Start by measuring the exact space where the board will go. Use a tape measure, then transfer the measurement onto the board with a pencil. When you’re asking how do I cut HardieBacker board, the accuracy of your marking makes all the difference.
Visual guide about How Do I Cut Hardiebacker Board
Image source: i.ytimg.com
Step 2 – Choose the Cutting Method
Here’s a quick decision chart:
- If the cut is straight and the board is ¼‑inch, use a utility knife and snap method.
- If the board is ½‑inch or thicker, opt for a cement board saw.
- For irregular shapes around fixtures, grab a jigsaw.
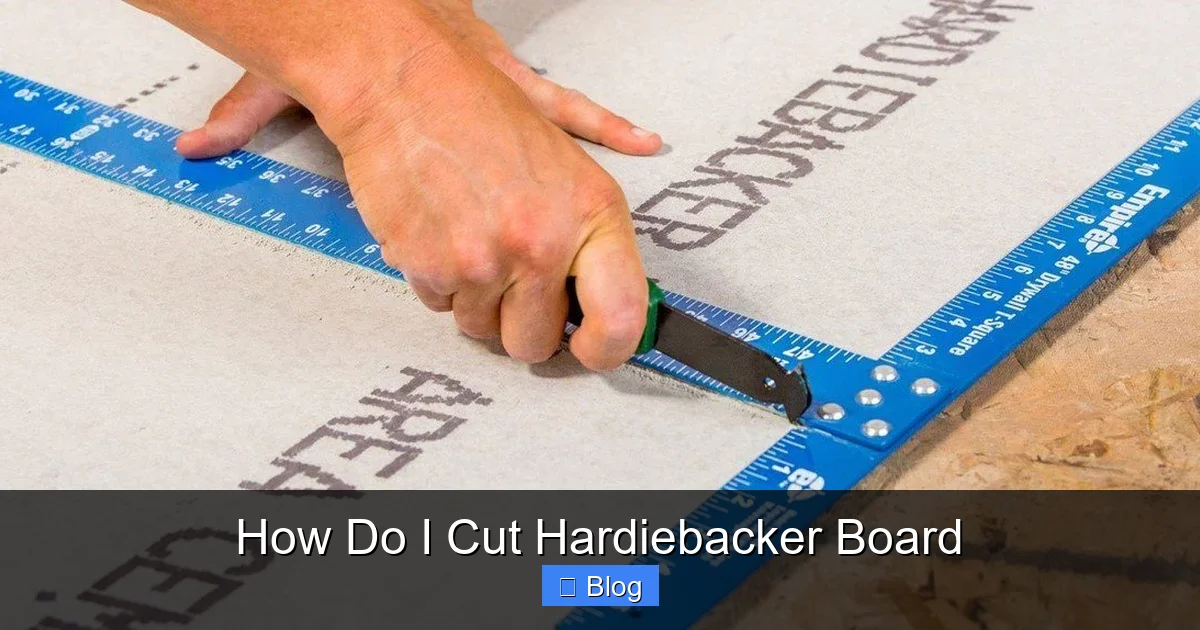
Step 3 – Scoring and Snapping (¼‑inch Boards)
- Place a straightedge along the pencil line.
- Run a sharp utility knife along the edge, applying firm, even pressure.
- Score the board 4–5 times until you see a deep groove.
- Lift the board and snap it over the straightedge; the board should break cleanly.
- Use a rasp or sandpaper to smooth the edge.
This method answers the question how do I cut HardieBacker board quickly without a power tool.
Step 4 – Using a Cement Board Saw (½‑inch & ¾‑inch)
- Clamp the board securely to a workbench.
- Set the blade depth so it just clears the board thickness.
- Start the saw and let the blade reach full speed before contacting the board.
- Guide the saw slowly along the marked line; let the blade do the work.
- After the cut, wipe away dust with a damp cloth.
Following these steps will give you a straight, clean edge—exactly what you need when you wonder how do I cut HardieBacker board for a professional finish.
Step 5 – Cutting Curves with a Jigsaw
- Draw the curve on the board.
- Use a fine‑tooth (6‑8 TPI) blade designed for cement board.
- Start the jigsaw at a low speed to avoid chipping.
- Follow the line slowly, supporting the board to prevent vibration.
- Deburr the cut edge with a file.
This technique answers the tougher version of how do I cut HardieBacker board when you need to navigate around a bathtub flange or a vent pipe.
4. Tips for Perfect Cuts and Minimizing Waste
Plan Your Layout
Before you even pick up a tool, lay out the boards on the floor and visualize the cuts. Position the long edges perpendicular to joists for maximum strength, and try to keep cuts to a minimum. Good planning reduces the number of times you have to ask, “how do I cut HardieBacker board?”
Use a Straight Edge as a Guide
A 2‑by‑4 or a metal straightedge doubles as a fence for scoring or sawing. It keeps the cut straight and protects the blade from wandering.
Make a Test Cut
Cut a scrap piece first. This helps you gauge blade speed, dust control, and edge quality before you move to the main board.
Seal the Cut Edges
After cutting, apply a thin coat of thin‑set mortar to the raw edges. This prevents moisture from seeping into the cut surface and helps the tile adhere better.
Recycle Off‑cuts
Small pieces can be used as backer for corners or as a substrate for small tile patches. This not only saves money but also reduces waste.
5. Data Table: Tool Comparison for Cutting HardieBacker
| Tool | Best For | Pros | Cons | Typical Cost |
|---|---|---|---|---|
| Cement Board Saw (Carbide Blade) | Straight cuts on ½‑inch & ¾‑inch | Fast, clean edges; minimal effort | Higher upfront cost; louder | $70‑$150 |
| Utility Knife & Snap | Straight cuts on ¼‑inch | Cheap, portable | Only works on thin board; edge may need sanding | $5‑$15 |
| Jigsaw (Fine‑tooth) | Curves and irregular shapes | Versatile, good for tight spaces | Can chip edges if speed is too high | $30‑$80 |
| Score and Snap Kit | Quick straight cuts on thin board | Very accurate, low dust | Limited to thin panels | $10‑$25 |
6. Common Mistakes and How to Avoid Them
Skipping the Safety Gear
One of the biggest regrets I’ve heard from DIYers is ignoring dust protection. Silica dust can cause long‑term health issues. Always wear a respirator when you ask yourself how do I cut HardieBacker board.
Using the Wrong Blade
A regular wood‐cutting blade will dull quickly and produce ragged cuts. Invest in a carbide‑tipped or diamond blade designed for cement board.
Cutting Too Fast
Rushing the saw leads to chatter and uneven edges. Let the blade spin at full speed before contact and feed the board slowly.
Neglecting to Support the Board
HardieBacker can crack if it’s not supported on both sides. Use a workbench or sawhorses; this eliminates the “how do I cut HardieBacker board” moments caused by broken pieces.
Forgetting to Clean Up Dust
Dust left on the surface can affect tile adhesion. After each cut, wipe the board with a damp rag and vacuum the area.
Conclusion: Mastering the Art of Cutting HardieBacker
Now that you’ve explored the question how do I cut HardieBacker board from every angle, you’re ready to tackle your next tiling project with confidence. Remember, the key steps are proper measurement, the right tool for the board thickness, and safety first. With a little practice, you’ll find that cutting HardieBacker is less of a headache and more of a satisfying part of the renovation process.
Whether you’re a seasoned contractor or a weekend warrior, the techniques shared here will help you achieve clean, professional cuts while keeping waste and frustration to a minimum. So grab your tool of choice, put on that respirator, and enjoy the smooth, hassle‑free experience of cutting HardieBacker board the right way.
🎥 Related Video: How to cut cement board fast n easy (dustless) #tile #tileshower #tilelife #diy #shower
📺 Tiling like pro
Frequently Asked Questions
What is How Do I Cut Hardiebacker Board?
How Do I Cut Hardiebacker Board is an important topic with many practical applications and benefits.
How can How Do I Cut Hardiebacker Board help me?
Understanding How Do I Cut Hardiebacker Board can improve your knowledge and provide practical solutions.

