
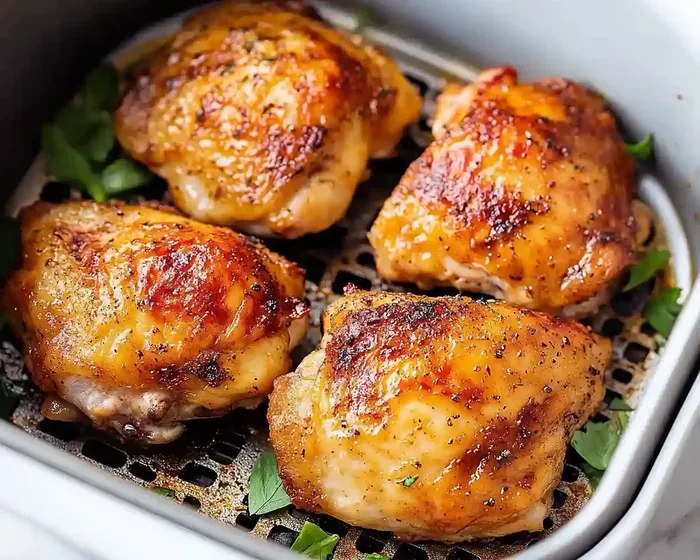
Making crispy chicken thighs in an air fryer is quick, easy, and delicious. You only need a few simple ingredients and the right temperature to get that perfect golden crunch. This method keeps the meat juicy inside while giving you the crispy skin you crave. Follow these straightforward steps and enjoy restaurant-style results at home.
This is a comprehensive guide about How To Make Chicken Thighs Crispy In Air Fryer.
Key Takeaways
- Prep matters: Pat the thighs dry and season well before cooking for the best crunch.
- Temperature is key: Cook at 380°F to 400°F for golden, crispy skin without burning.
- Flip halfway: Turn the thighs during cooking to ensure even browning on both sides.
- Use a rack or basket: Avoid overcrowding so hot air can circulate and crisp every piece.
- Check doneness: Cook until the internal temperature reaches 165°F for safe, juicy meat.
- Rest before serving: Let the thighs sit for a few minutes to keep the juices locked in.
- Experiment with seasoning: Try different spices and herbs to match your taste preferences.
[FEATURED_IMAGE_PLACEHOLDER]
Everyone loves a good chicken thigh. They are cheap, flavorful, and hard to mess up. But let’s be honest. Most people want that perfect crunch on the outside without drying out the meat inside. That is exactly why learning how to make chicken thighs crispy in air fryer setups has become such a popular kitchen hack. You get the best of both worlds. You get the speed of an air fryer and the texture of a deep fryer, all with way less oil.
The air fryer works by blowing hot air around your food. This mimics the effect of frying but uses a fraction of the fat. Chicken thighs are ideal for this method because they have enough natural fat to stay moist. The skin can turn beautifully crisp when you handle it right. You do not need fancy tools or complicated recipes. You just need the right steps and a little patience.
In this guide, you will learn everything you need to get golden, crunchy chicken thighs every single time. We will cover prep tricks, seasoning ideas, cooking times, and common mistakes to avoid. By the end, you will feel confident pulling perfect thighs out of your air fryer like a pro.
Why Air Fryer Chicken Thighs Turn Out So Well
Air fryers have changed how many of us cook weeknight meals. They are fast, compact, and surprisingly powerful. When you cook chicken thighs in one, the results can beat a standard oven in both speed and texture. The secret comes down to airflow and heat control.
Traditional ovens often trap moisture around the food. That can leave chicken skin soft or rubbery. An air fryer moves hot air rapidly around the basket. This strips away surface moisture and helps the skin tighten up. The result is a crisp exterior that still protects the juicy meat underneath.
Chicken thighs also bring their own advantages. They have more fat than chicken breasts, which means they stay tender even at higher heat. That fat renders out during cooking and adds flavor to the skin. This makes thighs a natural fit for crispy air frying.
The Role of Moisture Control
Moisture is the enemy of crispness. If the surface of your chicken stays wet, the skin will steam instead of crunch. That is why drying the thighs before cooking matters so much. A simple paper towel pat can make a huge difference.
You can also let the thighs sit uncovered in the fridge for a short time. This air-drying step pulls more moisture from the skin. Even ten to fifteen minutes helps. The drier the skin, the better the final crunch.
How Hot Air Creates Crispness
The air fryer’s fan pushes heated air across the food from multiple angles. This constant movement prevents cold spots and encourages even browning. It also helps fat render quickly, which adds to the crisp texture. When you combine good heat with dry skin, you get that satisfying crackle.
Think of it like a mini convection oven with superpowers. The difference is the intensity. The air moves faster, and the cooking chamber is smaller. That focus gives you faster results and better texture on smaller cuts like thighs.
How To Make Chicken Thighs Crispy In Air Fryer With Simple Prep
Great results start before the chicken ever hits the basket. Prep is where you set yourself up for success. The good news is that the steps are easy. You probably already have everything you need in your kitchen.
Start with fresh or thawed thighs. If they are frozen, you must thaw them first for the best texture. Frozen skin tends to trap ice crystals, which can make the final result uneven. Once thawed, pat them completely dry with paper towels. Do not rush this step.
Next, think about seasoning. Salt is the most important ingredient for crisp skin. It helps draw out extra moisture and improves browning. Add pepper, garlic powder, paprika, or your favorite herbs after the salt. Keep the seasoning light on the skin if you want maximum crunch. Heavy wet rubs can soften the surface.
Dry the Skin Thoroughly
This point deserves its own spot because it matters so much. Use clean paper towels and press gently across each thigh. You want to remove any shine or dampness. If the skin feels tacky, keep drying. The goal is a matte, dry surface.
If you have time, place the dried thighs on a rack in the fridge. Uncovered skin dries even more in the cold air. This small step can turn good results into great results. It is one of those quiet tricks that serious home cooks swear by.
Choose the Right Seasonings
You can keep things simple or go bold. A basic blend of salt, black pepper, garlic powder, and paprika works beautifully. The paprika adds color and a mild sweetness that complements the savory meat. If you like heat, a pinch of cayenne or chili powder brings nice contrast.
For a fresher flavor, try dried herbs like thyme, oregano, or rosemary. These pair well with chicken and crisp up nicely in the air fryer. Just remember to keep the mix relatively dry. A little oil on the skin can help seasoning stick, but too much can soften the crunch.
The Best Temperature And Time For Crispy Chicken Thighs
Getting the heat right is the next big piece of the puzzle. Too low, and the skin never really crisps. Too high, and the outside can burn before the inside finishes. For most air fryers, a range between 380°F and 400°F works best for chicken thighs.
At 380°F, the thighs cook evenly and the skin has time to brown slowly. This is a safe starting point if your air fryer runs hot or if the thighs are larger. At 400°F, you get a faster crisp, which is great for smaller thighs or when you are in a hurry. The key is to watch closely during the last few minutes.
Cooking time usually lands between 18 and 25 minutes, depending on size and thickness. Bone-in thighs often need a little more time than boneless pieces. Always check the internal temperature to be sure. You want at least 165°F in the thickest part.
Bone-In Versus Boneless Thighs
Bone-in thighs tend to stay juicier because the bone slows heat transfer slightly. They also often have more skin surface, which means more crunch. These are fantastic for a family dinner or meal prep. Just expect a slightly longer cook time.
Boneless thighs cook faster and are easier to season evenly. They are great for quick lunches or tossing into salads and wraps. Because they are smaller, they can brown quickly, so keep an eye on them near the end.
Adjusting for Your Air Fryer Model
Not all air fryers perform the same. Some run hotter, some have stronger fans, and some have smaller baskets. If you are new to your machine, start a little lower and check early. You can always add a couple more minutes if needed.
It also helps to learn how your basket fits food. A crowded basket blocks airflow and softens the crust. A single layer with a little space around each thigh gives the best results. If you have a lot to cook, do it in batches.
Step-By-Step Cooking Process For Golden Results
Now let’s walk through the full process from start to finish. This is the part where everything comes together. Follow these steps and you will get reliable, crispy thighs with very little effort.
First, preheat your air fryer if your model recommends it. A short preheat of 2 to 3 minutes helps the basket reach cooking temperature faster. This gives the skin a strong start and improves browning.
Next, place the dried and seasoned thighs in the basket in a single layer. Leave a little space between pieces so the air can move freely. If you are cooking a larger batch, work in rounds. It takes a bit more time, but the texture will be much better.
Set the temperature to 380°F or 400°F based on the size of the thighs and your preference. Cook for about 18 to 25 minutes, depending on thickness. Flip the thighs halfway through so both sides get equal exposure to the hot air.
Flipping And Checking Color
Flipping is a simple step, but it makes a real difference. It helps the skin brown evenly and prevents one side from getting too dark. Use tongs and be gentle so you do not tear the skin.
Around the 18-minute mark, start checking the color. You want a deep golden tone with some darker spots for texture. If the skin looks pale, give it a few more minutes. If it looks like it is moving toward burnt, drop the temperature slightly and finish cooking.
Using a Meat Thermometer For Accuracy
A thermometer takes the guesswork out of cooking chicken. Insert it into the thickest part of the meat, avoiding the bone if you use bone-in thighs. When it reads 165°F, the chicken is safe and ready.
Some cooks prefer to pull the thighs at 160°F and let carryover cooking finish the job. That can work if you rest the meat properly. Either way, checking the temperature helps you avoid dry, overcooked results.
Seasoning Ideas And Flavor Variations
One of the best parts about air frying chicken thighs is how easy they are to customize. You can keep the seasoning simple or build bold flavor profiles. The crispy skin acts like a canvas, so almost any dry rub works well.
For a classic savory taste, stick with salt, pepper, garlic powder, and onion powder. Add a little smoked paprika if you want depth. This combo tastes great on its own and works well with rice, vegetables, or bread.
If you want something brighter, try a lemon-herb blend. Use dried thyme, dried oregano, salt, and a little zest from a lemon after cooking. The fresh citrus note lifts the rich flavor of the thighs and makes the meal feel lighter.
Spicy Crunch Variations
Heat lovers can turn up the excitement with a spicy rub. Mix cayenne, chili powder, garlic, salt, and a touch of brown sugar for balance. The sugar helps with browning, so use it lightly. Too much can cause the skin to darken too fast.
Another option is a Cajun-style blend. Paprika, garlic, onion, oregano, thyme, and black pepper come together for a bold Southern-inspired flavor. This works especially well if you serve the thighs with coleslaw or cornbread.
Wet Marinades Versus Dry Rubs
Dry rubs are usually better for crisp skin because they do not add extra liquid. Wet marinades can flavor the meat beautifully, but they may soften the surface. If you love marinating, pat the thighs very dry before air frying. You can also brush off excess liquid so the skin has a better chance to crisp.
A smart compromise is to marinate for flavor, then finish with a light dry rub before cooking. That way you get deep seasoning inside and a better texture on the outside. It is a simple trick that gives you the best of both styles.
Common Mistakes That Keep Chicken Thighs From Getting Crispy
Even easy recipes can go sideways if a few small things get missed. The good news is that most of these mistakes are simple to fix. Once you know what to watch for, your results get much more consistent.
The most common issue is wet skin. If the thighs are not dried well, the skin steams instead of crunching. Another frequent problem is overcrowding the basket. When pieces sit too close together, the air cannot move around them properly.
Temperature mistakes also happen. Some people start too low and never get real browning. Others go too high and end up with dark skin before the meat is done. Finding the right balance takes a little attention, especially the first time you cook a new batch.
Too Much Oil Or Sauce
A light coating of oil can help seasoning stick and improve browning. But too much oil can make the skin greasy instead of crisp. The same goes for sauces. If you glaze the thighs early, the sugar and liquid can soften the crust.
If you want a saucy finish, cook the thighs first and add the sauce at the end. You can even toss them lightly after resting. That keeps the crunch you worked for while still giving you plenty of flavor.
Not Resting the Meat
Resting matters more than many people think. When chicken comes out of the air fryer, the juices are still moving around inside. If you cut immediately, those juices can spill out and leave the meat drier.
Give the thighs a few minutes to rest before serving. This short pause helps the juices settle back into the meat. It also lets the crust firm up a little more, which improves the final bite.
Quick Tips For Better Air Fryer Chicken Every Time
If you want consistently great results, these small habits help a lot. They do not take much extra time, but they can change the final texture in a big way.
- Dry the skin well: Paper towels are your friend before seasoning.
- Preheat when possible: A hot basket gives the skin a stronger start.
- Keep space in the basket: Airflow is the secret to crunch.
- Flip once halfway: Even exposure means even browning.
- Check early: Look at the color before the final minutes.
- Use a thermometer: It prevents undercooking and overcooking.
- Rest before slicing: A short pause keeps the meat juicy.
If you enjoy experimenting with air fryer cooking, you can also try pairing crispy thighs with other easy sides. For example, you can learn how to cook frozen asparagus in an air fryer for a fast vegetable side. Or if you want another crispy snack idea, check out how to make pita chips in air fryer batches for a fun add-on.
How To Serve And Store Crispy Chicken Thighs
Crispy air fryer thighs fit into almost any meal. Serve them over a salad for a light dinner, or pair them with roasted potatoes for something more filling. They also work well in wraps, bowls, and quick lunch plates. The flavor is strong enough to stand on its own, but they still play nicely with sauces and sides.
If you are meal prepping, let the thighs cool fully before storing them. Keep them in an airtight container in the fridge for a few days. Reheating in the air fryer usually works better than a microwave because it helps bring back some of the crispness. A short warm-up at a moderate temperature can make them taste close to fresh again.
For longer storage, freeze the cooked thighs once they are cool. Place them in a freezer-safe bag and remove as much air as you can. When you are ready to eat, thaw them first if possible, then reheat gently. This keeps the texture from getting tough.
Reheating Without Losing the Crunch
The microwave is convenient, but it can soften the skin quickly. If you want to keep the texture, use the air fryer or a skillet. A few minutes in the air fryer warms the meat and helps the skin tighten back up.
If you use a skillet, keep the heat moderate and flip carefully. You just want to warm the thighs, not cook them again. Too much extra heat can dry them out, so keep the process short and simple.
Final Thoughts On Crispy Air Fryer Chicken Thighs
Learning how to make chicken thighs crispy in air fryer cooking is one of those skills that pays off again and again. Once you understand the basics, you can make a fast, satisfying meal with very little fuss. Dry skin, good seasoning, the right temperature, and a little space in the basket are the main pieces of the puzzle.
The best part is that this method is flexible. You can keep it simple with salt and pepper or build bold flavors with spices and herbs. You can cook bone-in thighs for a hearty dinner or boneless pieces for a quick lunch. Either way, you get juicy meat and a crisp finish that makes the whole meal feel special.
So the next time you want something easy, tasty, and crunchy, reach for your air fryer and a pack of chicken thighs. With a few smart steps, you can turn an ordinary cut of chicken into something that feels much more exciting.
Frequently Asked Questions
How do I make chicken thighs crispy in an air fryer?
Start by drying the skin well, then season the thighs with salt and your favorite spices. Cook them in a single layer at 380°F to 400°F, flipping halfway through, until the skin is golden and the internal temperature reaches 165°F.
Do I need to flip chicken thighs in the air fryer?
Yes, flipping halfway through helps the skin brown evenly on both sides. It also improves air circulation around the pieces, which leads to a better overall crunch.
Can I cook frozen chicken thighs in an air fryer?
You can, but thawing first usually gives better results. Frozen skin tends to hold extra moisture, which can make it harder to get truly crispy skin.
What temperature is best for crispy chicken thighs?
A temperature between 380°F and 400°F works well for most air fryers. Lower heat helps larger thighs cook evenly, while higher heat can give a faster crisp on smaller pieces.
How long should chicken thighs cook in an air fryer?
Most thighs take about 18 to 25 minutes, depending on size and whether they are bone-in or boneless. Always check the internal temperature to make sure they are fully cooked.
Why are my air fryer chicken thighs not crispy?
The most common reasons are wet skin, overcrowding the basket, or cooking at too low a temperature. Drying the thighs well and leaving space for airflow usually fixes the problem.



