
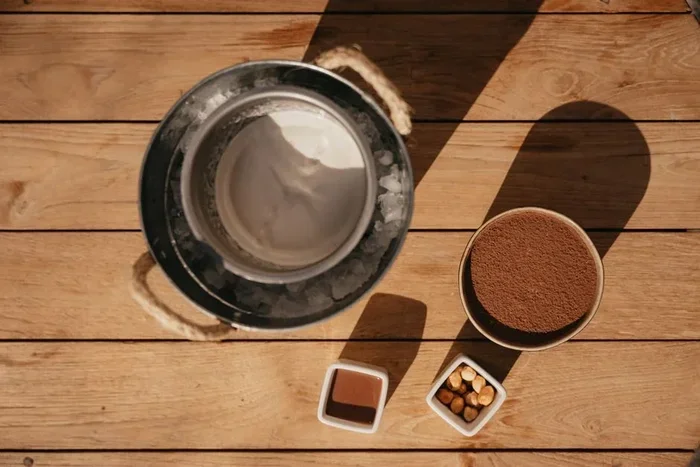
Making homemade ice cream from scratch is easier than you think. You only need a few simple ingredients like cream, sugar, and eggs to create a rich, creamy frozen dessert. This guide walks you through every step from choosing your ice cream base to churning and storing your batch. Whether you want classic vanilla or creative flavors, you will find everything you need right here.
There is nothing quite like a scoop of homemade ice cream on a warm summer evening. The truth is, making this frozen treat at home is way simpler than most people think. You do not need fancy equipment or years of experience. With just a handful of ingredients and a little patience, you can create a batch that tastes better than anything from the store.
Many folks assume that ice cream making is a complicated process reserved for professional kitchens. That could not be further from the truth. Once you understand the basics of your cream base and learn how to churn properly, the process becomes second nature. This guide covers everything you need to know, from your first batch to mastering advanced flavors.
Let us dive into the world of frozen desserts and get you making amazing ice cream at home.
Key Takeaways
- No ice cream maker needed: You can make no-churn ice cream with just a few pantry staples.
- The custard base is the foundation: A proper mix of cream, sugar, and egg yolks gives you that smooth, creamy texture.
- Churning matters: The right churning time and temperature make all the difference in your frozen dessert.
- Storage tips keep ice cream fresh: Proper storage prevents ice crystals and keeps flavors tasting great.
- Flavor possibilities are endless: From classic vanilla to salted caramel, you can customize any recipe to your taste.
📑 Table of Contents
Why Make Homemade Ice Cream?
Store-bought ice cream has its place, but homemade ice cream is a completely different experience. When you make it yourself, you control every single ingredient that goes into the mix.
Here is why so many home cooks are switching to homemade frozen desserts:
- Fresh ingredients: You use real cream, fresh eggs, and quality sugar. No preservatives or artificial flavors.
- Custom flavors: Want lavender honey or spicy mango? You decide what goes in.
- Diet-friendly options: Need a dairy-free or low-sugar version? Easy to adjust at home.
- Cost savings: A single quart of premium store ice cream costs more than ingredients for three batches at home.
- Fun activity: Making ice cream is a great family project or weekend hobby.
The biggest advantage is texture. Homemade ice cream churned fresh has a smoother, creamier consistency that store brands simply cannot match. Air gets incorporated during the churning process, creating that light, fluffy mouthfeel we all love.
Understanding the Ice Cream Base
The base is the heart of any great frozen dessert. Every flavor you make starts here. Getting the base right means your ice cream will turn out silky and smooth every single time.
The Science Behind a Creamy Base
Good ice cream relies on a balance of four key elements: fat, sugar, water, and air. Fat comes from your cream and gives richness. Sugar sweetens the mix and lowers the freezing point, which keeps the ice cream soft. Water is present in your milk and cream. Air gets folded in during churning.
When these elements are balanced correctly, you get a smooth texture with small ice crystals. If the balance is off, you end up with icy, grainy frozen dessert. The good news is that following a tested recipe keeps everything in check.
Essential Ingredients for Your Base
Here is what you need for a classic ice cream base:
- Heavy cream: This provides the fat that creates richness and smooth texture. Look for cream with at least 36% milk fat.
- Whole milk: Adds liquid and helps blend everything together. Skim milk will give you a lighter but less creamy result.
- Sugar: Granulated white sugar works best. It dissolves easily and sweetens the mix perfectly.
- Egg yolks: These act as natural emulsifiers. They bind the fat and water together for a custard-like base.
- Vanilla extract: For classic vanilla flavor. You can also use vanilla bean seeds for a more intense taste.
- A pinch of salt: This enhances all the flavors and balances the sweetness.
Some recipes also call for a bit of corn syrup or glucose syrup. These help prevent ice crystal formation and keep your frozen dessert scoopable for longer. If you want to try a no-churn method, sweetened condensed milk replaces the need for churning entirely.
Tools and Equipment You Will Need
You do not need a lot of equipment to make great ice cream at home. Here is what works best:
Ice Cream Maker
An ice cream maker is the most important tool for traditional recipes. It churns the base while freezing it, incorporating air and preventing large ice crystals from forming. Most models cost between 50 and 150 dollars and last for years with proper care.
If you have a stand mixer with a freezer attachment, that works too. Some people even use a hand mixer with a frozen bowl, though this takes more effort.
No-Churn Method
No ice cream maker? No problem. The no-churn method uses whipped cream and sweetened condensed milk to create a creamy frozen dessert without any machine. You simply fold whipped heavy cream into the condensed milk mixture, add your flavors, and freeze.
This method is perfect for beginners or anyone who wants to whip up a batch quickly. The result is slightly denser than machine-churned ice cream, but still delicious.
Other Helpful Tools
- A fine mesh strainer for removing any bits from your custard base
- A rubber spatula for scraping every bit of mix into your container
- A shallow, airtight container for freezing
- A kitchen thermometer to check your custard temperature
- A spatula or spoon for stirring during the churning process
Step-by-Step: Making Homemade Ice Cream
Now let us get into the fun part. Here is a complete walkthrough for making classic vanilla ice cream from scratch.
Step 1: Prepare the Custard Base
Start by whisking your egg yolks and sugar together in a bowl. Beat until the mixture turns pale and slightly thick. This usually takes about two to three minutes with a hand whisk.
Next, heat your cream and milk in a saucepan over medium heat. You want the mixture to steam and show small bubbles around the edges. Do not let it boil. Slowly pour the warm cream into the egg yolk mixture while whisking constantly. This process is called tempering, and it prevents the eggs from scrambling.
Step 2: Cook the Custard
Return the tempered mixture to the saucepan. Cook over medium-low heat, stirring constantly with a wooden spoon or spatula. Keep stirring until the mixture thickens enough to coat the back of your spoon. This usually takes about five to eight minutes.
Use a kitchen thermometer to check the temperature. You want it to reach 170 to 175 degrees Fahrenheit. Once it does, remove it from the heat immediately.
Step 3: Strain and Cool
Pour the custard through a fine mesh strainer into a clean bowl. This catches any cooked egg bits and gives you a perfectly smooth base. Stir in your vanilla extract and a pinch of salt.
Place the bowl over an ice bath to cool the mixture quickly. Stir occasionally until it reaches room temperature. Then cover the bowl with plastic wrap, pressing the wrap directly onto the surface of the custard. This prevents a skin from forming.
Refrigerate the base for at least four hours or overnight. Chilling the base thoroughly is essential for smooth ice cream.
Step 4: Churn the Ice Cream
Once your base is cold, pour it into your ice cream maker. Churn according to your machine instructions, usually about 20 to 25 minutes. The ice cream is ready when it has thickened and looks like soft-serve.
If you are using the no-churn method, whip your heavy cream to stiff peaks and fold it into your sweetened condensed milk mixture. Add your flavorings, then pour into a container and freeze.
Step 5: Freeze and Firm Up
Transfer your freshly churned ice cream into an airtight container. Press a piece of plastic wrap directly onto the surface before putting the lid on. This prevents ice crystals from forming on top.
Freeze for at least four hours before serving. The ice cream will firm up and develop its full flavor during this time.
Creative Ice Cream Flavors to Try
Once you master the basic vanilla base, the fun really begins. Here are some popular flavors to experiment with:
Classic Chocolate
Add unsweetened cocoa powder to your warm custard base before chilling. Use about half a cup for a standard batch. You can also melt real chocolate and stir it in after the custard cools. For a richer treat, drizzle some caramel sauce on top when serving.
Strawberry Swirl
Blend fresh strawberries into a smooth purée and strain out the seeds. Fold the purée into your churned ice cream in a swirling pattern. Do not overmix, or the color will blend completely and you will lose the beautiful swirl effect.
Salted Caramel
Make a simple caramel sauce by melting sugar on the stove, then slowly adding warm cream and a pinch of sea salt. Let the caramel cool completely before swirling it into your ice cream during the last few minutes of churning.
Cookies and Cream
Crush chocolate sandwich cookies and fold them into your ice cream during the last minute of churning. You can also sandwich a scoop between two cookies for a fun treat. This pairs wonderfully with a snickerdoodle cookie variation for a different twist.
Mango or Tropical Fruit
Blend ripe mangoes or a mix of tropical fruits into your base. These flavors work best with the no-churn method since the fruit adds natural sweetness and keeps the texture smooth.
Storing Your Homemade Ice Cream
Proper storage makes a huge difference in how your ice cream tastes and feels over time. Here are the best practices:
- Use an airtight container: A shallow, flat container works better than a deep one because the ice cream freezes faster and more evenly.
- Press plastic wrap on the surface: This simple step prevents ice crystals from forming on top of your frozen dessert.
- Keep the freezer temperature steady: Set your freezer to 0 degrees Fahrenheit or below. Temperature fluctuations cause ice crystals to grow.
- Scoop carefully: Use a warm ice cream scoop for clean portions. Run it under hot water and dry it before each scoop.
- Consume within two weeks: Homemade ice cream tastes best within the first two weeks of freezing. After that, the texture and flavor start to decline.
If you are making a batch with mix-ins like cookie pieces or candy bits, store them separately and add them when serving. This keeps the mix-ins from getting soggy or melted in the freezer.
Common Mistakes to Avoid
Even experienced home cooks make mistakes when making ice cream. Here are the most common ones and how to avoid them:
- Skipping the chilling step: A warm base churned in the machine can result in icy, grainy ice cream. Always chill your base thoroughly before churning.
- Over-churning: Leaving the ice cream in the machine too long turns it into butter. Follow your machine’s timing guidelines.
- Not using enough fat: Low-fat milk or cream gives you a watery, icy result. Stick with heavy cream and whole milk for the best texture.
- Adding mix-ins too early: Fold in cookies, chips, or fruit during the last minute of churning only. Adding them too early can crush them or make them dissolve.
- Ignoring the ice cream maker manual: Every machine is different. Read the instructions for your specific model before you start.
Expert Tips for Perfect Ice Cream Every Time
Here are some pro tips that will elevate your frozen dessert game:
- Add a tablespoon of alcohol: A splash of vodka or rum lowers the freezing point and keeps your ice cream scoopable. You will not taste the alcohol in the final product.
- Use a waffle cone as a bowl: Freeze your waffle cones for 10 minutes before scooping. They hold up better and add a nice crunch.
- Make a coffee-infused base: Brew a strong cup of coffee and add it to your warm custard base. This creates a rich mocha flavor that pairs beautifully with chocolate chips.
- Let it sit at room temperature: Five to ten minutes before scooping allows the ice cream to soften slightly for the perfect texture.
- Toast your nuts: If your recipe calls for nuts, toast them in a dry pan before adding them. This brings out deeper, more complex flavors.
Making homemade ice cream is one of the most rewarding things you can do in the kitchen. Once you nail the basic technique, you will want to experiment with new flavors every week. The process is forgiving, fun, and incredibly satisfying.
Start with a simple vanilla batch. Master the custard base and the churning process. Then let your creativity run wild with flavors, mix-ins, and toppings. Whether you are serving a family dinner or hosting a summer party, a fresh batch of homemade frozen dessert always impresses.
The best part is that this skill stays with you forever. Once you learn how to make ice cream from scratch, you will never go back to store-bought again. So grab your ingredients, fire up your machine, and enjoy the process. Your taste buds will thank you.
Frequently Asked Questions
Can I make ice cream without an ice cream maker?
Absolutely. The no-churn method uses whipped heavy cream and sweetened condensed milk to create a creamy frozen dessert without any machine. You simply fold the whipped cream into the condensed milk, add your flavors, and freeze for several hours.
How long does homemade ice cream last in the freezer?
Homemade ice cream stays at its best quality for about two weeks when stored in an airtight container at 0 degrees Fahrenheit. After that, it is still safe to eat but the texture and flavor start to decline.
Why is my homemade ice cream icy and grainy?
Icy texture usually comes from not churning long enough, not chilling the base before processing, or using too little fat in the recipe. Make sure your base is fully chilled and churn until it reaches a soft-serve consistency.
Can I use a stand mixer to churn ice cream?
Yes, if your stand mixer has a freezer bowl attachment. Freeze the bowl for at least 15 hours before use, then churn the base according to your mixer’s instructions. It will not be as efficient as a dedicated ice cream maker, but it works well for small batches.
What is the best way to soften hard frozen ice cream?
Let the container sit at room temperature for five to ten minutes. You can also place it in the refrigerator for 15 to 20 minutes. Avoid microwaving, as it can melt the edges unevenly and ruin the texture.
Can I make ice cream with coconut milk instead of cream?
Yes, coconut milk makes an excellent dairy-free alternative. Use full-fat coconut milk for the richest results. The texture will be slightly different from dairy-based ice cream, but it is still creamy and delicious. This works especially well with tropical fruit flavors.



