
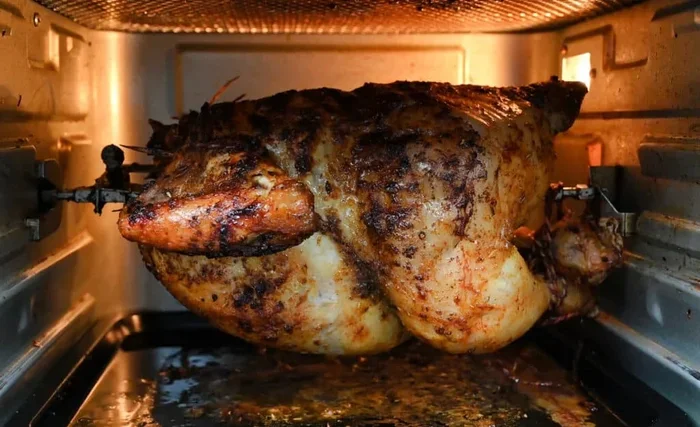
Cooking with a rotisserie in your air fryer oven brings restaurant-quality results right to your kitchen counter. This guide walks you through setting up the rotisserie kit, choosing the best meats, and mastering even cooking techniques without the guesswork. You will discover time-saving tips, food safety basics, and creative recipe ideas that make weeknight dinners effortless. By the end, you will feel confident spinning up everything from whole chickens to tender pork loins with perfectly crisp skin and juicy interiors.
Key Takeaways
- Rotisserie cooking uses slow rotation to baste meat in its own juices, creating tender results with less added fat.
- Always balance your food on the spit before turning on the motor to prevent strain and uneven spinning.
- Preheat your air fryer oven to the right temperature so the skin crisps evenly from the very first minute.
- Use a meat thermometer to check doneness instead of relying only on time, since sizes and starting temperatures vary.
- Let meat rest after cooking so the juices redistribute and every slice stays moist and flavorful.
- Clean the rotisserie rod and forks after each use to keep the setup smooth and avoid stuck-on residue.
- Start with simpler cuts like chicken quarters or pork chops before moving to larger roasts or whole birds.
📑 Table of Contents
- How to Use Rotisserie in Air Fryer Oven for Easy Weeknight Dinners
- Getting Started with Your Rotisserie Setup
- How to Prepare Meat for Rotisserie Cooking
- Setting Up the Rotisserie Without the Guesswork
- Cooking Times and Temperatures That Work
- Keeping Food Juicy and the Skin Crispy
- Cleaning and Maintaining Your Rotisserie Kit
- Rotisserie Recipe Ideas to Try This Week
- Safety and Troubleshooting for Confident Cooking
- Final Thoughts on How to Use Rotisserie in Air Fryer Oven
How to Use Rotisserie in Air Fryer Oven for Easy Weeknight Dinners
Have you ever wanted that slow-roasted, golden-brown finish without waiting hours by the stove? A rotisserie in your air fryer oven can give you exactly that. The gentle spin keeps meat bathed in its own juices while the hot air circulates around every side. That means less drying, more flavor, and a crisp exterior that feels like a special occasion.
This guide shows you exactly how to use rotisserie in air fryer oven setups without stress. You will learn how to assemble the kit, balance your food, pick the right temperature, and avoid common beginner mistakes. Whether you are cooking a small chicken, a pork roast, or even veggies on a skewer, you will find clear steps and practical tips here.
Let us dive in and make your first rotisserie spin a confident one.
Getting Started with Your Rotisserie Setup
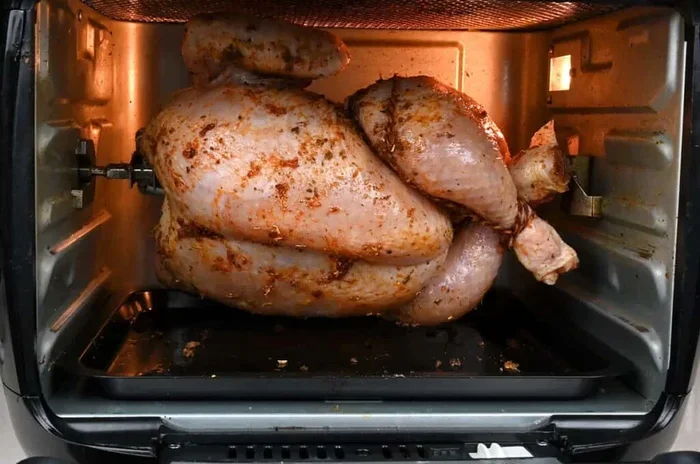
Visual guide about rotisserie chicken in air fryer oven
Image source: supergoldenbakes.com
Before you cook anything, it helps to understand the parts and how they fit together. Most air fryer ovens that include a rotisserie come with a motor unit, a spinning rod, and two forks or prongs. Some models also include a drip tray or a ring that holds the spit in place. Knowing where each piece goes makes the whole process smoother.
Checking the Components
Lay out every piece on a clean counter. Look for the motor base, the spinning rod, the locking forks, and any brackets that secure the rod to the oven walls or ceiling. Read the quick-start guide that came with your model, since placement can vary a little between brands. If anything feels loose or missing, pause and sort it out before you heat the oven.
Positioning the Motor and Rod
Slide the motor into its designated spot, usually near the back or top of the oven. Attach the rod so it can spin freely without rubbing against the walls or the basket. The forks should lock firmly onto the rod, and the whole assembly should feel steady when you give it a gentle nudge. A balanced setup prevents wobbling and keeps the motor from working too hard.
Preheating for Better Results
A hot oven helps the skin start crisping right away. Set your air fryer oven to the target temperature before you slide in the food. For most poultry and pork, a range around 350 to 375 degrees Fahrenheit works well. If your model has a preheat light or beep, wait for it so the cooking time stays predictable.
Quick Tips for a Smooth Start
– Wipe the interior before you begin so old crumbs or grease do not smoke.
– Place a drip tray under the rotisserie if your model uses one.
– Keep the motor dry and away from direct drips.
– Test the spin with the rod empty before adding food.
How to Prepare Meat for Rotisserie Cooking
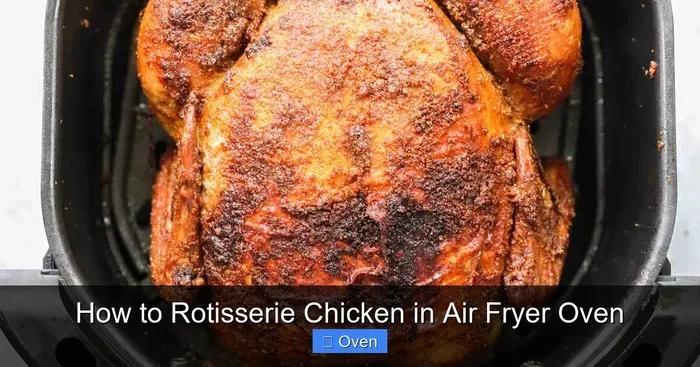
Visual guide about rotisserie chicken in air fryer oven
Image source: recipesalive.com
Good rotisserie results start long before the motor turns on. The way you season, trim, and shape the food affects how evenly it cooks and how well it stays on the spit. A little prep goes a long way toward juicy, flavorful results.
Choosing the Right Cuts
Start with cuts that are manageable for your oven size. Chicken pieces, whole chickens, pork loins, and smaller roasts all work nicely. If you are new to rotisserie cooking, try frozen burger patties or frozen fish for quick test runs, then move up to larger cuts once you feel comfortable with the spin and timing. You can also cook frozen asparagus or frozen lasagna in the same oven for side dishes, though those do not go on the rotisserie rod itself.
Trimming and Seasoning
Trim excess fat that could drip too heavily or cause flare-ups. Pat the meat dry so the surface can brown instead of steam. Rub on a light coating of oil, then add your favorite spices. Simple salt, pepper, garlic powder, and paprika work beautifully on many cuts. For extra flavor, tuck herbs under the skin or brush on a glaze near the end of cooking.
Securing Food on the Spit
Slide the meat onto the rod and lock the forks in place so it does not shift. If you are cooking a whole bird, trussing the wings and legs helps everything stay compact. For uneven cuts, add a small piece of foil or a skewer to fill gaps and keep the load balanced. The goal is a steady spin with minimal wobble.
Common Mistakes to Avoid
– Skipping the pat-dry step, which can leave the surface soggy.
– Overloading the spit with pieces that are too heavy or uneven.
– Forgetting to check balance before turning on the heat.
– Using wet marinades that drip too much without a drip tray.
Setting Up the Rotisserie Without the Guesswork
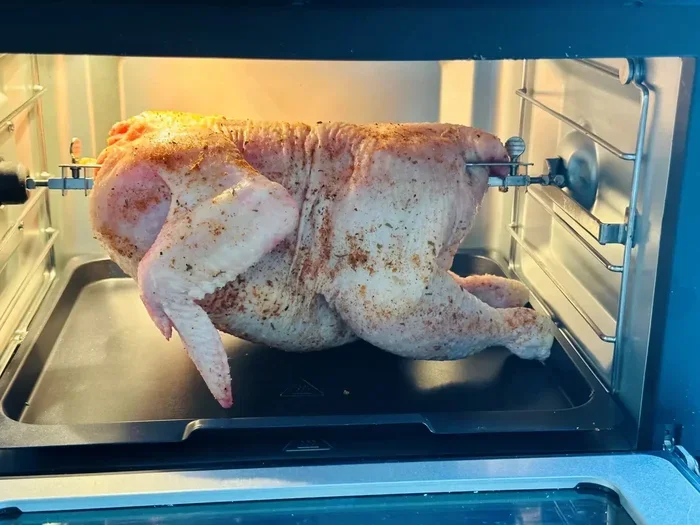
Visual guide about rotisserie chicken in air fryer oven
Image source: lianaskitchen.co.uk
Once your food is prepped, the next step is getting everything into the oven in the right order. A careful setup keeps the motor happy and helps the food cook evenly from the first minute to the last.
Loading the Rod Correctly
Place the rod into the motor hub and make sure it clicks or locks into position. Slide your seasoned meat onto the rod if you have not done that yet, then secure the forks. Double-check that nothing is touching the oven walls or the heating elements. A little clearance on both sides keeps the spin smooth.
Balancing the Load
Hold the rod gently and see if one side dips lower than the other. If it does, shift the food or add a small counterweight on the lighter side. Some cooks use a second fork or a folded piece of foil to even things out. A balanced load reduces noise and helps the motor run longer without strain.
Locking the Drip Tray
Slide the drip tray into its spot beneath the rotisserie path. This catches juices and keeps the oven floor clean. It also helps you avoid smoke from dripping fat hitting hot surfaces. If your model uses a removable tray, check that it sits flat and does not block airflow.
Quick Tips for a Stable Spin
– Start with the motor off while you adjust the food.
– Tilt the rod slightly to test for smooth movement.
– Keep the cord clear of hot surfaces if your motor is external.
– Use oven mitts when making final adjustments near hot walls.
Cooking Times and Temperatures That Work
Timing is where many beginners feel unsure, but you do not need to memorize a huge chart. A few simple ranges and a thermometer will cover most meals. The key is to watch the internal temperature rather than the clock alone.
General Time Ranges
Small chicken pieces often finish in a shorter window, while a whole bird needs more time to cook through without drying out. Pork loins and smaller roasts usually fall somewhere in the middle. If you are cooking a frozen burger or frozen fish in the same oven session, remember those cook faster and may need a lower rack position or less time. For sides like frozen asparagus, you can often add them near the end so they stay bright and crisp.
Temperature Guidelines
A steady medium heat works well for most rotisserie meals. Around 350 to 375 degrees Fahrenheit is a dependable starting point for poultry and pork. Higher heat can help crisp skin, but too much too soon may brown the outside before the center is done. Lower heat can dry out lean cuts if the spin is slow or the oven is crowded.
Using a Meat Thermometer
Insert the thermometer into the thickest part of the meat, away from bone if possible. For chicken, look for a safe internal temperature that indicates the meat is fully cooked. For pork, aim for a temperature that keeps it juicy without being underdone. Pull the meat a little early and let carryover cooking finish the job while it rests.
Expert Insights on Timing
– Rotate the rack position if the top browns too fast.
– Brush on glaze late so sugars do not burn.
– Check early and often near the expected finish time.
– Write down what works for your oven and favorite cuts.
Keeping Food Juicy and the Skin Crispy
Rotisserie cooking naturally helps meat stay moist because it keeps turning in its own juices. Still, a few small habits can make the texture even better. The goal is a crisp exterior and a tender center that does not dry out.
Dry Surface, Better Browning
Moisture on the surface turns to steam and slows browning. Pat the meat dry before seasoning. If you use a wet rub or marinade, let the excess drip off before the meat goes on the spit. A drier surface usually means a better finish.
Light Oil and Smart Seasoning
A thin coat of oil helps spices stick and supports browning. You do not need a heavy hand here. Too much oil can drip and cause smoke. Keep the seasoning balanced so the natural flavor of the meat still shines through.
Resting the Meat
When the cooking ends, move the meat to a cutting board or warm plate and let it rest. Resting gives the juices time to settle back into the fibers instead of running out on the first cut. A short rest often makes a noticeable difference in every slice.
Common Mistakes That Dry Out Meat
– Cooking at too high a heat for too long.
– Overcrowding the oven so airflow gets blocked.
– Skipping the rest period after cooking.
– Slicing too early and losing the juices.
Cleaning and Maintaining Your Rotisserie Kit
A clean rotisserie kit works better and lasts longer. Grease and food bits can build up on the rod, forks, and motor area, so a quick cleanup after each use keeps everything running smoothly.
After Each Use
Let the parts cool before you handle them. Remove the rod and forks, then wash them with warm soapy water unless the manufacturer says they are dishwasher safe. Wipe the motor area with a damp cloth, being careful not to let water get into electrical parts. Check the drip tray and empty it right away so residue does not harden.
Weekly and Monthly Care
Give the interior a deeper wipe if you notice smoke or smells building up over time. Inspect the rod for bends or rough spots that could catch food. Make sure the forks still lock securely. If your model has removable brackets or hooks, take them out occasionally and clean the surrounding area too.
Storage Tips
Store the rod and forks in a dry place so they do not rust. Keep the motor away from moisture and extreme heat. If you have a busy kitchen, a simple bin or drawer divider can keep the parts together and easy to grab next time.
Quick Tips for Longevity
– Never submerge the motor unless the manual clearly allows it.
– Dry every part fully before putting it away.
– Check screws and locks now and then.
– Replace worn forks if they no longer grip well.
Rotisserie Recipe Ideas to Try This Week
Once you know the basics, the rotisserie becomes a fun tool for all kinds of meals. You can keep it simple with salt and pepper, or build bold flavors with herbs, spices, and glazes. Here are a few easy ideas to get you started.
Classic Herb Chicken
Try a whole chicken or bone-in pieces with olive oil, salt, pepper, garlic powder, and dried herbs. The spin helps the skin brown evenly, and the juices stay inside. If you like a brighter finish, brush on a little lemon juice near the end.
Garlic and Herb Pork Loin
A pork loin works well with a rub of garlic, rosemary, thyme, and a touch of oil. Cook it until the center reaches a juicy doneness, then let it rest before slicing. Serve it with roasted vegetables or a simple salad for a complete meal.
Spiced Chicken Quarters
Chicken quarters are a friendly starting point because they are smaller and easier to balance. Season them well, secure them firmly, and watch the skin turn golden. This is a great option when you want a fast dinner with big flavor.
Side Dishes in the Same Oven
While the rotisserie does its work, you can often use the same oven for other tasks. You might warm up a frozen lasagna, cook frozen asparagus, or reheat leftovers on a different rack. If you enjoy crispy snacks, you can even make pita chips in the oven while the main dish spins away.
Quick Tips for Flavor Boosters
– Add a dry rub for a bold crust.
– Use a light glaze near the end for sweetness.
– Tuck fresh herbs under the skin for aroma.
– Finish with a squeeze of citrus for freshness.
Safety and Troubleshooting for Confident Cooking
A little attention to safety makes rotisserie cooking relaxing instead of stressful. Most issues are easy to fix once you know what to look for.
Heat and Movement Safety
Keep hands clear of the heating area while the oven is on. Make sure the rod spins freely before you close the door. If the motor sounds strained or the rod wobbles a lot, stop and rebalance the load. Never reach into a hot oven without proper protection.
What to Do If the Spin Slows
If the rotation slows down, check whether the food is unbalanced or touching the walls. Reduce the load if it is too heavy. Make sure the motor area is dry and that nothing is blocking the rod. If the problem continues, let the motor cool and review the setup again.
When Smoke Appears
A little smoke can happen if fat drips onto hot surfaces. Use the drip tray, wipe excess grease, and avoid over-oiling the food. If smoke keeps showing up, pause cooking, open the door carefully, and clean the area once things cool down.
Expert Insights on Troubleshooting
– Stop and adjust rather than forcing a bad setup.
– Keep a thermometer handy so you do not overcook while guessing.
– Note your oven’s quirks since every model behaves a little differently.
– Start simple and build confidence with easier cuts first.
Final Thoughts on How to Use Rotisserie in Air Fryer Oven
Learning how to use rotisserie in air fryer oven cooking is mostly about balance, temperature, and a little patience. Once you get the setup right, the rotisserie does a lot of the work for you. The result is food that looks inviting, tastes rich, and comes together with less fuss than many traditional methods.
Start with a simple cut, keep the load balanced, and use a thermometer to guide you. Clean the kit after each use, and do not be afraid to try new seasonings or glazes. With a few tries, you will find your favorite combinations and a rhythm that fits your kitchen. From there, weeknight dinners can feel a lot more fun and a lot less rushed.
Frequently Asked Questions
How do I balance food on the rotisserie rod?
Slide the food onto the rod, lock the forks in place, and gently check whether one side dips lower than the other. If it does, shift the food or add a small counterweight until the rod spins evenly.
What temperature is best for rotisserie cooking in an air fryer oven?
A steady medium heat around 350 to 375 degrees Fahrenheit works well for many poultry and pork cuts. Use a thermometer to check doneness, since sizes and starting temperatures can change the exact time needed.
Can I cook a whole chicken on the rotisserie?
Yes, a whole chicken can work nicely if it fits your oven and stays balanced on the spit. Truss the wings and legs, pat the skin dry, and check the internal temperature before resting and carving.
How do I prevent smoke while the meat spins?
Use a drip tray, trim excess fat, and avoid heavy oil or wet marinades that drip too much. If smoke appears, pause cooking once it is safe, then clean the area after things cool down.
Do I need to let the meat rest after rotisserie cooking?
Yes, a short rest helps the juices settle back into the meat so the slices stay moist. Move the food to a board or plate, cover it loosely if needed, and wait a few minutes before cutting.
How should I clean the rotisserie rod and forks?
Let the parts cool, then wash the rod and forks with warm soapy water unless the manual says they are dishwasher safe. Wipe the motor area with a damp cloth and keep water away from electrical parts.



