
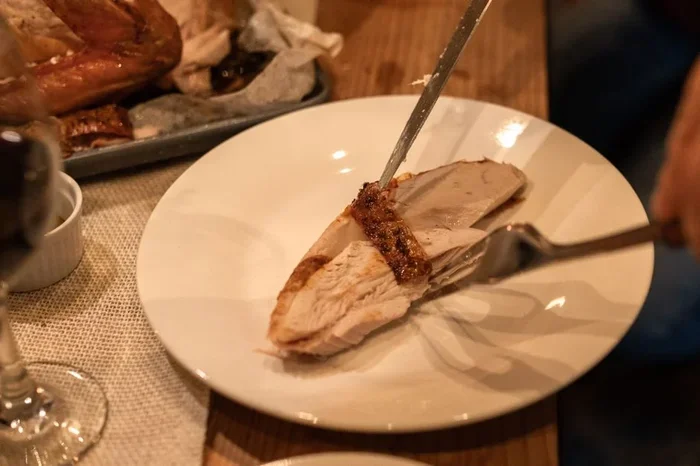
Our 20 lb turkey cooking instructions cover everything you need for a perfect roast. You will learn the ideal oven temperature, roasting time, and how to check for doneness using a food thermometer. Follow these simple steps to serve a tender, flavorful turkey that your whole family will love.
A 20 lb turkey is the centerpiece of many holiday meals and special dinners. But cooking a bird that large can feel intimidating. Will it be dry? Will it take all day? These are common worries, and they are completely understandable.
The good news is that 20 lb turkey cooking instructions are simpler than you think. With the right temperature, timing, and a few handy tips, you can pull a golden, juicy roast out of the oven that will impress everyone at the table. This guide walks you through every step, from thawing to serving.
Key Takeaways
- Roast at 325°F: This is the safest and most reliable temperature for cooking a whole turkey evenly.
- Plan for 13-15 minutes per pound: A 20 lb turkey needs roughly 4 to 5 hours of cooking time.
- Use a meat thermometer: The turkey is done when the thickest part of the thigh reaches 165°F.
- Let it rest for 30 minutes: Resting allows the juices to redistribute for a moist, tender result.
- Brine ahead of time: A simple saltwater brine adds flavor and keeps the meat juicy.
- Baste every 45 minutes: Regular basting promotes even browning and crispy skin.
📑 Table of Contents
- Why a 20 lb Turkey Needs Special Attention
- Preparing Your 20 lb Turkey
- Oven Temperature and Roasting Time
- Step-by-Step Cooking Process
- Checking Doneness and Safety
- Making the Most of Your Turkey Drippings
- Carving and Serving Your 20 lb Turkey
- Common Mistakes to Avoid
- Expert Tips for the Perfect Roast
- Conclusion
Why a 20 lb Turkey Needs Special Attention
A 20 lb turkey is a big bird. It is not like cooking a small chicken or a turkey breast. The size means longer cooking times, uneven heat distribution, and a higher risk of drying out. That is exactly why having a clear plan matters so much.
When you understand how heat moves through a large bird, you can make smart decisions. You will know when to cover it with foil, when to increase the heat, and how to tell when it is truly done. These details make all the difference between a dry bird and a perfectly roasted turkey.
Understanding Turkey Size and Cooking Dynamics
A 20 lb turkey typically serves 16 to 20 people. That means it is often the go-to choice for Thanksgiving, Christmas, or large family gatherings. The weight affects how long the heat needs to penetrate to the center of the bird.
Here are a few things to keep in mind:
- Thicker parts take longer: The thighs and legs are denser and need more time than the breast.
- Even cooking is the goal: You want the white meat and dark meat to finish at the same time.
- Carryover cooking matters: The turkey continues to rise in temperature even after you take it out of the oven.
Preparing Your 20 lb Turkey
Proper preparation sets the stage for a great roast. Skipping this step is the most common mistake home cooks make. Take your time here, and the rest of the process will go smoothly.
Thawing Your Turkey Safely
Never cook a frozen turkey unless the recipe specifically says you can. Thawing must happen in the refrigerator. Plan for about 24 hours of thawing time for every 4 to 5 pounds of turkey.
For a 20 lb bird, that means you need at least 4 to 5 days in the fridge. Place the turkey on a tray or in a large container to catch any drips. This keeps your refrigerator clean and safe.
Quick tips for thawing:
- Keep the turkey in its original wrapper.
- Place it on the bottom shelf of the fridge.
- Do not thaw at room temperature on the counter.
- If you are short on time, you can thaw in cold water, changing the water every 30 minutes.
Brining for Flavor and Moisture
Brining is one of the best things you can do for a large turkey. A simple saltwater soak helps the meat retain moisture during the long cooking process. The result is juicier, more flavorful meat.
To brine a 20 lb turkey, dissolve one cup of kosher salt and half a cup of brown sugar in one gallon of water. Submerge the turkey in the brine for 12 to 24 hours. Then rinse it thoroughly and pat it completely dry before seasoning.
Not everyone has time to brine. That is perfectly fine. A dry brine works too. Just rub salt and your favorite seasonings under the skin and let the bird sit uncovered in the fridge overnight.
Seasoning and Stuffing Options
Seasoning a 20 lb turkey is all about balance. You want flavors that complement the bird without overpowering it. A simple blend of salt, pepper, garlic powder, and paprika works beautifully.
Some cooks like to stuff the cavity with aromatics. Halved lemons, fresh herbs, onion quarters, and garlic cloves all work well. They infuse the meat with a subtle, lovely flavor as the turkey roasts.
However, avoid stuffing the turkey with a traditional bread stuffing if you are aiming for even cooking. Stuffing inside a large bird can block heat from reaching the center. Instead, cook your stuffing separately in a best big pot for cooking non stick and serve it alongside the roast.
Oven Temperature and Roasting Time
This is the heart of 20 lb turkey cooking instructions. Getting the temperature and timing right ensures a safe, delicious result every single time.
The Ideal Oven Temperature
The standard recommendation is to roast your turkey at 325°F. This temperature cooks the bird evenly without burning the outside before the inside is done. It is the sweet spot for a whole turkey recipe that comes out moist and golden.
Some cooks start at a higher temperature for the first 30 minutes to crisp the skin. Then they reduce it to 325°F for the rest of the cook. This technique works well if you are confident in your timing.
How Long Does It Take to Cook a 20 lb Turkey?
As a general rule, plan for about 13 to 15 minutes per pound. That means your 20 lb turkey will need roughly 4 to 5 hours. But this is just an estimate. Several factors can change the actual cooking time.
Factors that affect roasting time include:
- Whether the turkey is stuffed or unstuffed.
- The starting temperature of the bird.
- Your specific oven’s accuracy and hot spots.
- Whether you use a roasting pan with a rack or without one.
Always rely on a food thermometer rather than the clock. The clock gives you a rough idea, but the thermometer tells you the truth.
Using a Roasting Rack and Pan Setup
Place your turkey on a roasting rack inside a large roasting pan. The rack lifts the bird off the bottom of the pan, allowing hot air to circulate underneath. This promotes even cooking and crispier skin.
If you do not have a rack, you can place chopped vegetables like onions and carrots at the bottom of the pan. They act as a stand and also add flavor to the drippings. For easy cleanup and better heat distribution, many cooks prefer a best pan to cook turkey in oven with a built-in rack.
Step-by-Step Cooking Process
Now that your turkey is prepped and your oven is preheated, here is exactly what to do.
- Preheat your oven to 325°F. Let it reach the right temperature before the turkey goes in.
- Place the turkey breast-side up on the roasting rack in your pan.
- Rub butter or oil over the skin. This helps the skin brown and become crispy.
- Season generously with salt, pepper, and any herbs you like.
- Put the turkey in the oven and set a timer for the first 30 minutes.
- Baste the turkey every 45 minutes with the pan juices. Use a best extra long wooden spoon for cooking to reach deep into the pan without burning your hands.
- Check the internal temperature after about 3.5 hours. Insert the thermometer into the thickest part of the thigh, avoiding the bone.
- When the thigh reaches 165°F and the breast reaches 160°F, the turkey is done.
- Remove the turkey from the oven and let it rest for at least 30 minutes before carving.
Basting Tips for a Golden, Crispy Skin
Basting is more than just a tradition. It actually helps the skin cook evenly and develop a beautiful golden color. Every time you baste, you are coating the skin with the turkey’s own rendered fat and juices.
Be careful not to open the oven too often. Every time you open the door, heat escapes and the cooking time increases. Limit basting to every 45 minutes or so. That keeps the heat stable while still giving you great results.
When to Cover with Foil
If the skin is getting too dark before the inside is done, loosely cover the breast area with a sheet of aluminum foil. This slows down the browning without trapping too much steam. Some cooks skip this entirely and simply monitor the turkey closely. Both approaches work fine.
Checking Doneness and Safety
Knowing when your turkey is done is the most important part of the process. Undercooked turkey is a food safety risk, and overcooked turkey is dry and disappointing. You want to hit the sweet spot.
Use a digital instant-read food thermometer to check the temperature in three places:
- The thickest part of the thigh.
- The thickest part of the breast.
- Near the wing joint.
The USDA recommends an internal temperature of 165°F in all three spots. But here is a pro tip: pull the turkey out when the breast hits 160°F and the thigh hits 165°F. The carryover turkey cooking temperature will bring the breast up to a safe 165°F during the resting phase.
Understanding Carryover Cooking
Carryover cooking is the reason the turkey’s temperature continues to rise after you take it out of the oven. This can add 5 to 10 degrees to the internal temperature. It is a natural process caused by the heat stored in the meat.
This is why resting is so important. It allows the juices to settle back into the meat fibers. If you carve too soon, those juices run out onto the cutting board instead of staying in the bird.
How to Keep the Turkey Warm Before Serving
Once your turkey is done and rested, you need to keep it warm while you prepare the rest of the meal. The best approach is to tent the turkey loosely with foil and leave it in a warm spot.
If you are worried about the turkey cooling too fast, you can use a cooler lined with towels to hold the heat. Or you can turn the oven off, crack the door, and let the turkey sit inside. For more detailed guidance on this, check out our guide on how to keep a turkey warm in the oven. This method keeps the bird at a safe temperature without overcooking it.
Making the Most of Your Turkey Drippings
After roasting a 20 lb turkey, you will have a pan full of drippings. These drippings are liquid gold for making gravy. Do not throw them away.
Pour the drippings into a best grease container for reusable cooking oil and let them cool. The fat will rise to the top, and you can skim it off for other recipes. The remaining liquid makes a rich, flavorful base for your turkey gravy.
To make gravy, pour off most of the fat from the roasting pan, leaving the browned bits behind. Add chicken or turkey broth and scrape up the bits with a wooden spoon. Simmer until the gravy thickens. Season with salt and pepper to taste.
Carving and Serving Your 20 lb Turkey
Carving a large turkey can feel like a challenge, but a few simple techniques make it easy. Start by removing the twine and any stuffing from the cavity. Then use a sharp carving knife to slice through the joints, not the meat.
Remove the legs first by cutting through the joint where the leg meets the body. Then slice the breast meat against the grain in even, thick pieces. This keeps each slice tender and juicy.
Serve the turkey on a warm platter with your favorite sides. A fresh turkey gravy drizzled over the slices adds richness and flavor. Pair it with mashed potatoes, cranberry sauce, and roasted vegetables for a classic holiday meal.
Common Mistakes to Avoid
Even experienced cooks can make errors when roasting a large turkey. Here are the most common mistakes and how to avoid them:
- Not thawing the turkey fully: A partially frozen turkey cooks unevenly and takes much longer.
- Skipping the thermometer: Guessing doneness leads to either undercooked or overcooked meat.
- Roasting at too high a temperature: High heat burns the outside before the inside cooks through.
- Not letting the turkey rest: Cutting too soon releases all the juices and dries out the meat.
- Over-seasoning the outside: A light hand with salt and spices lets the natural turkey flavor shine.
Expert Tips for the Perfect Roast
Here are a few bonus tips from seasoned cooks that can elevate your turkey game:
- Bring the turkey to room temperature for one hour before cooking. This helps it roast more evenly.
- Butter under the skin of the breast adds moisture and flavor. Gently loosen the skin and spread softened butter directly on the meat.
- Use a meat probe thermometer that stays in the bird and has a remote alert. This lets you monitor the temperature without opening the oven door.
- Cook the turkey overnight at a low temperature if you prefer. Some cooks roast at 275°F for 8 to 10 hours for an incredibly tender result.
- Save the bones after carving. They make a fantastic turkey stock for soups and stews later in the week.
If you are looking for the right tools to make your turkey day easier, having quality cookware makes a real difference. Check out our recommendations for the best mini pots and pans for cooking for side dishes and smaller tasks that complement your main roast.
Conclusion
20 lb turkey cooking instructions do not have to be complicated. With the right temperature, proper timing, and a little patience, you can roast a turkey that is moist, flavorful, and beautifully golden. The key is to trust the process and use a thermometer to guide you.
Remember to thaw your turkey safely, brine or season it well, and roast it at 325°F for about 4 to 5 hours. Let it rest before carving, and use those delicious drippings to make a rich gravy. Follow these steps and your turkey will be the star of the table.
Now that you have all the information you need, it is time to put it into action. Your family and guests are going to love the results. Happy cooking!
Frequently Asked Questions
How long does it take to cook a 20 lb turkey at 325°F?
At 325°F, a 20 lb unstuffed turkey takes approximately 4 to 5 hours to cook. The exact time depends on your oven, whether the turkey is stuffed, and how cold the bird was when it went in the oven. Always use a meat thermometer to confirm doneness.
What internal temperature should a 20 lb turkey reach?
The turkey is safe to eat when the thickest part of the thigh reaches 165°F. The breast should be around 160°F when you pull the bird out, as carryover cooking will bring it up to the safe temperature during resting.
Should I cover my turkey with foil while roasting?
Covering with foil is optional. It helps prevent the skin from browning too quickly, especially if your oven runs hot. Most cooks leave the turkey uncovered for the entire roast to get crispy skin. Cover only if the breast is getting too dark before the rest is done.
Do I need to brine a 20 lb turkey?
Brining is not required, but it is highly recommended. A brine adds moisture and flavor to the meat, which is especially helpful for a large bird that cooks for several hours. If you skip the brine, make sure you rub butter under the skin and do not overcook the turkey.
How do I store leftover cooked turkey?
Let the turkey cool to room temperature, then refrigerate it within two hours. Store it in an airtight container for up to 4 days. You can also freeze leftover turkey for up to 3 months. Reheat gently to keep the meat moist.
Can I cook a 20 lb turkey the night before?
Yes, you can roast the turkey a day ahead and reheat it before serving. This is a great strategy for holiday meals when you want to spend time with guests instead of standing over the stove. Reheat at 325°F with a little broth added to keep it moist.



