
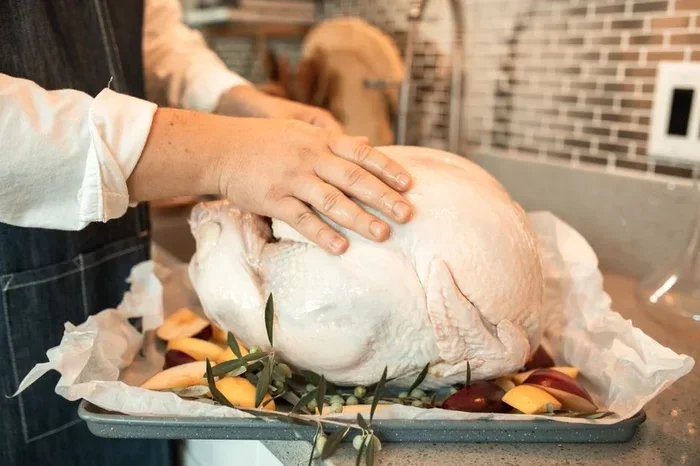
Brining a turkey before roasting is the easiest way to get juicy, flavorful meat that stays moist from breast to thigh. Whether you choose a wet brine or a dry brine, the process is simple and only requires salt, water, sugar, and a few aromatics. This guide walks you through every step so you can roast a perfect turkey with confidence.
Roasting a turkey can feel intimidating. You worry about dry breast meat, overcooked thighs, and ending up with a bland bird that nobody wants seconds of. But there is one simple trick that changes everything. Brining a turkey before roasting transforms a potentially dry, boring meal into a juicy, flavorful centerpiece that your whole family will love.
Brining is not complicated. It does not require fancy equipment or hard-to-find ingredients. You just need salt, water, a little sugar, and some basic seasonings. In this guide, we will walk you through exactly how to brine a turkey before roasting, step by step. By the end, you will feel totally ready to tackle your next holiday bird with confidence.
Whether you are a first-time turkey roaster or someone who has been doing it for years, brining is the one technique that will level up your results every single time. Let us get into it.
Key Takeaways
- Brining makes turkey juicier: The salt solution helps the meat retain moisture during roasting.
- Wet brine and dry brine both work: Choose wet brine for deeper flavor or dry brine for crispier skin.
- Brine time matters: Most turkeys need 12 to 24 hours in the brine for the best results.
- Don’t skip the aromatics: Herbs, spices, and citrus add layers of flavor to your bird.
- Pat dry before roasting: Removing excess moisture helps you get golden, crispy skin.
- Keep your turkey warm after roasting: Proper resting and holding techniques preserve juiciness.
📑 Table of Contents
- What Is Brining and Why Does It Work?
- How to Wet Brine a Turkey
- How to Dry Brine a Turkey
- How Long to Brine a Turkey
- Tips for the Perfect Roasted Turkey
- Common Brining Mistakes to Avoid
- Flavor Variations for Your Turkey Brine
- Brining vs. Other Turkey Prep Methods
- Frequently Asked Questions
- Final Thoughts
What Is Brining and Why Does It Work?
A brine is simply a saltwater solution that you soak your turkey in before cooking. The science behind it is straightforward and really fascinating. Salt helps the muscle fibers in the turkey absorb and hold onto water. When the turkey roasts, that extra moisture stays locked inside, which means juicier meat.
But brining does more than just add moisture. It also seasons the meat all the way through, not just on the surface. That means every bite of breast meat and every thigh gets flavor. This is especially important because turkey breast tends to dry out faster than the darker meat on the thighs.
There are two main types of brine you can use. A wet brine submerges the turkey in a liquid solution. A dry brine rubs salt directly onto the surface of the bird. Both methods work well, and we will cover each one in detail below.
How to Wet Brine a Turkey
A wet brine is the classic method. It involves soaking the entire turkey in a large container filled with salted water and aromatics. This is the most popular approach for home cooks, and for good reason.
What You Will Need
Here is a simple list of ingredients for a basic wet brine:
- Kosher salt (about 1 cup per gallon of water)
- Brown sugar or white sugar (about 1/2 cup)
- Water (enough to fully submerge the turkey)
- Aromatics like bay leaves, peppercorns, garlic cloves, and thyme
- Optional add-ins like orange zest, rosemary, or juniper berries
Make sure you use kosher salt for brining. Table salt is denser and can make the brine too salty. If you only have table salt, use about half the amount called for.
Step-by-Step Wet Brine Process
Follow these steps for a foolproof wet brine:
- Remove the giblets and neck from inside the turkey cavity. You can save these for gravy later.
- Find a large container. A clean bucket, a large stockpot, or a brining bag works perfectly. The turkey needs to be fully submerged.
- Dissolve the salt and sugar in a pot of hot water. Let it cool completely before adding the turkey.
- Add the aromatics to the cooled brine. Toss in your bay leaves, garlic, peppercorns, and any herbs you like.
- Submerge the turkey in the brine. Make sure it is fully covered with liquid.
- Refrigerate for 12 to 24 hours. The turkey should sit in the brine for at least 12 hours, but no more than 24. Longer than that and the texture can get mushy.
After brining, take the turkey out of the liquid. Rinse it under cold water and pat it completely dry with paper towels. Then let it sit uncovered in the refrigerator for a few hours or overnight. This step helps dry out the skin, which leads to crispier results when roasting.
How to Dry Brine a Turkey
A dry brine is a simpler, more hands-off approach. Instead of submerging the bird in liquid, you rub a mixture of salt and seasonings directly onto the turkey skin. The salt draws moisture out of the meat, dissolves, and then gets reabsorbed. This seasons the meat deeply and helps create incredibly crispy skin.
Why Choose Dry Brine?
Dry brining has some big advantages. You do not need a giant container or a lot of water. The process is cleaner and takes up less space in your fridge. Plus, dry brining tends to produce crispier skin compared to wet brining because the surface dries out more effectively.
Dry brining also takes less hands-on time. You mix your salt and spices, rub it on, and forget about it. There is no rinsing or waiting for water to cool.
How to Dry Brine Step by Step
Here is how to do a dry brine for your turkey:
- Mix your dry brine: Combine 1 tablespoon of kosher salt per pound of turkey with black pepper, garlic powder, and paprika.
- Unwrap the turkey and pat it dry with paper towels.
- Rub the mixture all over the turkey, getting some under the skin of the breast and thighs too.
- Place the turkey on a rack set inside a rimmed baking sheet.
- Refrigerate uncovered for 12 to 24 hours. The air circulation helps the skin dry out even more.
When you are ready to roast, take the turkey out of the fridge about 30 minutes before it goes in the oven. This lets the meat come closer to room temperature, which helps it cook more evenly.
How Long to Brine a Turkey
Brining time depends on the size of your turkey and the method you are using. Here is a quick reference guide:
| Turkey Size | Wet Brine Time | Dry Brine Time |
|---|---|---|
| 8-12 lbs | 12 hours | 12-18 hours |
| 12-16 lbs | 12-18 hours | 18-24 hours |
| 16-20 lbs | 18-24 hours | 24 hours |
| Over 20 lbs | 24 hours (max) | 24 hours |
Do not go overboard with brining time. Leaving a turkey in a wet brine for more than 24 hours can make the meat too salty and change the texture. With a dry brine, you have a little more flexibility, but 24 hours is still the sweet spot for most birds.
If you are short on time, even a 4 to 6 hour brine can make a noticeable difference. Every little bit helps. But for the best results, plan ahead and give your turkey the full time it needs.
Tips for the Perfect Roasted Turkey
Brining sets you up for success, but a few extra steps make a big difference when it is time to roast.
Pat the Turkey Dry
After you take the turkey out of the brine, use paper towels to pat the skin completely dry. The drier the surface, the crispier the skin will get. This is one of the most overlooked steps, but it really matters.
Grease the Pan Properly
Before you put the turkey in the oven, make sure your roasting pan is prepared. You can grease a pan without oil or butter by using a light coating of cooking spray or lining it with parchment paper. This prevents sticking and makes cleanup much easier.
Roast at the Right Temperature
Most turkey recipes call for roasting at 325°F to 350°F. A lower temperature cooks the bird more gently and evenly. Use a meat thermometer to check the internal temperature. The turkey is done when the thickest part of the thigh reaches 165°F.
Let It Rest
Once the turkey comes out of the oven, let it rest for at least 20 to 30 minutes before carving. This allows the juices to redistribute throughout the meat. If you carve too soon, all those juices will run out onto the cutting board instead of staying in the bird.
After resting, you can keep your turkey warm in the oven at a low temperature. Keeping a turkey warm in the oven is a great way to serve a hot meal without overcooking the bird while you wait for guests to arrive.
Common Brining Mistakes to Avoid
Even experienced cooks make brining mistakes. Here are a few to watch out for:
- Using too much salt: This is the number one error. Stick to the recommended ratio and taste your brine before adding the turkey. It should taste like mild seawater, not a salt lick.
- Skipping the rinse: After a wet brine, always rinse the turkey and pat it dry. Extra salt on the surface will make the skin taste salty.
- Brining for too long: More is not always better. Over-brining can turn your turkey into a mushy texture that nobody wants.
- Forgetting to account for the salt in seasonings: If your rub or seasoning blend already contains salt, reduce the amount of salt in your brine accordingly.
- Not letting the turkey come to room temperature before roasting: A cold turkey going into a hot oven cooks unevenly. Give it at least 30 minutes on the counter first.
Flavor Variations for Your Turkey Brine
The basic brine recipe is great on its own, but you can customize it to match your taste or holiday theme. Here are some fun variations to try:
- Citrus brine: Add orange zest, lemon slices, and fresh rosemary for a bright, fresh flavor profile.
- Sage and thyme brine: Classic holiday aromatics that give the turkey a warm, earthy taste.
- Apple cider brine: Swap some of the water for apple cider and add cinnamon sticks and cloves for a fall-inspired twist.
- Spicy brine: Add red pepper flakes, smoked paprika, and a splash of hot sauce for a bird with a little kick.
- Asian-inspired brine: Use soy sauce, ginger, garlic, and a touch of honey for a savory umami flavor.
Feel free to experiment with these combinations. The beauty of brining is that you can adapt it to whatever flavors you and your family enjoy. Just keep the salt ratio consistent and adjust the aromatics to your liking.
Brining vs. Other Turkey Prep Methods
Brining is not the only way to prep a turkey. Some people prefer to simply season the bird and roast it. Others use a marinade or a rub. Here is how brining compares to a few other popular methods:
- Brining vs. seasoning only: Seasoning adds flavor to the surface, but brining seasons the meat throughout and adds moisture. Brining wins for juiciness.
- Brining vs. marinating: Marinating works well for chicken or smaller cuts, but it is impractical for a whole turkey. Brining is more efficient for large birds.
- Wet brine vs. dry brine: Wet brine adds more moisture, while dry brine creates crispier skin. Both produce excellent results. Choose based on your preference for texture and convenience.
For the best tenderize meat naturally, brining is hard to beat. It is a simple process that delivers real, noticeable results. Your turkey will be juicier, more flavorful, and more tender than if you skip the brine entirely.
Frequently Asked Questions
Can I brine a turkey for too long?
Yes, over-brining is a real thing. Wet brining for more than 24 hours can make the turkey texture mushy and overly salty. Stick to the recommended time frames, and you will be just fine.
Do I need to rinse the turkey after brining?
Yes, always rinse the turkey after a wet brine. This removes excess salt from the surface. After rinsing, pat the turkey completely dry with paper towels before roasting.
Can I reuse brine?
No, you should not reuse brine. The liquid has been in contact with raw poultry and should be discarded. Always make fresh brine for each turkey you cook.
What is the difference between kosher salt and regular salt for brining?
Kosher salt has a coarser grain and is less dense than regular table salt. This means you need more volume of kosher salt to achieve the same saltiness. Using the right type of salt ensures your brine has the correct concentration.
Can I brine a frozen turkey?
No. You should always thaw the turkey completely before brining. Brining a frozen turkey does not work because the salt solution cannot penetrate the frozen meat evenly. Plan ahead and thaw in the refrigerator first.
How does brining affect cooking time?
Brining can slightly increase cooking time because the absorbed moisture needs to evaporate before the skin crisps. However, the difference is minimal and is more than offset by the juicier, more flavorful results you get.
Final Thoughts
Brining a turkey before roasting is one of the easiest and most effective ways to improve your holiday cooking. It takes just a little planning and a handful of simple ingredients, but the payoff is enormous. You get a juicy, flavorful turkey with tender meat from edge to edge.
Whether you choose a wet brine or a dry brine, the key is to give your turkey enough time in the salt solution. Plan for 12 to 24 hours, use the right ratio of salt to water, and add aromatics that match your taste. Then roast with confidence, knowing that your bird is going to turn out amazing.
Once your turkey is done, remember to let it rest properly and keep it warm until it is time to serve. And if you want to make sure your meal stays hot throughout dinner, check out tips on how to keep a turkey warm in the oven for stress-free serving.
Brining is a game-changer. Try it once, and you will never roast a turkey without it again. Happy cooking!



