
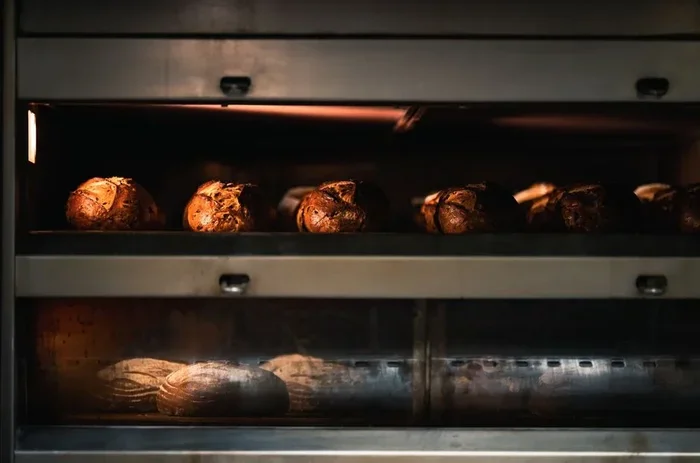
Learning how to store homemade bread properly keeps your loaf soft, flavorful, and ready to enjoy for days. Whether you prefer room temperature storage, the fridge, or the freezer, the right method makes all the difference. This guide shares simple, proven techniques that home bakers of every level can use right away.
Key Takeaways
- Room temperature storage works best for bread you will eat within 2–3 days and keeps the crust crispy.
- A bread box or airtight container creates the perfect balance of airflow and moisture retention.
- The freezer is your best friend for long-term storage and can keep bread fresh for up to 3 months.
- Never store bread in the fridge unless it is already sliced and you plan to eat it within a few days.
- Proper cooling before storage prevents condensation and soggy bread.
- Reheating stale bread can bring back much of its original freshness and crunch.
- The right wrapping method depends on how soon you plan to eat the bread.
📑 Table of Contents
- How to Store Homemade Bread Without Losing Freshness
- Why Proper Bread Storage Matters
- How to Store Homemade Bread at Room Temperature
- Can You Store Homemade Bread in the Fridge?
- How to Freeze Homemade Bread for Long-Term Storage
- Common Mistakes That Ruin Homemade Bread
- How to Revive Stale Homemade Bread
- Best Storage Methods by Bread Type
- Expert Tips for Keeping Homemade Bread Fresh Longer
- Final Thoughts on Storing Homemade Bread
How to Store Homemade Bread Without Losing Freshness
Baking homemade bread is one of the most rewarding things you can do in the kitchen. The smell fills your home. The crust turns golden. The crumb is soft and warm. But here is the tricky part. How to store homemade bread without it going stale or drying out? You worked hard on that loaf. You deserve to enjoy it for more than one meal.
The good news is that storing homemade bread is not complicated. You just need the right method for how quickly you plan to eat it. Whether you want to keep bread fresh for two days or two months, this guide covers it all. We will walk you through every storage option step by step. You will learn what works, what does not, and why. Let us dive in.
Why Proper Bread Storage Matters
Homemade bread has no preservatives. That is the beauty of it. But it also means your loaf will go stale faster than store-bought bread. Staling happens when moisture moves out of the crumb and the starch molecules crystallize. This process starts within hours of baking.
Improper storage leads to several problems. Your bread dries out. It develops a hard crust. Mold can appear. The flavor changes. Nobody wants to bite into a rock-hard loaf when they worked so hard to bake it. Proper bread storage preserves the texture, flavor, and aroma you worked so hard to create.
There are three main ways to store homemade bread. You can keep it at room temperature. You can refrigerate it. Or you can freeze it. Each method has its place. The right choice depends on your timeline and your lifestyle. Let us look at each one in detail.
How to Store Homemade Bread at Room Temperature
Room temperature storage is the best method for bread you plan to eat within two to three days. It keeps the crust crispy and the crumb soft. This is the way most artisan bakeries store their loaves. And it works beautifully at home too.
Step 1: Let the Bread Cool Completely
This step is critical. Do not wrap warm bread. Trapped heat creates condensation. That moisture makes the surface soggy. It invites mold. Let your loaf cool on a wire rack for at least one hour. Some loaves need two hours depending on size. The bread should feel completely cool to the touch before you store it.
Step 2: Choose the Right Wrapping
How you wrap your bread affects freshness. Here are the best options:
- Linen bread bag – Lets the bread breathe while retaining just enough moisture. This is the traditional method.
- Cotton kitchen towel – A simple and affordable option. Wrap the loaf loosely and secure with a rubber band.
- Parchment paper – Wraps the bread gently without trapping too much moisture.
- Airtight container – Keeps moisture locked in. Great for sliced bread or very soft loaves.
Avoid plastic bags that seal completely. They trap too much moisture and can make the crust soft and gummy. If you must use a plastic bag, leave it slightly open.
Step 3: Find the Right Spot
Place your wrapped bread in a cool, dry spot. A bread box is ideal. It allows just enough airflow to prevent moisture buildup. A pantry or cupboard works well too. Avoid spots near the stove or dishwasher. Heat and humidity speed up spoilage.
Quick Tip: If you do not have a bread box, a paper bag with the top folded over works surprisingly well. Many professional bakers use this method.
Can You Store Homemade Bread in the Fridge?
The short answer is: usually no. Refrigeration is one of the worst places to store fresh bread. The cold temperatures cause starch retrogradation. This is a fancy way of saying the bread goes stale much faster. Refrigerated bread can become dry and hard within one day.
However, there is one exception. If you have sliced bread and you will not finish it within two days, the fridge can help slow down mold growth. In that case, wrap the slices tightly in plastic wrap or place them in a sealed container. You can also store homemade caramel or other fillings alongside bread slices in the fridge, but the bread itself should be kept separate when possible.
For most homemade loaves, skip the fridge. Room temperature or the freezer is always better. If you have ever wondered why your refrigerated bread tasted stale the next morning, this is why. The fridge dries bread out fast.
How to Freeze Homemade Bread for Long-Term Storage
Freezing is the best way to keep homemade bread fresh for weeks or even months. It slows staling dramatically. When done correctly, frozen bread tastes almost as good as fresh-baked bread.
Step 1: Cool the Bread Fully
Just like room temperature storage, you must cool the bread completely before freezing. Warm bread creates ice crystals inside the packaging. Those crystals lead to freezer burn. Give your loaf at least two hours to cool. Patience here pays off big time.
Step 2: Slice Before Freezing
Slicing your bread before freezing is a game changer. It lets you pull out just one or two slices without thawing the whole loaf. Use a sharp serrated knife for clean cuts. How to store homemade bread in the freezer works best when each slice is separated by a small piece of parchment paper. This prevents the slices from sticking together.
Step 3: Wrap Tightly
Wrap the whole loaf or individual slices in plastic wrap first. Then add a layer of aluminum foil. Or place everything inside a freezer-safe zip-lock bag. Squeeze out as much air as possible. Air causes freezer burn, which dries out the bread and creates off-flavors.
Step 4: Label and Date
Use a marker to write the date and bread type on the bag. Homemade bread keeps well in the freezer for up to three months. After that, the quality starts to decline. Labeling helps you use the oldest loaves first.
How to Thaw Frozen Bread
Thawing frozen bread is simple. Take out the slices or loaf the night before. Place them on the counter at room temperature. By morning, they are ready to eat. For a quick reheat, warm slices in the oven at 350°F for 3 to 5 minutes. This brings back the crispy crust and soft interior. You can also crisp bread in oven using this same method for a fresh-from-the-oven feel.
Quick Tip: Do not microwave frozen bread unless you are in a real hurry. The microwave heats unevenly and can make the crust rubbery. The oven is always better.
Common Mistakes That Ruin Homemade Bread
Even experienced bakers make storage mistakes. Here are the most common ones to avoid:
- Wrapping bread while it is still warm. This traps steam and creates a soggy, mold-prone surface.
- Storing bread in a sealed plastic bag at room temperature. Too much moisture builds up and softens the crust.
- Putting fresh bread in the fridge. The cold accelerates staling. Your bread will taste worse faster.
- Leaving bread on the counter uncovered. It dries out within hours and attracts pests.
- Freezing bread without wrapping it tightly. Air exposure causes freezer burn and off-flavors.
- Storing bread near strong-smelling foods. Bread absorbs odors easily. Keep it away from onions, garlic, and spices.
Avoiding these mistakes alone will dramatically extend the life of your homemade bread. It is simple but often overlooked.
How to Revive Stale Homemade Bread
Even with the best storage, bread eventually goes stale. But stale bread is not garbage. You can bring it back to life with a few simple methods.
Sprinkle a little water over the crust. Place the loaf in a preheated oven at 375°F for 5 to 10 minutes. The moisture reactivates the starch and softens the crumb. The crust becomes crispy again. This method works for most bread types including homemade zucchini bread and sandwich loaves.
Another option is to steam the bread. Wrap the loaf in aluminum foil with a damp paper towel. Heat at 300°F for 10 minutes. The steam penetrates the crust and softens the interior. This works especially well for rustic artisan loaves with thick crusts.
If you have breadcrumbs or croutons in mind, stale bread is actually an asset. Cube it, toss it with olive oil and herbs, and bake until crispy. Stale bread for croutons is a win-win. You can also make bread pudding, French toast, or bread soup with day-old loaves.
Best Storage Methods by Bread Type
Different bread types benefit from different storage approaches. Here is a quick comparison:
- Crusty artisan loaves – Store at room temperature in a paper bag or linen bag. Eat within two days.
- Soft sandwich bread – Store in an airtight container or plastic bag at room temperature. Freezes very well.
- Sweet breads (banana bread, zucchini bread) – Room temperature for 2 days, then refrigerate or freeze for longer storage.
- Sourdough – Room temperature in a breathable bag. Sourdough naturally resists mold, so it lasts a bit longer.
- Bread with fillings or toppings – Refrigerate if it contains perishable ingredients like cream cheese or custard.
Think about the bread type when choosing your storage method. A crusty sourdough needs airflow. A soft sweet bread needs moisture retention. Matching the method to the bread type gives the best results.
Expert Tips for Keeping Homemade Bread Fresh Longer
Here are some extra tips from experienced bakers that make a real difference:
- Use a bread lame or sharp knife to score your loaf before baking. Proper scoring helps control moisture loss during cooling.
- Add a touch of honey or oil to your dough. These ingredients naturally retain moisture and slow staling.
- Store bread cut-side down on a cutting board. This keeps the crumb from drying out as fast.
- Invest in a good bread box. They are inexpensive and work wonders. A bread box maintains the ideal balance of airflow and humidity.
- Keep bread away from direct sunlight. UV rays break down starches and speed up spoilage.
- Rotate your stock. Use older loaves first and place fresh ones behind them. This simple habit prevents waste.
These small habits add up. Over time, they transform how long your homemade bread stays fresh and enjoyable.
Final Thoughts on Storing Homemade Bread
Storing homemade bread does not need to be stressful. The key is matching the method to your timeline. For bread you will eat within a few days, room temperature storage in a breathable bag or bread box works perfectly. For longer storage, the freezer is your best tool. And always remember to cool your bread fully before wrapping or storing it.
How to store homemade bread is a simple skill that saves money, reduces waste, and ensures every slice tastes as good as the first. Follow the tips in this guide and your bread will stay fresh longer. You will waste less. You will enjoy more. And every slice will remind you why you love baking at home.
Start with one method today. Try wrapping your next loaf in a linen bag and see the difference. Or freeze half the loaf for later in the week. Small changes lead to big improvements. Your homemade bread deserves the best care. Give it that care and it will reward you with flavor and freshness every single time.
And if you ever need to crisp up a loaf that has lost its crunch, remember that a few minutes in the oven can bring back the magic. Great bread storage is really about respect for the craft. You put time and love into every loaf. The storage method just helps you enjoy the fruits of that labor for as long as possible.
Frequently Asked Questions
How long does homemade bread last at room temperature?
Most homemade bread stays fresh for 2 to 3 days at room temperature. Artisan loaves with crispy crusts are best eaten within 1 to 2 days. Sweet breads and sandwich loaves can last up to 4 days if stored properly in a breathable bag or container.
Can I store homemade bread in a plastic bag?
Yes, but choose the right type of bag. A loosely tied plastic bag works better than a sealed one because it allows some airflow. For the best results, use a linen bread bag or paper bag instead. Sealed plastic bags trap moisture and make the crust soft.
How do I keep homemade bread from getting moldy?
Cool the bread completely before storing it. Keep it in a dry, cool spot away from heat sources. Use a breathable wrapper like a linen bag. Avoid storing bread in humid areas. If mold appears, discard the entire loaf because mold spores can penetrate deeper than you can see.
Is it better to freeze or refrigerate homemade bread?
Freezing is almost always better than refrigerating. The fridge causes bread to stale faster due to starch retrogradation. Freezing slows staling and keeps bread fresh for up to 3 months. Always wrap frozen bread tightly to prevent freezer burn.
How do I reheat frozen homemade bread?
Thaw the bread at room temperature overnight. Then warm it in a preheated oven at 350°F for 3 to 5 minutes. This restores the crispy crust and soft crumb. Avoid microwaving if possible because it can make the crust rubbery and the interior unevenly heated.
What is the best container for storing homemade bread?
A bread box is the gold standard for room temperature storage. It allows controlled airflow while retaining moisture. Other great options include a linen bread bag, a cotton kitchen towel, or an airtight container for sliced bread. Choose based on how quickly you plan to eat the bread.



