Replacing a gas cooktop with an induction cooktop is easier than you think. This guide walks you through every step, from turning off the gas line to plugging in your new unit. You’ll learn what tools you need, how to handle the electrical setup, and how to choose the right induction model for your kitchen.
Thinking about swapping your gas cooktop for an induction model? You are not alone. More homeowners are making the switch every year, and for good reason. Induction cooking heats up faster, cools down quicker, and uses less energy than traditional gas burners. Plus, a smooth glass surface is way easier to clean than grates and burners.
But let us be real. The process of replacing a gas cooktop with induction can feel intimidating. There is the gas line to deal with, electrical requirements to understand, and the actual installation to figure out. This guide breaks it all down into simple, manageable steps. By the end, you will feel confident enough to tackle the job yourself or at least know exactly what to expect if you hire a pro.
We will cover everything from turning off your gas supply to testing your new induction cooktop. You will also learn about compatibility, tools you need, and common pitfalls to avoid. Let us get started.
Key Takeaways
- Safety First: Always shut off the gas supply and electricity before starting any cooktop replacement work.
- Check Compatibility: Your kitchen may need wiring updates or a new circuit to support an induction cooktop.
- Measure Twice: Countertop cutout size and cooktop dimensions must match to avoid fit issues.
- Proper Tools Matter: Having the right tools on hand makes the entire process faster and safer.
- Induction Cookware Is Key: You will need induction-compatible pots and pans for the new cooktop to work.
- DIY Is Doable: Most homeowners can complete this swap in a few hours with basic skills.
- Professional Help Available: If electrical work feels daunting, a licensed electrician can handle the wiring safely.
📑 Table of Contents
- Why Replace Gas Cooktop With Induction?
- Step 1: Gather Your Tools and Materials
- Step 2: Turn Off Gas and Electricity
- Step 3: Remove the Old Gas Cooktop
- Step 4: Handle the Electrical Requirements
- Step 5: Install the New Induction Cooktop
- Step 6: Test and Optimize Your New Induction Cooktop
- Common Mistakes to Avoid
- Expert Tips for a Smooth Transition
- How Long Does the Process Take?
- Cost Considerations
- Conclusion
Why Replace Gas Cooktop With Induction?
Before diving into the how-to, it helps to understand why so many people are making this switch. Induction technology is not just a trend. It offers real benefits that change how you cook every day.
Faster Heating Times
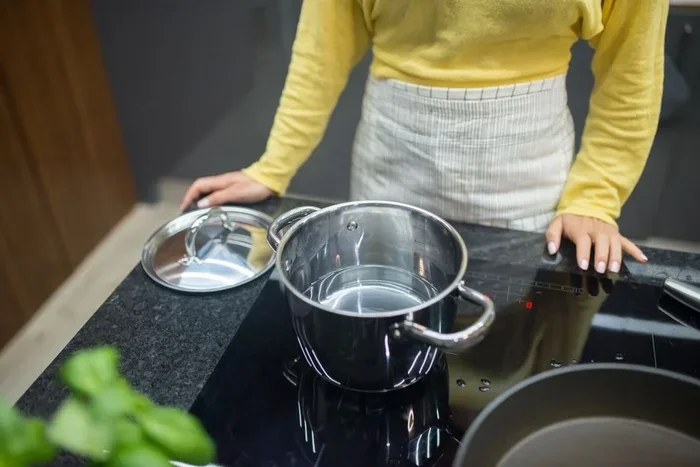
Induction cooktops heat cookware directly using electromagnetic energy. This means your pot or pan gets hot almost instantly. With gas, you wait for the burner to heat up, then wait for the heat to transfer through the bottom of your pot. Induction skips that middle step entirely.
Better Energy Efficiency
Gas cooktops lose a lot of heat to the surrounding air. Induction cooktops transfer energy directly to the cookware. Studies show induction is about 85-90% efficient, while gas clocks in around 40%. That means lower energy bills and a cooler kitchen.
Easier Cleaning
No grates, no drip pans, no burnt-on food stuck around burners. A flat glass surface wipes clean in seconds. Spills do not bake onto the cooktop because the surface stays relatively cool unless a pot is on it.
Improved Safety
No open flames means less risk of fire. The surface does not stay hot after you remove the pot, reducing burn risks. Many induction models also have auto-shutoff features and child locks.
Step 1: Gather Your Tools and Materials
Before you start any work, make sure you have everything you need. Being prepared saves time and prevents frustrating delays mid-project.
Tools You Will Need
- Screwdriver set — both flathead and Phillips head
- Adjustable wrench — for disconnecting gas lines
- Voltage tester — to confirm power is off
- Tape measure — for checking cutout dimensions
- Drill with bits — if you need to modify the countertop
- Wire stripper and connectors — for electrical connections
- Putty knife or chisel — for removing old caulk or adhesive
- Safety gloves and goggles — always protect yourself
Materials to Have Ready
- New induction cooktop — make sure it fits your countertop cutout
- Electrical wire and circuit breaker — if your kitchen needs an upgrade
- Silicone caulk — for sealing the cooktop to the countertop
- Gas shut-off valve — if your existing line needs replacement
Step 2: Turn Off Gas and Electricity
This is the most important step. Never skip it. Working on a live gas line or electrical circuit is dangerous and can cause serious harm.
Shutting Off the Gas Supply
Locate the gas shut-off valve near your cooktop. It is usually on the wall behind or beside the stove. Turn it clockwise to close it completely. After that, disconnect the gas line from the cooktop using an adjustable wrench. Cap the open line immediately to prevent gas leaks.
Pro tip: If you smell gas at any point, stop working, leave the area, and call your gas company. Do not use electrical switches or open flames.
Cutting Power to the Area
Go to your home’s electrical panel and turn off the circuit breaker that powers the cooktop area. Use a voltage tester to confirm no electricity is flowing to the outlet or wiring. Never assume the breaker is correct — always test it.
For more details on electrical requirements for different cooktop types, check out our guide on best 2 burner induction cooktop built in options that highlight electrical needs.
Step 3: Remove the Old Gas Cooktop
Now the fun part — removing the old unit. Take your time and work carefully.
Disconnect the Gas Line
With the valve shut and the power off, disconnect the gas supply line from the cooktop. Place a bucket or towel underneath to catch any residual gas or debris. Use your adjustable wrench to loosen the fitting. Have a second person hold the cooktop steady while you work.
Remove the Cooktop from the Countertop
Most gas cooktops are held in place by clips or screws under the countertop. Look for mounting screws along the edges. Remove them carefully. Some older models may also have caulk or adhesive holding them in place. Use a putty knife to gently break the seal.
Once all fasteners are removed, carefully lift the cooktop out of the cutout. Gas cooktops can be surprisingly heavy, so get help if needed.
Inspect and Prepare the Opening
Now that the old cooktop is out, inspect the countertop cutout. Check for any damage, water stains, or debris. Clean the area thoroughly. Measure the opening to confirm it matches the dimensions of your new induction cooktop.
Most standard cooktop cutouts are around 30 inches wide, but sizes vary. If your opening does not match, you may need to modify the countertop. This is a job best left to a professional carpenter or kitchen installer.
Step 4: Handle the Electrical Requirements
This is where replacing a gas cooktop with induction gets a bit more technical. Induction cooktops need a dedicated electrical circuit, and the requirements vary by model.
Understand Your Electrical Needs
Most induction cooktops require a 240-volt dedicated circuit. Some smaller models work on 120 volts, but full-size induction cooktops almost always need 240V. Check the specifications of your chosen model before you start.
Common amperage requirements include:
- 30-amp circuit — for most standard induction cooktops
- 40-amp circuit — for high-power models with extra features
- 50-amp circuit — for commercial-style or dual-zone induction units
Install a New Circuit if Needed
If your kitchen does not have a 240V outlet in the right location, you will need to have one installed. This typically involves running new wiring from your electrical panel to the cooktop location. A licensed electrician should handle this work to ensure it meets local building codes.
Do not try to use an existing gas cooktop outlet for an induction model. Gas cooktops use 120V outlets, while induction units need 240V. Using the wrong circuit can cause fires or damage the cooktop.
Wire the Cooktop Properly
Once the circuit is in place, connect the wiring according to the manufacturer’s instructions. Typically, you will connect the black and red hot wires, the white neutral wire, and the green or bare ground wire. Use wire connectors and make sure all connections are tight and secure.
If you are unsure about any electrical work, hire a professional. It is not worth the risk.
Step 5: Install the New Induction Cooktop
Now comes the rewarding part — putting in your new induction cooktop.
Place the Cooktop in the Cutout
Carefully lower the induction cooktop into the countertop opening. Make sure it sits flush and level. Most induction cooktops come with mounting clips or brackets. Secure them according to the manufacturer’s instructions.
Do not overtighten screws. Glass cooktop surfaces can crack if pressure is uneven.
Connect the Electrical Wiring
With the cooktop in place, connect the electrical wires. Match the colors: black to black, red to red, white to white, and ground to ground. Use wire nuts and make sure each connection is firm. Tuck the wires neatly into the cabinet space below the countertop.
Seal the Edges
Apply a thin bead of silicone caulk around the edges where the cooktop meets the countertop. This prevents water from seeping underneath and keeps the cooktop securely in place. Smooth the caulk with your finger or a damp cloth for a clean finish.
Let the caulk cure for at least 24 hours before using the cooktop.
Step 6: Test and Optimize Your New Induction Cooktop
Your new induction cooktop is installed. Now let us make sure everything works perfectly.
Power On and Test Each Zone
Turn the circuit breaker back on. Power up the cooktop and test each heating zone. Place a pot of water on each zone and check that it heats up evenly and quickly. Listen for any unusual sounds and look for any error codes on the display.
Check for Gas Leaks (Just in Case)
Even though you disconnected the gas line, it is smart to check nearby connections with a gas leak detector solution. Apply it to any remaining gas fittings and look for bubbles. No bubbles means no leaks.
Use the Right Cookware
Here is something many people overlook. Induction cooktops only work with magnetic cookware. If your pots and pans are not induction-compatible, they will not heat up. You can test a pan by holding a magnet to the bottom. If it sticks, it works on induction.
If you need new cookware, look for best non stick cookware for induction cooktop options that work great with your new setup. Similarly, a quality pots and pans set for induction cooktop ensures you get the best performance from day one.
Clean and Maintain
Induction cooktops are low maintenance, but a little care goes a long way. Wipe the surface after each use with a damp cloth. For stubborn stains, use a cooktop cleaner and a soft scraper. Avoid abrasive pads that can scratch the glass surface.
Common Mistakes to Avoid
Even with the best instructions, mistakes happen. Here are the most common errors people make when replacing a gas cooktop with induction:
- Skipping the electrical check. Assuming your existing outlet works for induction is a dangerous mistake. Always verify the voltage and amperage requirements first.
- Ignoring the gas line properly. Not capping or sealing the old gas line can lead to leaks. Always cap unused gas connections immediately.
- Using incompatible cookware. Buying an expensive induction cooktop only to realize your pots do not work on it is a frustrating and costly error.
- Not measuring the cutout. A cooktop that does not fit the countertop opening can delay your entire project. Measure twice and buy once.
- Over-tightening mounting screws. This can crack the glass surface and ruin a brand new cooktop.
- Forgetting to let caulk cure. Using the cooktop before the sealant dries can cause water damage underneath.
Expert Tips for a Smooth Transition
Here are some insider tips from experienced kitchen installers that make the whole process smoother:
- Keep your old gas cooktop until the induction is fully tested. Having a backup cooking surface during the switchover is incredibly helpful.
- Take photos before disconnecting anything. Photos of your old wiring and gas connections make reassembly and troubleshooting much easier.
- Read the entire manual before starting. Every induction cooktop model is slightly different. Reading the manual first prevents surprises during installation.
- Consider a cooktop with bridge zones. Bridge zones let you combine two cooking zones into one large zone, perfect for griddles and oversized pots.
- Plan for ventilation. Even though induction produces less heat than gas, you still need proper range hood ventilation for smoke and steam.
How Long Does the Process Take?
For a straightforward swap with existing 240V wiring, most homeowners complete the job in 3 to 5 hours. If you need new electrical work or countertop modifications, add another 2 to 3 hours — or more if you hire professionals for those tasks.
The actual cooktop installation takes about an hour once the electrical is ready. The rest of the time goes to preparation, disconnection, and cleanup.
Cost Considerations
The total cost depends on several factors. The induction cooktop itself ranges from $300 for a basic two-burner model to $2,000 or more for premium units. Electrical work adds $200 to $800 if you need a new circuit. Hiring a professional installer costs $100 to $300 on top of that.
Compare this to the long-term savings. Induction cooktops use less energy, and many utility companies offer rebates for switching from gas to electric induction. Over a few years, the energy savings can offset the upfront cost.
Conclusion
Replacing a gas cooktop with induction is a rewarding project that upgrades your kitchen in meaningful ways. You get faster cooking, better energy efficiency, easier cleaning, and improved safety. The process is very doable for homeowners with basic DIY skills, especially when you follow each step carefully.
Remember to prioritize safety at every stage. Turn off the gas and electricity before you start. Verify your electrical setup can handle the new cooktop. Use the right tools, measure carefully, and take your time.
Once your new induction cooktop is up and running, you will wonder why you did not make the switch sooner. The difference in cooking performance is noticeable from the very first meal. Enjoy your new kitchen setup and the many benefits that come with induction cooking.
Frequently Asked Questions
Can I replace a gas cooktop with induction myself?
Yes, most homeowners can handle this swap if they are comfortable with basic electrical work and have the right tools. The key steps involve turning off gas and power, removing the old unit, handling wiring, and installing the new cooktop. If you are unsure about any electrical connections, hire a licensed electrician for that part of the job.
Do I need a special outlet for an induction cooktop?
Yes. Most full-size induction cooktops require a 240-volt dedicated circuit, typically 30 to 50 amps. Gas cooktops use standard 120V outlets, so you will almost certainly need a new circuit installed by a qualified electrician.
What happens to the gas line after removal?
The gas line should be capped and sealed properly. If you plan to use that line for something else in the future, have a professional cap it and leave the valve accessible. If the line is no longer needed, a plumber can safely disconnect and remove it.
Do all pots and pans work on induction cooktops?
No. Induction cooktops only work with cookware that has a magnetic base. You can test any pan by holding a magnet to the bottom. If it sticks, the pan is induction-compatible. Stainless steel, cast iron, and some enameled cookware work great on induction.
How do I know if my countertop cutout will fit a new induction cooktop?
Measure the width, depth, and cutout dimensions of your existing gas cooktop opening. Compare these measurements to the specifications of the induction model you want to purchase. Most standard cutouts are around 30 inches wide, but always verify with both the old unit and the new manual.
Is induction cooking really more energy efficient than gas?
Yes, significantly more efficient. Induction cooktops transfer about 85-90% of their energy directly to the cookware, while gas cooktops only transfer around 40% of heat to the pot. The rest is lost to the surrounding air. This means faster cooking times and lower energy bills over time.