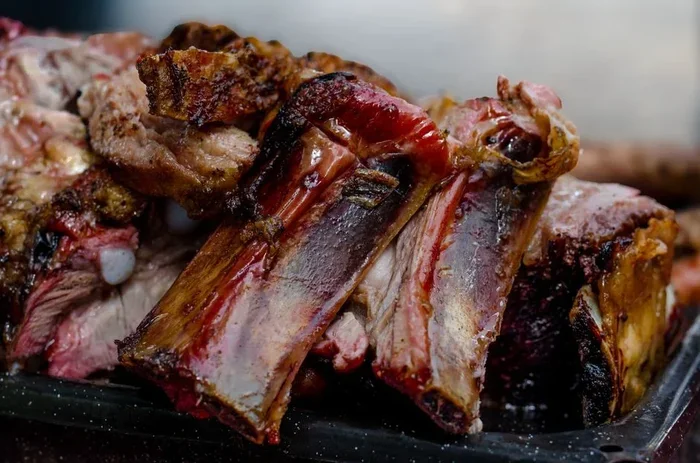
Cooking a standing rib roast takes about 15 to 20 minutes per pound at 325°F for medium-rare. The exact time depends on your roast size, oven type, and desired doneness. This guide covers everything from prep to resting so you get a juicy, tender result every single time.
Key Takeaways
- Plan for 15 to 20 minutes per pound at 325°F for a medium-rare standing rib roast.
- Use a meat thermometer to check internal temperature — 130°F for medium-rare, 140°F for medium.
- Let the roast rest for 20 to 30 minutes after cooking for the juiciest results.
- Bone-in roasts take slightly longer than boneless cuts of the same weight.
- Sear the roast first for a flavorful crust before slow roasting in the oven.
- Season generously with salt at least 2 hours before cooking for the best flavor.
- A 3-bone roast serves about 6 people, making it easy to plan your dinner.
📑 Table of Contents
- How Long to Cook Standing Rib Roast Per Pound
- Understanding Cooking Time Per Pound
- Step-by-Step Cooking Guide
- Temperature Guide for Perfect Doneness
- How to Tell When Your Roast Is Done
- Common Mistakes to Avoid
- Quick Tips for the Best Rib Roast
- Serving Suggestions and Pairings
- Storing Leftover Roast
- Final Thoughts on Cooking Standing Rib Roast Per Pound
How Long to Cook Standing Rib Roast Per Pound
There is nothing quite like a perfectly cooked standing rib roast sitting proudly on your holiday table. It fills the kitchen with an amazing aroma and brings everyone together. But cooking one can feel intimidating if you have never done it before. The biggest question most people ask is simple: how long to cook standing rib roast per pound?
The answer depends on a few key factors. Your oven temperature, whether the roast is bone-in or boneless, and your target doneness all play a role. In this guide, we break down everything you need to know. You will learn exact times, temperatures, and tips that turn a good roast into a great one.
Whether you are a beginner or a seasoned home cook, this guide has something for you. We keep things simple and practical. No fancy jargon. Just clear, honest advice you can use right away.
Understanding Cooking Time Per Pound
The general rule for standing rib roast cooking time is straightforward. At 325°F, plan for about 15 to 20 minutes per pound. This gives you a beautiful medium-rare finish for most cuts. But this is just a starting point. Several things can change your actual cook time.
Bone-In vs. Boneless Roasts
A bone-in roast takes a bit longer to cook than a boneless one of the same weight. The bone acts as insulation. It slows down heat reaching the meat directly. So if you have a 5-bone standing rib roast, add about 10 to 15 minutes to your estimated time.
Boneless roasts cook more evenly. They are also easier to slice. Many cooks prefer them for convenience. But bone-in roasts have more flavor. The bone marrow adds richness during the long slow cook. Some people will not cook a roast without it.
What Affects Rib Roast Cooking Time?
Several factors influence how long your roast takes. Let us look at the main ones.
- Oven type: Conventional ovens and convection ovens cook differently. Convection fans circulate hot air, which can reduce cooking time by about 25 percent.
- Starting temperature: A roast straight from the fridge cooks slower than one brought to room temperature first.
- Roast size: Larger roasts take more total time but may cook slightly faster per pound due to mass.
- Desired doneness: Medium-rare finishes faster than well-done. You simply pull the roast earlier for a rarer result.
- Rack position: Placing the roast too close to the top or bottom heating element can cause uneven cooking.
Step-by-Step Cooking Guide
Now let us walk through the actual process. Follow these steps and your roast will turn out beautifully every time.
Step 1: Prep the Roast
Take your rib roast out of the fridge at least 2 hours before cooking. Let it sit on the counter at room temperature. This helps it cook more evenly. Meanwhile, pat the roast dry with paper towels. Dry meat browns better.
Season generously with coarse salt and black pepper. You can also add garlic powder, rosemary, or thyme for extra flavor. Some cooks make small incisions in the meat and insert garlic cloves. This adds a subtle aroma throughout.
If you want to go deeper, check out our guide on how to tenderize meat naturally for extra tips that work great on beef roasts too.
Step 2: Sear the Roast
Preheat your oven to 450°F for the sear phase. Place the roast on a rack in a roasting pan. Sear it for about 15 minutes until the outside gets a nice brown crust. This step locks in juices and adds incredible flavor.
After searing, reduce the oven temperature to 325°F. This is where the slow roast begins. The high heat at the start creates a Maillard reaction on the surface. That is what gives you that deep, savory crust.
Step 3: Roast and Monitor
Now the real work begins. Place the roast in the oven and let it cook. Insert a meat thermometer into the thickest part of the roast. Do not touch the bone. The bone reads hotter and will give you a false reading.
For a 3-bone standing rib roast (about 6 to 7 pounds), expect roughly 90 to 140 minutes of total cooking time. Check the temperature often as you get closer to your target.
Here is a quick reference table to help you plan:
- Rare: 120°F internal temperature (pull at 115°F)
- Medium-Rare: 130°F internal temperature (pull at 125°F)
- Medium: 140°F internal temperature (pull at 135°F)
- Well-Done: 155°F internal temperature (pull at 150°F)
Remember, the temperature will rise 5 to 10 degrees while the roast rests. This is called carryover cooking. Pull the roast early to account for this.
Step 4: Rest the Roast
This step is just as important as cooking. Remove the roast from the oven and tent it loosely with aluminum foil. Let it rest for at least 20 to 30 minutes. During this time, the juices redistribute throughout the meat. If you skip this step, your roast will be dry when you cut into it.
Use this resting time to make a quick pan sauce. The drippings in the roasting pan are pure gold. Add a splash of beef broth, scrape up the browned bits, and you have a delicious sauce ready to go.
Temperature Guide for Perfect Doneness
Getting the temperature right is the single most important thing you can do. A standing rib roast temperature guide removes all the guesswork. Here is a closer look at each doneness level.
| Doneness | Pull Temperature | Final Temperature | Texture |
|---|---|---|---|
| Rare | 115°F | 120°F | Cool red center, very soft |
| Medium-Rare | 125°F | 130°F | Warm red center, juicy |
| Medium | 135°F | 140°F | Warm pink center, firm |
| Medium-Well | 145°F | 150°F | Slight pink, firmer |
| Well-Done | 150°F | 155°F+ | No pink, dry |
Most people agree that medium-rare is the sweet spot for rib roast. It gives you a juicy, tender bite with a beautiful pink center. If your guests prefer more done, simply cook a few minutes longer. But going past medium-well risks drying out the meat.
How to Tell When Your Roast Is Done
A meat thermometer is your best friend. Do not rely on the pop-up timer that sometimes comes with the roast. Those are often inaccurate. A digital instant-read thermometer gives you a precise reading in seconds.
Another way to check is the probe test. Insert a skewer or toothpick into the thickest part. If the juices run clear, you are close to done. If they are still pink, keep cooking. But the thermometer is always more reliable.
For additional beef cooking inspiration, you might enjoy our article on how to cook beef cheek meat step by step, which covers low-and-slow beef techniques similar to roasting.
Common Mistakes to Avoid
Even experienced cooks make mistakes with rib roast. Here are the most common ones and how to avoid them.
Skipping the Room Temperature Rest
Putting a cold roast straight into a hot oven creates uneven cooking. The outside overcooks while the inside stays raw. Always let your roast sit out for at least 1 to 2 hours before cooking. This small step makes a huge difference.
Not Using a Thermometer
guessing when the roast is done almost always leads to disappointment. Either it is undercooked or overcooked. A thermometer takes the guesswork out completely. They are inexpensive and available at any grocery store.
Cutting Into the Roast Too Soon
We know it is tempting. That beautiful roast is right there and you want to dig in. But cutting too early releases all those precious juices. Let it rest. Trust the process. Your patience will be rewarded.
Over-Salting at the Last Minute
Salt needs time to work its magic. If you season right before cooking, the salt sits on the surface and draws out moisture. For the best results, salt your roast at least 2 hours ahead or even overnight. This creates a flavorful crust and tender meat.
Quick Tips for the Best Rib Roast
Here are some extra tips that separate a good roast from a great one.
- Buy quality meat: Look for USDA Prime or Choice grade. The marbling makes all the difference in flavor and juiciness.
- Let it dry brine: Uncovered in the fridge overnight helps form a better crust. The dry surface browns faster.
- Use a roasting rack: It allows hot air to circulate around the roast evenly. No more soggy bottom.
- Save the bones: After carving, simmer the bones for beef bone broth. Nothing goes to waste.
- Slice against the grain: This makes each slice more tender and easier to chew.
For more beef cooking ideas, check out our guide on how to make beef stew meat tender on the stove for additional techniques that complement your roast skills.
Serving Suggestions and Pairings
A standing rib roast pairs wonderfully with many sides. Classic mashed potatoes are a favorite. Roasted vegetables like carrots and asparagus add color and nutrition. A fresh green salad cuts through the richness of the meat perfectly.
For the sauce, a simple red wine jus works beautifully. Deglaze the roasting pan with red wine, add a bit of beef stock, and reduce until syrupy. Pour it over sliced roast and watch your guests smile.
Storing Leftover Roast
Leftover rib roast makes incredible sandwiches the next day. Store slices in an airtight container in the fridge for up to 3 to 4 days. Reheat gently in the oven at 300°F to keep the meat from drying out.
You can also freeze leftover roast for up to 3 months. Wrap it tightly in plastic wrap and foil. Thaw overnight in the fridge before reheating. The flavor actually gets better the next day as the juices settle back in.
Final Thoughts on Cooking Standing Rib Roast Per Pound
Cooking a standing rib roast does not have to be complicated. The key is understanding your time per pound and monitoring temperature carefully. Plan for about 15 to 20 minutes per pound at 325°F, adjust for your oven, and always use a meat thermometer.
Let the roast rest, slice against the grain, and enjoy every bite. Once you nail this technique, you will never go back to dry, overcooked beef again. Your family and guests will remember this meal for a long time.
Grab a good quality roast, follow these steps, and trust yourself in the kitchen. A perfect standing rib roast is within your reach. Happy cooking!
Frequently Asked Questions
How long does it take to cook a 5-bone standing rib roast per pound?
A 5-bone roast typically weighs around 7 to 8 pounds. At 325°F, it will take approximately 105 to 160 minutes, or about 15 to 20 minutes per pound. Bone-in roasts may take slightly longer than boneless cuts of the same weight.
What is the best temperature to cook a standing rib roast?
The best approach is to start at 450°F for 15 minutes to sear the outside, then reduce to 325°F for the remainder of the cook. The final internal temperature should reach 125°F for rare, 130°F for medium-rare, or 140°F for medium.
Should I cover my standing rib roast with foil while cooking?
No, do not cover the roast during cooking. Leaving it uncovered allows the heat to circulate evenly and creates a beautiful brown crust. You only tent it with foil during the resting phase after removing it from the oven.
How do I know if my rib roast is done without a thermometer?
The most reliable method without a thermometer is the probe test. Insert a skewer or toothpick into the thickest part of the roast. If the juices run clear, the roast is likely done. However, a meat thermometer is always recommended for accuracy and food safety.
Can I cook a standing rib roast in a convection oven?
Yes, convection ovens cook faster due to the circulating fan. Reduce your cooking time by about 25 percent and check the temperature early. Convection ovens can produce excellent results with a slightly shorter cook time per pound.
How long should I let the roast rest before cutting?
Let the roast rest for at least 20 to 30 minutes after removing it from the oven. Tent it loosely with aluminum foil during this time. Resting allows the juices to redistribute, resulting in a much juicier and more flavorful slice when you cut into it.