
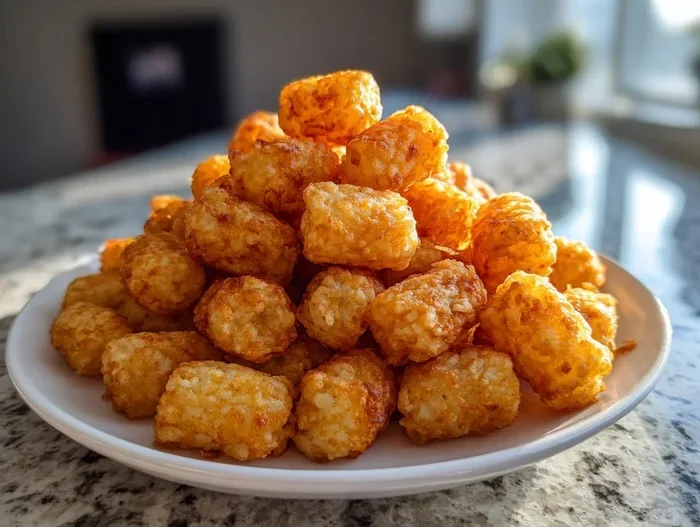
Cooking tater tots in a Ninja air fryer is quick, easy, and delivers that perfect crunchy exterior with a soft, fluffy center. For the best results, set your air fryer to 400°F and cook them for 15 to 20 minutes, shaking halfway through. This method uses hot circulating air to crisp every side without needing excess oil. Whether you are making a quick snack or a full side dish, mastering the right timing ensures you never end up with soggy or burnt tots again. With just a few simple tricks, you can enjoy golden, crispy tater tots straight from your Ninja appliance in minutes.
If you have ever pulled a tray of limp, soggy tater tots out of a conventional oven, you already know the struggle. Nobody wants a soft, greasy potato snack when they are craving that satisfying crunch. The good news is that your Ninja air fryer changes everything. It circulates superheated air around the food, mimicking the effects of deep frying while using little to no oil. That means you get the crispiness you love without the extra mess or calories.
Learning how long to cook tater tots in Ninja air fryer models is surprisingly simple once you understand the basics. The exact time depends on a few factors, like the size of the tots, how frozen they are, and how crunchy you like them. In this guide, we will walk you through the perfect timing, temperature settings, and practical tips so you can make restaurant-quality tots at home. Let us dive right into the details and get those golden bites ready.
Key Takeaways
- Ideal Temperature: Set your Ninja air fryer to 400°F for the best balance of speed and crispiness.
- Cooking Time: Most frozen tater tots need 15 to 20 minutes, depending on size and desired crunch.
- Shake Halfway: Always shake the basket or flip the tots at the 8-minute mark for even browning on all sides.
- Avoid Overcrowding: Spread tots in a single layer with space between them so hot air can circulate freely.
- Preheat for Faster Crisp: Preheating the Ninja air fryer for 2 to 3 minutes helps the tots start crisping immediately.
- Check Doneness Early: Start checking at 12 minutes to prevent burning, as air fryer models can vary slightly in intensity.
- Season After Cooking: Add salt, cheese, or spices after cooking so seasonings stick better and do not burn during frying.
📑 Table of Contents
- Understanding How Long To Cook Tater Tots In Ninja Air Fryer
- The Perfect Step-By-Step Method For Crispy Tater Tots
- Factors That Change Cooking Time For Tater Tots
- How To Make Tater Tots Even Crispier
- Quick Comparison: Air Fryer Vs. Oven For Tater Tots
- Serving Ideas And Flavor Variations
- Troubleshooting Common Tater Tot Problems
- Final Thoughts On Perfect Ninja Air Fryer Tots
Understanding How Long To Cook Tater Tots In Ninja Air Fryer
When you ask how long to cook tater tots in Ninja air fryer appliances, the short answer is usually between 15 and 20 minutes. However, the real magic lies in understanding why that timeframe works and how to adjust it for your specific batch. Frozen tater tots are already partially cooked during manufacturing, which means they just need enough heat to crisp the outside and heat the inside thoroughly.
The Ninja air fryer excels at this because of its powerful heating elements and rapid air circulation technology. Unlike a traditional oven that heats from the outside in, an air fryer pushes hot air around the basket from all angles. This means every side of the tot gets exposure to high heat, creating that coveted crispy shell much faster. If you are used to baking tots at 400°F for 25 to 30 minutes, you will notice the air fryer cuts that time down significantly.
Keep in mind that different Ninja models may have slight variations in wattage and airflow. A compact 4-quart model might cook a little faster than a large 10-quart oven-style unit. That is why it is always smart to start checking your tots a few minutes before the recommended time. You can always add a couple more minutes if they need extra crunch, but you cannot undo burnt edges.
Why Temperature Matters Just As Much As Time
Time alone does not tell the whole story. The temperature you choose plays a huge role in the final texture. For tater tots, 400°F is widely considered the sweet spot. At this temperature, the exterior browns quickly while the inside heats through without drying out. If you go too low, say 350°F, the tots may warm up but stay soft and pale. If you crank it up to 425°F or higher, you risk burning the outside before the center is fully hot.
Think of it like searing a steak. You want high heat to create a crust, but you also need enough time for the heat to reach the middle. The same principle applies to potato products. A steady 400°F gives you that balance. If you prefer extra-crispy tots and do not mind a slightly darker color, you can push to 410°F, but watch them closely during the last few minutes.
Quick Tip: If your tots are especially large or thick, add 2 to 3 extra minutes to the cooking time. Smaller, bite-sized tots may be ready closer to the 12 to 15-minute mark.
Preheating: Should You Do It For Tater Tots?
Preheating is one of those topics that sparks debate among air fryer users. Some swear by it, while others say it is unnecessary. When it comes to frozen tater tots, preheating your Ninja air fryer for 2 to 3 minutes can make a noticeable difference. A preheated basket gives the tots an immediate blast of hot air, which helps kickstart the crisping process right away.
Without preheating, the tots may sit in a warming basket for the first few minutes, which can lead to a softer exterior. That does not mean they will be bad, but if you are chasing maximum crunch, a quick preheat is worth the extra wait. Just set the temperature to 400°F, let it run empty for a couple of minutes, then add your tots and start the timer.
The Perfect Step-By-Step Method For Crispy Tater Tots
Now that you know the basics, let us walk through a simple, repeatable method that delivers consistent results. This approach works for most Ninja air fryer models, whether you have a basket-style unit or a larger oven-style appliance. Follow these steps, and you will have crispy tater tots ready in no time.
Step 1: Prepare Your Tots
Start by grabbing a bag of frozen tater tots. You do not need to thaw them first. In fact, cooking them straight from frozen helps preserve the texture and prevents them from falling apart. Shake the bag well to separate any stuck-together pieces. If you notice a few tots clumping, gently pull them apart with your fingers before they go into the basket.
You can also season them before cooking if you like. A light spray of cooking oil helps seasonings adhere and can boost browning. However, most frozen tots already contain enough fat to crisp up on their own, so oil is optional. If you want to keep things simple, just toss them in as they are.
Step 2: Load The Basket Properly
How you arrange the tots matters more than you might think. Pour them into the basket in a single layer whenever possible. Avoid piling them too high or packing them tightly together. Air needs room to flow around each piece. If the basket is too crowded, the tots in the middle will steam instead of crisp, leaving you with uneven results.
If you are cooking a large batch, it is better to cook in two rounds than to overcrowd the basket. Yes, it takes a little longer, but the quality difference is worth it. The tots on the bottom should lie flat with a little space between them. This setup ensures every piece gets direct exposure to the circulating heat.
Step 3: Set Time and Temperature
Set your Ninja air fryer to 400°F and program the timer for 15 minutes as a starting point. If your model has a digital display, you can usually dial in the time easily. For analog dials, set the timer and keep an eye on it. Remember, 15 minutes is a baseline. Some batches may need a few extra minutes, especially if the tots are deeply frozen or you prefer a darker crunch.
Once the timer starts, let the air fryer do its work. You do not need to open the basket constantly. In fact, opening it too often releases heat and can extend the cooking time. Trust the process and wait until the halfway point before checking.
Step 4: Shake and Check At The Halfway Mark
Around the 8-minute mark, pull the basket out carefully and give it a good shake. Tilt the basket back and forth or use a spatula to flip the tots over. This step is crucial because it exposes the underside to direct heat, ensuring even browning on all sides. If you skip this step, one side may stay pale while the other gets too dark.
While you are at it, take a quick look at the color. If they are already turning golden and you want a lighter crunch, you can reduce the remaining time by a minute or two. If they still look pale, keep going and plan to check again near the end.
Step 5: Finish and Serve
When the timer beeps, check the tots one final time. They should be golden brown with a firm, crispy exterior. If they need more crunch, add 2 to 3 extra minutes and check again. Once they look perfect, pull them out and let them rest for a minute or two. This brief rest allows excess steam to escape, which keeps them crisp instead of soggy.
Serve them hot with your favorite dipping sauces. Ketchup, ranch, cheese sauce, or spicy mayo all pair beautifully with crispy tater tots. If you are serving a crowd, keep them warm in a low oven while you finish cooking additional batches.
Common Mistake: Adding salt or fine seasonings before cooking can cause them to burn or fall off. For best results, season lightly before cooking or add salt right after they come out while they are still hot and slightly oily.
Factors That Change Cooking Time For Tater Tots
Even with a solid baseline, several variables can shift the exact cooking time. Understanding these factors helps you adjust on the fly and avoid undercooked or overcooked results. Let us break down the most common influences so you can adapt to any situation.
Size and Thickness Of The Tots
Not all tater tots are created equal. Some brands make mini tots that cook faster, while others produce larger, thicker pieces that need more time. Mini tots often reach peak crispiness in 12 to 15 minutes, while standard-sized tots usually need the full 15 to 20 minutes. If you are trying a new brand, start with the package recommendations and adjust based on your air fryer’s performance.
Thickness also matters. A thicker tot has more interior mass that needs heating, so it may require a couple extra minutes to get hot all the way through. If you notice the outside browning too fast before the inside is warm, lower the temperature slightly to 390°F and extend the time by 2 to 3 minutes.
How Frozen The Tots Are
The temperature of the tots when they go into the basket affects cooking speed. Tots that have been sitting in the freezer for months are rock-solid and may need a bit more time. Tots that have softened slightly due to temperature fluctuations in the freezer might cook a minute or two faster. For consistent results, try to cook them straight from a fully frozen state.
If you accidentally left a bag out for a short time and the outer layer thawed, that is usually fine. Just expect the cooking time to be slightly shorter. Always rely on visual cues like color and texture rather than sticking rigidly to the timer.
Ninja Air Fryer Model and Capacity
Different Ninja models deliver heat in slightly different ways. A compact basket model may concentrate heat more intensely in a smaller space, while a larger oven-style unit may have more evenly distributed but slightly gentler airflow. If you just bought a new Ninja appliance, run a quick test batch to learn how it handles frozen foods.
Capacity also plays a role. Cooking a full basket takes longer than cooking a half basket because the air has to work harder to circulate around more food. If you are making a large batch for family or guests, plan for extra time and shake more than once if needed.
Expert Insight: Keep a small notebook or phone note with your preferred time and temperature for each brand of tots. Over time, you will build a personal reference guide that makes cooking instant and predictable.
How To Make Tater Tots Even Crispier
Some people love a lightly golden tot, while others want maximum crunch that shatters when you bite into it. If you fall into the second camp, there are a few tricks to push the crispiness further without burning the outside. These small adjustments can transform a good batch into an outstanding one.
Use A Light Oil Spray
A thin coat of oil can amplify browning and create a sharper crunch. You do not need to drench the tots. A light mist of cooking spray or a quick drizzle of oil tossed with the tots before cooking is enough. The oil helps conduct heat to the surface and promotes Maillard browning, which is the chemical reaction that creates that rich, golden color and savory flavor.
Be careful not to overdo it. Too much oil can make the tots greasy rather than crisp. A little goes a long way, especially with frozen products that already contain some fat.
Add A Cornstarch Dusting
This is a lesser-known trick that works surprisingly well. Tossing frozen tots in a tiny amount of cornstarch before cooking can create an extra-crispy outer layer. The cornstarch absorbs surface moisture and forms a light, crunchy coating when exposed to high heat. Use just a teaspoon or two for a full bag, and shake well to distribute it evenly.
You will not taste the cornstarch, but you will notice the texture difference. This method is especially helpful if you prefer a sharper crunch or if your tots tend to come out a bit soft.
Do Not Overcrowd The Basket
We mentioned this earlier, but it deserves emphasis because it is one of the most common reasons for soft tots. When the basket is packed tight, moisture released from the potatoes has nowhere to go. That trapped steam softens the exterior. Giving each tot breathing room allows moisture to escape and keeps the surface dry and crisp.
If you are feeding a crowd, cook in batches. It takes a little more time, but the payoff in texture is huge. Your guests will notice the difference, and you will avoid the disappointment of a lukewarm, soggy batch.
Quick Comparison: Air Fryer Vs. Oven For Tater Tots
Many people wonder whether they should just use their regular oven instead of pulling out the air fryer. Both methods can produce tasty tots, but they have distinct differences in time, texture, and convenience. Here is a quick comparison to help you decide which method fits your situation best.
| Feature | Ninja Air Fryer | Conventional Oven |
|---|---|---|
| Typical Temperature | 400°F | 400°F to 425°F |
| Cooking Time | 15 to 20 minutes | 25 to 35 minutes |
| Crispiness | High, even crunch on all sides | Good, but may need flipping |
| Preheat Time | 2 to 3 minutes | 10 to 15 minutes |
| Energy Use | Lower, heats smaller space | Higher, heats larger cavity |
| Batch Size | Limited by basket size | Larger capacity on a tray |
| Convenience | Fast, hands-off, easy cleanup | Good for large groups |
As you can see, the air fryer wins on speed and even crispiness, while the oven shines when you need to cook a large volume at once. For everyday snacking or a quick side dish, the Ninja air fryer is usually the better choice. For game day or a big family dinner, the oven may make more sense if you need to feed a crowd.
Serving Ideas And Flavor Variations
Once you master how long to cook tater tots in Ninja air fryer setups, you can start getting creative with flavors and toppings. Plain crispy tots are great on their own, but a few simple additions can turn them into a full snack or meal.
Classic Dipping Sauces
The easiest way to elevate tater tots is with the right dip. Ketchup is the classic choice, but do not stop there. Ranch dressing adds a cool, creamy contrast to the hot crunch. Cheese sauce brings rich, savory flavor that clings to every bite. If you like heat, try a spicy mayo or a dash of hot sauce mixed into sour cream.
Loaded Tater Tots
For a more filling option, turn your tots into a loaded snack. After cooking, top them with shredded cheese, chopped green onions, crispy bacon bits, and a dollop of sour cream. You can even add a drizzle of chili or nacho cheese for a comfort-food vibe. These loaded tots work great as an appetizer or a quick lunch.
Seasoning Blends
If you want to experiment with flavor before cooking, try a seasoning blend. A mix of paprika, garlic powder, onion powder, and a pinch of salt adds depth without overwhelming the potato taste. For a bolder twist, a light sprinkle of Cajun or chili seasoning gives the tots a tasty kick. Just remember to add delicate herbs or fine salts after cooking to prevent burning.
Key Takeaway: Keep your seasoning simple and add it at the right time. Bold spices work well before cooking, while delicate herbs and salt shine when added right after the tots come out hot.
Troubleshooting Common Tater Tot Problems
Even with a solid routine, things can sometimes go sideways. Maybe your tots came out pale, or maybe they burned around the edges. Here are a few common issues and how to fix them next time.
Tots Are Pale And Soft
If your tots look pale and feel soft, the most likely culprit is overcrowding or insufficient time. Try cooking in a single layer with more space between pieces. Also, make sure you are cooking long enough. Some batches need a full 20 minutes to develop a deep golden color. A light oil spray can also help boost browning.
Tots Are Burning On The Outside
Burnt edges usually mean the temperature is too high or the tots are cooking too long. Drop the temperature to 390°F and check a few minutes earlier. If you are using a model with very intense airflow, you may need to reduce the time slightly. Always keep an eye on the last few minutes, as the difference between golden and burnt can be just a minute or two.
Tots Are Stuck Together
Frozen tots sometimes clump in the bag, and if you toss them in as a cluster, they may stick together in the basket too. Break them apart before cooking. A quick shake halfway through also helps separate any pieces that start to fuse. If you notice sticking, use a thin spatula to gently pry them apart while they are still hot.
Final Thoughts On Perfect Ninja Air Fryer Tots
Getting crispy, golden tater tots from your Ninja air fryer is all about nailing the right balance of time, temperature, and spacing. For most frozen tots, 400°F for 15 to 20 minutes with a good shake at the halfway point delivers excellent results. Preheating briefly, avoiding overcrowding, and checking doneness early will help you fine-tune the process for your specific model and favorite brand.
Once you have the basics down, you can start experimenting with seasonings, dips, and loaded toppings to make each batch your own. Whether you want a quick afternoon snack or a crowd-pleasing side dish, the Ninja air fryer makes it fast and easy. So grab a bag of frozen tots, set that timer, and enjoy the crunch. With a little practice, you will know exactly how long to cook tater tots in Ninja air fryer setups to get that perfect bite every single time.
Frequently Asked Questions
How long do I cook frozen tater tots in a Ninja air fryer?
For most frozen tater tots, cook them at 400°F for 15 to 20 minutes. Shake the basket halfway through to ensure even browning on all sides.
Do I need to preheat my Ninja air fryer before cooking tater tots?
Preheating is not required, but it helps. A quick 2 to 3-minute preheat at 400°F gives the tots an immediate blast of heat for extra crispiness.
Can I cook tater tots without oil in the Ninja air fryer?
Yes, you can. Most frozen tots already contain enough fat to crisp up on their own. A light oil spray is optional if you want a darker, sharper crunch.
Why are my tater tots soft instead of crispy?
Soft tots usually happen when the basket is overcrowded or the cooking time is too short. Spread them in a single layer and cook for a few extra minutes if needed.
How do I know when tater tots are done in the air fryer?
They are done when they are golden brown and feel firm on the outside. Start checking at 12 to 15 minutes so you do not overcook them.
Can I reheat leftover tater tots in a Ninja air fryer?
Absolutely. Reheat leftover tots at 400°F for 3 to 5 minutes to restore their crunch. Shake halfway through for even warming.



