Keeping your toaster clean isn’t just about appearance—it improves performance and food safety. Over time, crumbs build up inside your toaster, which can affect taste, cause unpleasant smells, or even pose a fire hazard. This guide walks you through the safest methods to remove crumbs, clean interior surfaces, and maintain your appliance for long-lasting use.
Key Takeaways
- Safety first: Always unplug your toaster before cleaning to avoid electrical hazards.
- Use the right tools: A soft brush, vacuum attachment, or dry cloth works best for removing crumbs.
- Avoid water on heating elements: Never spray liquid directly into the slots; moisture can damage internal components.
- Deep clean monthly: Regular maintenance prevents grease buildup and keeps your toaster functioning smoothly.
- Check manufacturer guidelines: Some models have specific care instructions—always refer to the manual.
- Clean exterior regularly: Wipe down the outside with a damp cloth and mild detergent to maintain hygiene.
- Prevent future mess: Place a baking sheet under the toaster to catch loose crumbs during use.
[FEATURED_IMAGE_PLACEHOLDER]
# How to Clean Out a Toaster: A Complete Guide
Have you ever noticed that your toast tastes slightly off—like it has a burnt or stale flavor? Or maybe you’ve seen blackened crumbs piling up in the bottom of your toaster? You’re not alone. Over time, crumbs accumulate inside any toaster, especially if you’re a frequent user. These tiny particles not only affect the taste of your bread but can also lead to smoke, unpleasant odors, or even pose a minor fire risk if they ignite.
Cleaning your toaster might seem intimidating—after all, it’s an electrical appliance with heating elements inside. But with the right approach, keeping your toaster spotless is easier than you think. Whether you own a classic pop-up toaster, a bagel model, or a convection toaster oven combo, this guide will walk you through safe and effective methods to restore your appliance to its original condition.
In this article, we’ll cover everything from daily upkeep to deep cleaning techniques. You’ll learn how to remove stubborn residue, clean hard-to-reach areas, and prevent future buildup—all while protecting your appliance and ensuring your breakfast stays delicious and safe.
## Why Cleaning Your Toaster Matters
A dirty toaster doesn’t just look messy—it affects how well it performs. When crumbs collect around the heating coils, they can create hot spots that burn your bread unevenly. That smoky smell? Often caused by old, charred crumbs burning off during toasting cycles. And let’s be honest: nobody wants to bite into a piece of toast that tastes like yesterday’s crumbs.
Beyond functionality, cleanliness matters for health reasons too. Mold spores and bacteria can grow in warm, dark spaces like a toaster slot, especially if moisture gets trapped. While modern toasters are designed to resist such issues, regular cleaning helps eliminate potential breeding grounds.
Finally, maintaining your toaster extends its lifespan. Built-in safety features may malfunction if debris interferes with temperature sensors or mechanical parts. By keeping things tidy, you protect both your appliance and your peace of mind.
## Safety Precautions Before You Start
Before you grab your vacuum cleaner or damp cloth, take these simple safety steps:
– Unplug the toaster immediately before cleaning. Even if it turns off automatically, residual electricity could pose a shock risk.
– Let it cool completely. The heating elements stay hot for minutes after use—wait at least 30–60 minutes before touching anything inside.
– Avoid water near electrical parts. Never submerge any part of the toaster in water or spray liquid directly onto the slots.
– Use non-abrasive tools. Steel wool or harsh scrubbers can scratch metal surfaces and damage coatings.
– Work in a well-lit area. It’s easier (and safer) to see what you’re doing when there’s good lighting.
Following these rules ensures you won’t accidentally damage your toaster or injure yourself. Once you’ve taken precautions, you’re ready to tackle the crumb-filled interior.
## Daily Maintenance: Simple Tips to Prevent Crumb Buildup
You don’t need to deep clean your toaster every day—but a quick routine goes a long way. After each use, give the crumb tray a gentle shake or tap. Many modern toasters come with a removable tray at the base designed specifically for catching loose particles. Simply slide it out, empty it into the trash, and wipe it with a dry cloth.
If your model doesn’t have a tray, place a piece of parchment paper or a small baking sheet underneath while toasting. This makes cleanup afterward much simpler. Just fold up the paper and toss it—no mess left behind.
Another trick? Toast plain white bread occasionally. The starchy surface sheds fewer crumbs than whole grain or seeded loaves, helping reduce buildup over time. It’s a small habit that adds up to big results.
For extra protection, consider placing a silicone mat or folded-up newspaper beneath the toaster during use. These act as backup barriers in case some crumbs escape the tray or slots.
## Step-by-Step Guide: Removing Crumbs from Inside the Toaster
Even with daily care, crumbs eventually find their way into the slots. Here’s how to remove them safely:
### 1. Unplug and Cool Down
As mentioned earlier, always disconnect power and wait until the toaster is cool. This prevents burns and ensures you can handle components without risk.
### 2. Shake Out Loose Debris
Hold the toaster upside down over a trash can or sink. Gently tap the base or lift and drop it a few times. Most loose crumbs should fall out easily. Repeat until no more debris drops.
*Pro tip:* If you’re concerned about dropping small pieces, do this outdoors or over a garbage disposal unit.
### 3. Use a Vacuum with Care
Attach a soft brush nozzle to your vacuum cleaner. Set it to low suction and gently run it along the slots. Don’t press too hard—you don’t want to damage delicate wires or push crumbs deeper into the mechanism.
*Note:* Avoid using upright vacuums with high-powered motors near electronics unless absolutely necessary.
### 4. Brush with a Soft Tool
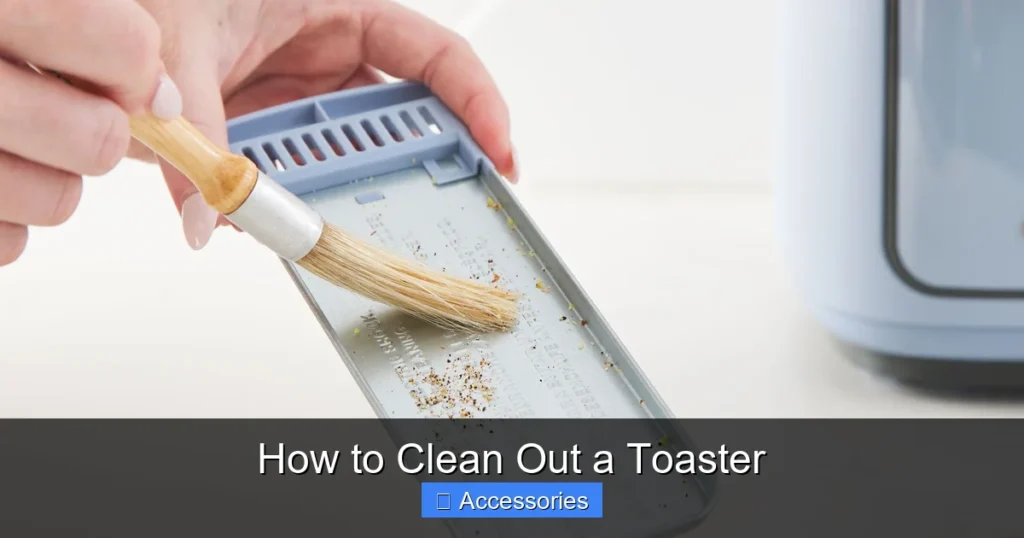
A clean toothbrush, pastry brush, or specialized crumb brush works wonders. Dip it lightly in warm water (if needed), wring it out thoroughly, and sweep across the slots. For stubborn residue, dampen the bristles slightly more—just ensure they’re not dripping wet.
### 5. Wipe Exterior Surfaces
While the interior is drying, clean the outside with a microfiber cloth slightly dampened with soapy water. Pay attention to buttons, handles, and crevices where grease accumulates. Dry immediately with a separate cloth to prevent water spots.
After completing these steps, plug your toaster back in and test it with a slice of bread. You should notice improved performance and a fresher taste.
## Deep Cleaning: Tackling Grease and Stains
Sometimes, crumbs aren’t the only culprits. Over time, splattered grease from butter or jam can leave sticky residue inside the slots. Here’s how to address those tougher spots:
### Create a Natural Cleaner
Mix equal parts white vinegar and water in a spray bottle. Vinegar cuts through grease naturally and leaves no chemical residue. Alternatively, use a solution of baking soda paste (made with a little water) applied directly to stains.
### Apply and Wait
Spray or dab the solution onto affected areas using a cotton swab or soft brush. Let it sit for 5–10 minutes to break down grime. Then wipe away with a damp cloth. Rinse briefly with a second damp cloth and dry thoroughly.
*Caution:* Never soak the entire toaster or immerse electrical components in liquid.
### Polish Metal Parts
For shiny chrome or stainless steel exteriors, mix olive oil with a few drops of lemon juice. Rub sparingly with a soft cloth, then buff to a shine. This also conditions rubber seals to prevent cracking.
Regular deep cleaning once a month keeps your toaster looking and smelling fresh. Plus, it reduces the chance of smoke alarms going off during breakfast rush.
## Cleaning Different Toaster Types
Not all toasters are created equal—some designs require special attention. Below are tailored tips for common models:
### Pop-Up Toasters
These standard models usually feature removable crumb trays and accessible slots. Follow the general cleaning steps above, but pay extra attention to the spring-loaded mechanism near the lever. Use compressed air (not liquid!) to blow dust from behind the release button if needed.
### Bagel Toasters
Bagels often shed more crumbs due to their dense texture. After shaking out loose particles, use a toothpick wrapped in aluminum foil to gently scrape sides of the slots. Foil acts as a soft abrasive that removes stuck-on bits without scratching.
### Convection Toaster Ovens
Combination units have larger interiors and multiple racks. Remove all trays and shelves. Wash removable parts in warm, soapy water (check manufacturer instructions first). Use a sponge with baking soda paste for stubborn stains. Dry completely before reassembling.
### Retro or Vintage Models
Older toasters may lack modern safety features. Exercise extra caution when disassembling. If unsure about internal components, consult a professional technician rather than risk damaging rare appliances.
Always refer to your user manual for model-specific guidance. What works for one brand might not suit another.
## Common Mistakes to Avoid
Even experienced cooks make cleaning errors. Steer clear of these pitfalls:
– Using too much water: Moisture inside electrical circuits causes shorts or corrosion.
– Ignoring the crumb tray: Neglecting this small detail leads to faster buildup.
– Scrubbing aggressively: Hard brushes scratch surfaces and trap food particles.
– Skipping cooling time: Touching hot elements causes burns and warps plastic parts.
– Over-cleaning: Daily deep cleans wear down gaskets and seals unnecessarily.
When in doubt, err on the side of gentleness. A light touch preserves your toaster’s integrity while still delivering excellent results.
## When to Call a Professional
Most toasters are easy to clean at home—but certain situations call for expert help:
– Your toaster emits unusual noises during operation
– Smoke persists even after thorough cleaning
– Visible damage to wiring or casing
– Water exposure occurred despite precautions
In these cases, stop using the appliance and contact the manufacturer or a certified repair service. Attempting DIY fixes on damaged electronics can worsen the problem or void warranties.
## Eco-Friendly Alternatives to Commercial Cleaners
Commercial toaster cleaners often contain harsh chemicals. Fortunately, natural solutions work just as well:
– Baking soda + water: Creates a paste that lifts stains without abrasion.
– White vinegar: Neutralizes odors and dissolves grease.
– Lemon juice: Adds shine and freshness; its acidity breaks down residue.
– Olive oil: Conditions rubber parts and polishes metal.
These ingredients are inexpensive, non-toxic, and environmentally friendly. Plus, they’re already in most pantries!
## Final Thoughts: Keep Your Breakfast Fresh and Safe
Cleaning your toaster doesn’t have to be daunting. With consistent daily habits and occasional deep cleans, you’ll keep your appliance running smoothly for years. Remember: safety comes first, tools matter, and prevention beats cure.
Whether you’re making toast for school lunches, weekend brunch, or midnight snacks, a clean toaster guarantees better taste and fewer surprises. So next time you reach for the lever, take pride knowing your appliance is in top shape—thanks to a little TLC.
And if you’re curious about other kitchen gadgets, check out our guides on how to clean a food processor or how to clean a juicer. Keeping appliances clean isn’t just practical—it’s part of loving your kitchen.
—
How often should I clean my toaster?
For optimal performance, clean your toaster weekly with a quick crumb shake and wipe-down. Perform a deep clean monthly to remove grease and residue. More frequent use may require biweekly attention.
Can I put the crumb tray in the dishwasher?
Yes, most plastic crumb trays are dishwasher-safe. However, check your manual first—some models recommend hand-washing to preserve seals and prevent warping.
Will cleaning fix a smoking toaster?
In many cases, yes! Persistent smoking is often caused by old crumbs burning off. Thorough cleaning usually resolves the issue. If smoke continues, inspect for electrical faults and consult a technician.
Is it safe to use aluminum foil to clean inside the slots?
Wrap a toothpick in aluminum foil to gently scrape stuck crumbs. Avoid inserting foil directly into slots, as loose pieces could melt or interfere with heating elements.
Can I use soap inside the toaster?
Never spray liquid soap into the slots. If needed, use a cloth lightly dampened with soapy water and wipe only external surfaces. Always dry thoroughly afterward.
What’s the best way to remove burnt-on residue?
Apply a paste of baking soda and water directly to stains. Let sit for 10 minutes, then gently scrub with a soft brush or cotton swab. Wipe clean and dry completely.
This is a comprehensive guide about How To Clean Out A Toaster.
Key Takeaways
- Understanding How To Clean Out A Toaster: Provides essential knowledge
Frequently Asked Questions
What is How To Clean Out A Toaster?
How To Clean Out A Toaster is an important topic with many practical applications.