
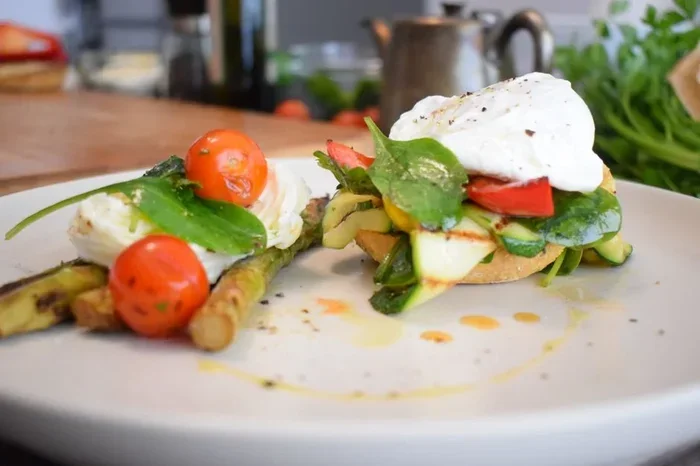
Want to know how to poach an egg without a tangled mess? This guide shows you the simple steps to get a perfectly poached egg with a runny yolk every time. You’ll learn the water temperature, vinegar trick, and timing secrets that make poached eggs foolproof.
Learning how to poach an egg is easier than you think. Imagine a silky white wrapping a golden, runny yolk—perfect over toast, on a salad, or nestled on a bowl of ramen. Poaching is one of the simplest ways to cook an egg without added fat. Yet many home cooks fear it, worried about wispy strands and broken yolks.
The truth is, once you understand the basic science, poaching eggs becomes second nature. You only need a few household items and a little confidence. This guide walks you through every step, from selecting the right eggs to serving them like a chef. By the end, you’ll be able to whip up a perfect poached egg in minutes, almost every time.
Key Takeaways
- Use fresh eggs: Fresh eggs have firmer whites that hold together better during poaching.
- Keep the water at a gentle simmer: A rolling boil will tear the egg apart; a quiet simmer (180–190°F) gives you a tender, neat result.
- Add a splash of vinegar: A teaspoon of white vinegar helps the egg white coagulate quickly around the yolk.
- Create a gentle vortex: Swirling the water before adding the egg helps it wrap into a tidy shape.
- Cook for exactly 3–4 minutes: This timing gives you a set white and a beautifully runny yolk.
- Drain and serve immediately: Use a slotted spoon and place the egg on a paper towel to remove excess water.
- Practice makes perfect: Every attempt improves your technique, so keep trying!
📑 Table of Contents
The Secret to a Perfect Poached Egg
Poaching is simply cooking an egg in simmering water. The heat gently sets the albumen (the white) while keeping the yolk liquid and creamy. Unlike frying or boiling, you don’t need oil or butter. This makes poached eggs a light, low-calorie option that still feels indulgent. Once you master the how to poach an egg technique, you’ll never go back to scrambled eggs for breakfast.
Why Poaching Is a Healthy Choice
When you poach eggs, you avoid the extra fat from butter or oil. A single poached egg contains about 70 calories and 5 grams of fat, all natural. The cooking method preserves the egg’s nutrients without adding unnecessary calories. It’s a great way to enjoy eggs if you’re watching your cholesterol or following a low-fat diet. Plus, the gentle heat keeps the yolk’s beneficial nutrients intact.
What You Need Before You Start
Gather these simple tools before you begin your egg poaching adventure:
- A deep saucepan or skillet (at least 3 inches deep)
- Fresh eggs (the fresher, the better)
- White vinegar (a splash is all you need)
- A slotted spoon
- A small bowl or ramekin for cracking the egg
- A timer or kitchen clock
- Paper towels for draining
Using fresh eggs is crucial. As eggs age, the white becomes thinner and more watery, making it harder to hold together. If you only have older eggs, add a tiny bit of vinegar to the water—this helps the whites set faster. If you’re curious about other egg cooking methods, you can also learn how to fry an egg without oil for a quick alternative.
How to Poach an Egg: Step-by-Step
Follow these clear steps to achieve a perfect poached egg every time. The process takes only about 5 minutes, but the result is restaurant-quality.
Step 1: Get the Water Ready
Fill your saucepan with about 3 inches of water. Bring it to a boil, then reduce the heat until you see small bubbles gently rising from the bottom. This is a simmer, not a rolling boil. The ideal temperature is between 180°F and 190°F (82–88°C). If the water is too hot, the egg white will shred and scatter. If it’s too cool, the white won’t set properly. A steady simmer is the foundation of how to poach an egg successfully.
Add a teaspoon of white vinegar to the water. The acidity helps the egg white coagulate faster, which keeps the egg together. Don’t worry—the vinegar flavor cooks off and won’t affect the taste of your final dish.
Step 2: Crack and Slide the Egg
Crack your fresh egg into a small bowl or ramekin first. This step is a game-changer. It lets you remove any stray shell pieces and gives you control over the slide into the water. Gently lower the bowl close to the water’s surface and tip the egg in slowly. Never drop the egg from a height—this causes the white to break apart.
If you want a perfectly round shape, create a gentle vortex in the water before adding the egg. Use a spoon to stir the water in a quick circular motion. The swirling current helps the white wrap neatly around the yolk. This trick is a favorite among chefs who want flawless poached eggs.
Step 3: Cook to Perfection
Let the egg cook undisturbed for 3 to 4 minutes. The white should become opaque and firm, while the yolk remains soft and liquid. For a slightly firmer yolk, cook for 5 minutes. Use a slotted spoon to carefully lift the egg out of the water. Hold it over the pot for a few seconds to let excess water drip off. Then place the egg on a paper towel to absorb any remaining moisture.
If you’re cooking multiple eggs, repeat the process in batches. Never crowd the pot—give each egg plenty of room. A good rule is to cook no more than three eggs at a time in a standard saucepan. You can also keep poached eggs warm in a bowl of hot water (not boiling) while you finish the rest.
Common Mistakes That Ruin Your Poached Eggs
Even experienced cooks sometimes run into trouble with egg poaching. Here are the most common pitfalls—and how to avoid them.
Mistake 1: Boiling the Water Too Vigorously
A hard, rolling boil is the enemy of a neat poached egg. The aggressive bubbling breaks the delicate white into feathery strands. Always maintain a gentle simmer. If you see large bubbles breaking the surface, lower the heat immediately. The water should be hot enough to cook the egg but calm enough to let the white set smoothly.
Mistake 2: Using Old Eggs
Older eggs have thinner whites that spread out in the water and create a wispy, messy result. Fresh eggs have a thicker, more cohesive white that holds its shape. Check the sell-by date or use eggs that are no more than a week old. If you only have older eggs, strain the loose white through a fine mesh sieve before gently slipping the egg into the water. This removes the watery part and leaves a thicker white that poaches beautifully.
Mistake 3: Skipping the Vinegar
Some people think vinegar is optional, but it genuinely helps. The acid in vinegar speeds up coagulation, giving the white a chance to set before it drifts away. Use just a teaspoon or two—it won’t change the flavor. If you’re concerned about the taste, use a mild white vinegar or even a squeeze of lemon juice.
Mistake 4: Overcooking the Egg
Timing is critical for the perfect runny yolk. More than 4 minutes and the yolk starts to firm up; more than 5 minutes and it becomes fully hard-boiled. Set a timer the moment the egg hits the water. If you prefer a firmer yolk, simply add 30 seconds to the cook time, but don’t walk away.
Pro Tips for Restaurant-Quality Results
Take your poached eggs to the next level with these professional tricks. Each tip addresses a specific aspect of the cooking process and helps you achieve consistent, beautiful results.
The Vinegar Trick
Adding vinegar is the simplest way to improve your poaching success. The acid in the vinegar lowers the water’s pH slightly, which causes the egg white proteins to coagulate faster. This means the white sets quickly around the yolk before it has a chance to break apart. Use about 1 tablespoon of white vinegar per quart of water. The flavor is completely neutralized during cooking, so you don’t need to worry about a tangy taste.
The Swirl Method
Creating a gentle whirlpool in the water before adding the egg is a classic chef’s move. As the water swirls, it pulls the white around the yolk, forming a tidy, compact shape. To do this, use a spoon to stir the water in one direction for a few seconds, then quickly and gently lower the egg into the center of the vortex. The egg will spin slightly and the white will wrap around it evenly. This method works especially well for fresh eggs with thick whites.
Temperature Control
Investing in a clip-on thermometer can transform your egg poaching results. You’ll be able to see the exact temperature of the water and adjust the heat instantly. The ideal range is 180–190°F (82–88°C). If you don’t have a thermometer, watch for small bubbles forming on the bottom of the pot—this is a sign the water is ready. The surface should look calm, with only an occasional lazy bubble breaking through.
Comparison: Poaching vs. Other Egg Cooking Methods
Understanding how poaching compares to other methods helps you choose the right technique for your meal. Here’s a quick look at the differences:
| Method | Fat Added | Texture | Best For |
|---|---|---|---|
| Poaching | None | Tender white, runny yolk | Light, healthy breakfast; eggs Benedict |
| Frying | Butter or oil | Crispy edges, variable yolk | Quick breakfast; sandwiches |
| Boiling | None | Firm white, firm yolk | Prep-ahead snacks; salads |
| Baking | None (in ramekin) | Soft, custard-like | Shirred eggs; crowd cooking |
As you can see, poaching stands out for its simplicity and health benefits. If you’d like to explore another oil-free method, check out how to fry an egg without oil for a crispy alternative.
How to Serve and Store Poached Eggs
Poached eggs are incredibly versatile. Serve them immediately for the best texture and flavor. Here are some delicious serving ideas:
- On top of toasted sourdough with avocado and a sprinkle of salt
- Over a bed of sautéed spinach and mushrooms
- As the star of Eggs Benedict with Hollandaise sauce
- On a grain bowl with quinoa and roasted vegetables
- Alongside a classic English breakfast
If you have leftover egg shells from your prep, you can dry them in the oven for compost or crafts—learn how to dry egg shells in the oven for a simple tutorial. For reheating, note that poached eggs don’t reheat well, so it’s best to cook only what you’ll eat immediately.
When it comes to storing, poached eggs are best enjoyed fresh. If you must keep them, place them in a container of cold water in the refrigerator for up to 24 hours. The water will keep the white moist, but the texture will change slightly. For longer storage, you can freeze raw eggs (not poached) out of the shell for use in baking. If you’re using an Instant Pot for other recipes, you can also learn how to boil in an Instant Pot for quick water heating.
With practice, how to poach an egg will become a skill you can rely on. Start with fresh eggs, keep the water at a gentle simmer, and use the vinegar trick. You’ll be amazed at how quickly you can produce a perfect poached egg with a gorgeous, runny yolk. Serve it on your favorite dish and enjoy the satisfying, elegant result.
Frequently Asked Questions
Can I use a microwave to poach an egg?
Yes, you can poach an egg in the microwave, but the results are less predictable. Crack the egg into a microwave-safe bowl filled with water, cover it, and cook on medium power for about 1 minute. The white may not wrap around the yolk as neatly as stovetop poaching. It’s a quick option, but for a perfectly shaped poached egg, the stovetop method is still best.
How do I know if an egg is fresh enough for poaching?
A fresh egg will have a thick, cloudy white that holds tightly around the yolk. To test, place the egg in a bowl of water. If it sinks and lies flat on its side, it’s very fresh. If it stands upright, it’s still good but older. If it floats, discard it. Fresh eggs are the key to successful egg poaching.
What temperature should the water be for poaching eggs?
The ideal water temperature is between 180°F and 190°F (82–88°C). You want a gentle simmer with small bubbles rising from the bottom. A full rolling boil will break the egg apart. If you don’t have a thermometer, watch for the surface of the water to look calm with only occasional lazy bubbles.
Can I poach eggs ahead of time for a dinner party?
You can, but poached eggs are best served immediately. If you need to prep ahead, cook them for 2 minutes less than usual, then transfer them to an ice bath. When ready to serve, reheat in gently simmering water for 30–60 seconds. The texture won’t be exactly the same as a freshly poached egg, but it’s still delicious.
Does the type of vinegar matter for poaching eggs?
White vinegar is the most common choice because it’s mild and colorless. Apple cider vinegar also works well and adds a subtle flavor that usually disappears during cooking. Avoid using dark or strongly flavored vinegars, as they might tint the egg white or affect the taste. A teaspoon to a tablespoon is all you need per quart of water.
Why does my poached egg have feathery strands?
Feathery strands happen when the water is too hot or the egg is too old. The hot, turbulent water breaks the thin part of the white into wispy strands. Use fresh eggs, keep the water at a gentle simmer, and add a splash of vinegar. You can also strain the loose white through a sieve before adding the egg to the water for a cleaner result.
=== CONCLUSION ===
How to poach an egg is a simple, rewarding skill that transforms your breakfast or brunch. With fresh eggs, a gentle simmer, and a splash of vinegar, you can create a perfect poached egg every single time. The key is patience and practice—don’t be discouraged if your first attempt isn’t flawless. Keep experimenting with the water temperature, timing, and swirling technique until you find your rhythm. Soon, you’ll be plating up beautiful, runny-yolked poached eggs with confidence. Enjoy the process, and savor the delicious results!



