
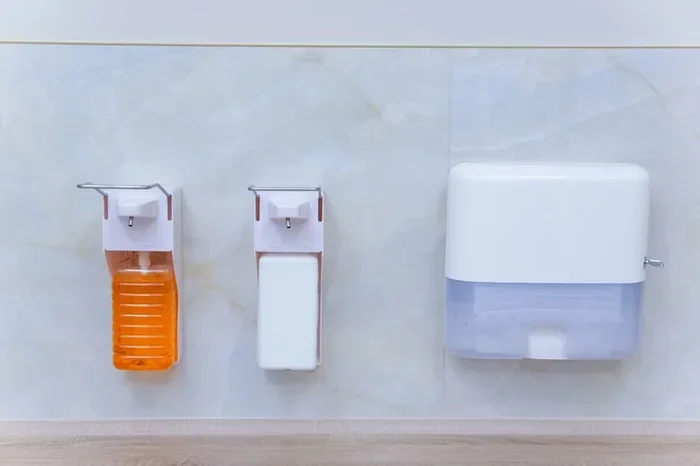
Learning how to refill soap dispenser without making a mess is a simple skill that saves time, reduces waste, and keeps your bathroom clean. With the right technique, a few household tools, and a little patience, you can top off your dispenser quickly and avoid sticky spills on your counters and floors. This guide walks you through every step so you can refill with confidence and zero cleanup stress.
Key Takeaways
- Use a funnel: It prevents drips and keeps your countertop clean every single time.
- Choose the right soap: Thin liquid soap refills smoothly and reduces clogs in the dispenser.
- Clean the nozzle first: Wipe away old residue to ensure a smooth, mess-free refill process.
- Fill slowly and steadily: Pour gently to avoid overflow and messy spills on the pump.
- Wipe excess immediately: Quick cleanup prevents dried soap buildup that causes future dispensing problems.
- Store soap properly: Keep refill bottles sealed and upright to prevent leaks and waste.
📑 Table of Contents
- Why Knowing How to Refill Soap Dispenser Changes Everything
- Introduction
- Why Knowing How to Refill Soap Dispenser Matters
- Choosing the Right Soap for Your Dispenser
- Step-by-Step Guide: How to Refill Soap Dispenser Without Making a Mess
- Tips for Different Types of Soap Dispensers
- Common Mistakes When Refilling Soap Dispensers
- Keeping Your Soap Dispenser Clean and Long-Lasting
- Quick Tips and Expert Insights
- Key Takeaways
Why Knowing How to Refill Soap Dispenser Changes Everything
Let’s be honest. We’ve all been there. You reach for the soap dispenser, push the pump, and nothing comes out. In the middle of washing your hands, you’re standing there with soapy water dripping down the sink. It’s a small moment, but it’s annoying. The good news? Refilling your soap dispenser is one of the simplest household tasks you can do. And when you know the right way to do it, you never have to deal with messy spills again.
In this guide, we’ll walk you through everything. You’ll learn how to pick the right soap, how to fill different dispenser types, and how to avoid those common mistakes that turn a simple refill into a slippery disaster. Whether you have a kitchen soap dispenser or a bathroom pump bottle, this guide has you covered.
We’ll also share some soap dispenser maintenance tips that keep your dispenser working smoothly for months. Think of this as your complete playbook for a clean, mess-free refill every single time. Let’s get into it.
Introduction
Running out of soap is one of those small problems that throws off your whole routine. But refilling your dispenser doesn’t have to be stressful. With the right approach, you can top off your liquid soap container quickly and cleanly.
This guide will show you exactly how. We’ll cover everything from choosing the right soap type to troubleshooting leaky pumps. By the end, you’ll feel confident handling any soap refill job like a pro.
Why Knowing How to Refill Soap Dispenser Matters
You might think this is a no-brainer task. Pour soap in, push the pump, done. But there’s more to it than that. When you refill the wrong way, you end up with sticky residue on the counter, soap clogging the pump, or a bottle that leaks all over your kitchen hygiene area.
Learning the proper method saves you time. It also saves you from buying a new dispenser every few months. A well-maintained refillable soap dispenser can last for years. That’s money in your pocket and less waste in your home.
Here’s why this skill matters more than you think:
- Cost savings. Buying bulk soap and refilling your own costs a fraction of pre-filled bottles.
- Less waste. You reduce plastic packaging and keep your countertop clutter-free.
- Better hygiene. A properly filled dispenser means no air pockets or bacterial buildup inside the bottle.
- Convenience. You never run out at the worst possible moment.
Choosing the Right Soap for Your Dispenser
Not all soaps work the same way in every dispenser. This is where most people make their first mistake. Before you pour anything into that bottle, take a moment to think about what you actually need.
Liquid Soap vs. Foaming Soap
Standard liquid soap is thicker and works best in regular pump dispensers. Foaming soap is thinner and requires a special foaming pump. If you put regular soap into a foaming dispenser, it won’t pump properly. You’ll get sputtering and frustration instead of a nice foam.
Check your dispenser type first. If you’re not sure, look for markings on the bottle or check the product page where you bought it. Some soap dispenser brands clearly state which soap type to use.
Bulk Refill vs. Pre-Mixed Soap
You have two main options when shopping for soap:
- Bulk refill containers. These are large jugs of concentrated or standard soap. They’re cost-effective and reduce plastic waste. You pour directly into your dispenser as needed.
- Pre-mixed single-use bottles. These come pre-filled and you just pop the pump on. They’re convenient but create more waste over time.
For most households, bulk refills make more sense. You get more uses per container and spend less over the year. If you want a reliable option, check out this guide on the best soap dispenser pump for kitchen sink to find a durable pump that handles bulk soap well.
What to Avoid When Choosing Soap
Stay away from these types of soap in standard pump dispensers:
- Thick hand soaps with exfoliating beads. They clog the pump mechanism.
- Soaps with large oil slicks on top. They can separate and block the tube.
- Extremely diluted or watery soap. It doesn’t dispense well and creates drips.
Step-by-Step Guide: How to Refill Soap Dispenser Without Making a Mess
This is the part you’ve been waiting for. Here’s the full process for refilling your dispenser cleanly and efficiently. Follow these steps and you’ll never have a soap spill again.
Step 1: Gather Your Supplies
Before you start, get everything ready. You’ll need:
- Your soap dispenser bottle
- The soap refill or bulk soap container
- A small tray or paper towel (for catching drips)
- A damp cloth for quick wipe-ups
Placing a small tray under the bottle catches any drips. This simple trick is the difference between a clean refill and a slippery mess on your counter.
Step 2: Remove the Pump and Check the Tube
Unscrew or pull off the pump head from the bottle. Look inside. You should see a small plastic tube reaching down to the bottom. Make sure it’s not bent, cracked, or clogged. If it looks damaged, replace it before refilling.
While the pump is off, this is a great time to clean the inside of the bottle. Rinse it with warm water and let it dry. This keeps your soap replacement fresh and free from old residue.
Step 3: Pour the Soap Slowly
This is the most important step for a mess-free refill. Pour the soap directly into the bottle opening at a slow, steady pace. Don’t rush it. Overfilling causes overflow, and that’s how you get sticky soap on the exterior.
Here’s a helpful rule of thumb:
- Fill the bottle to about 80-90% capacity. Leave room for air.
- If you’re using a large jug, tilt it slowly and let the soap flow gently.
- Stop pouring when you see the soap level reach just below the neck of the bottle.
Step 4: Reattach the Pump and Test
Once the bottle is filled, screw or click the pump back into place. Make sure it sits snugly. Push the pump a few times to cycle the soap through the tube. You should get a smooth, steady stream of soap on the first few pumps.
If the pump sputters, don’t panic. Sometimes air bubbles get trapped during the refill. Just pump a few more times. If it still doesn’t work, remove the pump, check that the tube is submerged in soap, and try again.
Quick Tip: Use a Funnel
For larger containers or thick soap, a small funnel makes this process even easier. It guides the soap directly into the bottle and eliminates splashing. Keep a small funnel in your kitchen organization area dedicated to this task.
Tips for Different Types of Soap Dispensers
Not every dispenser works the same way. Let’s break down the most common types and how to handle refills for each one.
Standard Pump Dispensers
These are the most common type. They have a simple pump mechanism and a screw-on or snap-off top. Refilling is straightforward. Just follow the step-by-step guide above. These dispensers work best with standard liquid hand soap at medium thickness.
Foaming Soap Dispensers
Foaming dispensers have a special pump that mixes air with soap to create foam. You must use soap that is specifically formulated for foaming pumps. Regular soap is too thick and will jam the mechanism. When refilling:
- Pour slowly into the center of the pump opening.
- Do not overfill. These bottles usually have a lower capacity.
- Test the pump several times after refilling to ensure consistent foam output.
Automatic Soap Dispensers
Automatic dispensers use a battery-powered sensor. They have a reservoir that you open from the bottom or the back. Refilling these is simple, but be careful not to get soap on the sensor window. Wipe it clean after refilling for best performance.
Comparison Table: Dispenser Types at a Glance
| Dispenser Type | Best Soap Type | Refill Difficulty | Common Issue |
|---|---|---|---|
| Standard Pump | Liquid hand soap | Easy | Clogged tube |
| Foaming Pump | Foaming soap only | Moderate | Jammed mechanism |
| Automatic Sensor | Liquid hand soap | Easy | Sensor buildup |
| Wall-Mounted | Liquid or foaming | Moderate | Leaky seal |
As you can see, each type has its quirks. Knowing your dispenser type before you buy soap saves you headaches down the road.
Common Mistakes When Refilling Soap Dispensers
Even with clear instructions, people make predictable mistakes. Here are the ones we see most often, and how to avoid them.
Mistake 1: Overfilling the Bottle
This is the number one cause of messy refills. When you fill the bottle all the way to the top, pressure builds inside. That pressure pushes soap out through the pump seal. The result? Soap leaks from the top of the dispenser or oozes out the sides.
Fix: Always leave 10-20% empty space at the top. This allows room for air pressure to equalize.
Mistake 2: Using the Wrong Soap Type
We mentioned this earlier, but it deserves another reminder. Putting thick or exfoliating soap into a standard pump is a recipe for disaster. The pump can’t push through heavy particles, and you end up with a broken mechanism.
Fix: Match your soap viscosity to your pump type. When in doubt, use a basic liquid hand soap.
Mistake 3: Skipping the Cleaning Step
Old soap residue inside the bottle mixes with your new refill. This creates a cloudy, inconsistent mixture. It can also breed bacteria over time. Taking 30 seconds to rinse and dry the bottle before refilling makes a big difference.
Mistake 4: Not Checking the Pump Seal
The small rubber or silicone seal inside the pump keeps soap from leaking. Over time, these seals wear out. If your dispenser leaks from the bottom, the seal is likely damaged. Replacing it takes two minutes and saves you from replacing the entire unit.
Keeping Your Soap Dispenser Clean and Long-Lasting
A clean dispenser works better and lasts longer. Soap dispenser maintenance isn’t hard, but it does require regular attention. Here’s how to keep things running smoothly.
Weekly Cleaning Routine
Set a weekly reminder to give your dispenser a quick clean. Here’s what to do:
- Remove the pump head.
- Rinse the bottle with warm water.
- Wipe the pump mechanism with a damp cloth.
- Let everything air dry completely before reassembling.
- Refill if the soap is low.
Monthly Deep Clean
Once a month, do a deeper clean:
- Remove the pump and tube completely.
- Soak the pump in warm, soapy water for 10-15 minutes.
- Use a toothpick or small brush to clear any clogs in the tube opening.
- Rinse everything thoroughly and let it dry.
- Reassemble and test the pump.
This routine prevents buildup and keeps the pump mechanism functioning like new. Think of it like maintaining any other kitchen tool. Regular care means better performance.
Storing Your Dispenser Properly
Where you place your dispenser matters too. Keep it away from direct sunlight. UV rays can degrade certain soap formulas and weaken plastic over time. Also, make sure the dispenser sits on a stable surface where it won’t get knocked over. Keeping your kitchen area tidy helps reduce accidental bumps and spills.
For those with anti fatigue kitchen mats, keeping your soap dispenser nearby on a stable counter edge rather than on the mat itself prevents moisture damage to the mat and keeps the dispenser steady.
Quick Tips and Expert Insights
Quick Tips for a Perfect Refill Every Time
- Use a small tray. Catch drips before they become a mess.
- Pour at eye level. This gives you better control over the flow.
- Label your refills. If you have multiple soap types, label the bulk containers so everyone in the house knows which is which.
- Refill before it’s empty. Waiting until the bottle is completely empty introduces air that can clog the tube.
- Keep spare pumps. Having a backup pump on hand means you’re never stuck with a broken one.
Expert Insight
Professional cleaning services often recommend using standard liquid soap without added moisturizers for dispensers. Thick moisturizers and serums tend to leave residue that builds up inside the pump. A basic, unscented liquid soap keeps the mechanism clear and reduces cleaning frequency. This simple switch can extend the life of your refillable soap dispenser by years.
Key Takeaways
Let’s wrap up the essentials. Here’s what you need to remember every time you tackle a soap refill:p>
- Choose the right soap type for your dispenser. Match thickness to pump style.
- Pour slowly and stop at 80-90% capacity. Never overfill.
- Clean the bottle before refilling. This prevents residue and bacteria.
- Test the pump several times after reassembly to ensure smooth operation.
- Maintain a regular cleaning schedule. Weekly quick cleans and monthly deep cleans keep everything working.
Knowing how to refill your soap dispenser without making a mess is a small skill with big impact. It saves money, reduces waste, and keeps your kitchen or bathroom looking fresh. The next time your dispenser runs low, you’ll have everything you need to handle it like a pro. Grab that soap, set down a tray, and get it done right.
Frequently Asked Questions
How to Refill Soap Dispenser Without Making a Mess?
The easiest way is to remove the pump mechanism first and pour the soap directly into the bottle opening. Go slowly and use a funnel to prevent spills. Wipe any drips immediately with a paper towel to keep everything clean.
Can You Refill a Soap Dispenser With Any Type of Soap?
Most soap dispensers work well with liquid hand soap, dish soap, or even homemade soap solutions. Avoid thick or gritty soaps because they can clog the pump and make future refills difficult. Stick to liquid formulas that match your dispenser’s design for the best results.
What Is the Best Way to Avoid Soap Stains When Refilling?
Place a paper towel or tray underneath the dispenser before you start pouring. This catches any drips or splashes that might otherwise stain your countertop or sink area. Cleaning up small spills right away prevents stubborn soap buildup over time.
How Often Should You Clean Your Soap Dispenser Before Refilling?
You should clean it every time you refill it to prevent old soap residue from mixing with the new soap. A quick rinse with warm water and a wipe-down with a cloth keeps the dispenser working smoothly. This simple habit extends the life of your dispenser and keeps your soap fresh.
Why Does My Soap Dispenser Leak After I Refill It?
Leaking usually happens when too much soap is filled past the recommended line or the pump seal is not aligned properly. Make sure you leave a small air gap at the top and that the pump is screwed on tightly. If the problem continues, the pump mechanism may need replacing.
Is It Cheaper to Refill a Soap Dispenser Than Buying New Ones?
Absolutely, refilling saves a significant amount of money compared to constantly buying new dispensers or single-use bottles. A large refill bottle of soap costs much less per ounce than individual pump bottles. This simple switch also reduces plastic waste and is better for the environment.



