
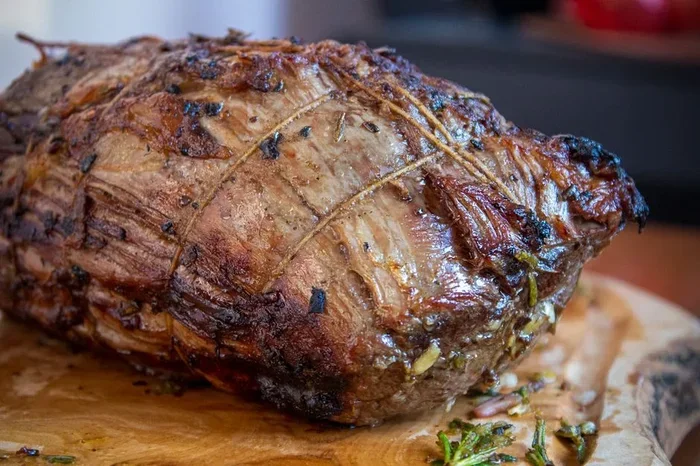
A roast beef temperature chart is the single most important tool for cooking beef perfectly every time. Knowing the exact internal temperature ensures your roast is juicy, safe, and cooked to your preferred doneness. This guide covers every temperature level from rare to well-done, plus expert tips, common mistakes, and storage advice. Whether you use an oven, slow cooker, or instant pot, this chart has you covered.
Cooking the perfect roast beef starts with one simple tool: a roast beef temperature chart. Many home cooks rely on guesswork or visual cues alone. But temperature is the only reliable way to know your beef is done right. Whether you are roasting in the oven, using a slow cooker, or pulling out your instant pot, understanding internal temperatures makes all the difference.
A good roast beef temperature chart takes the stress out of cooking. You will know exactly when your roast hits rare, medium-rare, medium, or well-done. This guide walks you through every temperature level, offers practical tips, and shares common mistakes to avoid. By the end, you will feel confident cooking beef roasts like a pro.
Key Takeaways
- Internal temperature is everything: Using a meat thermometer removes all guesswork and guarantees perfectly cooked roast beef.
- Resting matters just as much as cooking: Letting your roast rest allows juices to redistribute for a more flavorful result.
- Carryover cooking can raise temps by 5°F: Always pull your roast off heat a few degrees before it hits your target temp.
- USDA recommends 145°F for whole cuts: This is the safe minimum for beef roasts with a 3-minute rest period.
- Storage keeps leftovers safe: Properly stored roast beef lasts 3-4 days in the fridge and up to 3 months frozen.
- Different cuts need different approaches: Tough cuts benefit from low-and-slow cooking, while tender cuts cook faster at higher heat.
📑 Table of Contents
Why Roast Beef Temperature Matters
Temperature control is the foundation of great roast beef. Cooking beef to the right internal temperature affects everything from safety to texture. When you use a beef roast thermometer, you remove guesswork and get consistent results every single time.
Undercooked beef can carry harmful bacteria. Overcooked beef turns dry and tough. The sweet spot lies somewhere in between, and that is exactly where a roast beef temperature chart helps you land. Here is why temperature matters so much:
- Food safety: Cooking beef to the recommended minimum temperature kills harmful pathogens like E. coli and Salmonella.
- Texture and juiciness: The right temperature keeps your roast moist and tender instead of dry and chewy.
- Flavor development: Properly cooked beef retains its natural juices and rich beefy flavor.
- Consistency: A chart gives you a reliable reference point so every roast turns out the same way.
- Confidence: You stop second-guessing yourself and just trust the numbers.
The USDA sets the safe minimum internal temperature for whole beef cuts at 145°F (63°C) followed by a 3-minute rest. However, most beef lovers prefer their roast at lower temperatures for better flavor and texture. A roast beef temperature chart lets you choose your preferred level of doneness while staying safe.
The Complete Roast Beef Temperature Chart
Here is the core of this guide: the full roast beef temperature chart broken down by doneness level. Use this chart as your go-to reference every time you cook a roast. Remember that temperatures are measured at the thickest part of the meat, away from the bone.
Beef Doneness Levels and Internal Temperatures
| Doneness | Internal Temperature | Color | Texture |
|---|---|---|---|
| Rare | 120°F – 125°F | Red center | Soft, cool center |
| Medium-Rare | 130°F – 135°F | Warm red center | Juicy, tender |
| Medium | 140°F – 145°F | Pink center | Firmer, juicy |
| Medium-Well | 150°F – 155°F | Slight pink | Firm, less juicy |
| Well-Done | 160°F and above | No pink | Firm, dry |
Most chefs and home cooks agree that medium-rare is the ideal doneness for roast beef. At 130°F to 135°F, the meat stays juicy with a rich, beefy flavor. If you prefer your roast more cooked, simply push the temperature higher. Just keep in mind that the higher you go, the more moisture you lose.
Always remember carryover cooking. After you remove your roast from the heat source, the internal temperature will continue to rise by about 5°F to 10°F. This is why experienced cooks pull their roast off heat a few degrees early. Let the roast rest, and the final temperature will reach the perfect level without overcooking.
How to Cook Roast Beef to Perfection
Now that you have your roast beef temperature chart, let us talk about how to actually cook the roast. Different methods work better for different cuts and preferences. Here are the most popular ways to cook roast beef and how to nail the temperature every time.
Oven Roasting
Oven roasting is the classic method for beef roasts. Preheat your oven to 325°F to 450°F depending on your recipe. For a tender roast, low and slow at 325°F works beautifully. For a faster cook with a crispy exterior, a higher temperature of 400°F to 450°F does the trick.
Insert your meat thermometer into the thickest part of the roast. Avoid touching the bone or fat, as these give false readings. Check the temperature frequently as the roast nears your target. When the thermometer reads 5°F below your desired doneness, pull the roast out and let it rest.
Slow Cooker Method
A slow cooker is one of the easiest ways to prepare roast beef. Set it to low for 8 to 10 hours or high for 4 to 6 hours. The low-and-slow approach breaks down tough connective tissues and creates incredibly tender meat.
If you love slow cooker beef, check out these 24 Crockpot Beef Roast Recipes for inspiration. They cover a wide range of flavors and techniques that pair perfectly with your temperature knowledge.
Instant Pot and Pressure Cooking
The instant pot has changed how many people cook roast beef. Pressure cooking cuts the time dramatically while still producing tender, flavorful results. Use the manual setting on high pressure and cook based on the weight of your roast.
For quick and easy beef recipes in the instant pot, explore these 15 Instant Pot Ground Beef Recipes. While these focus on ground beef, the principles of pressure cooking apply to roasts as well.
Stovetop Searing and Finishing
Many cooks like to sear their roast beef on the stovetop before finishing it in the oven. Searing creates a flavorful crust through the Maillard reaction. This adds depth and richness to the final dish.
Heat a heavy skillet over high heat with a small amount of oil. Sear each side of the roast for 2 to 3 minutes until a brown crust forms. Then transfer to the oven and continue cooking until your roast beef temperature chart target is reached.
Common Mistakes When Cooking Roast Beef
Even experienced cooks make mistakes. Knowing what to avoid helps you achieve better results every time. Here are the most common errors people make when cooking roast beef and how to fix them.
Not Using a Meat Thermometer
This is the number one mistake. Relying on cooking time alone or cutting into the meat to check doneness wastes juices and leads to inconsistent results. A simple meat thermometer takes the guesswork out completely. Invest in a good instant-read thermometer and use it every time.
Skipping the Resting Period
Cutting into your roast immediately after cooking is a huge mistake. The juices inside the meat need time to redistribute. If you cut too early, all those flavorful juices run out onto the cutting board instead of staying in the meat.
Let your roast rest for at least 10 to 15 minutes before slicing. Tent it loosely with aluminum foil to keep it warm. This simple step makes a dramatic difference in juiciness.
Ignoring Carryover Cooking
As mentioned earlier, carryover cooking raises the internal temperature after you remove the roast from heat. Many people pull their roast at exactly the target temperature, only to find it overshoots by several degrees. Always pull early and let the resting period do the work.
Cooking from Room Temperature
Some recipes call for bringing the roast to room temperature before cooking. This helps it cook more evenly. However, leaving raw beef out for too long creates a food safety risk. Keep it to no more than 30 minutes at room temperature.
Overcooking Tough Cuts
Not all beef roasts are created equal. Tough cuts like chuck roast or brisket need long, slow cooking to break down collagen. If you cook these at high heat for a short time, you end up with tough, chewy meat. Low and slow is the way to go for tougher cuts.
Expert Tips for Perfect Roast Beef Every Time
Want to take your roast beef to the next level? These expert tips will help you get restaurant-quality results at home. Use these alongside your roast beef temperature chart for the best outcomes.
- Season generously: Salt your roast at least 40 minutes before cooking, or even overnight. This allows the salt to penetrate deep into the meat.
- Bring the roast to room temperature: Take it out of the fridge 30 to 60 minutes before cooking for more even heat distribution.
- Sear before roasting: A good sear adds flavor and creates a beautiful crust on the outside.
- Use a probe thermometer: A leave-in probe thermometer lets you monitor the temperature without opening the oven door.
- Let it rest properly: Always allow at least 10 minutes of resting time before slicing.
- Slice against the grain: Cutting against the muscle fibers makes the beef more tender and easier to chew.
For more beef cooking inspiration, check out these 16 Healthy Ground Beef Recipes For Dinner if you are looking for quick weeknight meals. And if you want to make the most of your leftovers, these 16 Leftover Ground Beef Dinner Ideas are fantastic.
How to Store and Serve Roast Beef
Cooking the perfect roast is only half the battle. Proper storage ensures your hard work does not go to waste. Follow these guidelines to keep your roast beef fresh and safe.
Let the roast cool to room temperature within two hours of cooking. Then wrap it tightly in aluminum foil or plastic wrap and store it in an airtight container. Refrigerate within two hours of cooking. Properly stored roast beef lasts 3 to 4 days in the refrigerator. For longer storage, freeze the beef in airtight freezer bags. Frozen roast beef stays good for up to 3 months.
If you want to learn more about proper beef storage, visit our guide on How To Store Beef for detailed tips on keeping your beef fresh and safe.
When reheating leftover roast beef, do so gently. Use a low oven temperature or the microwave on a defrost setting. Adding a splash of broth or water helps keep the meat moist during reheating. Avoid high heat, which can dry out the beef quickly.
For serving, slice your roast against the grain for maximum tenderness. Pair it with your favorite sides like mashed potatoes, roasted vegetables, or a fresh salad. A good beef roast pairs well with red wine, au jus, or a simple horseradish cream sauce.
Conclusion
A roast beef temperature chart is the most valuable tool in your kitchen for cooking beef roasts. It takes all the guesswork out and gives you confidence every time you cook. From rare to well-done, knowing your target temperature ensures juicy, flavorful, and safe results.
Remember to use a meat thermometer, let your roast rest, and account for carryover cooking. Avoid common mistakes like skipping the resting period or overcooking tough cuts. With the right knowledge and a little practice, you will cook roast beef that rivals any restaurant.
Keep this guide bookmarked and refer back to it every time you prepare a roast. Your family and guests will notice the difference. Happy cooking!
Frequently Asked Questions
What is the safest internal temperature for roast beef?
The USDA recommends a minimum internal temperature of 145°F for whole beef cuts, followed by a 3-minute rest period. However, most people prefer their roast beef at 130°F to 135°F for medium-rare, which is safe when the meat has been properly handled and cooked.
How long should I let my roast beef rest after cooking?
Let your roast rest for at least 10 to 15 minutes before slicing. This allows the juices to redistribute throughout the meat, resulting in a more flavorful and juicy roast. Tent it loosely with foil to keep it warm during the resting period.
Can I use a meat thermometer for all types of beef roasts?
Yes, a meat thermometer works for all beef roasts regardless of the cut or cooking method. Simply insert the probe into the thickest part of the meat, avoiding bone and fat, for an accurate reading. This is the most reliable way to check doneness.
For additional beef recipes and cooking methods, check out our guide on How To Make Beef Stew Meat Tender On The Stove for more tips on beef tenderness.
What is carryover cooking and why does it matter?
Carryover cooking means the internal temperature of the meat continues to rise after you remove it from the heat source. This happens because residual heat spreads toward the center of the roast. It matters because it can raise the temperature by 5°F to 10°F, so you should pull your roast off heat a few degrees before your target temperature.
How do I know if my roast beef is done without a thermometer?
While a thermometer is the most accurate method, you can use the touch test as a rough guide. Press the center of the roast with your finger. A rare roast feels soft and squishy, medium-rare feels springy, and well-done feels firm. However, this method is less reliable and takes practice to master.
What is the best cut of beef for roasting?
Popular cuts for roasting include chuck roast, rib roast, brisket, and sirloin tip. Each cut has different fat content and cooking requirements. Tender cuts like rib roast cook faster, while tougher cuts like chuck roast benefit from low-and-slow cooking methods like braising or slow cooking.



