
Your toaster keeps popping back up instead of staying down? This frustrating issue often stems from worn-out internal components like broken springs, misaligned hinges, or electrical glitches. The good news is—most causes are fixable with simple troubleshooting steps. Whether it’s a mechanical fault or a wiring problem, understanding the root cause can save you time, money, and morning stress.
Have you ever been in the middle of making breakfast, your toast perfectly golden, only to watch it shoot back up before you can even grab it? You press the lever down, the heating elements glow bright red, and then—bam!—it springs right back up, leaving your breakfast half-finished and your patience in shreds. If this sounds familiar, you’re not alone. The frustrating experience of a toaster that refuses to stay down is more common than you’d think. Whether it’s a cheap model from years ago or a pricier appliance that suddenly developed quirks, this issue can ruin your morning routine. But don’t worry—there are solid explanations and practical solutions for why your toaster won’t stay down, and many of them you can tackle yourself with just a little know-how.
When a toaster won’t stay down, it’s usually because something inside is preventing the carriage from locking into position. This could be anything from a simple buildup of crumbs to a complex electrical malfunction. Understanding what’s happening under the hood—literally—can help you diagnose the problem quickly and decide whether to fix it or replace it. In this guide, we’ll walk through the most likely causes, how to identify them, and step-by-step instructions to get your toaster working like new again. Plus, we’ll share pro tips to prevent future issues so you never have to wonder, “Why will my toaster not stay down?” ever again.
Key Takeaways
- Worn or broken springs are one of the most common reasons a toaster won’t stay down—replacing them can restore full function.
- Misaligned or damaged hinges prevent the carriage from locking into place properly, requiring realignment or part replacement.
- Faulty electrical components, such as a defective thermostat or relay, may cause intermittent operation and need professional inspection.
- Dirty or obstructed guides can interfere with smooth movement, so regular cleaning is essential for consistent performance.
- Using the wrong bread size can jam the mechanism; always ensure your bread fits within the slots without forcing it.
- Aging appliances often develop wear over time—knowing when to repair vs. replace helps avoid repeated frustration.
📑 Table of Contents
- Understanding How a Toaster Works
- Common Reasons Why Your Toaster Won’t Stay Down
- Step-by-Step Troubleshooting Guide
- Prevention Tips for Long-Term Performance
- When to Call a Professional vs. DIY Repair
- Comparing Repair vs. Replacement
- Frequently Asked Questions About Toaster Mechanics
- Conclusion: Get Back to Perfect Toast
Understanding How a Toaster Works
Before diving into repairs, it helps to know the basics of how a standard toaster operates. Most toasters use a spring-loaded mechanism that lifts the bread carriage when the lever is released. When you press the lever down, it triggers the bimetallic strips (or thermostats) and activates the heating elements. The carriage should remain down long enough for the bread to toast, then pop back up automatically once the cycle completes. For the toaster to stay down during toasting, the release mechanism must be held in place by internal latches or springs until the proper temperature is reached.
Over time, these small but vital parts wear out. Springs lose tension, latches can bend or break, and electrical contacts corrode. That’s why even well-made toasters eventually develop issues like the one you’re dealing with. Knowing how each component contributes to the process helps pinpoint where things might be going wrong.
Common Reasons Why Your Toaster Won’t Stay Down
Let’s explore the most frequent culprits behind a toaster that pops back up prematurely or refuses to stay engaged.
1. Worn or Broken Springs
The heart of the toaster’s lifting system is its return spring. This tiny metal coil is responsible for popping the bread up after toasting. But over hundreds of cycles, it can stretch, weaken, or even snap completely. A weak spring won’t provide enough force to hold the carriage down, causing it to rise too soon or not at all.
To check if this is the issue:
– Unplug the toaster.
– Remove the outer casing (usually held by screws on the sides or back).
– Locate the spring near the lever mechanism.
– Inspect it for signs of rust, deformation, or breaks.
If the spring looks damaged, replacing it is often straightforward—especially on older models where parts are easier to access. Newer, compact toasters may require more disassembly, but YouTube tutorials can guide you through the process safely.
2. Misaligned or Damaged Hinges
Hinges connect the carriage to the toaster body and allow it to move up and down smoothly. If they become loose, bent, or corroded, the carriage may not seat properly when lowered. This misalignment prevents the locking mechanism from engaging, so the toaster thinks it’s done and releases the bread.
Signs of hinge problems include:
– The carriage wobbling or tilting sideways.
– Resistance when pressing the lever down.
– Visible gaps between the carriage and the toaster slot.
Fixing this usually involves tightening screws or carefully bending the hinge back into alignment. On some models, you may need to remove the entire assembly to adjust it. Always refer to your user manual for guidance—or consult a repair guide specific to your brand and model.
3. Dirty or Obstructed Guides
Crumbs and grease naturally accumulate inside toasters over time. While this is normal, excessive buildup can block the tracks that guide the bread carriage. If the guides are clogged, the carriage can’t move freely, which means it either won’t go all the way down or gets stuck mid-cycle.
Cleaning your toaster regularly is one of the easiest preventive measures. Here’s how:
– Unplug the appliance.
– Use a soft brush or compressed air to clear crumbs from the slots.
– Gently wipe the interior walls with a damp cloth (never submerge the base).
– Never use water directly on electrical parts.
For stubborn grime, mix equal parts vinegar and water, dip a cloth, wring it out, and clean carefully. Avoid harsh chemicals that could damage plastic or metal surfaces.
4. Faulty Electrical Components
Sometimes, the issue isn’t mechanical at all—it’s electrical. Internal parts like the thermostat, bimetallic strip, or relay control the timing and heating process. If one of these fails, the toaster might detect “toasting complete” too early, triggering an automatic release before your bread is ready.
Symptoms of electrical problems include:
– The toaster turning off before reaching desired darkness.
– Inconsistent toasting results.
– Burning smells or sparking (which indicates immediate danger—unplug and stop using it).
Electrical faults typically require professional diagnosis unless you’re experienced with appliance repair. However, if your toaster is still under warranty, contact the manufacturer first. Attempting to open and repair high-voltage components without training can be dangerous.
5. Using the Wrong Bread Size
Believe it or not, the type and size of bread can affect how the toaster functions. If your slices are too thick, too wide, or oddly shaped, they may jam the mechanism. Some artisanal loaves or specialty breads don’t fit snugly in standard slots, creating pressure that interferes with the carriage’s movement.
To avoid this:
– Stick to standard sandwich bread thickness (about ½ inch).
– Avoid bagels or thick-cut toast unless your toaster has a dedicated bagel setting.
– Don’t force bread into the slots—if it doesn’t slide in easily, it probably won’t work correctly.
If you frequently bake thick breads, consider upgrading to a wider-slot toaster with adjustable settings.
6. Age and Wear Over Time
Like any kitchen gadget, toasters have a lifespan. Most last between 5 to 10 years with regular use. As they age, internal components degrade. Even with careful maintenance, eventually, parts will fail. If your toaster is older than seven years and keeps having issues, it might simply be time to retire it.
Modern toasters offer better features—like auto-reheat, bagel modes, and digital controls—that make daily use much more convenient. Before spending money on repairs, ask yourself: Is it worth fixing an old model when a new one could solve multiple problems at once?
Step-by-Step Troubleshooting Guide
Ready to roll up your sleeves? Follow these simple steps to diagnose and fix the issue yourself.
Step 1: Safety First
Always unplug the toaster before inspecting or repairing it. Never touch internal wires or components while the appliance is powered. Work in a dry environment and wear safety glasses if removing screws or springs.
Step 2: Inspect the Exterior and Slots
Look for visible debris, burnt crumbs, or warped slots. Use a flashlight to peer inside. If you see large chunks of food stuck deep in the slots, gently remove them with tweezers or a bent paperclip.
Step 3: Test the Lever Mechanism
Press the lever down firmly and observe:
– Does it click into place?
– Does it feel stiff or loose?
– Does it spring back immediately?
If it doesn’t lock, the latch or spring is likely faulty.
Step 4: Open the Toaster (Carefully)
Remove screws from the sides or bottom. Some models have hidden clips—check the edges. Once open, locate the spring, hinges, and electrical connections. Take photos before disconnecting anything to remember how things were assembled.
Step 5: Replace or Repair Faulty Parts
Based on your findings:
– Swap out broken springs.
– Tighten loose hinges.
– Clean carbonized residue from contacts.
If unsure about any step, search for your toaster’s model number online. Many brands sell replacement kits or individual parts directly.
Step 6: Reassemble and Test
Put everything back together exactly as it was. Plug in the toaster and run a short test cycle. Watch closely to see if the carriage stays down. If it works, enjoy your perfectly toasted bread!
Prevention Tips for Long-Term Performance
Once your toaster is fixed, you’ll want to keep it running smoothly. Here are some easy habits to adopt:
- Clean weekly: Wipe down the exterior and vacuum crumbs from the slots every few days.
- Avoid overloading: Don’t stuff multiple thick slices in at once—this strains the mechanism.
- Use quality bread: Stale or overly dense bread can gum up the works.
- Store properly: Keep your toaster in a dry spot away from moisture.
- Unplug when not in use: Prevents accidental activation and extends cord life.
These small efforts go a long way in preserving your appliance’s functionality and extending its lifespan.
When to Call a Professional vs. DIY Repair
While many toaster issues are DIY-friendly, some situations call for expert help:
- You smell burning or see sparks: Stop using the toaster immediately and contact a technician.
- It’s under warranty: Self-repair may void coverage—contact the manufacturer instead.
- Complex electronics are involved: Thermostats and relays require specialized tools and knowledge.
- You lack confidence in handling small parts: It’s okay to admit you’d rather pay a pro!
On the other hand, if the problem is clearly mechanical—like a loose screw or broken spring—DIY is totally safe and cost-effective. Just take your time, follow instructions precisely, and prioritize safety above all else.
Comparing Repair vs. Replacement
So, should you fix it or toss it? Consider these factors:
| Factor | Repair | Replacement |
|---|---|---|
| Cost | Low (parts under $10) | Medium to High ($20–$50+) |
| Time | 1–2 hours (DIY) | Minutes (shopping + install) |
| Lifespan | Restored to original function | New features, efficiency |
| Sustainability | Eco-friendly | Higher carbon footprint |
If your toaster is less than five years old and the repair costs under 30% of a new unit, go ahead and fix it. But if it’s older or needs multiple part replacements, investing in a new model might make more sense.
Frequently Asked Questions About Toaster Mechanics
Why does my toaster keep popping up before the timer ends?
This usually means the bimetallic thermostat is detecting heat too quickly—possibly due to buildup or misalignment. Cleaning the interior and checking the spring tension often resolves it. If the problem persists, the thermostat itself may need replacing.

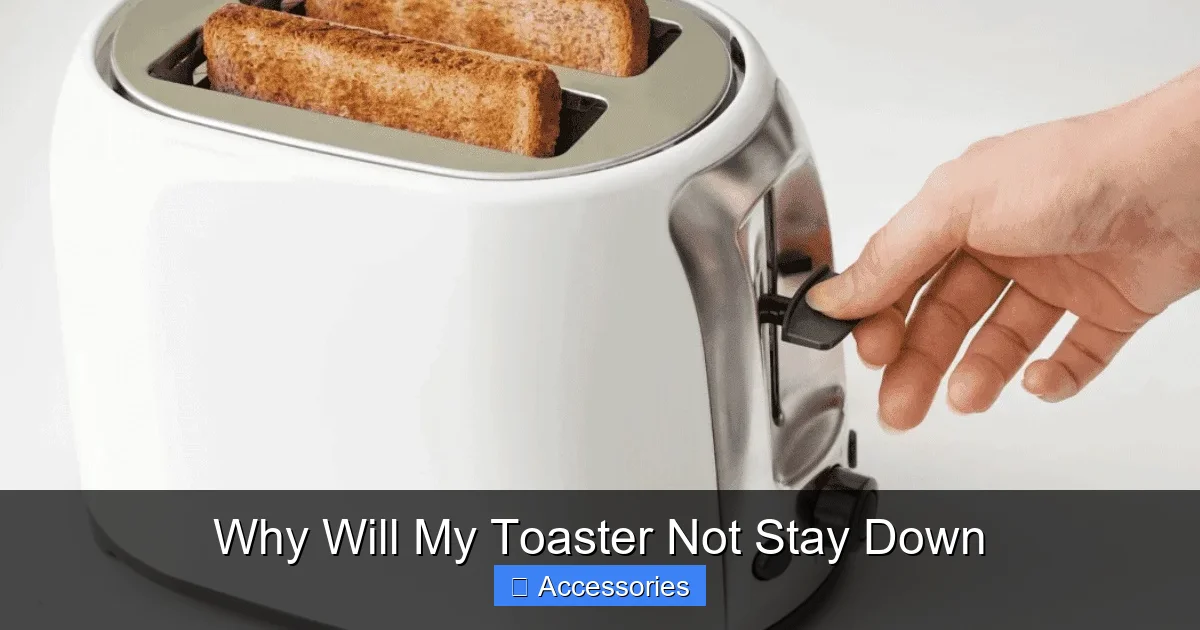
Visual guide about Why Will My Toaster Not Stay Down
Image source: howdykitchen.com
Visual guide about Why Will My Toaster Not Stay Down
Image source: storables.com
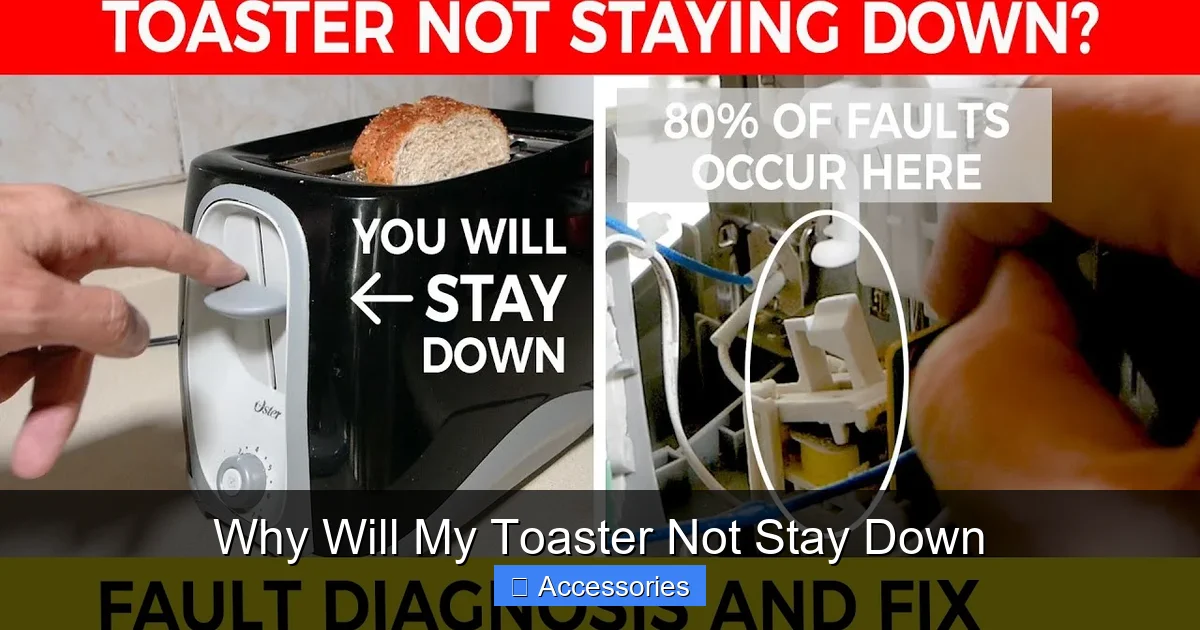
Visual guide about Why Will My Toaster Not Stay Down
Image source: i.ytimg.com
Can I use WD-40 on my toaster?
No. WD-40 is not food-safe and can leave residues that attract dirt or create smoke when heated. Instead, use a dry brush or compressed air to clean moving parts.
Is it dangerous if my toaster makes crackling noises?
Crackling may indicate arcing or overheating inside. Unplug immediately and inspect for loose wires or carbonized buildup. Persistent noise warrants professional inspection.
How often should I clean my toaster?
At least once a week, especially if you use it daily. Weekly cleaning prevents crumb accumulation that leads to jams and fire hazards.
Will resetting my toaster help?
Most basic toasters don’t have a reset button. However, unplugging it for 5–10 minutes can sometimes resolve minor electronic glitches by allowing capacitors to discharge.
Can I repair a modern digital toaster?
Possibly, but digital models have sealed interiors and complex circuitry. If the lever mechanism is mechanical, you might still fix it—but consult a repair specialist for electronic faults.
Conclusion: Get Back to Perfect Toast
There’s nothing quite like the satisfying crunch of freshly toasted bread, and a toaster that works reliably makes all the difference in your morning routine. While it’s annoying when your appliance decides not to cooperate, most cases of a toaster that won’t stay down are solvable with patience and a bit of hands-on effort. From worn springs to dirty guides, understanding the mechanics behind the issue empowers you to take action—whether that’s a quick cleaning, a simple repair, or deciding it’s time for an upgrade.
Remember, prevention is key. Regular maintenance not only saves you from future headaches but also ensures your toaster performs safely and efficiently. And if you ever find yourself stumped, don’t hesitate to reach out to customer support or seek advice from appliance repair communities online.
With the right approach, you’ll soon be enjoying consistently perfect toast—every single time. So next time you ask yourself, “Why will my toaster not stay down?”, you’ll already know exactly what to do.
Frequently Asked Questions
Why does my toaster keep popping up before the timer ends?
This usually means the bimetallic thermostat is detecting heat too quickly—possibly due to buildup or misalignment. Cleaning the interior and checking the spring tension often resolves it. If the problem persists, the thermostat itself may need replacing.
Can I use WD-40 on my toaster?
No. WD-40 is not food-safe and can leave residues that attract dirt or create smoke when heated. Instead, use a dry brush or compressed air to clean moving parts.
Is it dangerous if my toaster makes crackling noises?
Crackling may indicate arcing or overheating inside. Unplug immediately and inspect for loose wires or carbonized buildup. Persistent noise warrants professional inspection.
How often should I clean my toaster?
At least once a week, especially if you use it daily. Weekly cleaning prevents crumb accumulation that leads to jams and fire hazards.
Will resetting my toaster help?
Most basic toasters don’t have a reset button. However, unplugging it for 5–10 minutes can sometimes resolve minor electronic glitches by allowing capacitors to discharge.
Can I repair a modern digital toaster?
Possibly, but digital models have sealed interiors and complex circuitry. If the lever mechanism is mechanical, you might still fix it—but consult a repair specialist for electronic faults.