
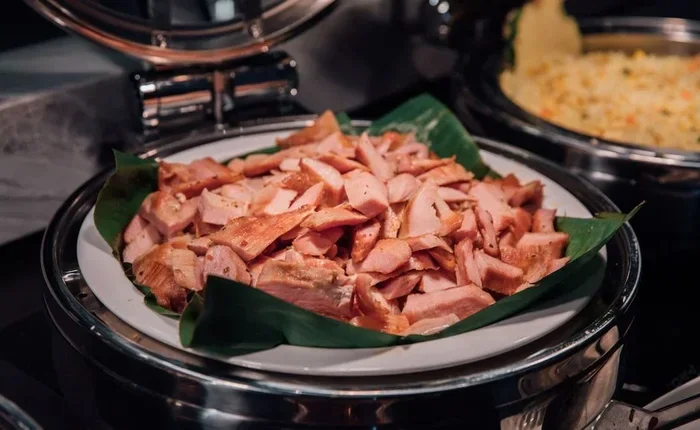
Smithfield ham cooking directions are easier than you think. Whether you are baking, glazing, or slow-cooking a Smithfield ham, this guide walks you through every step with clear instructions. You will learn the right oven temperature, cooking times, and pro tips for a juicy, flavorful ham that impresses everyone at the table.
Cooking a Smithfield ham does not have to be stressful. If you have ever stood in front of a whole ham wondering where to start, you are not alone. Many people buy a beautiful Smithfield cured ham and then feel lost when it comes to the actual cooking part.
The good news is that smithfield ham cooking directions are straightforward once you know the basics. This guide breaks everything down into simple, easy-to-follow steps. You will learn how to prepare your ham, what tools you need, the best cooking methods, and how to get that perfect golden glaze. Whether you are a beginner or a seasoned cook, these tips will help you cook a ham that tastes amazing every single time.
Smithfield is one of the most trusted names in cured and smoked hams. Their hams come in different styles, including fully cooked, partially cooked, and raw. Each type needs a slightly different approach, which we will cover below. By the end of this article, you will feel confident and ready to cook your ham like a pro.
Key Takeaways
- Soak your ham first: Soaking removes excess salt and improves flavor.
- Bake at 325°F: This is the ideal temperature for even cooking.
- Glaze in the last 30 minutes: A brown sugar or maple glaze adds sweetness and shine.
- Use a meat thermometer: Aim for an internal temperature of 140°F for reheating or 160°F for raw ham.
- Rest before slicing: Let the ham rest 10-15 minutes for juicier slices.
- Try alternative methods: Crockpot and stovetop methods work great too.
- Store leftovers properly: Refrigerate within two hours and use within 5 days.
📑 Table of Contents
Understanding Your Smithfield Ham
Before you dive into cooking, it helps to know what kind of ham you have. Not all hams are the same, and the cooking method changes depending on the type.
Fully Cooked Ham
A fully cooked ham has already been cured and smoked. You just need to reheat it. This is the most common type you will find at the grocery store. Smithfield ham cooking directions for fully cooked hams are the simplest. You basically just need to warm it up and add a glaze if you want.
Partially Cooked Ham
A partially cooked ham needs more time in the oven. It has been cured but not fully cooked through. You will need to bake it longer to reach a safe internal temperature. Always check the package for specific guidance.
Raw Ham
Raw ham requires the most cooking time. It has not been cured or smoked. You must cook it thoroughly to ensure it is safe to eat. This type is less common in stores but still popular in Southern cooking traditions.
What You Need Before You Start
Gathering your tools and ingredients ahead of time makes the whole process smoother. Here is a simple checklist to follow before you begin smithfield ham cooking directions.
Essential Tools
- A large roasting pan or baking dish
- A meat thermometer for checking internal temperature
- Aluminum foil to cover the ham while baking
- A basting brush for applying glaze
- A sharp knife for scoring and slicing
- An extra large non-stick pot if you plan to simmer the ham
Basic Ingredients for Glaze
You do not need fancy ingredients for a great ham glaze. Most people keep these staples in their kitchen already:
- Brown sugar or maple syrup
- Whole grain mustard or Dijon mustard
- Cloves or pineapple juice for extra flavor
- Honey for natural sweetness
- A splash of apple cider vinegar
Quick Tip
If you are using a long wooden spoon to baste or stir your glaze, it makes reaching into deep roasting pans much easier. It is a small tool that saves a lot of hassle.
Step-by-Step Smithfield Ham Cooking Directions
Now let us get into the heart of the matter. Here is a clear, step-by-step walkthrough for cooking your Smithfield ham in the oven. This method works for most ham types and delivers consistently great results.
Step 1: Soak the Ham
This step is often overlooked but very important. If your ham is heavily salted, soaking it overnight in cold water draws out excess brine. Place the ham in a large container and cover it with fresh water. Change the water a couple of times if possible.
Not all Smithfield hams need soaking. Check the label. If it says “cured” or “country style,” soaking is highly recommended. For hams labeled “fully cooked,” you can skip this step.
Step 2: Preheat the Oven
Set your oven to 325°F. This is the sweet spot for cooking ham evenly without drying it out. While the oven heats up, remove the ham from the water and pat it dry with paper towels.
Step 3: Score the Ham
Use a sharp knife to make shallow diamond cuts across the surface of the ham. Score about a quarter inch deep. This does two things. It helps the glaze seep into the meat, and it gives the ham a beautiful presentation when served.
Place the ham flat side down in your roasting pan. If you do not have a large enough pan, a big non-stick pot can also work for stovetop methods.
Step 4: Add Liquid to the Pan
Pour about one cup of water, apple juice, or cola into the bottom of the roasting pan. This creates steam that keeps the ham moist during cooking. It also makes cleanup easier by preventing drippings from sticking.
Step 5: Cover and Bake
Tent the ham with aluminum foil, making sure the foil does not touch the glaze. Bake for about 15 to 20 minutes per pound. For a fully cooked ham, aim for 10 to 12 minutes per pound since you are just reheating.
Keep the ham covered for most of the cooking time. Remove the foil during the last 20 to 30 minutes to let the outside caramelize.
Step 6: Apply the Glaze
Mix your glaze ingredients in a small bowl. A simple blend of brown sugar, mustard, and pineapple juice works wonders. Brush the glaze onto the ham during the last 30 minutes of cooking.
Apply the glaze in thin layers. Two to three coats give the best results. Each layer should be slightly tacky before you add the next one.
Step 7: Check the Temperature
Use a meat thermometer to check the internal temperature. For a fully cooked ham being reheated, 140°F is your target. For raw or partially cooked ham, aim for 160°F in the thickest part.
Step 8: Rest and Serve
Remove the ham from the oven and let it rest for 10 to 15 minutes. This allows the juices to redistribute, making every slice moist and tender. Carve against the grain for the most tender results.
Alternative Cooking Methods
The oven is the most popular method, but it is not the only way to cook a Smithfield ham. Here are two other approaches worth trying.
Crockpot Method
A crockpot is a hands-off way to cook ham. Place the ham inside, add your glaze ingredients, and set it on low for 4 to 6 hours. This method works especially well for smaller hams or spiral-cut varieties.
For a detailed recipe using this approach, check out our crockpot ham and beans recipe. It pairs perfectly with ham and makes a complete meal.
Stovetop Simmering
You can also simmer a ham on the stove. Place it in a large pot, cover it with water or broth, and bring it to a gentle simmer. Cook for about 20 to 25 minutes per pound. This method keeps the ham very moist but does not give you a crispy exterior.
After simmering, you can transfer the ham to a hot oven for 10 to 15 minutes to get some color on the outside. This two-step approach gives you the best of both worlds.
Common Mistakes to Avoid
Even experienced cooks make mistakes when preparing ham. Here are the most common errors and how to avoid them.
- Skipping the soak: A salty ham can ruin an otherwise great meal. Always soak heavily cured hams overnight.
- Cooking at too high a temperature: High heat dries out ham quickly. Stick with 325°F for the best results.
- Adding the glaze too early: Sugar burns fast. Only apply the glaze during the last 20 to 30 minutes.
- Not using a meat thermometer: Guessing the temperature leads to overcooked or undercooked ham. A thermometer takes the guesswork out.
- Cutting too soon: Slicing immediately after cooking releases all the juices. Be patient and let the ham rest.
- Overcrowding the pan: Give your ham room in the roasting pan. Air needs to circulate for even cooking.
Glaze Recipes Worth Trying
The glaze makes or breaks a ham. Here are three easy recipes you can try with your next Smithfield ham.
| Glaze Type | Ingredients | Best For |
|---|---|---|
| Classic Brown Sugar | Brown sugar, mustard, pineapple juice | Traditional spiral hams |
| Maple Bourbon | Maple syrup, bourbon, black pepper | Smoked hams |
| Honey Mustard | Honey, whole grain mustard, apple cider vinegar | Fully cooked city hams |
Each glaze brings a different flavor profile. The classic brown sugar glaze is the most popular and pairs well with almost any ham. The maple bourbon glaze adds a sophisticated smoky twist. The honey mustard glaze is lighter and works beautifully on hams that are already well-seasoned.
Storing and Reheating Leftover Ham
Cooked ham keeps well in the refrigerator. Wrap it tightly in plastic wrap or store it in an airtight container. You can also freeze leftover ham for up to 3 months.
When reheating, use a low oven temperature of 275°F. Cover the ham with foil and warm it slowly. This prevents the meat from drying out. A high-temperature plastic wrap can also work well for wrapping ham during storage and reheating.
Leftover ham makes incredible soups and casseroles. Try adding diced ham to bean soup for a hearty meal. Our ham and bean soup recipes are perfect for using up leftovers in a delicious way.
Expert Tips for the Perfect Ham
Here are a few extra tips from experienced cooks that can elevate your ham game.
Use the bone. If your ham comes with a bone, cook it bone-in. The bone adds flavor and makes the meat juicier. You can also save the bone for making stock later.
Let it come to room temperature. Taking the ham out of the refrigerator 30 minutes before cooking helps it cook more evenly. Cold ham in a hot oven leads to uneven results.
Baste regularly. Basting the ham every 30 minutes keeps the surface moist and builds flavor. Use the pan juices for the best results.
Add cloves for aroma. Press whole cloves into the scored diamonds of your ham before baking. They release a warm, fragrant aroma that fills your kitchen and adds a classic touch.
Serving Suggestions
Now that your ham is cooked to perfection, it is time to serve it. Here are some crowd-pleasing side dishes that pair beautifully with Smithfield ham:
- Scalloped potatoes or roasted sweet potatoes
- Green bean casserole
- Fresh pineapple rings or pineapple salsa
- Cornbread or dinner rolls
- Pickled vegetables for a tangy contrast
- Mac and cheese for a comforting classic
A well-cooked ham is the centerpiece of any holiday table or family gathering. With the right smithfield ham cooking directions, you can serve a ham that gets rave reviews every time.
Final Thoughts
Cooking a Smithfield ham is a rewarding experience. Once you understand the basics, the process becomes second nature. Start with a good quality ham, follow the steps outlined above, and do not be afraid to experiment with glazes and cooking methods.
The key to a perfect ham is patience. Low and slow cooking, proper glazing, and resting before slicing all contribute to a moist, flavorful result. Whether you are preparing ham for Easter, Christmas, a family reunion, or just a Sunday dinner, these smithfield ham cooking directions will guide you to success.
Keep this guide handy for your next ham cooking session. With the right approach and a little practice, you will be cooking Smithfield ham like a professional in no time. Your family and guests will love every bite.
Frequently Asked Questions
How long does it take to cook a Smithfield ham?
Cooking time depends on the size and type of ham. A fully cooked ham takes about 10 to 12 minutes per pound at 325°F. A raw or partially cooked ham needs 15 to 20 minutes per pound. Always use a meat thermometer to confirm doneness.
Do you need to soak a Smithfield ham before cooking?
It depends on the type of ham. Heavily cured or country-style hams benefit from an overnight soak in cold water. Fully cooked city hams usually do not need soaking. Check the package label for specific instructions.
What temperature should Smithfield ham be cooked to?
For a fully cooked ham being reheated, the target internal temperature is 140°F. For raw or partially cooked ham, cook until it reaches 160°F in the thickest part. A reliable meat thermometer is essential for accuracy.
Can you cook a Smithfield ham in a Crockpot?
Yes, a Crockpot works well for cooking ham. Place the ham inside on low heat for 4 to 6 hours. Add your glaze during the last hour of cooking for the best flavor and caramelization.
How do you keep a Smithfield ham from drying out?
The key is low oven temperature, covering with foil during most of the cooking time, and adding liquid to the roasting pan. Let the ham rest for 10 to 15 minutes after cooking before slicing to retain juices.
What is the best glaze for a Smithfield ham?
The classic brown sugar and mustard glaze is the most popular choice. Mix brown sugar, whole grain mustard, and a splash of pineapple juice. Apply it in the last 30 minutes of cooking for a glossy, flavorful finish.
=== CONCLUSION ===
Smithfield ham cooking directions are simple once you know the right steps. From soaking and scoring to glazing and resting, each step plays an important role in delivering a delicious ham. Follow the tips in this guide, avoid common mistakes, and you will cook a ham that everyone at the table will love. Happy cooking!



