
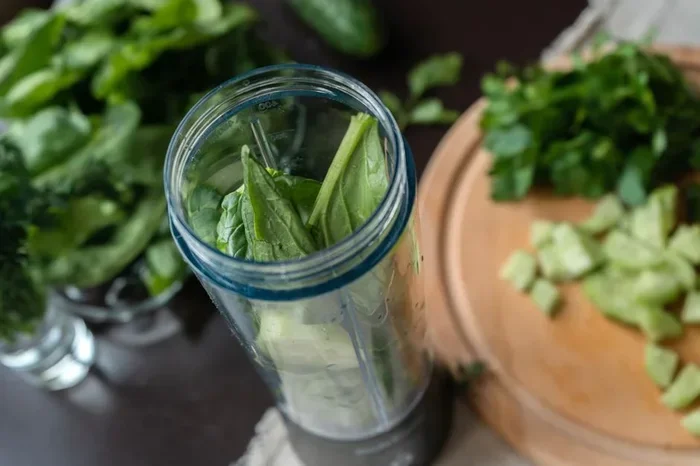
Learning how to clean a blender fast is easier than you think. With just a few household items like dish soap, vinegar, and baking soda, you can keep your blender sparkling and odor-free. This guide covers everything from a quick daily wash to a full deep clean, so your smoothie maker stays in top shape for years.
Have you ever blended a delicious smoothie and then stared at your blender, wondering how on earth you are going to clean it? Learning how to clean a blender fast is one of those kitchen skills that saves you time, money, and a whole lot of frustration. A dirty blender can harbor bacteria, develop stubborn odors, and even affect the taste of your next meal. The good news is that you do not need fancy cleaners or expensive tools. Most of what you need is already sitting under your kitchen sink.
Whether you use your smoothie blender every morning or just pull it out on weekends, regular blender cleaning keeps it running smoothly and your food tasting great. This guide walks you through simple, effective methods using items you already have at home. We will cover quick daily routines, deep cleaning techniques, and common mistakes to avoid. By the end, you will feel confident tackling any blender mess in minutes.
Proper blender maintenance goes beyond just rinsing out the pitcher. It means paying attention to the blade assembly, the gasket seal, and even the lid. Taking a few extra minutes to care for your appliance pays off big time. Let us dive into the best ways to keep your blender spotless and odor-free.
Key Takeaways
- Daily cleaning keeps your blender fresh: A quick rinse after every use prevents buildup and stubborn stains.
- Household items work wonders: Vinegar, baking soda, and dish soap handle most blender cleaning tasks without special products.
- Deep cleaning extends blender life: Regular maintenance of the blade, gasket, and pitcher prevents odors and performance issues.
- Avoid common mistakes: Never submerge the motor base, and always let parts dry fully before reassembling.
- Know when to replace: If your blender shows signs of wear despite proper care, it may be time for a new one.
📑 Table of Contents
Why Regular Blender Cleaning Matters
Many people rinse their blender pitcher quickly and call it done. But a proper household blender cleaning routine does much more than just look good. Here is why you should make it a habit.
Prevents Bacterial Growth
Blenders create a warm, moist environment that is perfect for bacteria. Leftover fruit residue, dairy, and protein from smoothies can sit at the bottom of the pitcher and breed germs quickly. Washing your blender right after use stops this cycle in its tracks. A quick rinse with warm water and a drop of dish soap removes most of the buildup before it has a chance to grow.
Eliminates Stubborn Odors
Have you ever noticed a lingering smell in your blender even after washing it? That is blender odor caused by oils and tiny food particles trapped in the gasket or blade assembly. Regular deep cleaning removes these odor-causing residues. Using natural items like vinegar or baking soda neutralizes smells without harsh chemicals.
Extends the Life of Your Blender
A well-maintained blender lasts significantly longer than one that is neglected. Blender care includes cleaning the blades, checking the gasket for wear, and making sure no food particles get stuck in the motor base. Simple habits like these prevent damage and keep your appliance performing at its best for years.
What You Need to Clean a Blender
Before you start, gather these common household items. You probably already have everything on this list in your kitchen.
- Warm water — the foundation of most cleaning solutions
- Dish soap — cuts through grease and food residue
- White vinegar — a natural disinfectant that removes odors
- Baking soda — a gentle abrasive that tackles stains
- Soft sponge or cloth — for scrubbing without scratching
- A small brush (old toothbrush works great) — reaches tight spaces
- Drying towel — prevents water spots and moisture buildup
That is it. You do not need specialized blender cleaning products. These everyday items handle 95% of blender cleaning tasks. For a natural blender cleaner alternative, you can also use lemon juice or citric acid, which adds a fresh scent while cutting through grime.
Step-by-Step: How to Clean a Blender
Now let us get into the actual process. Follow these steps for a sparkling clean blender every time.
Step 1: Disassemble the Blender
Unplug the blender first — always safety first. Then separate the pitcher from the motor base. Remove the blender lid, the gasket ring, the blade assembly, and any other detachable parts. Lay everything out on a clean towel so you can see each piece clearly. This step is crucial because it lets you access all the nooks and crannies where grime hides.
Step 2: Rinse All Removable Parts
Rinse each piece under warm running water to remove loose food particles. Pay special attention to the blade assembly and the bottom of the pitcher. Use your fingers to gently remove any stuck-on fruit or vegetable bits. This pre-rinse makes the scrubbing step much easier and more effective.
Step 3: Wash with Soapy Water
Fill your sink or a basin with warm water and add a few drops of dish soap. Submerge the pitcher, lid, gasket, and blade assembly. Let them soak for five to ten minutes. After soaking, use a soft sponge to wash each piece thoroughly. For the blade assembly, use a small brush to clean around the blades carefully. Always handle the blades with care — they are sharp and can cause injury.
Step 4: Tackle Stubborn Stains
Stains from berries, turmeric, or tomato-based smoothies can be tough to remove. Make a paste of baking soda and water, then apply it to the stained areas. Let it sit for ten minutes before scrubbing gently. For an extra boost, add a splash of white vinegar to the baking soda paste. The fizzing action helps lift stains and disinfect the surface. This method works wonders on blender buildup that refuses to budge.
Step 5: Clean the Motor Base
Never submerge the motor base in water. Instead, wipe it down with a damp cloth and a small amount of dish soap. Pay attention to the area where the pitcher sits, as residue often accumulates there. Use a dry cloth to wipe away moisture afterward. Keeping the base clean prevents grease buildup and ensures proper ventilation during use.
Step 6: Dry and Reassemble
Lay all parts on a clean towel and let them air dry completely before reassembling. Moisture trapped inside the blender can lead to mold and mildew. Once everything is dry, put the gasket back on the blade assembly, reattach the pitcher, and snap the lid into place. Your blender is now clean and ready for its next use.
Deep Cleaning Your Blender
A quick wash after every use is great for daily maintenance. But every few weeks, your blender needs a deeper treatment. Deep cleaning removes hidden buildup, disinfects all surfaces, and keeps your blender performing at its peak.
The Vinegar Soak Method
Fill the blender pitcher halfway with warm water and add one cup of white vinegar. Blend the mixture on high for one to two minutes. The vinegar solution circulates through the entire blender, cleaning the interior walls and blade area that are hard to reach by hand. Pour out the mixture, rinse thoroughly, and wash with soapy water as usual. This method is one of the most effective blender deep clean techniques and also eliminates lingering odors.
The Baking Soda Scrub
For a heavy-duty clean, make a thick paste of three tablespoons of baking soda and one tablespoon of water. Apply this paste to the inside of the pitcher, the lid, and the gasket. Let it sit for fifteen minutes, then scrub with a sponge or brush. The mild abrasion of baking soda lifts stains and buildup without scratching the surface. Rinse everything thoroughly with warm water afterward.
Cleaning the Gasket and Blade Separately
The gasket ring and blade assembly are the most overlooked parts of blender maintenance. Food particles and dried liquids get trapped in these small components, leading to mold and unpleasant smells. Remove the gasket and soak it in warm soapy water for at least twenty minutes. Use a toothbrush to scrub between the folds. For the blade, soak it separately and rinse it carefully. If your gasket shows signs of wear or cracking, consider replacing it to maintain a proper seal.
Running a Self-Cleaning Cycle
If you have a high-powered smoothie blender, many models come with a self-cleaning function. Simply add warm water and a drop of dish soap to the pitcher, secure the lid, and run the self-clean cycle. While this is convenient, it is not a substitute for manual cleaning. You should still disassemble and hand-wash the parts at least once a week for the best results.
Common Blender Cleaning Mistakes to Avoid
Even the best intentions can lead to mistakes. Here are some errors that people commonly make when washing their blender and how to avoid them.
- Putting the motor base in water: This can cause serious electrical damage. Always wipe the base with a damp cloth only.
- Using abrasive pads: Steel wool or harsh scrubbers can scratch the pitcher interior, creating grooves where bacteria thrive. Stick with soft sponges.
- Leaving parts wet after washing: Moisture trapped in the gasket or blade area promotes mold growth. Always dry components thoroughly.
- Ignoring the lid and gasket: These small parts harbor the most bacteria and odors. Clean them every single time you wash the blender.
- Using harsh chemical cleaners: Strong detergents can leave residues that contaminate your food. Stick with gentle, natural cleaning solutions like vinegar and baking soda.
Avoiding these simple mistakes keeps your blender hygienic and extends its lifespan significantly. If you ever notice cracks in the pitcher or dull blades despite regular cleaning, it may be time to consider replacing the unit. Check out our guide on how to dispose of a blender for responsible recycling options.
Expert Tips for Blender Maintenance
A little extra care goes a long way in keeping your blender in excellent condition. Here are some pro tips that experienced home cooks and kitchen experts swear by.
Clean Immediately After Use
The longer food sits in your blender, the harder it becomes to clean. Make it a habit to rinse the pitcher right after you pour out your smoothie. Even a quick thirty-second rinse with warm water prevents dried residue from forming. This single habit makes all the difference in your blender hygiene routine.
Use the “Soapy Water Blend” Trick
After pouring out your smoothie, add a drop of dish soap and warm water to the pitcher. Blend on high for thirty seconds, then rinse. This simple trick cleans the interior walls and blade area automatically. It is one of the fastest ways to maintain a clean blender without extra scrubbing.
Store Parts Separately
When storing your blender, keep the pitcher, lid, gasket, and blade assembly separate rather than nested together. This prevents moisture from getting trapped between pieces and reduces the risk of mold. It also makes reassembly faster when you are ready to use the blender again.
Replace Worn Parts Promptly
The gasket seal and blade assembly are wear items that need periodic replacement. A worn gasket can cause leaks and reduce blending performance. If you notice cracks, warping, or dull blades, replace these parts right away. Proper replacement keeps your blender performing like new and ensures food safety.
Know When Your Blender Needs More Than Cleaning
Sometimes a blender has issues that cleaning cannot fix. If you notice unusual noises, poor blending performance, or leaks that persist even after replacing parts, there may be a deeper mechanical problem. In these cases, it helps to understand your options. You can learn more about troubleshooting and repair in our guide on how to fix a blender. And if you ever use your blender for heavy-duty tasks like shredding chicken, check out our tips on how to shred chicken in a Ninja blender for best practices.
How Often Should You Deep Clean Your Blender?
For daily users, a deep clean once a week is ideal. If you use your blender less frequently, aim for a thorough cleaning every two weeks. In between deep cleans, stick to the quick rinse-and-wash routine after each use. This balanced approach keeps your blender in top shape without requiring a lot of time or effort.
Pay extra attention to your cleaning schedule if you frequently blend fibrous vegetables, nuts, or dairy-heavy smoothies. These ingredients leave more residue and are more likely to cause odors. A consistent cleaning routine prevents buildup from becoming a recurring problem.
Conclusion
Learning how to clean a blender fast is one of the simplest kitchen skills you can develop, and the results speak for themselves. With just warm water, dish soap, vinegar, and baking soda, you can keep your blender spotless, odor-free, and running smoothly. Regular daily rinsing, weekly deep cleaning, and proper storage make all the difference in extending the life of your appliance.
Remember to clean every part — the pitcher, lid, gasket, and blade assembly — and avoid common mistakes like submerging the motor base or using harsh chemicals. These small habits add up to big benefits over time. A well-cared-for blender makes better smoothies, lasts longer, and keeps your kitchen healthier. Start incorporating these tips today, and your blender will thank you every time you use it.
Frequently Asked Questions
Can I put my blender pitcher in the dishwasher?
Most blender pitchers are dishwasher safe, but always check the manufacturer’s instructions first. The heat and harsh detergent in dishwashers can sometimes warp plastic pitchers over time. Hand washing is the safest method for long-term blender care and helps maintain the clarity and shape of the pitcher.
How do I remove stuck-on fruit stains from my blender pitcher?
Make a paste of baking soda and water, apply it to the stained areas, and let it sit for fifteen minutes. Scrub gently with a soft sponge. For tough stains, fill the pitcher with warm water and a cup of white vinegar, let it soak for thirty minutes, then scrub again. This combination tackles even the most stubborn blender stains effectively.
Why does my blender smell bad even after washing?
Lingering odors usually come from trapped food particles in the gasket ring or blade assembly. Disassemble these parts and soak them in warm soapy water for at least twenty minutes. Use a toothbrush to clean between folds and crevices. A vinegar rinse also helps neutralize odor-causing bacteria that regular washing might miss.
Is it safe to use vinegar to clean my blender?
Yes, white vinegar is a safe and effective natural cleaner for blenders. It disinfects surfaces, removes odors, and breaks down mineral deposits. Just avoid using vinegar on rubber gaskets too frequently, as the acid can degrade the material over time. Stick to occasional vinegar cleans and use mild soap for regular washing.
How often should I replace my blender gasket?
Inspect your gasket every few months for cracks, warping, or loss of elasticity. Most gaskets need replacement every six to twelve months with regular use. A worn gasket can cause leaks and reduce blending performance. Replacing it promptly keeps your blender running efficiently and maintains a proper seal during operation.
Can I clean the blender blade assembly in the dishwasher?
It is best to hand wash the blade assembly to protect both the blades and your hands. The high heat and pressure of a dishwasher can dull blades over time and pose a safety risk when unloading. Wash the blade carefully with warm soapy water and a small brush, then dry it completely before reassembling.
=== CONCLUSION ===
Keeping your blender clean does not have to be a chore. With the right techniques and household items, you can have a sparkling clean blender in under five minutes. Regular blender cleaning prevents bacteria, eliminates odors, and keeps your appliance running at its best. Start with the quick daily rinse, add a weekly deep clean, and follow the expert tips in this guide. Your blender will stay fresh, hygienic, and ready for your next favorite recipe every single time.



