These monster cookies are the ultimate indulgence – chewy, chocolatey, and loaded with peanut butter goodness. Made with simple pantry staples and packed with oats, chocolate chips, and colorful candies, this recipe delivers soft-baked cookies that satisfy any sweet tooth. Perfect for after-school snacks, party treats, or late-night cravings!
Key Takeaways
- Easy preparation: Simple mixing method requires no special techniques or equipment.
- Wholesome ingredients: Oats add fiber and nutrition to these sweet treats.
- Customizable mix-ins: Swap candy types or add-ins based on preferences.
- No chill required: Dough can be baked immediately without refrigeration.
- Perfect texture: Soft, chewy centers with slightly crispy edges.
- Make-ahead friendly: Dough freezes well for future baking sessions.
- Kid-approved: Fun colors and familiar flavors children love.
📑 Table of Contents
What Are Monster Cookies?
Monster cookies aren’t your average chocolate chip cookies. These oversized treats got their name because they’re packed with so many delicious ingredients that they look like something a monster would love! The combination of peanut butter, oats, and an assortment of candies creates a cookie that’s both satisfying and fun to eat.
Think of monster cookies as the ultimate comfort food mashup. They combine the best elements of several beloved treats into one perfect bite. The peanut butter adds richness and protein, while oats provide a hearty texture that makes these cookies more filling than typical sweets. Plus, the colorful candy pieces make them visually appealing – especially for kids!
These cookies have been a staple at bake sales and family gatherings for decades. Their popularity stems from how easy they are to make and how universally loved they are. Whether you’re feeding a crowd or just want something special for yourself, monster cookies deliver every time.
The History Behind Monster Cookies
Monster cookies first gained popularity in the 1970s and 80s. They were originally created by home bakers who wanted to use up leftover candy from Halloween or holiday baking. The name stuck because these cookies truly are “monstrous” in size and flavor!
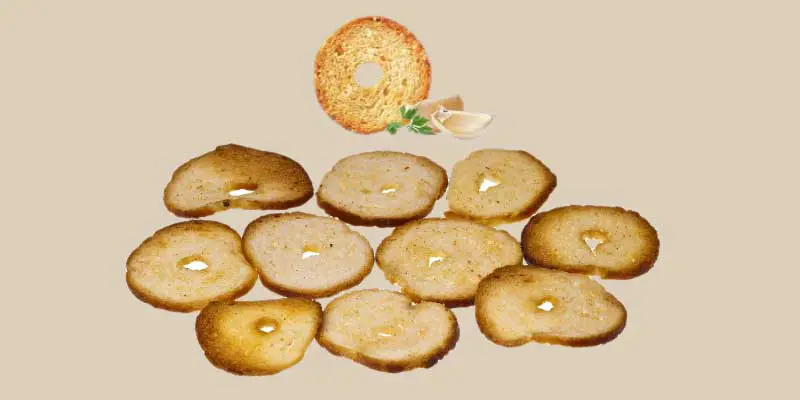
Ingredients You’ll Need

Visual guide about Monster cookies peanut butter
Image source: ih1.redbubble.net
Making monster cookies requires basic pantry staples that most home cooks already have on hand. Let’s break down what goes into these irresistible treats.
Dry Ingredients
- All-purpose flour – provides structure and holds everything together
- Rolled oats – adds chewiness and nutritional value
- Baking soda – helps cookies rise properly
- Salt – enhances all the flavors
Wet Ingredients
- Peanut butter – creamy or crunchy, your choice!
- Butter – adds richness and tenderness
- Brown sugar – gives cookies that perfect chew
- Granulated sugar – helps with browning and sweetness
- Eggs – bind everything together
- Vanilla extract – adds depth of flavor
Mix-Ins That Make Them “Monster”
- Chocolate chips – classic choice
- M&M’s or other colored candies – for that signature monster look
- Peanut butter chips – extra peanut butter punch
- Chopped nuts – for added crunch
Step-by-Step Instructions
Visual guide about Monster cookies peanut butter
Image source: blogger.googleusercontent.com
Now that we know what goes into these cookies, let’s talk about how to bring them all together. The process is straightforward, but there are some important tips to ensure success.
Preparing Your Workspace
Before you start mixing, make sure your workspace is ready. Line your baking sheets with parchment paper – this prevents sticking and makes cleanup much easier. If you’re looking for the perfect tools, check out these best cookie sheets that don’t rust for long-lasting performance.
Mixing the Dough
Start by creaming together your butter, peanut butter, and sugars. This step is crucial – you want everything well combined until light and fluffy. This usually takes about 2-3 minutes with an electric mixer.
Next, add your eggs one at a time, mixing well after each addition. Stir in the vanilla extract. In a separate bowl, whisk together your dry ingredients. Gradually add the dry mixture to the wet ingredients, mixing until just combined.
Finally, fold in all your mix-ins. This is where the magic happens! The colorful candies and chocolate chips create that signature monster appearance. Use a sturdy spatula or wooden spoon for this step.
Baking Tips for Perfect Cookies
Scoop generous portions of dough onto your prepared baking sheets. These cookies spread quite a bit, so leave plenty of space between them – about 3 inches minimum. Bake in a preheated 350°F oven for 10-12 minutes, or until edges are golden brown.
Remember, cookies continue cooking on the pan after you remove them from the oven. Take them out when they still look slightly underdone in the center – they’ll firm up as they cool.
Variations and Customizations

Visual guide about Monster cookies peanut butter
Image source: as2.ftcdn.net
One of the best things about monster cookies is how easily you can customize them. Here are some popular variations to try:
Different Nut Butters
While peanut butter is traditional, almond butter, cashew butter, or even Nutella work beautifully in this recipe. Each brings its own unique flavor profile while maintaining that creamy texture we love.
Candy Substitutions
Feel free to swap out M&M’s for any small candy pieces. Reese’s Pieces, chopped candy bars, or even dried fruit work well. The key is keeping pieces small enough to distribute evenly throughout the dough.
Adding Protein
For a healthier twist, consider adding protein powder or substituting some of the flour with oat flour. You can also mix in seeds like chia or flax for extra nutrition.
Flavor Boosters
A pinch of cinnamon or espresso powder intensifies the chocolate flavors beautifully. Some bakers even add a little sea salt on top before baking for a sweet-salty combination.
Storage and Shelf Life
Proper storage keeps your monster cookies tasting fresh for longer. Here’s how to maintain their quality:
Room Temperature Storage
Store cooled cookies in an airtight container at room temperature for up to 5 days. Place a slice of bread in the container to help maintain softness if you prefer chewy cookies.
Refrigeration Option
For extended freshness, refrigerate cookies in an airtight container for up to one week. The flavors often meld beautifully overnight, creating even more delicious results.
Freezing for Later
Monster cookie dough freezes exceptionally well. Portion dough onto a baking sheet, freeze until solid, then transfer to freezer bags. Bake straight from frozen – just add 1-2 extra minutes to baking time.
Troubleshooting Common Issues
Even experienced bakers sometimes encounter problems. Here’s how to fix the most common issues:
Cookies Spreading Too Much
If your cookies are spreading into thin, crispy discs, your butter might be too warm. Chill the dough for 15-20 minutes before baking. Also, make sure your baking soda isn’t expired – it helps cookies rise instead of spread.
Dry or Tough Texture
Overmixing develops gluten, leading to tough cookies. Mix wet and dry ingredients only until combined. Also, check your oats – old oats can absorb more moisture and create drier results.
Not Browning Properly
Ensure your oven is properly calibrated. Too-low temperatures prevent proper browning. You can also increase granulated sugar slightly for better color development.
Flat Instead of Thick
Undercreaming the butter and sugars often causes flat cookies. Spend adequate time on this step – it builds the structure that keeps cookies thick and chewy.
Serving Suggestions and Pairings
Monster cookies are versatile treats that work in many settings. Here are some ideas for serving:
Perfect Pairings
These cookies pair beautifully with cold milk, coffee, or ice cream. For an indulgent treat, sandwich a scoop of vanilla ice cream between two warm cookies for an instant ice cream sandwich.
Gift Giving Ideas
Package cooled cookies in clear cellophane bags tied with ribbon. They make wonderful gifts for teachers, neighbors, or hostess presents. Add a festive tag explaining what makes them “monster” cookies.
Party and Celebration Uses
Monster cookies work great for birthday parties, holiday gatherings, or sports events. Their colorful appearance makes them naturally festive without additional decoration.
Nutrition and Dietary Considerations
While monster cookies are treats, they do offer some nutritional benefits:
Healthier Alternatives
Consider using natural peanut butter with no added sugars. Substitute half the chocolate chips with dried fruit or seeds for added fiber and nutrients. Whole wheat flour can replace some all-purpose flour for extra fiber.
Allergy Awareness
These cookies contain nuts and dairy. For allergy-friendly versions, try sunflower seed butter and dairy-free chocolate chips. Always check candy labels for allergen information.
Portion Control
Monster cookies are substantial – one cookie can satisfy a sweet tooth adequately. Their size and richness mean smaller portions go further than with typical cookies.
Equipment Recommendations
Having the right tools makes cookie making more enjoyable:
Essential Tools
A good stand mixer or hand mixer makes creaming easier. Quality mixing bowls with lids help store leftover dough. Non-stick baking sheets ensure even browning.
Time-Saving Tips
If you make nut butters at home, invest in a quality food processor for making peanut butter that will handle tough nuts effortlessly. This saves money and lets you control ingredients.
Organization Helpers
Keep all ingredients measured and ready before starting. This prevents overmixing while you hunt for ingredients. Clear bowls let you see mix-ins clearly for even distribution.
Conclusion
Monster cookies with oats and peanut butter represent the perfect balance of indulgence and wholesomeness. They’re easy enough for beginner bakers yet impressive enough for seasoned cooks to proudly serve. The combination of textures – chewy oats, creamy peanut butter, and melty chocolate – creates a symphony of flavors that keeps people reaching for more.
Whether you stick to the classic recipe or experiment with variations, these cookies rarely disappoint. Their forgiving nature means you can adjust ingredients based on what you have available. Plus, they freeze well, making them perfect for meal prep or unexpected guests.
The next time you crave something sweet but want more than just a plain cookie, remember this monster cookie recipe. It’s guaranteed to satisfy your cravings while bringing smiles to everyone who tries them!
Frequently Asked Questions
What makes monster cookies different from regular peanut butter cookies?
Monster cookies are loaded with multiple mix-ins like chocolate chips, M&M’s, and oats, while regular peanut butter cookies typically focus on the peanut butter flavor with minimal additions. The texture is also different – monster cookies are thicker and chewier due to the oat content.
Can I use steel cut oats instead of rolled oats?
Steel cut oats are too dense and hard for cookie recipes. They won’t soften properly during baking and will create a unpleasant texture. Stick with old-fashioned rolled oats which provide the right chew without overwhelming the dough.
How do I prevent my cookies from getting too hard?
Remove cookies from the oven when they still look slightly underbaked in the center. Let them cool on the baking sheet for 5 minutes before transferring to a wire rack. Overbaking is the most common cause of hard cookies.
Can I make monster cookies without eggs?
Yes, you can substitute flax eggs (1 tablespoon ground flaxseed mixed with 3 tablespoons water per egg) or commercial egg replacer. The texture will be slightly different but still delicious. Add an extra tablespoon of peanut butter to compensate for binding.
What’s the best way to store leftover monster cookies?
Store completely cooled cookies in an airtight container at room temperature for up to 5 days. Place a piece of bread in the container to help maintain softness. For longer storage, freeze in airtight containers for up to 3 months.
Why are my monster cookies flat instead of thick and chewy?
Flat cookies usually result from butter that’s too warm, overcreaming, or expired baking soda. Make sure your ingredients are at room temperature but not warm. Chill dough for 15 minutes before baking if needed, and always use fresh leavening agents.