
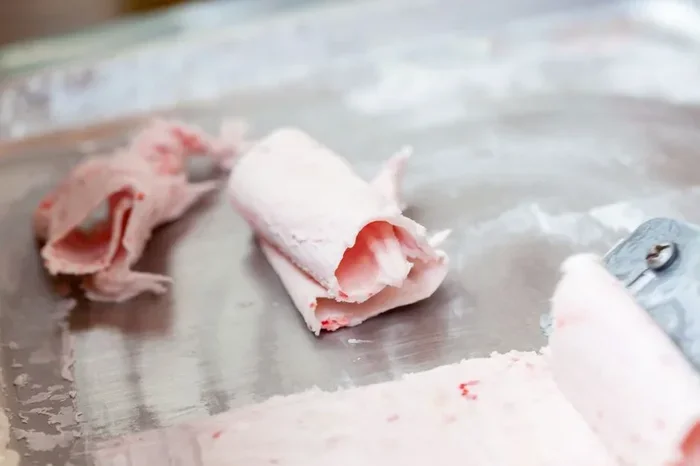
Making ice cream at home is easier than you think. With just a few simple ingredients and basic tools, you can create rich, creamy frozen desserts that rival any shop-bought treat. This guide walks you through every step, from choosing your ice cream ingredients to mastering the perfect churn. You will learn multiple methods, fun flavors, and pro tips that guarantee success every time.
There is something truly special about making ice cream at home. It fills your kitchen with a sweet, creamy aroma that store-bought pints simply cannot match. Whether you are a complete beginner or a seasoned home cook, this frozen treat is one of the most rewarding dessert recipes you can tackle.
The beauty of homemade ice cream lies in its simplicity. You control every ingredient, every flavor, and every texture. No preservatives, no artificial colors, and no mystery additives. Just pure, delicious frozen goodness made right in your own kitchen. Let us walk through everything you need to know.
Key Takeaways
- Simple ingredients work best: You only need cream, milk, sugar, and vanilla to start.
- No machine needed: Try the no-churn method using condensed milk and whipped cream.
- Patience matters: Proper freezing and resting time create the smoothest texture.
- Flavor creativity is endless: From classic vanilla to cookie dough, the options are limitless.
- Storage tips keep ice cream fresh: Proper containers and freezer organization prevent ice crystals.
- Start simple, then experiment: Master the basics before trying advanced flavors and mix-ins.
📑 Table of Contents
Why Making Ice Cream at Home Is Worth It
Before we dive into the recipes, let us talk about why you should even bother. After all, you can grab a pint at the grocery store for a few dollars. So what is the big deal about kitchen ice cream?
First, you get complete control over what goes into your dessert. Many commercial brands are loaded with stabilizers, excess sugar, and fillers. When you make your own ice cream recipe, you choose every single ingredient. This is especially important if you have dietary restrictions or food allergies.
Second, the flavor possibilities are truly endless. You are not limited to what the grocery store stocks. Want to combine lavender honey with dark chocolate chunks? Go for it. Want a spicy mango sorbet? You can make that too. Homemade dessert creativity has no boundaries.
Third, making ice cream is a fun family activity. Kids love helping measure ingredients and churn the mixture. It teaches basic cooking skills and creates wonderful memories. Plus, everyone gets to enjoy the fruits of their labor right away.
The Joy of a Fresh Batch
There is nothing quite like serving a freshly churned batch of vanilla ice cream straight from the machine. The texture is impossibly smooth and airy. Each scoop feels like a small celebration. Once you taste the difference, you will never go back to store-bought again.
You can also experiment with different frozen dessert styles. Try making a batch of Italian-style gelato, which has a denser, more intense flavor than traditional American ice cream. Or go for a refreshing sorbet on a hot summer day. The learning curve is gentle, and the results are always satisfying.
Essential Ice Cream Ingredients You Need
Great ice cream ingredients are the foundation of any perfect batch. You do not need anything exotic or hard to find. In fact, most of what you need is probably already in your pantry and fridge.
The Core Base Ingredients
Every great ice cream base starts with a few key components:
- Heavy cream: This provides the rich, creamy fat content that gives ice cream its luxurious mouthfeel. Look for cream with at least 36% milk fat.
- Whole milk: This adds body and liquid to the mix. Skim milk will not give you the same creamy results.
- Granulated sugar: Sugar sweetens the mixture and also helps keep the ice cream soft by lowering the freezing point.
- Egg yolks (optional): For a custard-based ice cream, egg yolks add richness and a silky smooth texture. This is the traditional method used by artisan ice cream makers.
Flavor Boosters and Mix-Ins
Once you have your base, the fun really begins. Here are some popular additions:
- Vanilla extract: The classic choice. Pure vanilla extract gives a warm, familiar flavor that pairs with almost everything.
- Cocoa powder or melted chocolate: For chocolate lovers, a good quality cocoa powder or melted dark chocolate transforms a basic base into something extraordinary.
- Fresh fruit: Strawberries, mangoes, raspberries, and peaches all make wonderful fruit-based ice creams. Use them fresh or frozen.
- Cookie pieces and candy: Crushed Oreos, chocolate chips, or chopped candy bars add fun texture and flavor contrast.
If you love chocolate desserts, you might enjoy exploring chocolate fountain recipes to pair with your homemade ice cream for a fun dessert party experience.
How to Make Ice Cream with an Ice Cream Maker
Using an ice cream maker is the most traditional and reliable method. It gives you the smoothest, most evenly churned results. Do not worry if you have never used one before. The process is straightforward and easy to follow.
Step-by-Step Process for Churning Ice Cream
Here is how to make ice cream the proper way using a machine:
- Prepare your ice cream base: Combine cream, milk, sugar, and any flavorings in a saucepan. Heat gently until the sugar dissolves and the mixture is warm. Do not let it boil.
- Cool the mixture completely: Transfer the base to a bowl and place it in the refrigerator. Let it chill for at least 4 hours, or overnight. A cold base churns better and faster.
- Pour into the ice cream maker: Follow your machine’s instructions. Most models require you to freeze the bowl beforehand. Pour in the chilled base and start the machine.
- Churn until thick: The machine will spin and incorporate air into the mixture. This process usually takes 20 to 30 minutes. You will know it is done when the mixture resembles soft-serve ice cream.
- Freeze to set: Transfer the soft ice cream to a freezer-safe container. Let it freeze for at least 4 hours until firm. This step is crucial for the right creamy texture.
Tips for Using Your Machine Effectively
A few simple tips will help you get the best results every time:
- Always pre-freeze the ice cream maker bowl according to the manufacturer’s instructions. Skipping this step will significantly increase your churning time.
- Make sure your base is completely cold before it goes into the machine. Warm base can melt the frozen bowl and create uneven results.
- Do not overfill the machine. Leave some room for the mixture to expand as it churns.
- If you are making a custard-based ice cream, strain the base through a fine mesh sieve before chilling. This removes any cooked egg bits and ensures a silky smooth finish.
For those who love a caffeine kick, try using freshly brewed coffee from a stove top percolator to create a rich coffee ice cream flavor that is absolutely irresistible.
No-Churn Ice Cream: Make It Without a Machine
Not everyone owns an ice cream maker, and that is perfectly fine. The no-churn ice cream method is a game changer. It requires no special equipment and produces wonderfully creamy results. This is the perfect approach for beginners who want to try making ice cream at home without any investment in machinery.
The Secret to No-Churn Success
The magic of no-churn ice cream comes down to one key ingredient: sweetened condensed milk. This thick, sweet milk is already concentrated and preserved, which means it stays soft and scoopable even when frozen. Combined with whipped heavy cream, it creates a light and airy frozen dessert that tastes indulgent.
Here is a simple method to get started:
- Sweeten and whip heavy cream until stiff peaks form. This adds air and lightness to the final product.
- In a separate bowl, combine condensed milk with your chosen flavorings. Vanilla extract, cocoa powder, or mashed fruit all work beautifully.
- Gently fold the whipped cream into the condensed milk mixture. Be careful not to deflate the cream.
- Transfer the mixture to a loaf pan or freezer-safe container.
- Freeze for at least 6 hours or overnight. The result is a soft, creamy frozen treat ready to scoop.
If you enjoy making other desserts from scratch, you might also like trying homemade toaster strudel for a different sweet treat that is equally fun to prepare with simple pantry ingredients.
Why No-Churn Works So Well
The whipped cream does all the heavy lifting in this method. Instead of relying on an ice cream maker to churn air into the mixture, the whipped cream traps air naturally. This creates a soft serve-like texture without any machine at all. It is one of the easiest and most reliable easy dessert options you can make.
No-churn ice cream also freezes well for meal prep. You can make a batch on Sunday and enjoy it throughout the week. Just make sure to store it in an airtight container to prevent ice crystals from forming on the surface.
Fun and Creative Ice Cream Flavors to Try
Once you have mastered the basic techniques, it is time to get creative. The best part about making ice cream at home is that you can invent any flavor you want. Here are some ideas to spark your imagination.
Classic Flavors That Never Get Old
Sometimes the classics are the best. A perfectly executed vanilla ice cream is a thing of beauty. Use real vanilla bean pods for an even more luxurious result. The tiny seeds speckled throughout the cream add visual elegance and a deep, aromatic flavor.
Chocolate ice cream is another timeless favorite. Use high-quality cocoa powder or melted baking chocolate for the richest taste. You can even add a pinch of sea salt to enhance the chocolate flavor and create a salted caramel effect.
Fruit-Based Frozen Treats
Fruit ice creams are perfect for summer. They are lighter, fresher, and naturally sweet. Here are some combinations to try:
- Strawberry: Blend fresh strawberries into your ice cream base before churning. The result is a vibrant pink frozen dessert that tastes like summer.
- Mango: Use ripe mangoes for a tropical twist. The natural sweetness means you can reduce the sugar in the base.
- Lemon: A lemon sorbet is the ultimate refreshing frozen dessert. It is bright, zesty, and the perfect palate cleanser.
- Peach: Fresh peaches blended with a touch of cinnamon create a warm, fruity ice cream that is perfect for spring and summer.
Bold and Adventurous Combinations
Ready to push the boundaries? Try these unexpected flavor pairings:
- Lavender honey: Infuse your cream with dried lavender buds, then sweeten with honey. It is elegant and surprisingly refreshing.
- Miso caramel: A pinch of white miso paste in your caramel sauce adds a savory depth that is absolutely addictive.
- Matcha green tea: Whisk matcha powder into your base for a vibrant, earthy ice cream that is as beautiful as it is tasty.
- Biscoff cookie: Crushed Biscoff cookies folded into the base create a cookie butter ice cream that fans absolutely love.
For a more Italian-inspired approach, consider exploring the world of gelato and Italian ice cream. These styles use less fat than traditional American ice cream but more flavor, resulting in a denser, more intensely flavored frozen dessert that is well worth trying at home.
After you have tried these flavors, you might want to explore other dessert recipes on our site, such as slow cooker rice pudding, which offers another creamy and comforting homemade treat option.
Expert Tips for Perfect Ice Cream Every Time
Even with a great recipe, small mistakes can affect your final result. Here are some expert tips that will help you achieve ice cream perfection every single time.
Common Mistakes to Avoid
Watch out for these pitfalls that can ruin an otherwise perfect batch:
- Skipping the chilling step: A warm base will not churn properly and can create icy, grainy ice cream. Always refrigerate your mixture for at least 4 hours.
- Using too much sugar: While sugar keeps ice cream soft, too much will prevent it from freezing properly. Stick to the recommended amount in your recipe.
- Opening the machine too often: Every time you open the lid, you lose cold air and can introduce ice crystals. Trust the process and let the machine do its work.
- Not aging the custard: If you are making custard-based ice cream, let it rest in the fridge for at least 8 hours. This allows the flavors to meld and the texture to improve.
Quick Tips for Better Texture
Want that perfect scoopable consistency? Try these tricks:
- Add a tablespoon of vodka or alcohol to your base. Alcohol lowers the freezing point and keeps the ice cream soft without affecting the flavor significantly.
- Use a splash of corn syrup or glucose syrup. These ingredients interfere with ice crystal formation and create a smoother final product.
- Fold in crushed mix-ins during the last 2 minutes of churning. This prevents them from sinking to the bottom.
- Store your finished ice cream in the back of the freezer where the temperature is most consistent. Avoid the door, which experiences temperature fluctuations every time you open it.
How to Store Homemade Ice Cream Properly
Proper storage is just as important as the churning process. Follow these guidelines to keep your homemade ice cream fresh and delicious:
- Use an airtight container with a tight-fitting lid. This prevents ice crystals from forming and keeps flavors from absorbing other freezer odors.
- Place a piece of plastic wrap directly on the surface of the ice cream before closing the lid. This creates an airtight seal that prevents freezer burn.
- Homemade ice cream is best enjoyed within 1 to 2 weeks. After that, the texture may degrade and flavors can become muted.
- If your ice cream becomes too hard to scoop, let it sit at room temperature for 5 to 10 minutes before serving. This softens it to the perfect consistency.
When you are ready to serve, grab a quality ice cream scoop and enjoy. The effort you put into making it at home will shine through in every single bite.
Conclusion
Making ice cream at home is one of the most satisfying and enjoyable things you can do in the kitchen. With simple ingredients, a little patience, and the techniques outlined in this guide, you can create frozen desserts that are far superior to anything you will find at the store.
Whether you prefer the traditional method with an ice cream maker or the convenient no-churn approach, the results are always rewarding. You control the quality of every ingredient, the sweetness level, and the flavor profile. There is truly no limit to what you can create.
Start with a simple vanilla base and build your confidence from there. Then experiment with bold flavors, mix-ins, and different textures. Before long, you will be known among friends and family as the go-to person for the best homemade frozen desserts around. So grab your ingredients, fire up your machine (or your whisk), and start making your next batch of homemade ice cream today.
Frequently Asked Questions
Can I make ice cream without an ice cream maker?
Absolutely. The no-churn method uses whipped cream and sweetened condensed milk to create a smooth, creamy frozen dessert without any machine. It is one of the easiest and most reliable ways to enjoy homemade ice cream at home.
How long does homemade ice cream last in the freezer?
Homemade ice cream is best enjoyed within 1 to 2 weeks. After that, the texture may become icy and the flavors can fade. Always store it in an airtight container in the back of your freezer for the best results.
Why is my homemade ice cream icy and hard?
Icy ice cream usually results from not churning long enough, using too much sugar, or not aging the base properly. Make sure your base is fully chilled before churning, and consider adding a small amount of alcohol or corn syrup to improve texture.
Can I use condensed milk instead of sugar in the base?
Yes, sweetened condensed milk is actually the secret ingredient in no-churn ice cream. It provides sweetness and helps keep the ice cream soft and scoopable even when frozen solid. It is a wonderful alternative to regular sugar in certain recipes.
What is the difference between ice cream and gelato?
Gelato uses less cream and more milk than traditional ice cream, resulting in a lower fat content. It is also churned at a slower speed, which incorporates less air and creates a denser, more intensely flavored frozen dessert. Italian ice cream enthusiasts often prefer gelato for its rich, creamy mouthfeel.
Can I make vegan ice cream at home?
Yes, you can make delicious vegan ice cream using coconut cream, oat milk, or cashew cream as your base. The no-churn method works especially well for vegan versions since whipped coconut cream whips up beautifully and creates a light, creamy texture without any dairy products.



