Making easy homemade dill pickles is simpler than you think. With just fresh cucumbers, dill, garlic, and a few pantry staples, you can create crunchy, flavorful pickles in under an hour. Whether you want fermented or vinegar-based pickles, this guide gives you everything you need for perfect results every time.
Key Takeaways
- Perfect Crunch: Learn the secrets to getting that satisfying snap every time you bite into a homemade dill pickle.
- Simple Ingredients: You only need fresh pickling cucumbers, fresh dill, garlic, vinegar, and a few spices to get started.
- Two Methods: We cover both fermented and vinegar-based pickling so you can choose your preferred style.
- Beginner-Friendly: No special equipment or advanced skills are required to make these delicious pickles at home.
- Storage Tips: Know exactly how to store your pickles so they stay fresh and crunchy for weeks.
- Customizable Recipes: Easily adjust spice levels and flavors to match your personal taste preferences.
📑 Table of Contents
Why Homemade Dill Pickles Are Worth Making
There is something deeply satisfying about biting into a crisp, tangy pickle you made yourself. Store-bought pickles can be good, but easy homemade dill pickles hit a completely different level of flavor and crunch. Once you master the basics, you will never go back to the jar on the grocery shelf.
Making pickles at home is also incredibly budget-friendly. A single cucumber plant can produce dozens of cucumbers, which means gallons of delicious pickles for just a few dollars. You control every ingredient too, so there are no mystery preservatives or artificial flavors.
If you are new to the kitchen, do not worry. Pickling is one of the simplest food preservation methods out there. You do not need fancy equipment or years of experience. A few basic supplies and a little patience are all it takes. For more kitchen basics, check out this super easy cookbook for beginners to build your confidence.
The Joy of Fresh Pickles
There is a real difference between a fresh homemade pickle and one that has been sitting on a shelf for months. Homemade pickles have a brightness and freshness that store-bought versions simply cannot match. The cucumbers stay firmer, the dill flavor is more vibrant, and the garlic hits just right.
Many people who start making easy homemade dill pickles find themselves hooked right away. It becomes a weekend ritual, a way to preserve the harvest, and a fun project to share with family. Kids especially love watching the pickles transform over a few days.
What You Need to Get Started
Before you dive in, let us talk about what you need. The good news is that the ingredient list is short and affordable. You probably already have most of these items in your kitchen right now.
Essential Ingredients for Dill Pickles
- Pickling cucumbers: These are smaller, firmer cucumbers bred specifically for pickling. Look for them at your local farmers market or grocery store. Regular slicing cucumbers work in a pinch but may not hold their crunch as well.
- Fresh dill: Fresh dill fronds give authentic dill pickles their signature flavor. Dried dill works too, but fresh is far superior.
- Garlic cloves: Fresh garlic adds depth and that classic garlic pickle taste everyone loves.
- Vinegar: White distilled vinegar is the most common choice for vinegar-based pickles. It provides the tangy bite that defines a great pickle.
- Pickling salt: This pure salt has no additives like iodine or anti-caking agents, which can cloud your brine.
- Water: Clean, filtered water works best for a clear brine.
- Pickling spices: Mustard seed, coriander seed, black peppercorns, and red pepper flakes are the backbone of a great dill pickle brine.
Basic Equipment You Will Need
You do not need a lot of gear to start pickling. A large pot for making brine, clean canning jars with lids, and a good colander for easy food draining are the essentials. A funnel makes filling jars cleaner, and a ladle helps pour hot brine without spills. That is really all you need to get going.
The Best Pickling Methods Explained
Not all pickles are created equal. The method you choose affects flavor, texture, and how long your pickles last. Let us break down the two most popular approaches to making easy homemade dill pickles.
Vinegar-Based Pickles (Quick Pickles)
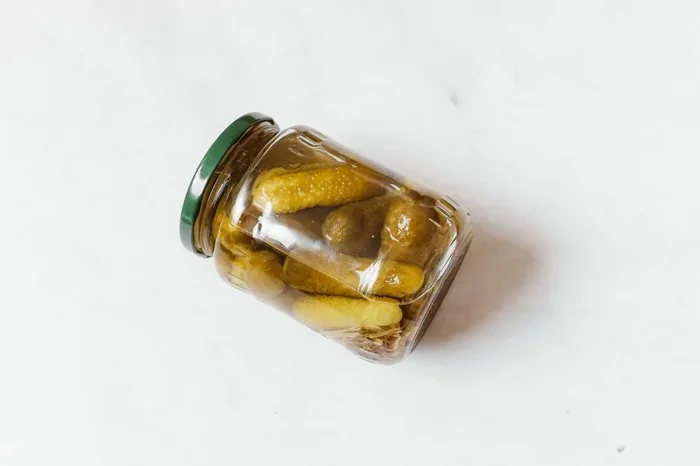
Vinegar-based pickles are the fastest route to delicious results. You heat a brine of vinegar, water, salt, and spices, pour it over prepared cucumbers in a jar, and let them cool. These refrigerator pickles are ready to eat within a day or two and stay crisp in the fridge for several weeks.
This method is perfect for beginners because there is no waiting period and no special equipment. You get that satisfying pickle crunch almost immediately. The trade-off is that refrigerator pickles do not last as long as canned pickles and must be kept cold.
Fermented Pickles (Traditional Method)
Fermented pickles are the old-school way of making homemade dill pickles. You submerge cucumbers in a saltwater brine and let natural bacteria do the work over several days. The result is a complex, tangy flavor that vinegar pickles cannot replicate.
Fermented pickles also offer probiotic benefits, which support gut health. They tend to have a softer crunch than vinegar pickles but a much deeper, more developed flavor. This method takes a bit more patience, but the payoff is well worth it.
Which Method Should You Choose?
If you want pickles fast and love a firm, tangy bite, go with the vinegar method. If you enjoy the process of waiting and want a more complex flavor profile, try fermentation. Both produce wonderful results, and many pickle makers enjoy doing both.
Step-by-Step Recipe for Crunchy Dill Pickles
Here is a simple, foolproof recipe that delivers easy homemade dill pickles with perfect crunch every time. This vinegar-based method is beginner-friendly and produces reliable results.
Ingredients
- 2 pounds pickling cucumbers
- 4 cups white distilled vinegar
- 4 cups water
- 3 tablespoons pickling salt
- 6 cloves garlic, peeled
- 4 fresh dill heads (or 2 tablespoons dried dill)
- 1 tablespoon mustard seed
- 1 teaspoon black peppercorns
- 1 teaspoon red pepper flakes (optional)
Instructions
- Wash and trim your cucumbers. Rinse them well and cut off both ends. This helps the brine penetrate evenly.
- Prepare your jars. Sterilize four pint-sized canning jars by boiling them in water for 10 minutes. This step is crucial for food safety.
- Make the brine. In a large pot, combine the vinegar, water, and pickling salt. Bring the mixture to a boil, stirring until the salt dissolves completely.
- Pack the jars. Place 2 garlic cloves and a fresh dill head in each jar. Tightly pack the cucumbers standing upright. Add mustard seed, peppercorns, and red pepper flakes to each jar.
- Pour the brine. Carefully ladle the hot brine over the cucumbers, leaving a half-inch of headspace at the top.
- Seal and cool. Wipe the jar rims clean, place the lids on, and let the jars cool to room temperature. Then transfer them to the refrigerator.
- Wait and enjoy. Your pickles will be ready to eat in 24 to 48 hours. They taste best after 3 to 5 days of chilling.
These pickles pair wonderfully with sandwiches, burgers, and salads. They also make a great addition to easy dinner recipes for busy nights when you need a quick, flavorful side dish. Serve them alongside your favorite meal and watch them disappear fast.
Pro Tips for the Best Brine
The brine is the soul of any pickle. Use the ratio of equal parts vinegar and water for a balanced tang. If you prefer a stronger vinegar punch, try a 2:1 ratio of vinegar to water. Always use pickling salt rather than table salt, as table salt contains additives that can make your brine cloudy and affect the texture of your pickles.
Tips for Perfect Pickle Crunch Every Time
Crunch is everything when it comes to a great dill pickle. A soft, limp pickle is disappointing no matter how good the brine tastes. Here are the top tips to keep your easy homemade dill pickles perfectly crispy.
Choose the Right Cucumbers
Not all cucumbers are created equal for pickling. Look for pickling cucumbers that are firm, dark green, and no more than 5 inches long. Larger cucumbers tend to be seedy and soft, which leads to mushy pickles. The fresher the cucumber, the crunchier the final product.
Keep Them Cold
Temperature matters a lot. Always start with cold cucumbers and keep your brine cold too. Hot cucumbers in a warm brine can break down the cell walls and cause softening. Refrigerate your pickles promptly after filling the jars.
Add a Secret Crunch Booster
Here is a trick many experienced pickle makers use: add a grape leaf, a bay leaf, or a small piece of alum to the jar. These natural ingredients contain tannins that help maintain firmness. A single grape leaf per jar works wonders for keeping your homemade dill pickles crispy.
Avoid Overcooking the Brine
When making vinegar pickles, bring the brine to a boil and then immediately remove it from the heat. Overcooking the brine can reduce its acidity and affect how well it preserves the cucumbers. A quick, rolling boil is all you need.
Use Fresh Garlic and Dill
Old or dried-out garlic can lose its potency, which affects flavor. Fresh dill provides the bright, herbal notes that define a great dill pickle. If you must use dried dill, increase the amount slightly to compensate for the loss of freshness.
Storing and Enjoying Your Homemade Pickles
Proper storage is key to keeping your easy homemade dill pickles fresh and crunchy for as long as possible. The good news is that storage is simple.
For refrigerator pickles, keep them in the fridge at all times. They will stay at their best for up to 3 months. For fermented pickles, store them in a cool, dark place during fermentation, then move them to the refrigerator once they reach your desired tanginess.
Always use clean utensils when reaching into your jars. Introducing contaminants can spoil the batch. If you notice any mold, off smells, or slimy texture, discard the entire jar immediately. Food safety always comes first.
Getting Creative With Your Pickles
Once you have the basic recipe down, the fun really begins. Try adding sliced onions for a sweet and tangy twist. Use fresh chili peppers for a spicy kick. You can even experiment with different vinegars like apple cider vinegar for a slightly fruity flavor. Each batch is an opportunity to make the pickles your own.
Homemade pickles also make wonderful gifts. Pack them in pretty jars with a handwritten label, and you have a thoughtful, homemade present that anyone would love. They are perfect for holidays, housewarmings, or just because.
Common Mistakes to Avoid
Even experienced cooks make mistakes when pickling for the first time. Here are the most common pitfalls and how to avoid them.
- Using the wrong type of cucumber: Standard slicing cucumbers are too soft and seedy for great pickles. Stick with pickling varieties.
- Skipping the blossom end: The blossom end of a cucumber contains enzymes that can soften pickles. Always cut it off before brining.
- Using iodized table salt: Iodine and anti-caking agents can discolor your brine and affect flavor. Pickling salt is the way to go.
- Not using enough vinegar: Vinegar provides the acidity needed for safe preservation. Do not dilute the brine too much.
- Rushing the process: Patience is key. Pickles need time to develop flavor. Give them at least 24 to 48 hours before judging the results.
Final Thoughts
Making easy homemade dill pickles is one of the most rewarding things you can do in the kitchen. It requires minimal effort, a handful of affordable ingredients, and a little bit of patience. The result is a jar full of crunchy, tangy, flavorful pickles that beat anything you can buy at the store.
Whether you are a complete beginner or a seasoned home cook looking to try something new, pickling is a skill that pays off every single time. Start with the simple recipe above, experiment with flavors, and soon you will be making batch after batch of perfect pickles. Your taste buds will thank you.
So grab some fresh cucumbers from the market, clear a shelf in your fridge, and get started today. Once you taste the difference between homemade and store-bought, there is no going back. Happy pickling!
Frequently Asked Questions
How long do homemade dill pickles last?
Refrigerator pickles stay fresh and crunchy for up to 3 months when stored properly in the fridge. Fermented pickles can last even longer when kept refrigerated after the fermentation process is complete. Always check for signs of spoilage before eating.
Can I use regular cucumbers instead of pickling cucumbers?
You can, but pickling cucumbers give you the best crunch and texture. Regular slicing cucumbers tend to be softer and seedier, which can result in mushier pickles. If you must use slicing cucumbers, choose small, firm ones and reduce your soak time.
Do I need to water bath can pickles?
For refrigerator pickles, you do not need water bath canning at all. Simply store them in the fridge. If you want shelf-stable pickles that can be stored at room temperature, water bath canning is necessary for food safety. Follow a tested recipe carefully for this method.
Why are my homemade pickles soft and not crunchy?
Soft pickles are usually caused by using the wrong cucumber type, not trimming the blossom end, or using table salt instead of pickling salt. Cold cucumbers and a quick brine also help maintain crunch. Adding a grape leaf or alum can boost firmness as well.
Can I make pickles without fresh dill?
Yes, dried dill works as a substitute, but you will need to use more of it to achieve the same flavor intensity. About 2 tablespoons of dried dill replaces 4 fresh dill heads. Fresh dill is always preferred for the best flavor profile.
Are homemade pickles healthy?
Yes, homemade pickles are a healthy snack. They are low in calories, contain no artificial preservatives, and fermented pickles offer probiotic benefits that support digestive health. They also add a flavorful crunch to salads and sandwiches without adding excess calories.