
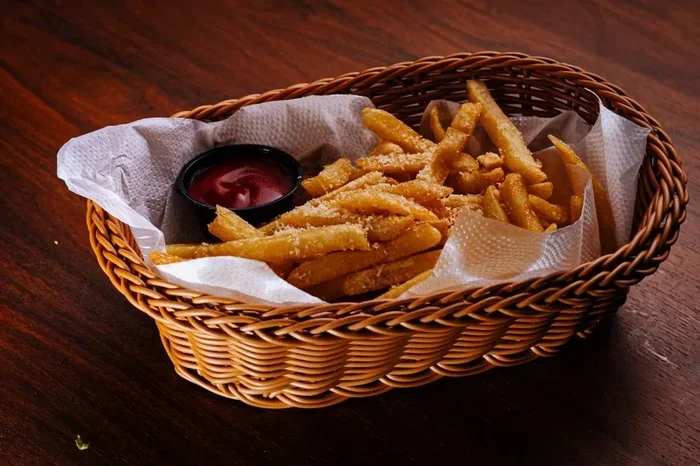
Making crispy potatoes is easier than you think with the microwave 6 min then airfryer 12 min method. This double-cooking hack gives you golden, crunchy potatoes with a fluffy inside every single time. Whether you want fries, wedges, or roasted chunks, this technique saves time and delivers restaurant-quality results at home.
There is something magical about crispy potatoes that makes every meal feel special. Whether you are feeding a crowd or just feeding yourself, golden potato fries or wedges on the table always get a reaction. But here is the thing — achieving that perfect crunch without deep frying has always felt like a mystery.
Well, I am about to let you in on a secret that changed the way I cook potatoes forever. The method is simple: potatoes microwave 6 min then airfryer 12 min. That is it. Six minutes in the microwave followed by twelve minutes in the air fryer, and you get crispy, golden, restaurant-quality potatoes right in your own kitchen.
This technique works because of a clever two-step process. The microwave heats the potato evenly from the inside out, softening the flesh and preparing it for maximum crispiness. Then the air fryer takes over, blasting hot air around the potatoes to create that satisfying golden shell. The result? Potatoes that are crispy on the outside and fluffy on the inside. No deep fryer needed. No endless monitoring. Just great potatoes with minimal effort.
If you have been searching for an easy and reliable way to make crispy potatoes at home, you have come to the right place. This guide walks you through everything you need to know. From choosing the right potatoes to timing each phase perfectly, I have got you covered.
Key Takeaways
- Microwave first, air fry second: Pre-cooking potatoes in the microwave for 6 minutes cuts total cooking time and ensures fluffy interiors.
- Double cooking creates superior crunch: The microwave softens the potato, while the air fryer crisps the outside to golden perfection.
- No special equipment needed: You only need a microwave and an air fryer, which most kitchens already have.
- Seasoning matters: Tossing potatoes with the right oil and spices before air frying makes a huge flavor difference.
- Works with many potato types: Russet, Yukon Gold, and red potatoes all respond well to this method.
- Customizable and versatile: You can make fries, wedges, or roasted potato cubes using the same basic technique.
- Healthier than deep frying: Using an air fryer means you get crispy potatoes with a fraction of the oil.
📑 Table of Contents
Why the Microwave Then Air Fryer Method Works
The Science Behind Double Cooking Potatoes
You might wonder why you need two appliances when one could do the job. The truth is, each appliance plays a very specific role in creating the perfect potato.
The microwave uses radiation to heat water molecules inside the potato. This creates steam from the inside out. In just six minutes, the potato becomes fully cooked and tender throughout. But it is not crispy. It is soft, almost pale, and not ready for eating yet.
That is where the air fryer steps in. An air fryer circulates super-hot air around the food at high speed. When you put partially cooked potatoes into the air fryer, the surface moisture evaporates quickly. This creates a crispy, caramelized exterior. The inside stays fluffy because the microwave already did the heavy lifting.
This two-step method is called double cooking, and it is the same technique professional kitchens use. When you microwave potatoes first, you shorten the air fryer time significantly. This means less energy use and better results. It is a win-win situation for your taste buds and your electric bill.
Why You Will Love This Method
This method is a game changer for several reasons. First, it is fast. Total cooking time is only about 18 minutes. Compare that to roasting potatoes in a traditional oven, which can take 45 minutes or more. Second, it is consistent. Every batch comes out the same way — golden, crispy, and delicious. No more guessing or hoping for the best.
Third, it is healthy. Air frying uses up to 80 percent less oil than deep frying. You still get that satisfying crunch without all the extra grease. If you are watching what you eat but still want something delicious, this method fits perfectly.
Finally, it is versatile. You can make fries, wedges, roasted chunks, or even potato rounds using this same basic approach. Once you master the potatoes microwave 6 min then airfryer 12 min technique, you can adapt it to any potato dish you can think of.
What You Will Need
Choosing the Best Potatoes
Not all potatoes are created equal when it comes to this method. The type of potato you choose affects the texture and crispiness of the final result. Here is what works best:
- Russet potatoes: These are the best choice for crispy potatoes. They have a high starch content, which creates a fluffy interior and a crispy exterior when cooked. They are also widely available and affordable.
- Yukon Gold potatoes: These give you a slightly creamier texture with a buttery flavor. They crisp up nicely in the air fryer and hold their shape well.
- Red potatoes: These are waxy and hold their shape better than russets. They work well for potato wedges and roasted chunks.
- Avoid new potatoes or fingerlings: These are too small and have high moisture content, which can make them soggy rather than crispy.
For the best results, choose potatoes that are similar in size. This ensures they cook evenly during both the microwave and air fryer phases.
Tools and Equipment You Need
You do not need a lot of equipment for this recipe. Here is what you will need:
- A microwave safe dish or plate
- A sharp knife or cutting board for slicing
- An air fryer (any standard size works)
- A bowl for tossing potatoes with oil and seasoning
- Paper towels for drying the potatoes
If you do not have a standalone air fryer, you can use a best countertop microwave air fryer convection oven instead. These combination appliances handle both tasks beautifully and save counter space. They are especially useful if you want to streamline your cooking process even further.
Step-by-Step Instructions
Here is where the magic happens. Follow these steps carefully, and you will have perfect crispy potatoes every time.
Step 1: Prep Your Potatoes
Start by washing your potatoes thoroughly. Pat them completely dry with paper towels. Moisture is the enemy of crispiness, so remove as much surface water as possible. Cut the potatoes into your desired shape. Fries work great, but so do wedges and cubes.
Place the cut potatoes in a bowl of cold water for about 10 minutes. This removes excess starch, which helps them crisp up better. After soaking, drain them and dry them again with fresh paper towels. This extra drying step makes a real difference.
Step 2: The Microwave Phase (6 Minutes)
Arrange the potatoes on a microwave safe plate in a single layer. Do not stack them or overlap them. You want each piece to get equal microwave exposure.
Microwave on high for 6 minutes total. If you are cooking a large batch, you may need to do this in two rounds of 3 minutes each. Halfway through, flip the potatoes over so they cook evenly on both sides.
When done, the potatoes should be tender when pierced with a fork. They will not be golden or crispy yet. That is completely normal. The microwave has done its job by cooking the interior. Now it is time to move to the air fryer.
Step 3: The Air Fryer Phase (12 Minutes)
Preheat your air fryer to 400 degrees Fahrenheit for 3 minutes. While it is preheating, toss the microwaved potatoes with a small amount of oil. About one tablespoon of olive oil or avocado oil for every two large potatoes works well. Add salt, pepper, and any other seasonings you like.
Place the potatoes in the air fryer basket in a single layer. Do not overcrowd the basket. Overcrowding traps steam and prevents crispiness. If you have a large batch, cook in two rounds.
Air fry at 400 degrees for 12 minutes. Shake the basket or flip the potatoes halfway through. This ensures even browning on all sides.
When the timer goes off, check the potatoes. They should be golden brown and crispy on the outside. If they need more color, add 1 to 2 more minutes. But 12 minutes is the sweet spot for most potatoes.
Pro Tips for Perfectly Crispy Potatoes
Oil and Seasoning Tips
The oil you use and how much you apply matters more than you might think. Here are some tips that elevate your potatoes from good to amazing:
- Use a light coating: Too much oil makes potatoes greasy instead of crispy. A thin, even layer is all you need.
- Try avocado oil: It has a high smoke point and adds a subtle, clean flavor that lets the potato shine.
- Season before air frying: Toss potatoes with seasoning while they are still damp from the microwave. The seasoning sticks better this way.
- Add garlic powder and paprika: These two spices pair beautifully with crispy potatoes and add depth of flavor.
Temperature and Timing Adjustments
Every air fryer is slightly different, so you may need to make small adjustments. Here is what to keep in mind:
- If your air fryer runs hot, reduce the temperature by 10 degrees and add 1 to 2 minutes.
- If your potatoes are not crispy enough, try increasing the air fryer time by 2 minutes.
- For extra crispy results, spray the potatoes lightly with oil right before they go in the air fryer.
- If you prefer softer potatoes, reduce the microwave time to 4 minutes instead of 6.
The beauty of this method is that it is forgiving. You can easily adjust based on your preferences and equipment. Once you make this recipe a few times, you will develop a feel for exactly how your appliances work together.
Delicious Variations and Flavor Ideas
Once you master the basic method, the fun really begins. You can transform simple crispy potatoes into all kinds of flavorful dishes.
Herb and Spice Combos
Seasoning is where you can get creative. Here are some winning combinations:
- Classic ranch: Mix dried dill, garlic powder, onion powder, and a pinch of salt. Toss with warm potatoes and serve with ranch dressing.
- Spicy kick: Add cayenne pepper, smoked paprika, and a touch of chili powder for a bold flavor.
- Italian style: Use dried oregano, basil, garlic powder, and a sprinkle of parmesan cheese right out of the air fryer.
- Southeast Asian: Toss with turmeric, cumin, and a squeeze of fresh lime juice after cooking.
Dipping Sauce Pairings
Crispy potatoes pair wonderfully with a variety of dipping sauces. Here are some ideas to try:
- Classic ketchup or chipotle mayo
- Garlic aioli or sriracha mayo
- Honey mustard for a sweet and tangy contrast
- Cool sour cream with fresh chives
- Spicy peanut sauce for an Asian-inspired twist
These flavor combinations make the potatoes microwave 6 min then airfryer 12 min method perfect for parties, game day snacks, or a simple weeknight side dish.
Common Mistakes to Avoid
Overcrowding the Air Fryer Basket
This is the number one mistake people make. When you pack too many potatoes into the air fryer, the hot air cannot circulate properly. The result is steamed potatoes instead of crispy ones. Give each piece room to breathe. If you need to cook a large batch, do it in two or three rounds. The extra few minutes of waiting are worth the perfectly crispy result.
Skipping the Drying Step
Surface moisture is the enemy of crispiness. If you skip drying the potatoes after soaking or after microwaving, they will come out soggy. Always pat them dry thoroughly with paper towels before seasoning and air frying. This small step makes a massive difference in the final texture.
Not Flipping Halfway Through
Air fryers cook from the outside in, and the bottom of the basket can get much hotter than the top. Flipping or shaking the basket halfway through ensures even browning on all sides. Skipping this step often leads to one side being perfectly crispy while the other side is pale and soft.
Using the Wrong Potato Type
As mentioned earlier, starchy potatoes like russets work best for this method. Waxy potatoes like red or fingerling varieties have higher moisture content and do not crisp up as well. Choose the right potato, and you are already halfway to perfect results.
Serving Suggestions and Meal Pairings
Crispy potatoes made with this method go with almost everything. Here are some serving ideas:
- With burgers: Crispy potato wedges are the perfect companion to any grilled burger.
- With grilled chicken: The crunch of the potatoes balances the tenderness of grilled chicken beautifully.
- As a standalone snack: Serve them in a paper cone with a dipping sauce for a casual and satisfying snack.
- With salad: Pair crispy potatoes with a fresh green salad for a light and balanced meal.
- At brunches: These potatoes work wonderfully alongside eggs, bacon, and toast for a hearty weekend breakfast.
For more air fryer inspiration, check out some of our other popular recipes like best 3 in 1 microwave air fryer options and 12 air fryer dessert recipes that make the most of this versatile kitchen appliance.
Conclusion
The potatoes microwave 6 min then airfryer 12 min method is one of the simplest and most rewarding cooking techniques you can learn. It takes just 18 minutes from start to finish, requires minimal equipment, and delivers crispy, golden potatoes that rival anything from a restaurant or fast food drive-thru.
Whether you are making fries for a family dinner, wedges for a weekend gathering, or a quick snack for yourself, this method never disappoints. The double cooking approach ensures every potato is fluffy on the inside and perfectly crunchy on the outside.
Give this method a try tonight. Once you see how easy and delicious it is, you will never go back to waiting 45 minutes for oven-roasted potatoes again. The microwave and air fryer combo is a kitchen shortcut that actually improves the quality of your food. Embrace it, experiment with flavors, and enjoy crispy potatoes whenever the craving strikes.
For those interested in expanding their air fryer and microwave cooking setup, a best all in one microwave convection oven can handle both tasks and more, making it a worthwhile investment for any kitchen that loves this kind of cooking approach.
Frequently Asked Questions
Can I use frozen potatoes with this method?
Yes, you can, but you should skip the microwave phase. Frozen potatoes already have moisture built in, so microwaving them first can make them soggy. Instead, pat them dry, toss with oil and seasoning, and air fry at 400 degrees for 15 to 18 minutes, shaking halfway through.
How do I store leftover crispy potatoes?
Store leftover potatoes in an airtight container in the refrigerator for up to 3 days. To restore crispiness, reheat them in the air fryer at 375 degrees for 3 to 4 minutes. Avoid microwaving leftovers, as that will make them soft and soggy again.
What is the best oil for air fryer potatoes?
Avocado oil and olive oil are the best choices for air fryer potatoes. Both have high smoke points and create a thin, even coating that promotes crispiness without making the potatoes greasy. Avoid using too much oil, as this can lead to soggy results.
Can I make this recipe in a convection oven instead of an air fryer?
Absolutely. A convection oven works very similarly to an air fryer. Spread the microwaved potatoes on a parchment-lined baking sheet and bake at 400 degrees for 12 to 15 minutes, flipping halfway through. The results will be nearly identical to using an air fryer.
Why are my potatoes not crispy after air frying?
The most common reasons are overcrowding the basket, not drying the potatoes thoroughly, or skipping the microwave step. Make sure each potato piece has space in the basket, pat them completely dry before seasoning, and always pre-cook them in the microwave first. These three steps are essential for achieving that perfect crunch.
Can I add cheese or other toppings to crispy potatoes?
Definitely. Adding cheese, herbs, or bacon bits right after the air fryer cycle is a great way to elevate the dish. The residual heat from the hot potatoes will melt cheese perfectly. Just add the toppings immediately after pulling the potatoes out and let them sit for a minute before serving.



