Sausage stuffing may be among the most straightforward things that even the absolute noobs can crack. Things take a different turn when you have to use a sausage stuffer. If you’ve made sausages before, a sausage stuffer is something you should be looking forward to using. For anyone looking forward to making their first sausages straight from a sausage stuffer, well, it won’t be daunting, courtesy of this guide on how to use a sausage stuffer.
The traditional method of stuffing sausage, which is both time-consuming and tiresome, will at some point feel like the reward is not worth the effort that you put. This is the prime time to upgrade to a sausage stuffer. Let’s first find out what a sausage stuffer is, as well as the reason(s) why you need one.
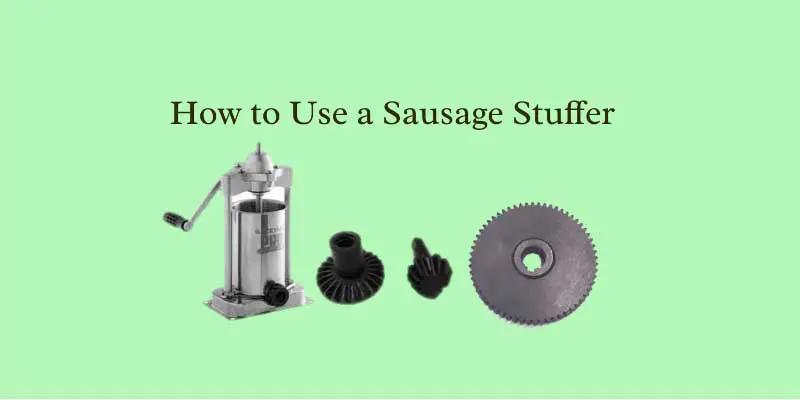
What is a Sausage Stuffer?
A sausage stuffer is a kitchen appliance used for filling a sausage mixture into the casings at home. These appliances enable you to make high-quality sausages, or sometimes better than what you’d typically buy at the supermarket. The traditional form of the sausage stuffer wasn’t that efficient as it required one person to turn the crank and another to collect the filled sausages. Modern motorized sausage stuffers are hyper-fast and highly efficient. With a foot-operated switch, these stuffers let you enjoy every step that culminates in one properly filled sausage.
Types of Sausage Stuffers
Just as you know that there’s often more than one single way of doing anything, sausage stuffers come in different types too. Although the basic working principle is the same, below are the main types of sausage stuffers:
1. Horn Sausage Stuffers
Horn sausage stuffers are fully manually operated. Traditionally they were made from cast iron and finished to a tin or chrome surface. Horn-type stuffers are nowadays made of stainless steel for hygiene purposes.
If you’re starting making your own sausages, or you anticipate that you will be making smaller batches, then this type of stuffer would be ideal for you. Horn type stuffers are available in capacities ranging from 3 to 5lbs.
2. Horizontal Sausage Stuffers
Just as the name suggests, these stuffers come in the shape of a cylinder-and-piston arrangement, mounted horizontally. They are either electrically or manually operated and have capacities between 5 and 20 lbs.
A horizontal stuffer accommodates the meat in the cylinder. When the piston is pushed by turning the crank or running the motor, the stuffer pushes the meat out through a stuffing tube at the cylinder’s end.
The manual type has a setback in that you need to place the machine near the edge of the operating bench to leave enough allowance for turning the crank.
3. Vertical Sausage Stuffers
This is the most popular stuffer among both professionals and beginners. Just as the horizontal type, the vertical stuffer is available in both manually and electrically operated models. The only difference is that the cylinder holding the meat is vertically mounted and that the electrically operated models are the high-capacity commercial units.
When the piston is actuated to push downwards, the meat in the cylinder is extruded through the stuffing tube at the bottom, from where it enters the sausage casing.
These stuffers have capacities anywhere between 5 and 15 lbs.
Benefits of Using a Sausage Stuffer
A sausage stuffer turns everything about sausage stuffing into convenience. Should you buy yourself a unit, you stand to benefit in several ways. If you’re also not very sure about upgrading to a sausage stuffer, perhaps the benefits listed below will help you make the decision. Read on to see how.
i) Lesser Working Time
One of the main reasons for using a sausage stuffer is saving time. Stuffing sausages manually takes so much time, and the end-results are usually not worthwhile. High-capacity commercial-grade sausage stuffers are at least 10 times faster than stuffing manually by hand.
ii) Lesser Labor
Stuffing sausages by hand is both time-consuming and labor-intensive. It gets more challenging if the demand exceeds the rate of stuffing, for you have to be quicker and still minimize bubbles’ formation.
ii) Lesser air Bubbles
One of the signs of a poorly stuffed sausage is the presence of air bubbles in the casing. Sausage stuffers usually have air valves installed in them to rid air bubbles. If not taken care of, the bubbles pop before the sausage hardens, releasing the meat and seasoning out of the sausage.
How to Choose the Best Sausage Casing
Making the best sausages is a function of the operator’s skills, the stuffer’s ability, and the quality of the casing. I consider that you already have the ideal stuffer, and I will sharpen your skills, but before that, let’s first look at how to choose the best sausage casing.
- There are about for types of sausage casings:
- Natural casings
- Collagen casings
- Cellulose casings
- Fibrous casings
Natural casings are made from animal intestines. The other types are all artificial, made from cellulose and other materials. The natural casings are popular with European-style sausages and are a bit rare. The types you mostly find in grocery stores around are artificial.
How to use a Sausage Stuffer
Sausages require fatty ground meat. The meat can be any type as per your preference but needs to be fatty. If you’re making sausages at home, chop the meat into small cubes before grinding, and remember to add fat when grinding. Season the meat to your liking.
- The following steps will give you the best that your stuffer can achieve:
- Apply some cooking grease to the selected tube so that the casing slides onto it smoothly.
- Depending on the size of the batch you want to make, cut about 3 or 4-feet long casing. Tie a not at one end or use a string to seal it off.
- Beginning from the open end of the casing, push the casing onto the stuffing tube all the way up till the knot is at the tip of the tube.
- Depending on the type of stuffer, get it running by either turning on the motor or turning the crank manually.
- Feed small amounts of the ground meat into the hopper as the machine runs. The stomper guides the meat into the hopper tube and allows only small amounts into the worm gear. NOTE: It takes a few minutes for the meat to fill the worm gear and the stuffing tube.
- As the meat begins extruding into the casing, support the tied end of the casing in one hand to guide the meat as it fills the rest of the casing.
- Leave about 4 inches of the open side of the casing unstuffed. Tie the open end, and you can load up the next casing for stuffing.
Pro Tips to Make Your Stuffing Better and Easier
To make the best machine-stuffed sausages, you will need some experience with the stuffer. This is, however, not necessary as I am sharing the best tips on stuffing today. Even an absolute beginner will make professional-grade sausages after applying these tips. Check them out below:
- 1If you’re going to use natural casings, soak them in warm water for at least 30 minutes before stuffing. This rids off the excess salt used to preserve the casing. You should then rinse the casing thoroughly by running water through the casing.
- 2The artificial or synthetic casing should be soaked for about 5 minutes to get them soft.
- 3To further thwart air bubbles from forming, slip the casing onto the stuffer tube after the meat has filled the worm gear and the stuffer tube. Let some of the meat come out of the tube before putting the casing on the stuffer tube.
- 4Do not fill the casing completely with the meat, lest the meat compacts and starts to bunch up in the hopper instead of feeding into the worm gear.
- 5Do not use excessive pressure to push the meat into the worm gear. This may cause the juices to back up into the mixer producing a sausage with varying texture and taste.
- 6If air causes ballooning before meat starts to fill the casing, puncture the casing with a small clean pin or toothpick to release the air.
- 7Fit just enough meat into the casing such that you can comfortably twist the casing to smaller links.
- 8Add a little water into the sausage mixture and mix before loading up into the hopper. This helps the casing fill up smoothly.
- 9Just as a good cook would, remember to test your seasoning before stuffing. Fry a small amount to check on the seasoning.
Wrapping it up
Sausages have been made and eaten from as early as 3000BC. The commercialization of the practice came along with the addition of toxic preservatives. It is best to enjoy a home-made sausage without worrying about a single ingredient. This guide has equipped you with all the skills you’d need to stuff your sausages like a pro.
Enjoy working with a sausage stuffer in the comfort of your kitchen.

